Prototype Wearable LED Dance Harness
 bboyho
 Making It Better
There's always room for improvement. After the project was completed, I realized that the harness could be built better. Below are a list of possible upgrades and improvements that could be implemented for future builds.
Vest - It was exhausting making about 10x-15x units for each student. In the future, I may just consider buying a vest/harness and adding the parts to the material to save on time and energy.
Quick Release Buckle vs Ribbon Ties - A few of the students had some issues tying the ribbon. Instead of using ribbon ties, a quick release buckle could make it easier
Snaps vs Velcro - The velcro held the LEDs and the vinyl securely. As an alternative, a button tool and metal snap could be used.
Pocket for 9V Battery - With the amount of time I had available, I decided to just tape the battery and cable to the harness and the ribbon tie. A pocket to hold the 9V battery would make it easier to switch out.
Labels - Initially, I did not label the wire colors. After a few months, I forgot about the wire connections on the LED strips, jumper wires, and custom power adapter. I decided to try and revise the project by adding sensors to control the LED straps. It was not until I inspected the connection throughout the harness again that I remembered the simple circuit. Labeling the connection with a marker or paint would have saved some time.
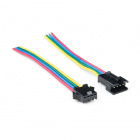
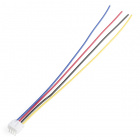
Connectors - The 1x4 female header pins were tedious to strip and solder each wire to the breadboard. Using individual jumper wires might have been easier to connect. However, troubleshooting wires might not be the quickest if a wire becomes loose during a performance. I also noticed that a male header pin broke off one of my student's harness after about 1 year due to wear and tear. In the future, I would probably consider using pigtail connector or polarized PTH connector with cable extensions. I would use switches or transistors rated to handle the current in order to switch between the LED colors.
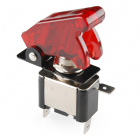
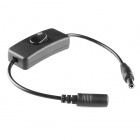
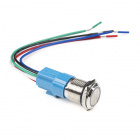
Switch - Plugging in the battery underneath the button up shirt was a little difficult even with the barrel jack. Adding a latching switch after the battery would improve on the design. Below are a few switches that could be used but an enclosure might be needed for the panel mounts switches.
For Mark III, I was able to explore the following option.
Sensor -- Adding a sensor can make the wearable LED dance harness more interactive. It was not until Mark III that I was able to add an acceleroemeter with the wearable LED dance harness. I used the full mini-solderable breadboard, microcontroller, and a MOSFET. For more information, check out the motion controlled wearable LED dance harness.
Motion Controlled Wearable LED Dance Harness
January 30, 2019
Control LEDs based on your movement using an accelerometer! Make your LEDs breathe by fading in and out when laying on the floor, turn off the LEDs when moving to your side, or make the LEDs blink in a headstand!