- Home
- Product Categories
- Weather
- CO₂ Humidity and Temperature Sensor - SCD30


CO₂ Humidity and Temperature Sensor - SCD30
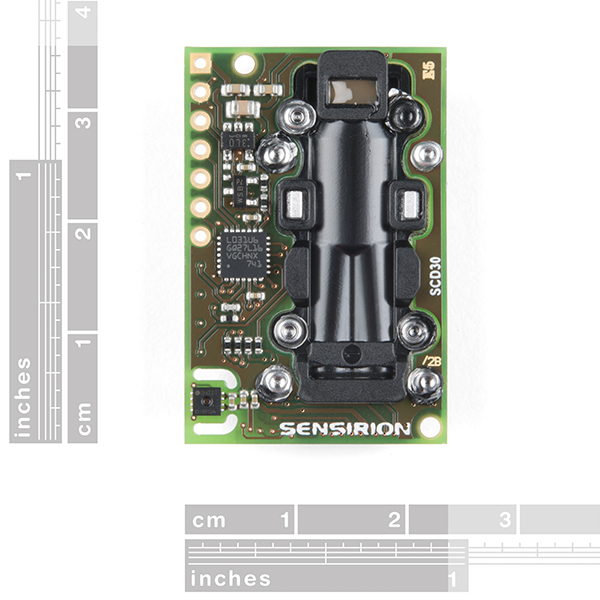
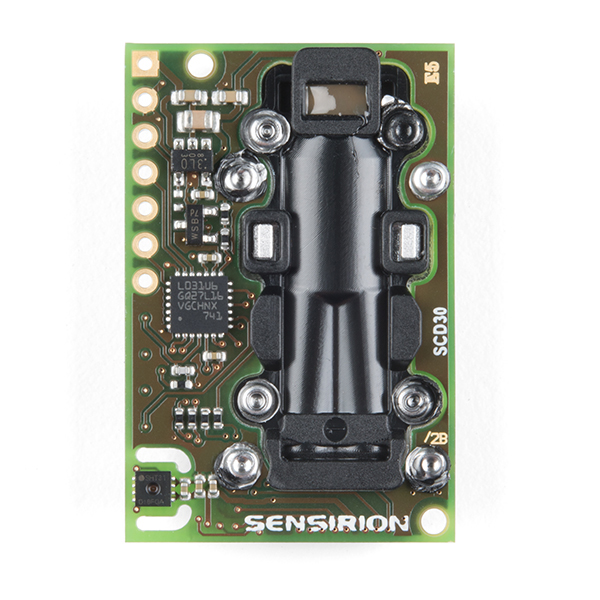
The SCD30 from Sensirion is a high quality Nondispersive Infrared (NDIR) based CO₂ sensor capable of detecting 400 to 10000ppm with an accuracy of ±(30ppm+3%). In order to improve accuracy the SCD30 has temperature and humidity sensing built-in, as well as commands to set the current altitude. For additional accuracy the SCD30 also accepts ambient pressure readings!
We've written an Arduino library to make reading the CO₂, humidity, and temperature very easy. It can be downloaded through the Arduino Library manager: search for 'SparkFun SCD30' or it can be found in the Documents tab above.
The SCD30 Humidity and Temperature Sensor can also be automatically detected, scanned, configured, and logged using the OpenLog Artemis datalogger system. No programming, soldering, or setup required!
Note: The SCD30 has an automatic self-calibration routine. Sensirion recommends 7 days of continuous readings with at least 1 hour a day of 'fresh air' for self-calibration to complete.
- Power supply voltage: 3.3V - 5.5V
- NDIR CO2 sensor technology
- Integrated temperature and humidity sensor
- Best performance-to-price ratio
- Dual-channel detection for superior stability
- Small form factor: 35 mm x 23 mm x 7 mm
- Measurement range: 400 ppm – 10.000 ppm
- Accuracy: ±(30 ppm + 3%)
- Current consumption: 19 mA @ 1 meas. per 2 s.
- Energy consumption: 120 mJ @ 1 measurement
- Fully calibrated and linearized
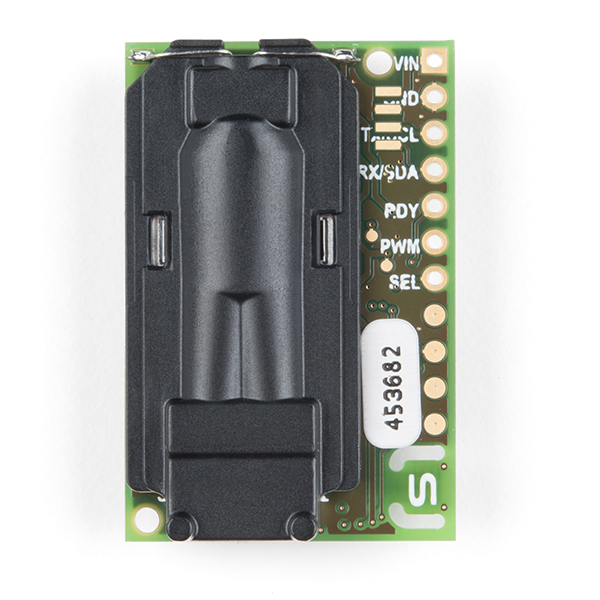
- Digital interface UART or I2C
CO₂ Humidity and Temperature Sensor - SCD30 Product Help and Resources
Core Skill: Soldering
This skill defines how difficult the soldering is on a particular product. It might be a couple simple solder joints, or require special reflow tools.
Skill Level: Noob - Some basic soldering is required, but it is limited to a just a few pins, basic through-hole soldering, and couple (if any) polarized components. A basic soldering iron is all you should need.
See all skill levels
Core Skill: Programming
If a board needs code or communicates somehow, you're going to need to know how to program or interface with it. The programming skill is all about communication and code.
Skill Level: Competent - The toolchain for programming is a bit more complex and will examples may not be explicitly provided for you. You will be required to have a fundamental knowledge of programming and be required to provide your own code. You may need to modify existing libraries or code to work with your specific hardware. Sensor and hardware interfaces will be SPI or I2C.
See all skill levels
Core Skill: Electrical Prototyping
If it requires power, you need to know how much, what all the pins do, and how to hook it up. You may need to reference datasheets, schematics, and know the ins and outs of electronics.
Skill Level: Competent - You will be required to reference a datasheet or schematic to know how to use a component. Your knowledge of a datasheet will only require basic features like power requirements, pinouts, or communications type. Also, you may need a power supply that?s greater than 12V or more than 1A worth of current.
See all skill levels
Comments
Looking for answers to technical questions?
We welcome your comments and suggestions below. However, if you are looking for solutions to technical questions please see our Technical Assistance page.
Customer Reviews
4.4 out of 5
Based on 10 ratings:
3 of 3 found this helpful:
Best/most accurate CO2 sensor I've used so far
Only sensor I've tried that gives remotely reasonable readings. Most other sensors need some kind of calibration (usually using "fresh air" as a proxy for 400ppm CO2) and even then they're bouncing around all over the place [0].
Downsides: Library compatibility is mostly Arduino-centric; originally was planning on using a Raspberry Pi but between drivers for other sensors and the clock stretching shenanigans the SCD30 pulls, using an Arduino dumping data over UART to the Pi wound up being easier. Also had to downclock i2c on the Arduino pretty heavily to get it all to play nicely over a qwiic bus (but it did work somewhat reliably then, plus or minus some resetting the Arduino when it gets locked up for reasons I'm not clear on).
One last unexpected upside: much smaller than I was expecting! Which means I might actually be able to fit it in a portable sensing platform, esp since it has on board humidity sensing. (Would be near perfect if it included a barometer!)
[0] The MH-Z14A's analog output is apparently unbuffered, which doesn't play nice with the Ardunio's ADC. See http://www.doctormonk.com/2018/03/review-and-test-of-mh-z14a-ndir-co2.html
1 of 1 found this helpful:
Good true CO2 sensor
I played around with several eCO2 sensors which require calibration and other things, and eventually came upon this sensor which gives true CO2 concentration numbers. It is reasonably accurate, and outputs the values directly over i2c unlike many other sensors. I had good luck interfacing with this sensor using i2c on the Raspberry Pi and Arduino. It also handles temperaure/humidity compensation etc internally which makes it much easier to use than many other sensors. The output data looks really nice and I was able to determine that my college dorm room was exceeding 2000ppm co2 regularly.
2 of 2 found this helpful:
This is the best OEM sensor you can readily buy
Accuracy is better than stated. I would say this is +- 5ppm if you have a source of calibrated CO2 to use as a reference. Some tips:
- Use calibrated gas it's cheaper than you think.
- Put it in a bag or small sealed box and introduce the calibrated gas. Be sure to flush out all the other air
- Turn OFF the automatic self calibration
- Set your own reference using the built-in function
- Do this about once a year for great results
I have roughly 20 of these running in a research setting. They're great.
2 of 2 found this helpful:
Works as advertised.
Used sparkfun's available software and QWIC Red Board which was a great help in getting this device up and running. It would be helpful to have a pins added version. For my application needing to expose the sensor to 1 hour of fresh air each 24 hour period was a problem. If you are using this to sample and store continuous reading inside a closed area, then taking it out to provide "fresh" air can be a problem. 7 day calibration worked perfectly. Used two built up sensors two compare outputs which after calibration was within stated accuracy between the two sensors. I did not have a alternate calibration source to test the sensor against which would have helped.
1 of 1 found this helpful:
Easy to use CO2 sensor
I wrote some Python code to use this with a Beaglebone (because I knew the beaglebone hardware supported I2C clock stretching). It was a very enjoyable experience because the Sensirion documentation covered the interface very well, above and beyond what I've ever seen before. Maybe it mentioned it somewhere but I would add that the returned CO2 values are encoded as a 32-bit float. The sensor seems quite responsive, I could open a window, and see the CO2 ppm levels change as the room ventilated. I didn't go thru all the details for the calibration process; I was getting about 530ppm for outside air, when I expected something like 405 ppm.
Seems like the best CO2 sensor around
I'm liking this sensor a lot. The manual calibration was the way to go for me. I just sat outside with it for a while until it settled and then set the calibration factor. Taking it outside a couple times I got consistent numbers. It's been very interesting to see how it varies indoors. My long term interest was to ballpark air turnover rates in my house. I think with a central system that will be viable. If you're looking for a CO2 sensor I'd say you should pull the trigger on this one. SparkFun is a solid source.
Niche solution for those niche applications
All things considered, this really is a marvel to observe in action. The sensor is sensitive to the slightest of environmental changes. The small size opens new avenues notably for biological applications. Note that the accuracy of the devices is all over the place. Four of the sensors placed next to one another delivers more than 100% variance; while calibration is always a must, I do question the long-term performance especially if the out-of-the-box values are so different. Provided library works as expected for easy integration for any microcontroller.
Works well with adjusting
Needed some manual calibration on CO2 when compared to my Airthings but overall am very happy. Keep in mind this device throws a little heat it seems so the temp reading runs higher then true environmental temp. ( 3 degrees in open air in my experience)
comparison with SCD40
I had an Adafruit SCD40 CO2 sensor, and I wanted another, but they were out of stock, so I got an SCD30 from SparkFun.
The two sensors are similar, but the SCD30 has a broader range. The firmware is different enough that they need separate drivers.
I have no access to calibrating gas, so I ran the two side by side to calibrate them. Temperature compensation corrects for internal heating; they differed by about 0.5 °C.
I expected them then to give similar readings for CO2 ppm, but they didn't. They moved in parallel with changes, but the SCD30 was consistently reporting levels that were about 130% of those reported by the SCD40.
Because Sensirion says that the SCD30 is more accurate, I was tempted to force-calibrate the SCD40 to agree with the SCD30. On the other hand, the values shown by the SCD30 were implausibly high, so I ended up force-calibrating the SCD30 to agree with the SCD40.
After power-on, the first few temperature and CO2 readings from the SCD30 are consistently too high, as if it were only slowly waking up to its calibration settings. It is easy enough to take account of this in the driver.
Can this be submerged? Doesnt look like it but I want to measure CO2 in water.
I purchased about 10 of those CO2 sensor. I calibrated all the sensor outside in the same place, but despite that I have some differences in the readings. To test them, I blow air in a box that I sealed. Then I log CO2 every 5 minutes during 24 hours. I obtain a deacreasing curve of CO2 between about 16000 PPM to 2000 PPM. Any other idea about calibration process? Best regards, Eric
I would recommend using calibration gas.