- Home
- Product Categories
- Arduino
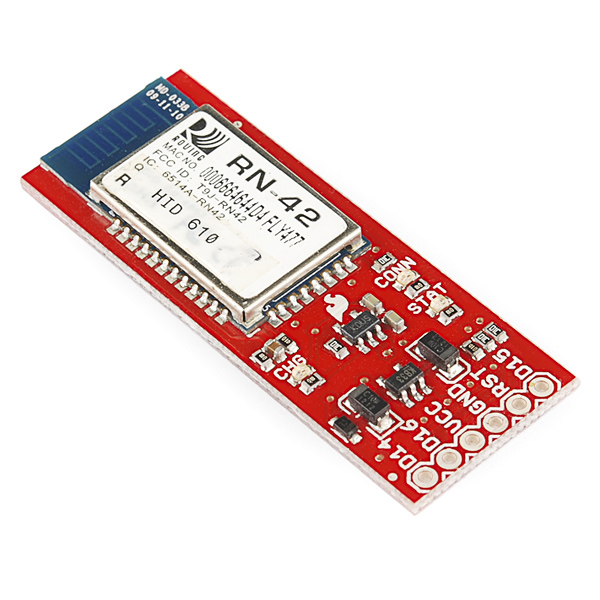
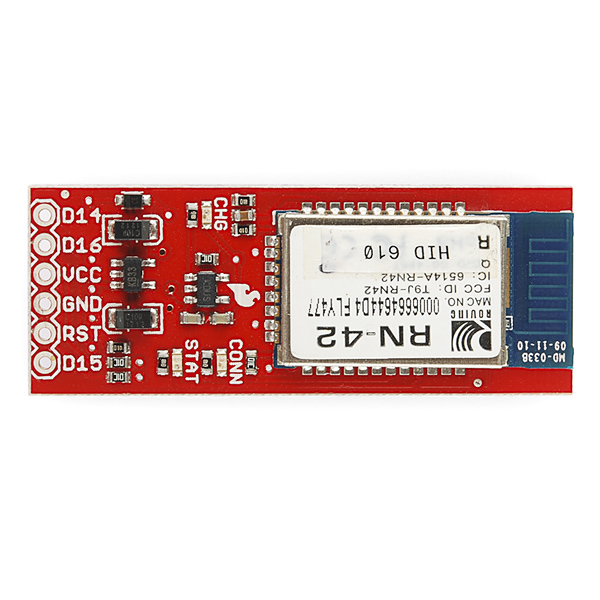
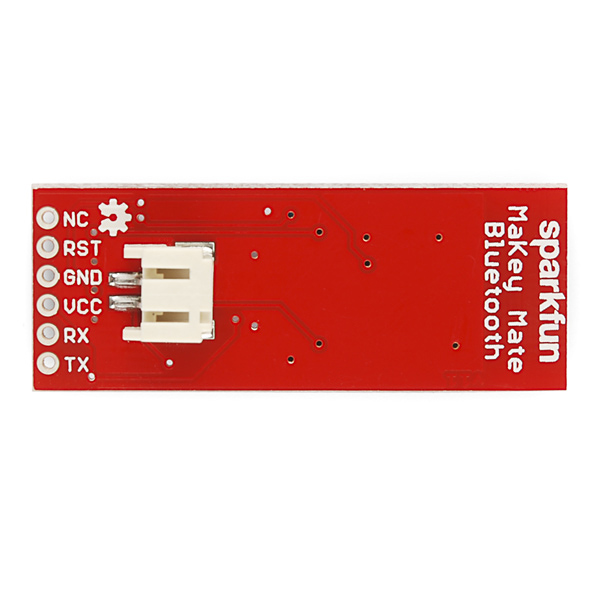
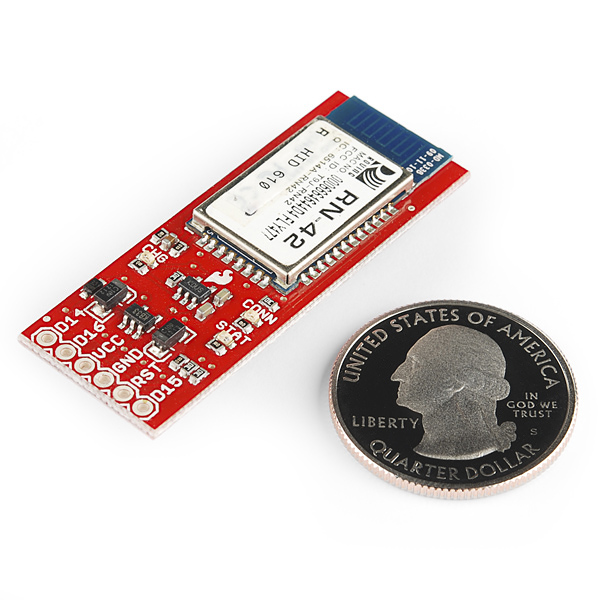
- SparkFun Bluetooth and LiPo Add-On for Makey Makey

SparkFun Bluetooth and LiPo Add-On for Makey Makey
The MaKey MaKey is really cool, but wouldn't it be cooler if it wasn't tethered to your computer? There's only one way to find out: Go wireless.
Our Bluetooth & LiPo Add-On for MaKey MaKey frees your MaKey invention from the bonds of USB wired connection. Data is passed over a Bluetooth HID connection to your Bluetooth enabled computer which will recognize it as a Bluetooth wireless keyboard. Power is handled through a 2-pin JST connector, simply connect any of our 3.7V lithium-polymer batteries. If the MaKey MaKey is plugged in using USB, the Bluetooth & LiPo Add-On will use that source to charge any connected LiPo battery!
To get this thing up and running, you will need to upload some special code to your MaKey MaKey so some Arduino knowledge is recommended. Check out the wiki below for more information.
Note: This Add-On board does not include a LiPo battery, check the related items below for compatible batteries! If your computer doesn't have Bluetooth, no worries, check out the Bluetooth USB Module in the related items!
SparkFun Bluetooth and LiPo Add-On for Makey Makey Product Help and Resources
Core Skill: Soldering
This skill defines how difficult the soldering is on a particular product. It might be a couple simple solder joints, or require special reflow tools.
Skill Level: Noob - Some basic soldering is required, but it is limited to a just a few pins, basic through-hole soldering, and couple (if any) polarized components. A basic soldering iron is all you should need.
See all skill levels
Core Skill: Electrical Prototyping
If it requires power, you need to know how much, what all the pins do, and how to hook it up. You may need to reference datasheets, schematics, and know the ins and outs of electronics.
Skill Level: Noob - You don't need to reference a datasheet, but you will need to know basic power requirements.
See all skill levels
Comments
Looking for answers to technical questions?
We welcome your comments and suggestions below. However, if you are looking for solutions to technical questions please see our Technical Assistance page.
Customer Reviews
No reviews yet.
Is the firmware on this the same as the Mate/Surf? Looks like it from the comments, but anything to worry about?
If so, this would be a great board for remote sensors, particularly if the input (charge) power could be from a solar panel. If not, maybe a new product?
Thx
Default Baudrate is 9600. In case you are trying to send it commands (such as entering SPP mode).
is there anyway to make it behave like a normal, without bt, makeymakey when the module is removed? or do I have to reload the original arduino sketch to make it back to normal?
Unfortunately not -- just not enough flash space for both. You'll have to reload whichever sketch you want to use.
I have alr solved
I have uploaded the Arduino.ino file from the Github Repo to my makey makey. However, the up down left and right arrow became controlling my mouse. I want it to control the arrow up and down button on the keyboard. Anyone know the solution to my problem?
Is there a guide/tutorial on how to use this with an arduino?
Has anyone ever tried this with an i-Pad ? If it is HID, it seems it should work.
Hi, the question is .. this bluetooth has compatibility with arduino UNO .. in the specifications says arduino pros and lilypad... is a rule? or I can arduinoUno
I've got this module paired up with a Rpi. The problem i'm facing, is that it does not send multiple pressed keys. For example, if I hold "left arrow" then press "B", the "B" won't react until I release the "left arrow". I didn't have this problem when I had the makey makey directly plugged in the USB with the original sketch.
I feel this is a buffer priority problem, but I haven't yet figured out where in the maKeyMate_BT sketch this is handled. Apart from this small nuisance, this module works great with the Rpi (+makey makey)!
Input for this problem would be great! Thanks!
Howdy --
How would I go about using this to communicate w/my Arduino via my computer? I feel like I'm close but am not sure what to do with the RST and NC pins. I've got the BT's Tx pin hooked up to the Arduino's Rx pin, and the BT's Rx pin hooked up to the Arduino's Tx pin (via a voltage divider).
The code I am trying to test is located here: http://www.instructables.com/id/Cheap-2-Way-Bluetooth-Connection-Between-Arduino-a/step2/Load-the-Arduino-test-sketches/
Basically there are two problems that I'm running into (due to my lack of knowledge of BT connectivity): 1) I'm not sure what to do with the RST and NC pins on the BT module. 2) I'm not sure if I need to modify the code from above/in what way I should modify it.
Any help is much appreciated! Thanks in advance!
You need to pair the bluetooth module to your computer initially, so make sure you are doing that properly. Sometimes the bluetooth plugins on computers end up showing two ports for bluetooth connections (i.e., an RX line and a TX line), which can cause problems, so make sure that isn't the issue you are running into.
how do you use this with the arduino mini pro? how do you connect the usb cable for charging (not involving usb data) when the arduino mini pro is connected to this module?
Why did you guys tie pin#4 high? I'd really like to use this at rates higher than 9600 baud, but that pin overrides software setting of baud rate.
Hi, I have been trying to use this module and I want to save power when I am not transmitting. Here is the user manual - http://www.sparkfun.com/datasheets/Wireless/Bluetooth/rn-bluetooth-um.pdf
Now My requirements are these 1. keep the module connected to my pc 2. transmit "Hello" to pc when a button pin 12 goes high on the arduino, this will happen by button press
So when I am not transmitting, I want to be able to keep the device in sleep mode. The command for that is SW,8000 However my module is still consuming 25 miliamps when not transmitting. Has anyone tried this?
Board suffered a rapid drop to the ground and now seems dead. Suggestions on this boards weakest link? Probably the headers I soldered in, but other notes are welcomed.
hi! I bought this add-on and tried to use it with a MaKey MaKey! from Joylabz. The connection works, but the keys don't. ( i followed the getting started, uploaded new arduino files etc)
Is there a driver difference between your files and the Joylabz one?
And @sparkfun: could you add to the note: "You have to solder this module to a 6-pin straight male header" ( and if you dont' have that, buy it, just like the battery... You need to have that to make it work!)
How can I make this bluetooth add-on work exactly like the factory Makey Makey? I have found that when changing the settings.h file back the standard arrowkeys, space and click it sends multiple key presses not just one like out of the box MaKey without bluetooth. I have been trying to make a wireless musical instrument but instead of playing one sample at a time everything sounds like death metal.
I had to mess with the noise filter constants a bit to reproduce the MM behavior. In settings.h I set SWITCH_THRESHOLD_OFFSET_PERC to 5, and SWITCH_THRESHOLD_CENTER_BIAS to 75, which increase the release sensitivity. I'd recommend playing around with the center bias threshold to hone in on the sensitivity you need.
Probably a dumb question, but I'm a total n00b when it comes to wireless. Can I use this with an Arduino Uno as well as a makeymakey? As bluetooth modules can be expensive, I would like to be able to use it on both. Also is there any particular battery model recommended? Sparkfun lists quite a few.
Sure! You could definitely use it with an Arduino, or any micro with a serial port.
Any of the batteries below will work, the bigger they are the longer they'll last between charges. The little 110mAh battery will last around 2-3 hours before running out of juice, and the rest go up from there.
Thanks for the reply! Appreciate it. :D
It looks as though this has a serial input, and anything sent via serial is relayed as a keyboard press? Or does this have a special 2 way protocol over the serial line?
It's got the HID version of the RN-42 on there. So when connected it looks just like a bluetooth keyboard/mouse to the host computer. Any ASCII characters sent over serial are just relayed as a key-press, and there are more complicated commands (detailed in this user's manual) to send more exotic key-presses and mouse movements/clicks.