- Home
- Product Categories
- Color
- Serial TFT LCD - 3.2" with Touchscreen (uLCD-32PTU-GFX)


Serial TFT LCD - 3.2" with Touchscreen (uLCD-32PTU-GFX)
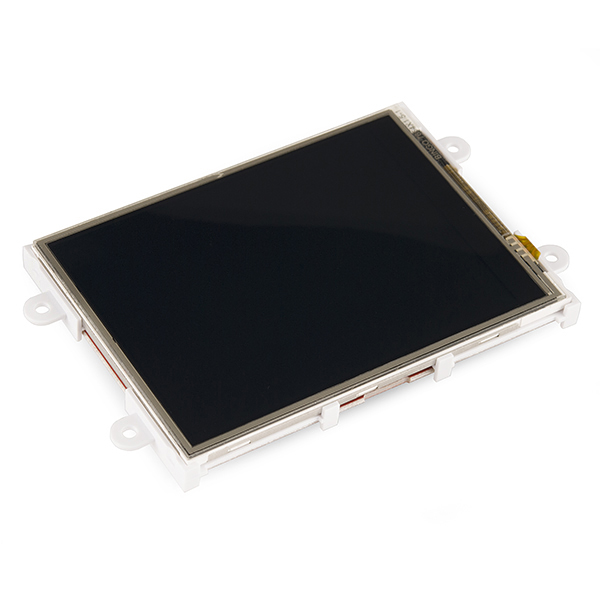
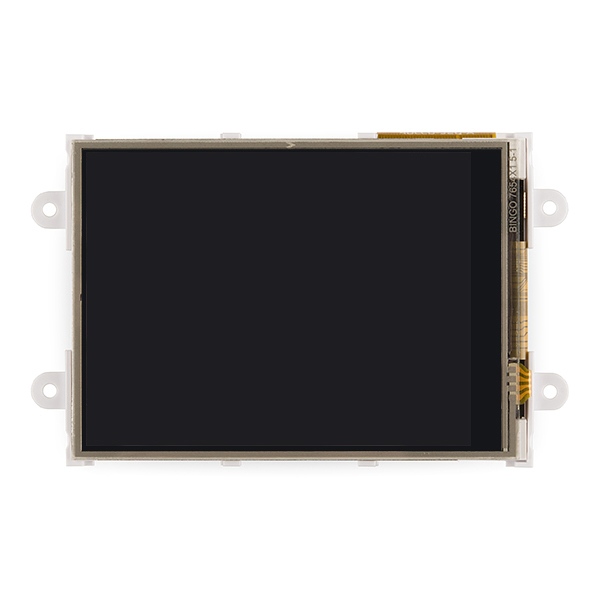
The µLCD-32PTU is a compact Intelligent Display Module from 4D Systems packed with plenty of features, ready to become the GUI for your project, and capable of being an interface controller for a number of applications.
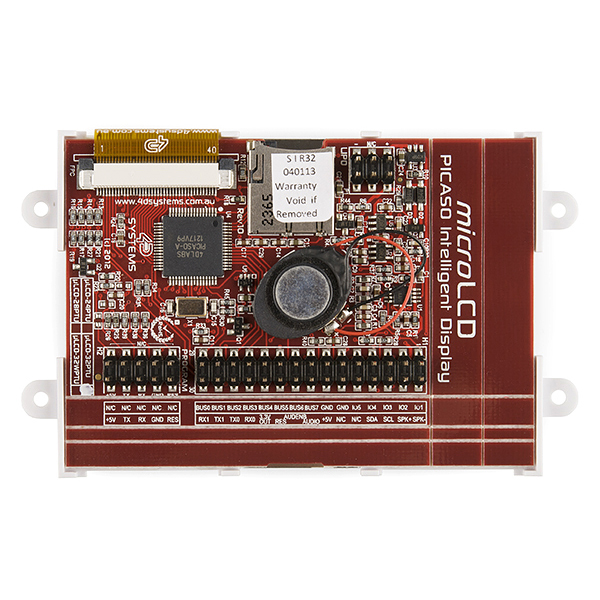
At the heart of the design is the PICASO processor, which is driven by a highly optimised virtual core engine called EVE (Extensible Virtual Engine). A whole bunch of hardware and software peripherals have been integrated into the design, to give you the freedom to adapt the module to suit almost any application.
The µLCD-32PTU is a combination of a 3.2” (240x320) LCD Screen, audio amplifier and speaker, micro-SD card connector, Lithium Polymer (LiPo) battery support, along with a group of general purpose input/output pins (GPIO's), including I2C and serial COMMS.
Note: The module can be switched to a "SGC" by changing the firmware. It's been brought to our attention that trying to program the 4D screens using an FTDI breakout can damage the driver. Check the Recommended Items section below for 4D Systems' µUSB-PA5.
Replaces:LCD-10089
- Low-cost 3.2" LCD-TFT display graphics user interface solution
- 240 x 320 VGA resolution, RGB 65K true to life colours, TFT screen with Integrated 4-Wire Resistive Touch Panel
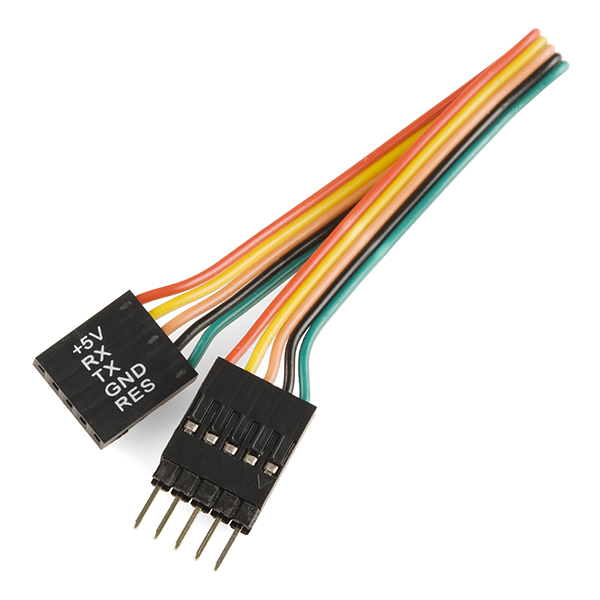
- Easy 5 pin interface to any host device:
- VCC, TX, RX, GND, RESET
- Powered by the 4D-Labs PICASO processor
- 14KB of flash memory for user code storage and 14KB of SRAM for user variables, or 14KB shared user code and program variables
- 2 x Asynchronous hardware serial ports (COM0, COM1), TTL interface, with 300 to 600K baud
- 1 x I2C interface (Master)
- 8 x 16 bit timers with 1 millisecond resolution
- 13 x General Purpose I/O pins. Supports fast 8-bit parallel data transfer through Upper 8 bits
- On-board micro-SD memory card adapter for multimedia storage and data logging purposes. HC memory card support is also available for cards larger than 4GB
- DOS compatible file access (FAT16 format) as well as low level access to card memory
- Lithium Polymer battery support, with built in battery charger and automatic change-over
- Dedicated PWM Audio pin driven by WAV files from micro-SD card
- On-board audio amplifier with a tiny 8Ω speaker for sound generation and WAV file playback
- Built in extensive 4DGL graphics and system library functions
- Display full color images, animations, icons and video clips
- Supports all available Windows fonts
- A 30 pin header for I/O expansion and future plug-in daughter boards
- 4.0V to 5.5V range operation (single supply)
- Display Viewing Area: 48.60 x 64.80mm
- 4 x corner plates with 2.7mm holes for mechanical mounting.
- 56.32 x 92.19 x 15.9mm (including corner plates)
Serial TFT LCD - 3.2" with Touchscreen (uLCD-32PTU-GFX) Product Help and Resources
Core Skill: Programming
If a board needs code or communicates somehow, you're going to need to know how to program or interface with it. The programming skill is all about communication and code.
Skill Level: Rookie - You will need a better fundamental understand of what code is, and how it works. You will be using beginner-level software and development tools like Arduino. You will be dealing directly with code, but numerous examples and libraries are available. Sensors or shields will communicate with serial or TTL.
See all skill levels
Core Skill: Electrical Prototyping
If it requires power, you need to know how much, what all the pins do, and how to hook it up. You may need to reference datasheets, schematics, and know the ins and outs of electronics.
Skill Level: Competent - You will be required to reference a datasheet or schematic to know how to use a component. Your knowledge of a datasheet will only require basic features like power requirements, pinouts, or communications type. Also, you may need a power supply that?s greater than 12V or more than 1A worth of current.
See all skill levels
Comments
Looking for answers to technical questions?
We welcome your comments and suggestions below. However, if you are looking for solutions to technical questions please see our Technical Assistance page.
Customer Reviews
5 out of 5
Based on 1 ratings:
1 of 1 found this helpful:
Very easy to get started on.
Using Visi-Genie it takes very little time to get a good understanding of how to use the display. Connecting it to an Arduino for some analog inputs took little time. It was exceptionally easy, for the complexity of the projects that can be done.
Does anyone know if this would work with the raspberry pi?
Yes it does. Few videos here:
http://www.youtube.com/watch?v=KFdDmTqGhK4
http://www.youtube.com/watch?v=kscX6m42qJI
http://www.youtube.com/watch?v=ubx60AYpqVI
and here's the Github Pi library
Programming cable is included? I see it in the picture but is not listed on the product. Thanks!
I believe the cable shown is listed, but it is just a flat ribbon cable, you will still need the USB to serial adapter to program the board.
The datasheet shows that this can be programmed with a proprietary USB cable, but I'm curious if it can be programmed with an FTDI breakout. Has anyone tried this?
i've run over a dozen of these via a USB to UART dongle picked up on ebay for $1. Warning, they used to claim that using any other cable would void your warrantee, not sure if that is still the case or not.
Wait...you've "run" over a dozen of these or "programmed" over a dozen of these with the $1 USB dongle from eBay?
Both. in "run", I use it in serial mode and drive via USB. I've also programmed them via the same adapter.
Please consider carrying the bezels for these in stock.
http://www.4dsystems.com.au/product/17/135/Accessories/Bezel/
I need with CAPACITIVE touch panel with same size, are you sell that product? Thank You.
I was having trouble controlling the display and late last night discovered that the 5-pin ribbon cable had an open circuit on the green reset wire. I took the connector apart and the conductors are all cut right at the edge of the insulation where the crimping tool would have clamped down to close around the insulation. The mfg. should be notified to check the crimping setup. Jay. PS: I took a picture if you want to see it.
Silly question, how difficult would it be to work with this on an Arduino Pro?
Holy cow, that's an amazing display! Anything it doesn't do?
It won't do SPI, and the compiler does not support double precision -- the 16-bit integer arithmetic can be very limiting so don't use it where you need wide ranges of numbers unless you want to write some double-precision routines yourself.
^^This. I had to come up with some creative ways to use the onboard micro to handle some of the functions I needed - it was a fun challange though :)
Why is it listed as being 240x320? Shouldn't that be 320x240? Or did everyone switch to using displays in portrait mode when I wasn't looking?
edit: I see, the viewing angles are made for portrait mode, so obviously that makes it 240x320.
The programming environment is also amazingly easy. You can download it for free from their web site. I was just playing with the visi-genie mode. And you can program it in landscape or portrait setting.