Using the Serial 7-Segment Display
 jimblom
Introduction
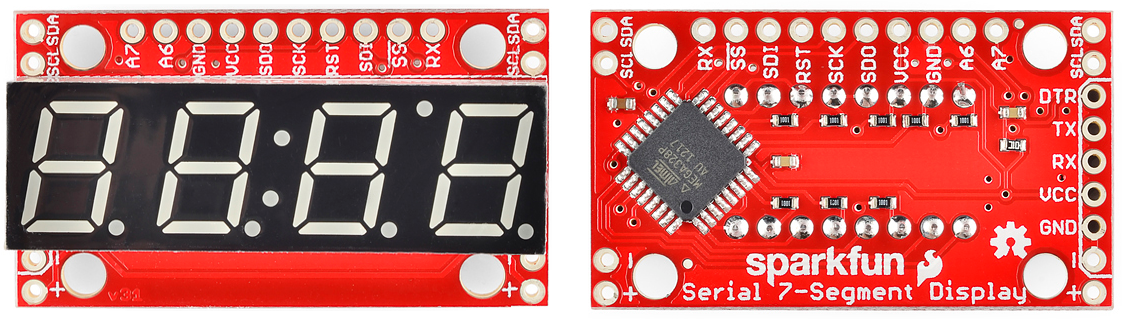
The Serial 7-Segment Display is an easy-to-use 4-digit display that is controlled using a serial interface. Instead of using up a dozen-or-so of your microcontroller's pins to control the LEDs, all you need is one. Using either a serial, I2C, or SPI interface, you can control all digits, decimal points, the colon, and the apostrophe.
The goal of this tutorial is to get you familiar with the Serial 7-Segment Display. We'll cover hardware set-up, assembly, and example interface circuits/code. Given the popularity of Arduino, the examples will make use of the ubiquitous development platform/language.
This tutorial also covers the 7-Segment Shield. If you have the 7-Segment Shield, we recommend going to its tab first and beginning your journey there. The board is very easy to use since you can just plug it straight into an Arduino Uno compatible board and you can use the same exact code examples as the Serial 7-Segment Display which are covered in this tutorial.
Required Materials
Aside from the display itself, you'll need an Arduino (or one of its variants) to send the serial data. In the Arduino's stead, you could use an FTDI Basic, or any device capable of sending TTL serial data.
You'll also need some way to connect between the display and Arduino. You could use a combination of male headers and breadboard. Or, you could just go with a few pieces of wire.
Tools
In order to make use of the Serial 7-Segment Display, you'll need to solder to at least a few of its pins. That means you'll need at least a basic soldering iron as well as solder. Check out our how to solder tutorial for help, if this is you first time soldering.
Before You Begin
Before reading about how to hook up the Serial 7-Segment Display, it'll help to be familiar with some of these concepts. Consider reading through these tutorials before continuing on:
- Binary - The data sent to the display comes in "packets" of bytes. In order to control the decimals or individual segments, knowledge of binary will be important.
- How to Solder - To connect to the display, you'll have to solder either wire, headers, or another connector to it.
- Serial Communication - This is the simplest of the three communication standards used to talk to the display.
- I2C Communication - I2C is a two-wire serial interface. An alternative to serial for talking to the display.
- SPI Communication - SPI is a three (or four) wire serial interface. The third serial option for controlling the LED.
- What is an Arduino? - In this example, we'll use an Arduino to control the LED. If you're not sure what that is, definitely check out this tutorial.