- Home
- Product Categories
- Kits
- SparkFun Arduino IoT Weather Station


SparkFun Arduino IoT Weather Station
Building a weather station can be rewarding whether you're an agriculturalist, professional meteorologist, or weather hobbyist. Create your own weather station effortlessly using SparkFun's Arduino IoT Weather Station, seamlessly monitored through Arduino Cloud, an all-in-one IoT platform that brings your creations to life in a snap. SparkFun created this Arduino library specifically for use with our MicroMod Weather Carrier Board (w/o UV Sensor) and MicroMod ESP32 Processor to allow users to easily record wind speed, wind direction, and rainfall data from our weather meter kit with reliable wireless capabilities.
The MicroMod Weather Carrier Board is a peripheral for the MicroMod ecosystem that allows you to create your own weather station with one of a multitude of processors. The carrier board in this kit includes two sensors: the BME280 temperature, pressure, and humidity sensor and the AS3935 Lightning detector.
Along with these on-board sensors, there is a 3-pin latch terminal & cables to add an external soil moisture sensor (also included) and a pair of RJ11 jacks to plug in the wind and rain sensors to connect the included Weather Meter Kit. To top it all off, there is a microSD card slot so you can plug in an SD card to log all that glorious weather data using the MicroMod processor of your choosing!
The rain gauge is a self-emptying bucket-type rain gauge, which activates a momentary button closure for each 0.011" of rain that is collected. The anemometer (wind speed meter) encodes the wind speed by simply closing each rotation switch. The wind vane reports wind direction as a voltage produced by the combination of resistors inside the sensor. The vane’s magnet could close two switches simultaneously, indicating up to 16 different positions, but we have found that eight positions are more realistic.
MicroMod is a modular interface ecosystem that connects a microcontroller “processor board” to various “carrier board” peripherals. Utilizing the M.2 standard, the MicroMod standard is designed to easily swap out processors on the fly. Pair a specialized carrier board for the project you need with your choice of compatible processor!
- SparkFun MicroMod ESP32 Processor
- SparkFun MicroMod Weather Carrier Board w/o UV Sensor
- Weather Meter Kit
- SparkFun Soil Moisture Sensor (with Screw Terminals)
- Jumper Wires Premium 12" M/M Pack of 10
ESP32 MicroMod Processor Board:
- General Features:
- Dual-core Tensilica LX6 microprocessor
- Up to 240MHz clock frequency
- 520kB internal SRAM
- 128mbit/16MB flash storage
- Integrated 802.11 BGN WiFi transceiver
- 2.7 to 3.6V operating range
- 500µA sleep current under hibernation
- 10-electrode capacitive touch support
- Hardware accelerated encryption (AES, SHA2, ECC, RSA-4096)
- Specific Peripherals made available on MicroMod ESP32:
- 1x USB dedicated for programming and debug
- 1x UART
- 2x I2C
- 1x SPI
- 7x GPIO
- 2x Digital Pins
- 2x Analog Pins
- 2x PWM
- Status LED
- VIN Level ADC
- *Additional peripherals are available but are shared on dedicated MicroMod pins.
MicroMod Weather Carrier Board (w/o UV Sensor):
- Barometric Pressure/Humidity/Temperature Sensor - BME280
- Operated in I2C mode. I2C address: 0x77
- Lightning Detector - AS3935
- Operated in SPI mode.
- 2 x RJ11 Connectors to connect Wind/Rain sensors.
- 3-pin Latch Terminal to connect Soil Moisture sensor.
Weather Meter Kit:
- Wind Vane
- Cup Anemometer
- Tipping Bucket Rain Gauge
- Two-Part Mounting Mast
- Rain Gauge Mounting Arm
- Wind Meter Mounting Bar
- 2 x Mounting Clamps
- 4 x Zip Ties
Soil Moisture Sensor:
- PCB Coated in ENIG (Electroless Nickel Immersion Gold)
- 3-Pin Screw Terminal (Pre-Assembled)
Weather Meter Kit:
MicroMod Documentation:
- General Information:
- ESP32 Processor Board:
- Schematic
- Eagle Files
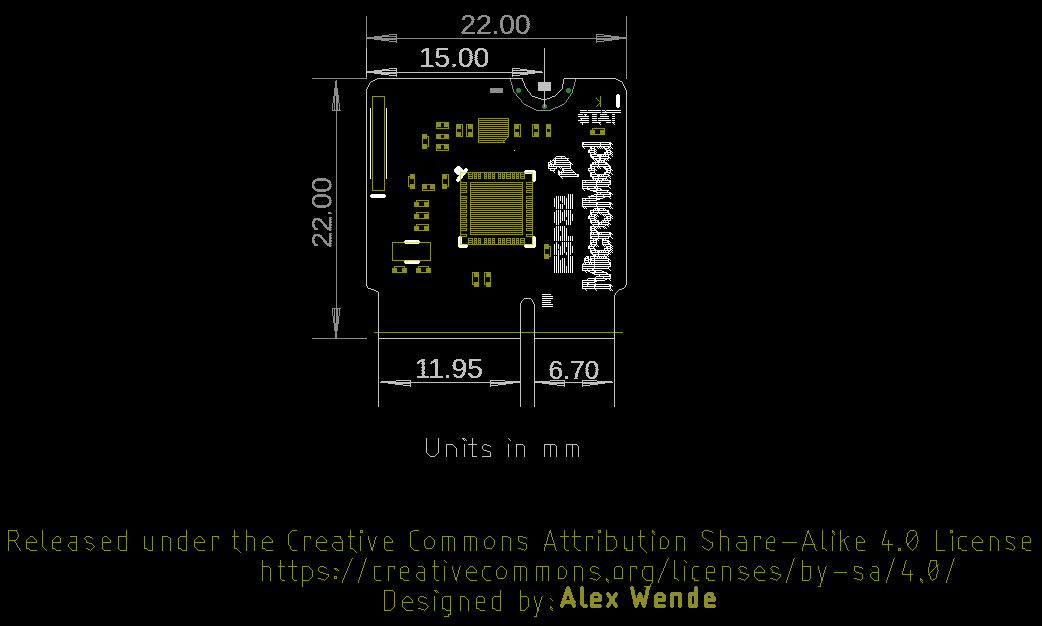
- Board Dimensions
- Hookup Guide
- Datasheet (ESP32-D0WDQ6-V3)
- Graphical Datasheet
- GitHub Hardware Repo
- ESP32 Documentation:
- Weather Carrier Board (w/o UV Sensor):
Soil Moisture Sensor:
SparkFun Arduino IoT Weather Station Product Help and Resources
MicroMod ESP32 Processor Board Hookup Guide
October 21, 2020
A short hookup guide to get started with the SparkFun MicroMod ESP32 Processor Board.
Soil Moisture Sensor Hookup Guide
January 29, 2021
A quick hookup guide and project to get you started with the Soil Moisture Sensor from SparkFun.
MicroMod Weather Carrier Board Hookup Guide
January 14, 2021
A quick guide to help to create your own MicroMod weather station using the MicroMod Weather Carrier Board and Processor of your choice.
Comments
Looking for answers to technical questions?
We welcome your comments and suggestions below. However, if you are looking for solutions to technical questions please see our Technical Assistance page.
Customer Reviews
3.5 out of 5
Based on 2 ratings:
4 of 4 found this helpful:
Fundamentally broken
This is an inherently broken project. Placing the UV, humidity and temperature sensors (arguably, the three most important variables evaluated when assessing the weather) on a non-weatherproof board and then suggesting that board be mounted in an enclosure undermines the entire point of the project. OK, so now the board is protected from the elements but now the temperature sensor is left to what?...cook inside a sealed box with the sun radiating on it? If the box is placed under shade, good luck getting a reasonable UV measurement. And what of the humidity sensor, same problem. A sealed box or even a vented box that is subject to direct radiation will not afford a reliable reading of the humidity. That leaves wind direction, speed and rain gauges which should work but they will need to be mounted away from areas that will skew/block their reliable readings. And they seem very delicate and only time will tell how well they hold up in the sun. I realize there is a daughter card the operates on the Qwik connector that might help with the relocation of the temperature, etc. but that's an extra and isn't it reasonable to assume this kit would have included reliable out-board sensors that could be properly placed in isolated areas and suitable for the environment in which they were intended? The outdoors I mean? It's one thing to tout features of a board and flexibility with programming integration but what good is it when it can't function in the environment without serious compromises to the accuracy - something it ostensibly provides vs. general weather forecasts. I don't think so. What a letdown.
1 of 3 found this helpful:
I love this thing!
I installed it on the roof and connected it to Home Assistant using MQTT. Works like a charm! It makes me want to stare at it all day though, and the data it collects :-) I'll add some automation in HA next, to notify me when it's getting too windy and other fun stuff.
Can this be powered by a LiPo battery / solar charger combo such as https://www.sparkfun.com/products/12885 and https://www.sparkfun.com/products/18725?
Lovely and adaptable kit. Thank you! My question is the schematic (MicroMod_Weather_CB-Schematic.pdf) indicates there is a Real Time Clock on this board. How do I use it? Is it a venerable 1805? I want a UV sensor (23518) on the way. This thing is going to be mounted 40+' up a pole and I don't need the soil sensor. Can I use that port like any other 10-bit ESP32 ADC? And it looks like I can incorporate a Sensirion (23715) via modified QWIIC cables for data through an LLC (12009) for the voltage difference. Does this sound doable?. Regards, Ken
RTC is a core function of ESP32. Looking at the schematic of the proc board though, the RTC battery backup does not seem to be connected to the ESP32.
Feature request: connect the RTC battery to ESP32 RTC power pin in a future edition, please. A way to monitor it would be neat too.
Not sure about the rest of your question though.
Is there a way to install a network interface (either wifi or eth)? Or can it only log to an SD card?
There are guides linked in the Documents tab, for how to use an ESP32 MicroMod processor to connect the kit to the Arduino Cloud for cloud based data logging.
See our blog post
The ESP32 micromod processor board shows WiFi capabilities.
In order to lower the cost of the kit a bit, it would have been nice to let the user chose the MCU (and an esp32 may not be appropriate (for various reasons), and some users may already own Micromod MCU).
Can you confirm that the KIT 22636 includes UV sensor? Because the "Includes" tab states that the carrier board is "SparkFun MicroMod Weather Carrier Board w/o UV Sensor"
Hi jmst! The included SparkFun MicroMod Weather Carrier Board in the SparkFun Arduino IoT Weather Station (KIT-22636), is not equipped with a UV Sensor.
Please add/suggest a CASE for this kit. Preferably a simple 3D print OR a lasercut design. I have several suggestions for case designs if there's interest.
Hi, CyberchuckTX! This is a great question!
We have a project releasing in the blog next week that shows how we assembled one of these kits on top of SparkFun HQ. I will see about posting that information this weekend, but most people are away for the Labor Day weekend. Sorry for the delay on that!
We do provide some considerations for the enclosure for this kit in the blog, depending on whether or not you want to use a sealed or unsealed enclosure.
EDIT: This is the enclosure we used in the video and in this Monday's Post!