
Using the LilyPad LilyTwinkle board
Twinkle, Twinkle, Little LED
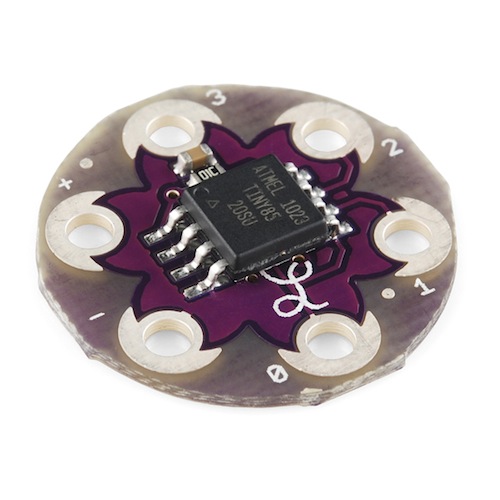
The LilyPad LilyTwinkle and LilyTiny boards are a great stepping stone between simple circuits and Arduino circuits. Both boards will allow you to practice building microcontroller circuits without requiring that you provide your own code. Additionally, these are significantly less expensive than a LilyPad Arduino board, so if the effect you're looking for is relatively simple, the Tiny boards can make your project simpler and cheaper.
Requirements
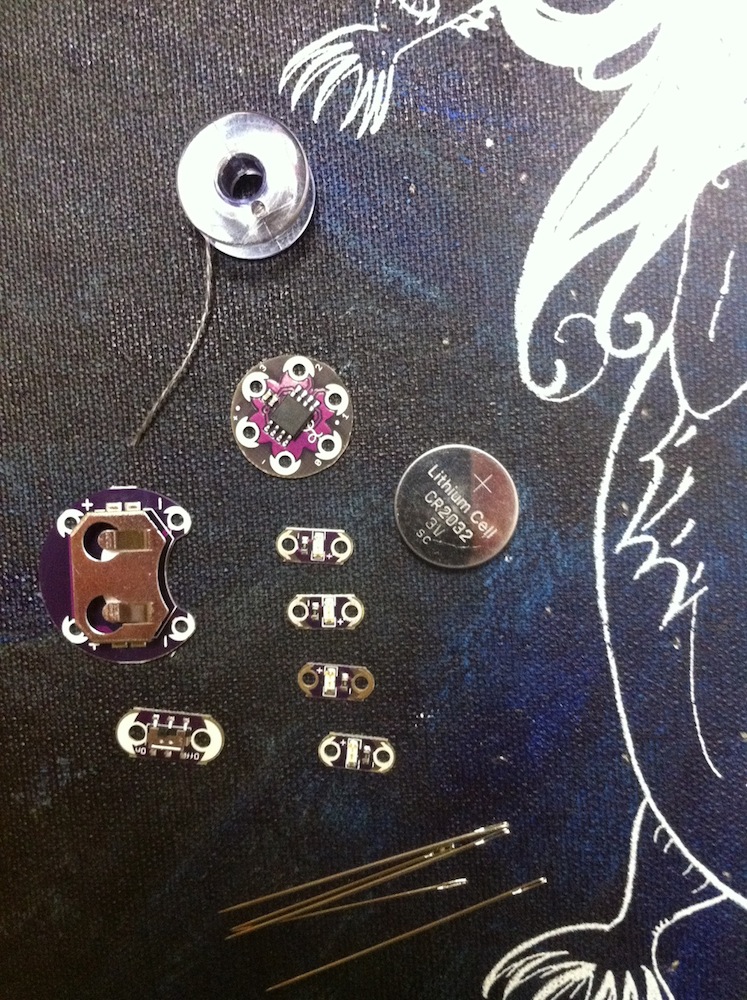
Here's all the parts you'll need to follow along:
- 1 LilyPad LilyTwinkle
- 1 LilyPad coin cell battery holder
- 1 LilyPad switch
- 1 Coin cell battery
- 1 bobbin of conductive thread
- 4 LilyPad LEDs, color of your choice. I used the MicroLeds, because they were what I had handy on my desk in green, but regular LilyPad LEDs would be even better.
- Something to sew the circuit onto
- Sewing needles
The Tiny boards, much like traditional Arduino boards, take power from a power supply and then regulate what other connected devices it goes to. The Tiny boards are designed to be combined with LEDs.
*Before we start, I want to discuss, just briefly, the difference between the micro LEDs and the regular ones. The size of the micro LEDs is smaller because there is no resistor. This is important because that resistor prevents too much current from damaging the LED. In the case of this circuit, the LED can work without the resistor because I'm using a coin cell battery, which won't supply enough current to damage the LED. If I were using a Lithium Polymer battery for this circuit, it would be critical that I use a regular LilyPad LED, or place a resistor in-line with the micro LED.
I'll be using a painted and screen-printed canvas for my project, but this circuit will work just as well elsewhere- it's a very easy way to add some sparkle to a shirt!
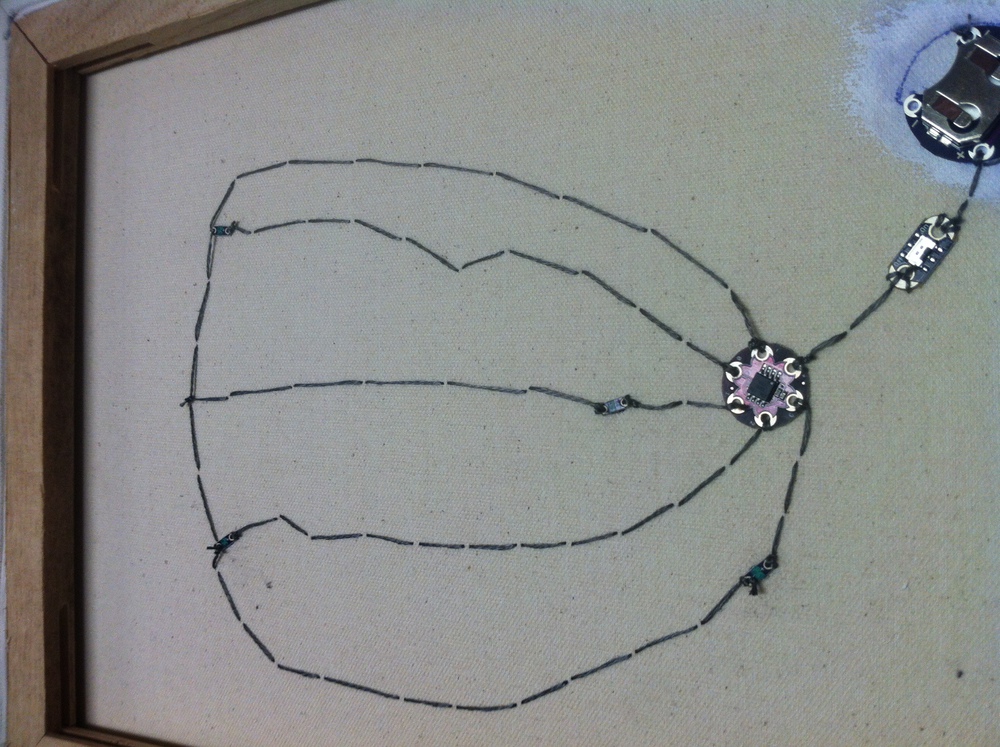
Sewing it Together
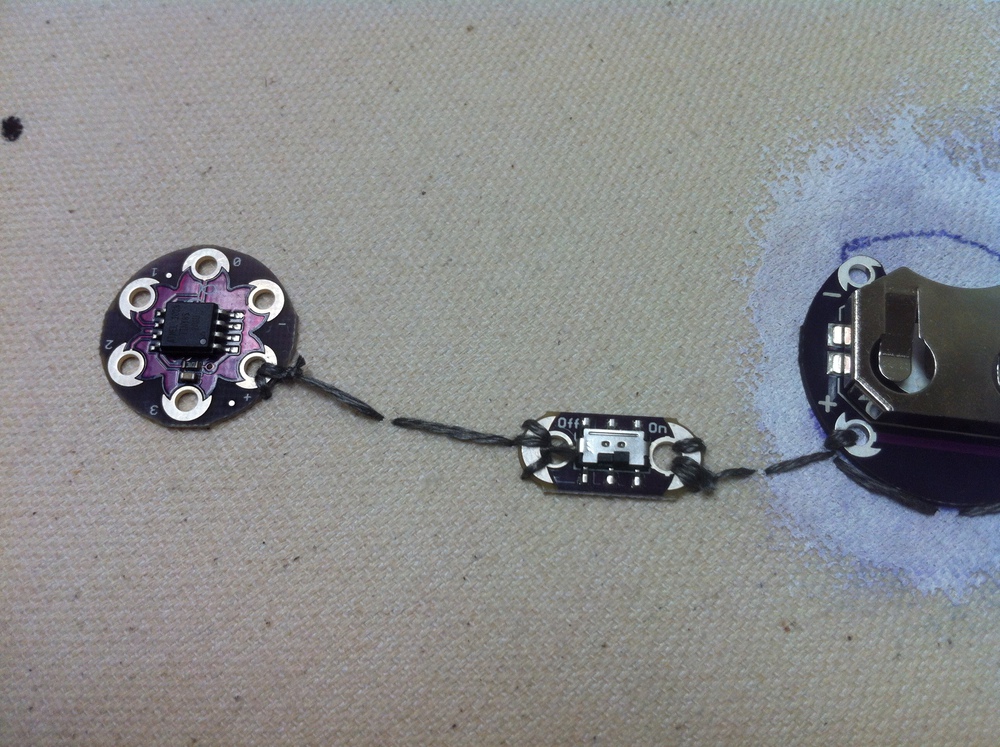
First, plot out where you want things to go. You'll want the positive and negative pins on the controller to point at the positive and negative terminals on the battery. The LEDs should be placed so that you can easily connect each numbered pin on the board to an LED. It's also important to leave room to connect the other end of the LEDs to each other and to the negative pin of either the circuit board or the battery pack. Once you're happy with the layout of your parts, start with the battery holder. Sew the positive terminals down and to each other. I'm using larger stitches on the back of my project and very small stitches on the front, which helps make the sewing less visible from the front. Be aware, however, that if the stitches are too big, they'll be loose and more likely to connect traces that should not connect.
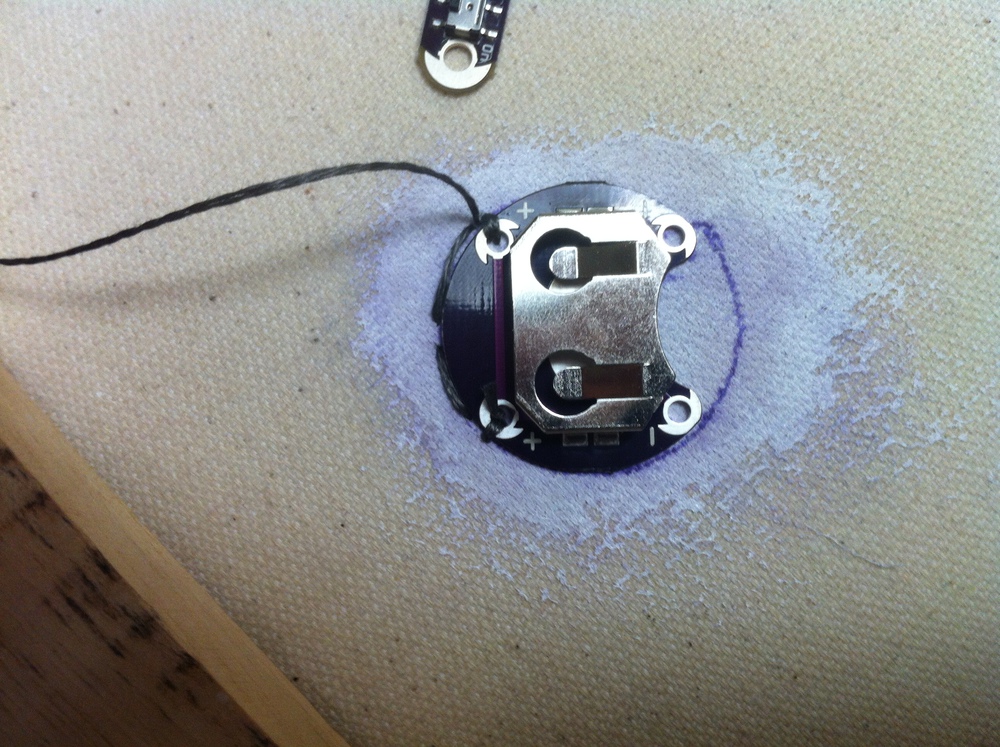
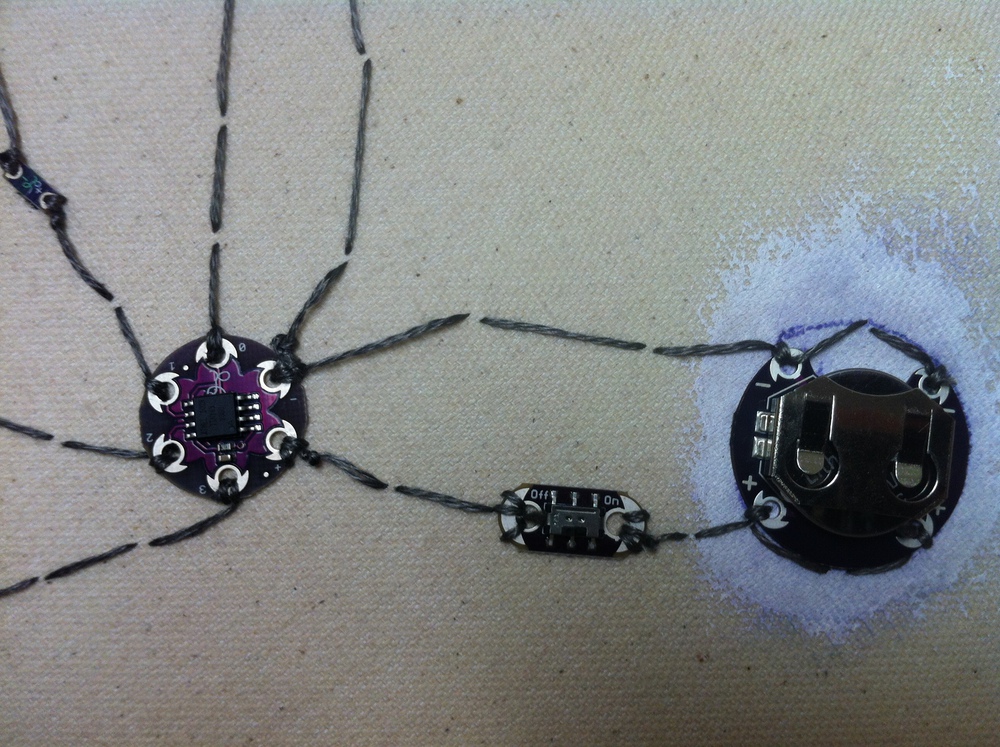
Next, we're going to connect the positive battery terminals to the switch. The switch will determine whether the Tiny board gets power, allowing you to turn the circuit off without taking the battery out. The switch isn't polarized, so go ahead and sew down either end, then tie a knot in your thread and cut it off.
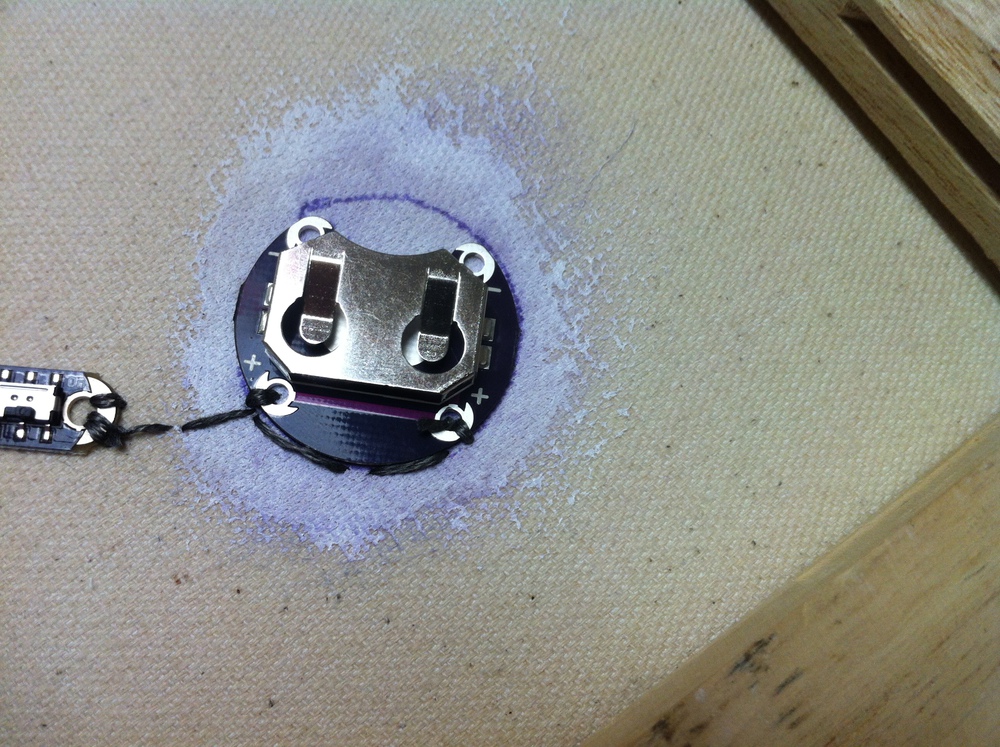
Next, start with a new thread, and sew the other side of the switch to the positive pin on the microcontroller.
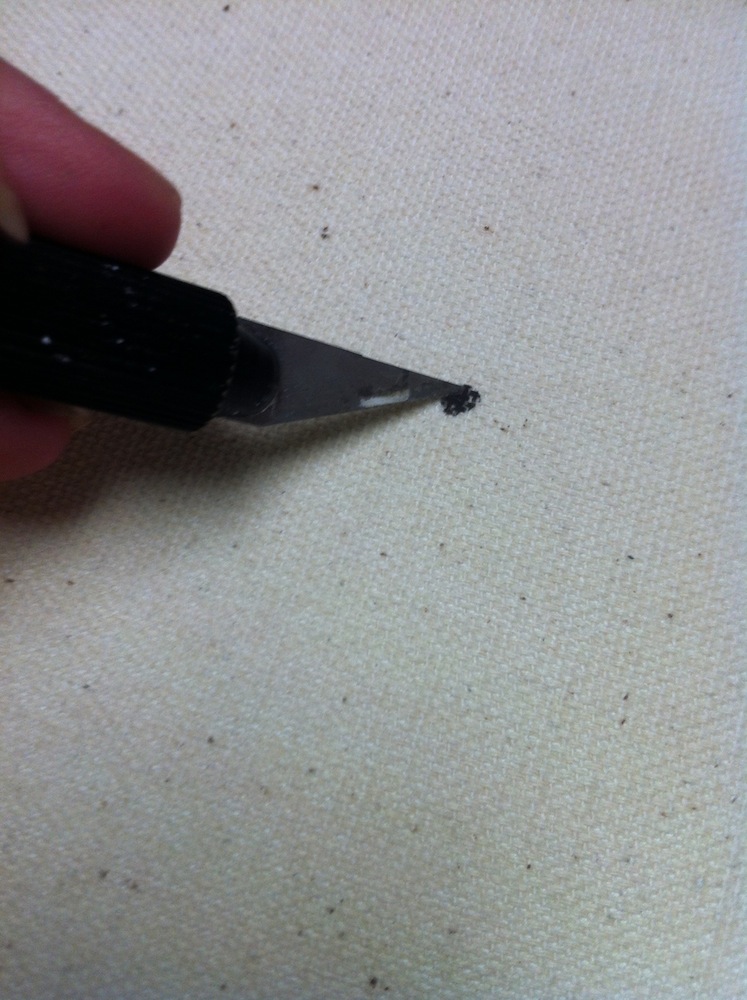
It's important to me to put the body of the LEDs on the back of my project. However, canvas and paint together are too much for the light to shine through, so I'm going to cut a small hole in the canvas where each of my lights will go.
Move on to your first light. I'm going to press mine against the back of the canvas, face down, so that the LED is visible on the front of the canvas. The positive side, marked on the back, should be pointed towards the microcontroller. Sew from one numbered pin of the controller to the positive side, then knot and cut the thread.
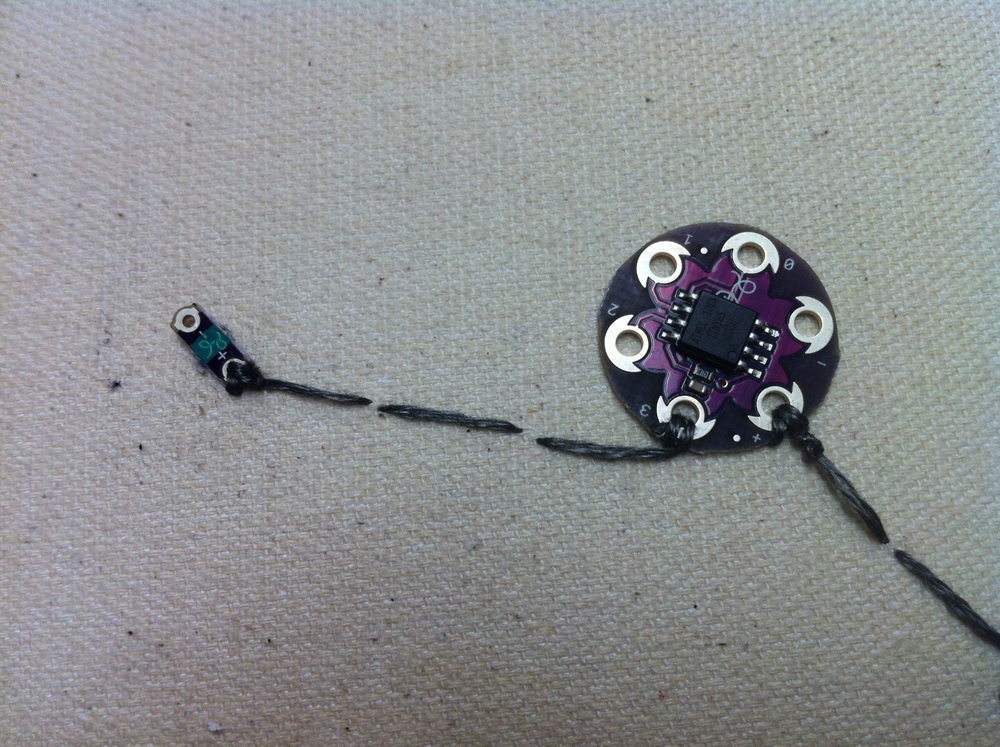
Repeat this process for the other three pins and LEDs.
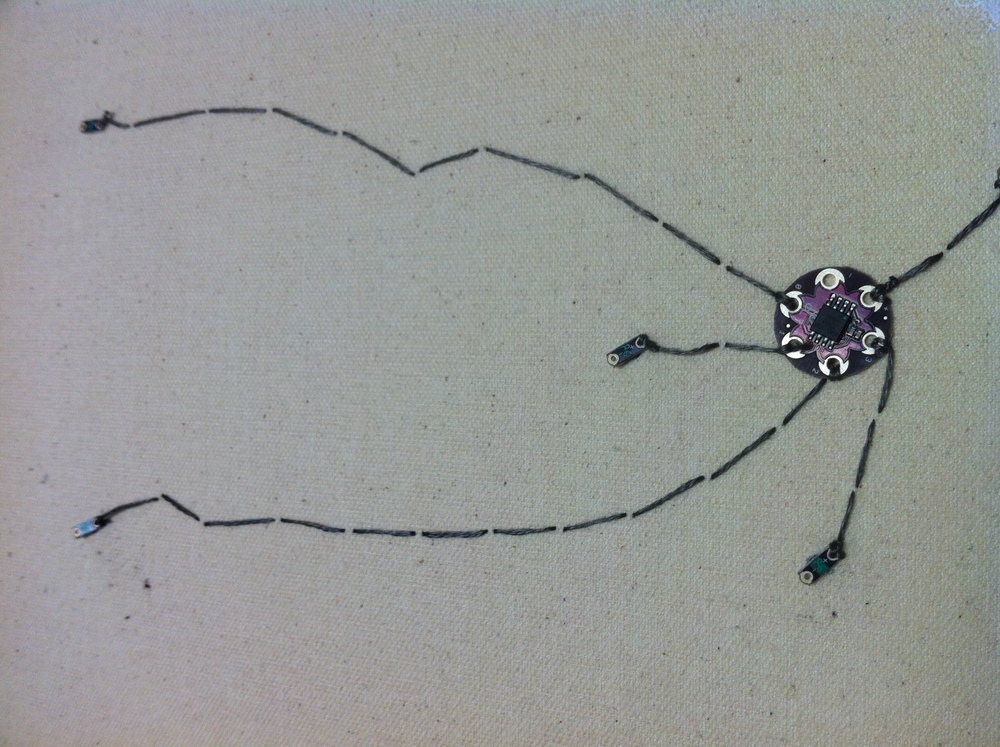
Use one big trace to connect all 4 of the negative sides of the LEDs to each other, and also to the negative pin on the Tiny board. The shape of this trace will depend on your LED placement. It's often a sort of loop.
Finally, sew the negative terminals down, to each other, and to the negative pin of the LilyTwinkle
That should be it!
When you turn the switch on, the lights should fade on and off in a random twinkling pattern!

Troubleshooting
If it doesn't do what it's supposed to, check that your battery is in correctly- the side with the writing should be up. If that's correct, go back and make sure that you've connected everything the directions call for, and nothing that they don't. In particular, make sure that positive and negative on the battery pack are connected to positive and negative on the LilyTwinkle board. Also confirm that there is no point in the circuit where a positive trace and a negative trace are in contact, either where you've sewn the traces, or where a loose thread has fallen. If you have any more questions or comments, please drop them in the comments below.
Resources
Want to try your hand at other LilyPad tutorials? Have a look at these...
Made a wish list for this tutorial.
how many leds can you connect to each pin? i'm trying to make a set of finger less gloves for a costume that i would love to twinkle and i'll be using different colors. i was going to connect them in a parallel up my palm and up the fingers. the lilypad leds would be ideal for it but with how much im planning on putting in each glove i'm also not sure if one cell battery will be enough
This is perfect! I got an email today for a e-textiles mask and we're going to make one for my wife for her Mardi Gra party. But I was thinking that it would be nice to make the lights blink with an ATTINY85...sure enough you're way ahead of me. Thanks!
If you'd rather have a blinking effect, try the LilyTiny. Same board, different code. Pin 2 will blink your lights, or you can have a breathing or heartbeat pattern if that's more your style!
I have not been able to get this to work. I am not using a Lilypad battery holder but I don't think that should impact, not using a switch but that is just an off/on issue that can be duplicated by popping the battery. Puzzled as to why. I have tested the battery and LEDs and they work just not attached to the twinkle board. Is there a way to test the board?
I have the same issue. I am wondering about one thing I noticed - the component on the twinkle board labeled "OIC" or possibly "DIC" is positioned upside-down compared to the photographs of the product I've seen online. I've afraid I don't actually know what what this stands for - I just see that it is positioned differently, and my twinkle board also does not work. Am going to call customer service.
Customer Service was super-nice, they informed me my board probably didn't have any firmware on it and they are going to replace it. Don't drive yourself too nuts if you're having trouble - call and describe your specific problem and they may be able to help.
I followed the directions exactly and it is not working. My battery holder has an on/off switch and I sewed an on/off switch in, too. Could that be the problem? I am sewing onto glittery fabric, could that cause problems?
Shouldn't be a problem as long as both switches are turned to 'on'! If they are, and you still have problems, you should definitely email techsupport@sparkfun.com!
Forgot to add switch to the things needed list.
So I did! Good catch- fixed now.
how many of the micro LED's can be powered off each of the 4 connections?