- Home
- Product Categories
- Bluetooth
- SparkFun NanoBeacon Lite Board - IN100

SparkFun NanoBeacon Lite Board - IN100
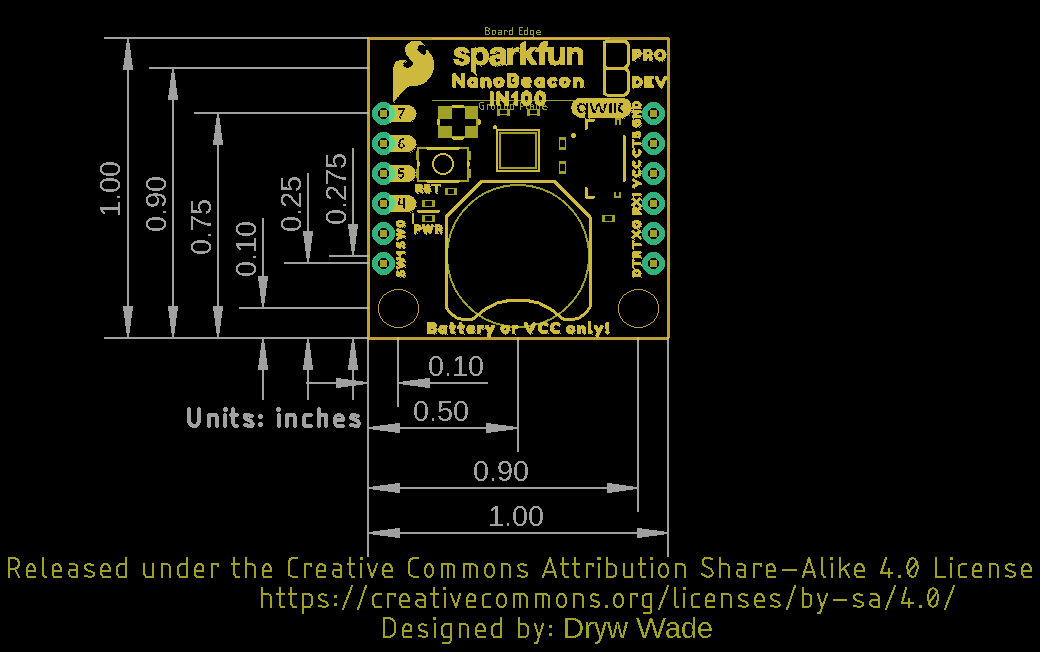
The SparkFun IN100 NanoBeacon Lite Board offers the ubiquitous 2.4 GHz wireless low-energy BT beacon breakout with exceptionally low power consumption features and minimal programming required. The board features the IN100 NanoBeacon™ from InPlay™ that is compliant with several standard 2.4 GHz protocols and has several built-in configurable features for device behavior that can drastically reduce power consumption allowing for continuous operation in the field for multiple years even with a connected device. This board is a great option for wireless sensor monitoring, asset tracking, retail beacons or even making your own beacon tag for real-time location monitoring.
The IN100 can be powered by a single 3V coin cell battery so we've added a 12mm coin cell battery holder (CR1225 battery not included) to power the board. We've added a Qwiic connector to allow for easy integration into our ever-expanding Qwiic ecosystem. One side of the board breaks out the UART interface to a 0.1"-spaced through-hole header to connect a Serial Basic for serial communication. The other side breaks out four of the IN100's GPIO pins (4-7) as well as the two I/O power switch pins (SW0 and SW1). Lastly, we've included a "Notes" space on the back of the board for you to write any notes or labels to differentiate between different NanoBeacon boards at a glance.
This Lite version of this board is designed for prototyping applications for users to test in a development environment before integrating into full production. It includes a power LED and reset button on the board and does not include any pre-soldered headers. Users looking to integrate the IN100 Beacon Breakout into a production environment may want to consider getting the SparkFun NanoBeacon Board - IN100.
The InPlay NanoBeacon Config Tool allows for software-free programming of the IN100. This tool provides a graphical user interface (GUI) to select settings and configure the module removing any need to perform any tricky programming for advertising and pairing to send and receive data packets.
Important! When programming the IN100 with the InPlay NanoBeacon Config Tool, the "Burn/Program" option uploads the settings and locks the module. Before selecting this option make sure everything is set up and working as you intend as you cannot undo this step and you may brick your IN100.
The Config Tool offers a testing "Run in RAM" mode for many settings but I2C is not available in the RAM testing mode. Users connecting I2C devices to the board should ensure their code works before clicking the "Burn/Program" button.
The Config Tool offers a testing "Run in RAM" mode for many settings but I2C is not available in the RAM testing mode. Users connecting I2C devices to the board should ensure their code works before clicking the "Burn/Program" button.
The SparkFun Qwiic Connect System is an ecosystem of I2C sensors, actuators, shields and cables that make prototyping faster and less prone to error. All Qwiic-enabled boards use a common 1mm pitch, 4-pin JST connector. This reduces the amount of required PCB space, and polarized connections mean you can’t hook it up wrong.
- IN100 NanoBeacon
- 2.4GHz BT Beacon module
- Supply Voltage Range: 1.1-3.6V
- Ultra Low Power: < 650nA in Sleep Mode
- Beacon Modes: Proprietary BT, Google™ Eddystone™, and Apple® iBeacon® compliant
- Through Hole Headers:
- 3.3V UART
- 4 GPIO
- 2 Switch Pins
- Coin Cell Battery Holder
- Fits a 3V CR1225 battery
- Reset Button
- Power LED
- 1x Vertical Qwiic Connector
SparkFun NanoBeacon Lite Board
IN100 NanoBeacon
- Datasheet
- NanoBeacon Config Tool User Guide
- NanoBeacon BLE Scanner Phone App
- NanoBeacon Config Examples GitHub Repo
SparkFun NanoBeacon Lite Board - IN100 Product Help and Resources
SparkFun NanoBeacon Board - IN100 Hookup Guide
February 16, 2023
A quick guide to show how to configure and use your own 2.4Ghz wireless beacon with the SparkFun NanoBeacon Board - IN100.
Core Skill: Soldering
This skill defines how difficult the soldering is on a particular product. It might be a couple simple solder joints, or require special reflow tools.
Skill Level: Noob - Some basic soldering is required, but it is limited to a just a few pins, basic through-hole soldering, and couple (if any) polarized components. A basic soldering iron is all you should need.
See all skill levels
Core Skill: Programming
If a board needs code or communicates somehow, you're going to need to know how to program or interface with it. The programming skill is all about communication and code.
Skill Level: Rookie - You will need a better fundamental understand of what code is, and how it works. You will be using beginner-level software and development tools like Arduino. You will be dealing directly with code, but numerous examples and libraries are available. Sensors or shields will communicate with serial or TTL.
See all skill levels
Core Skill: Electrical Prototyping
If it requires power, you need to know how much, what all the pins do, and how to hook it up. You may need to reference datasheets, schematics, and know the ins and outs of electronics.
Skill Level: Competent - You will be required to reference a datasheet or schematic to know how to use a component. Your knowledge of a datasheet will only require basic features like power requirements, pinouts, or communications type. Also, you may need a power supply that?s greater than 12V or more than 1A worth of current.
See all skill levels
Comments
Looking for answers to technical questions?
We welcome your comments and suggestions below. However, if you are looking for solutions to technical questions please see our Technical Assistance page.
Customer Reviews
No reviews yet.
This thing is so cool and low power. Sad that it only can be programmed once.
Not exactly true. Connect the Rx, Tx, and GND wires from your FTDI, but leave the VCC disconnected. Slip in a battery to power it. "Run in RAM" and disconnect. As long as it gets power from the battery it will continue to run. If I want to re-program it, I just hook it up again. Works for me.
The description says 1.5v coin cell. It should be 3v.
Yes, it should say 3v
Thanks for the note, we'll get that updated!
Can this be used to transmit data from a sensor via a UART connection?
I believe the UART interface is only intended for an external host to control the NanoBeacon, typically a computer running InPlay's software, so I don't know if your use case would work. One thing you could try is programming a microcontroller to collect sensor data, which then tells the NanoBeacon what to send, though I'm not sure what kind of software support is available for that. You could try contacting InPlay directly for an API if you want to go down that route, but not sure we can provide any support beyond that. And if you're adding a microcontroller, it'd probably be simpler to just get one that supports Bluetooth (eg. ESP32).
Hope this helps!
One thing I'd suggest after my initial testing is to add a ground pin on the side that has the 4 ADC inputs. One of my projects involves monitoring a couple of different voltages. While running the board in the run in memory mode there isn't a pin readily available for the ground side of things I'm testing. I ended up soldering one on, but it would be nice to have it as part of the board.
a "Notes" space Is included—- very well thought out, simple but very useful!
Provided you only want to have a Bluetooth beacon sent when a door opens with a reed switch would it just be connecting GND and one’s choice of pin 4-7? And using the appropriate settings in software?
Yep, that's the idea! The config required for that would be similar to the one in the product showcase video, just without the I2C stuff.