- Home
- Product Categories
- Audio Boards
- SparkFun Qwiic MP3 Trigger

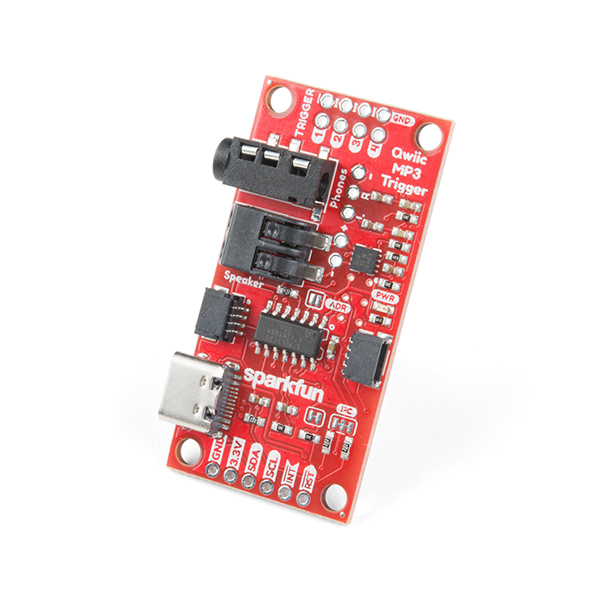
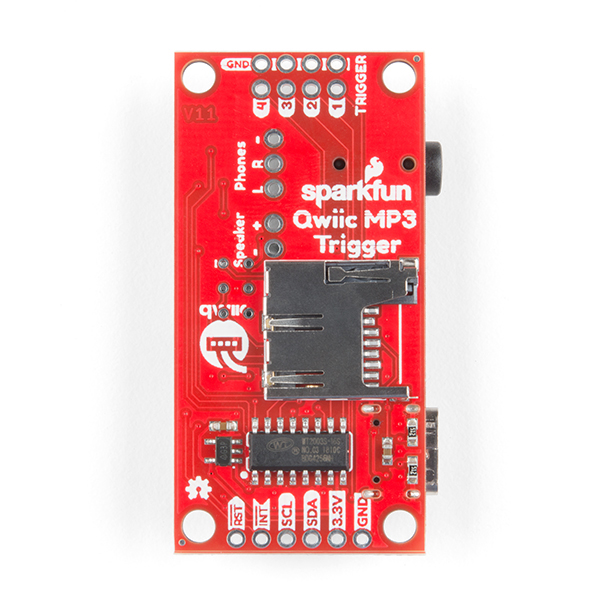
SparkFun Qwiic MP3 Trigger
Sometimes you just need an MP3 to play. Whether it's a theme song as you enter the room or a power song when you are working out. The SparkFun Qwiic MP3 Trigger takes care of all the necessary requirements, all you need to do is send a simple I2C command and listen to whatever is on your micro SD card. Utilizing our handy Qwiic system, no soldering is required to connect it to the rest of your system. However, we still have broken out 0.1"-spaced pins in case you prefer to use a breadboard.
When a USB-C cable is connected to the Qwiic MP3 Trigger the contents of the microSD card appears as a jump drive. Simply plug in the Qwiic MP3 Trigger and you'll be transferring MP3s, no need for drivers and no need for WAV or Vorbis conversion! Sound output is provided via a 3.5mm headphone jack or poke-home connector allowing an external speaker to be connected without soldering. Your supplied speaker is boosted by a Class-D mono amplifier capable of outputting up to 1.4W making it capable of being incredibly loud! Volume is software selectable between 32 levels while equalization can be tuned to be sure your classical hits sound different from your jazz dance routines. If you don't want to deal with any programming, there are four trigger pins. When pin 3 is pulled low the T003.mp3 file will immediately be played. This allows you to start playing sound effects with the touch of a button! By pulling multiple pins down simultaneously the four triggers can play up to ten tracks: T001 to T010. Up to 255 tracks can be loaded onto the SD card and triggered via the I2C interface.
All settings including volume, EQ, and I2C address are stored in NVM and loaded at each power up. The I2C address of the Qwiic MP3 Trigger can be modified via a solder jumper or be assigned using a software command. Multiple Qwiic MP3 Triggers can be chained together on a single bus allowing for simultaneous track mixing and triggering.
We've written an extensive Arduino library to make MP3 playing over I2C a breeze. Play tracks, change volume, play next/previous, check if track is playing, stop play, change EQ, and change I2C address are all supported.
NOTE: The I2C address of the MP3 Trigger is 0x37 and is jumper selectable to 0x38. A multiplexer/Mux is required to communicate to multiple MP3 Trigger sensors on a single bus. If you need to use more than one MP3 Trigger sensor consider using the Qwiic Mux Breakout.
The SparkFun Qwiic Connect System is an ecosystem of I2C sensors, actuators, shields and cables that make prototyping faster and less prone to error. All Qwiic-enabled boards use a common 1mm pitch, 4-pin JST connector. This reduces the amount of required PCB space, and polarized connections mean you can’t hook it up wrong.
- Operating voltage: 3.3V
- Current consumption:
- 40mA standy
- 40mA when playing over headphones at any volume level
- 150mA-300mA when driving external 8Ω speaker at full volume setting
- microSD supports 128MB to 32GB cards
- Volume, EQ setting, and I2C address settings stored in non-volatile memory and loaded at each power-on
- WT2003S MP3 decoder IC provides USB access to microSD socket (up to 32GB) and MP3 decoding
- ATtiny84 receives I2C commands and controls the MP3 decoder
- Poke-home connector allows for sturdy but temporary speaker connection without soldering
- Trigger pins 1, 2, 3, and 4. When pins 1+4 are pulled low simultaneously T005.mp3 will play
- Up to 255 tracks can be loaded onto the SD card and triggered via the I2C interface
- Built-in TPA2005D1 based 1.4W Class-D mono amplifier
- Address jumper to select between I2C address 0x37 (default) and 0x38. I2C address is also configurable via software to one of 110 different addresses.
- USB-C Connector
- Qwiic Connector
SparkFun Qwiic MP3 Trigger Product Help and Resources
Build a Qwiic Jukebox that is Toddler Approved!
March 29, 2019
Follow this tutorial to build your own custom jukebox. Note, this is designed simple and tough for use primarily with toddlers. It's also a great introduction to SparkFun's Qwiic products!
Connector Basics
January 18, 2013
Connectors are a major source of confusion for people just beginning electronics. The number of different options, terms, and names of connectors can make selecting one, or finding the one you need, daunting. This article will help you get a jump on the world of connectors.
Core Skill: Programming
If a board needs code or communicates somehow, you're going to need to know how to program or interface with it. The programming skill is all about communication and code.
Skill Level: Rookie - You will need a better fundamental understand of what code is, and how it works. You will be using beginner-level software and development tools like Arduino. You will be dealing directly with code, but numerous examples and libraries are available. Sensors or shields will communicate with serial or TTL.
See all skill levels
Core Skill: Electrical Prototyping
If it requires power, you need to know how much, what all the pins do, and how to hook it up. You may need to reference datasheets, schematics, and know the ins and outs of electronics.
Skill Level: Rookie - You may be required to know a bit more about the component, such as orientation, or how to hook it up, in addition to power requirements. You will need to understand polarized components.
See all skill levels
Comments
Looking for answers to technical questions?
We welcome your comments and suggestions below. However, if you are looking for solutions to technical questions please see our Technical Assistance page.
Customer Reviews
3.9 out of 5
Based on 8 ratings:
2 of 2 found this helpful:
Great cost and setup
4 out 5 because the headphone port is wired backwards. I have not checked speaker port or line-out breakout connections. My headphones are on correctly :) Confirmed with an .mp3 with voice saying "Left" on left channel and "Right" on right channel. Not going to matter to me in the end, I can switch line outs to my amplifier that I am using for my project, but figured the review may be helpful to others considering the product.
Works
Everything works as expected. I wanted to use it has a simple trigger with no programming. I was a bit disappointed that the Volume setting is in NV memory and there is no apparent way to change it unless you have a working I2C port.
The volume is quite low. With a 4 watt make speaker it put out enough sound to work as say and alarm clock. I was hoping for a bit more in the way of volume.
What would have been nice is a config file that you could put on the root of the SD card.
Very easy and fast to get working
The file system and triggers on this card are great. The only CON is it does not have an external volume control. It must be adjusted thru external software. The volume is adjustable from 0 to 32... firmware has it at about 10... I had to I2C it to an Arduino Pro mini and have it up to 29.
Would be great if it played back cleanly
This board is really easy to use and has plenty of options, but playback is marred by crackly static at the start (the files play fine on my laptop). Others have reported this issue in the forums, too.
Update: seems it's an issue with the amp's SHUTDOWN pin being connected to the decoder’s PLAYING pin. The amp is turned on right when things start to play, and has some noisy startup time.
It'd be great if they broke out the PLAYING signal, as well.
Hi JetForMe.
Thanks for the feedback, that will help us improve the Qwiic MP3 Trigger. The static you're hearing is when the amp comes out of standby mode and the headphone jack isn't connected to the amp. If the headphone jack has enough of an output for your speakers, or if you're using an amplified speaker, you might try using the headphone jack instead. (The board shuts the amp off when not playing to conserve power. In the future we may end up using a jumper to disable that feature.)
Very easy to make a talking raccoon
I bought this and the SparkFun 3.3V Step-Up Breakout - NCP1402 (PRT-10967) to make a plush raccoon play my own sound instead canned commercial soundtrack that came with it (I made it say "I love you lots Alex" and it also plays an mp3 when patted on the back). The only small problem being the Step-Up converter couldn't handle the startup load and caused the board to reboot. I added 10,000 uF capacitor to the 3.3V output and it plays now. (It might need something a little bigger because the sound seems a little lower on start). Volume is loud enough, but the lack of adjustment without connecting something else to it is a little annoying. The holes being kinda on the small side for the wire I had. But overall these two boards made it easy to make a talking raccoon.
Really cool
I am a troglodyte confused by many things electronic. But I have built 4 of your MP3 triggers and they work GREAT when hooked to two AA batteries for 3 volts of power. I mean GREAT. But they don't work at all when hooked to your 3.3/5 volt power supply stick. The input of the stick is 12VDC and the output shows 3.3 VDC, but it will not operate any of the 4 MPC triggers. I know that I am STUPID but could you please explain how I am STUPID? PLEASE.--RANDY
Not sure why that would happen! You might try our tech support team, they may be able to help figure it out. :-)
Outstanding board for an outstanding application!
For Valentine's Day this year I wanted to make my sweet wife an electronic valentine. I'm a homemade paper hearts sort of guy, but thought I'd up my game. I had purchased the Velleman flashing heart kit and thought I'd mount it into a small cigar box. Then I got the idea, hey! What if there was some sort of a way to turn this into a music box to play our song [Moon River, Andy Williams] when the box opened. Well, the SparkFunQwiic MP3 Trigger was JUST THE THING! While I've been trying to do more with microcontrollers on my workbench, I haven't gotten too far. This SparkFun board performed just as promised - the online documentation was perfect. Want to see my music box valentine featuring the SparkFUn Qwiic MP3 Trigger? Check it out here: https://ab1dq.com/2019/02/14/my-funny-valentine THANKS SPARKFUN FROM A VERY SATISFIED CUSTOMER!!!
Thanks so much for the review, and your project looks amazing! Thank you for sharing that with us! :-)
Almost does everything I wanted in a MP3 Player Card
My big motivation for using the card was it had a Pause along with Stop. I time shift long radio shows and restarting at the beginning was a non starter. What I wish it had is a resume at specific time. A nice to have is to report the current play time over the I2C, but I can do that external to the card.
You have to dig in the schematic and descriptions for it, but the card is capable of being powered by 5V, using the USB connector. All the interfaces are 3.3V.
I did not use the mono power amp, but it is there.
You can get to the stereo phone output using the thru holes behind the connector, but - the holes are not lined up on the same 0.1 spacing as the edge thru holes. Why? We hobby types use 0.1 grid cards for mounting and connecting cards.
Another feature that seems only half way is the reset pin RST- only resets the front end processor. It does not force a refresh on the SD card. You have to cycle power to get that accomplished. Cycling power impacts the state of other cards in my systems.
I like the I2C interface concept. Very reliable and easy to interface.
It is a good thing the I2C signal pullup resisters can be removed by cutting a strap on the card. They really hammered my I2C bus.
For my application I would have liked the SD card reader cage positioned almost over the edge of the card. I am putting this card in a box and getting the SD card pushed all the way in will require a hole in the side of the box.
Can this power the I2C master over QWIIC with power from the USB-C port on it?
Just tried it, the answer seems to be yes! :)
I bought mine to make a gift last week but suddenly when I use the triggers it starts playing the song but after a second it stops. Anyone might know why? Could it be a low battery issue?
It could also be the audio file... I know I had an issue with some converters converters. There were a few files that I tested that either the track length or file size was the issue; after I cut down the track to a shorter length/smaller size, it had no issue playing the files.
Is it polyphonic? I know that's too much to ask in a $20 board with a lot of cool things but it doesn't say it anywhere!
Hey hydronics, Sorry, no. This will only play one MP3 at a time.
If you want to layer tracks, you can use the Tsunami Super WAV Trigger. I recently used it on a project that needed layered sound and, although a bit pricier, it works flawlessly!