FLIR Radiometric Lepton Dev Kit V2
With the FLIR Radiometric Lepton Dev Kit you will be able to bring FLIR's thermal imaging reliability and power to your desired development platform!
Product Overview
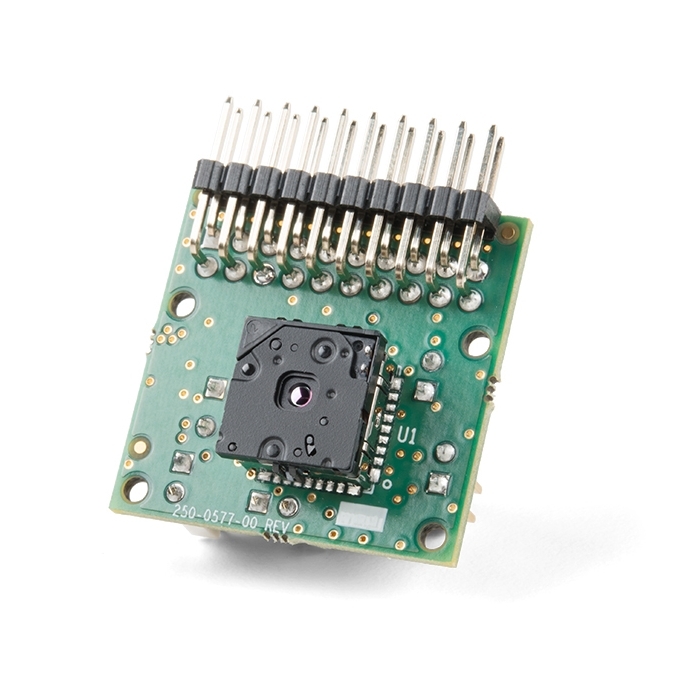
The FLiR Dev Kit includes a breakout as well as a Lepton® longwave infrared (LWIR) imager. With this kit you will be able to bring FLiR's thermal imaging reliability and power to your Arduino, Raspberry Pi, or any ARM based development tool all in an easy to access breadboard friendly package. All you need to do to get this kit set up, simply attach the Lepton® imager module into the provided breakout, connect the headers, and you will be seeing in full darkness in no time!
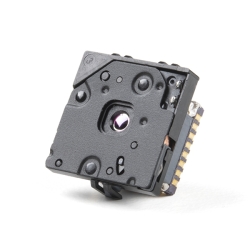
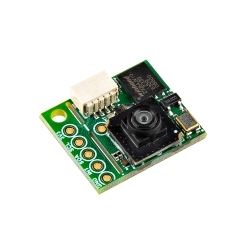
The Lepton® LWIR module included in each FLiR Dev Kit acts as a sort of camera and packs a resolution of 80 × 60 pixels into a camera body that is smaller than a dime and captures infrared radiation input in its nominal response wavelength band (from 8 to 14 microns) and outputs a uniform thermal image. Meanwhile, each breakout board in these kits provides the socket for the Lepton®, power supply's, 25Mhz Crystal Oscillator, 100 mil header for use in a breadboard or wiring to any host system. A few things to consider about this kit: the breakout board will accept a 3-5V input and regulate it to what the Lepton® wants, to read an image from the lepton module all you need is an SPI port, and to configure the camera settings you also need an I2C port, although this is not required.
Note: This kit comes in two separate parts and will need to be assembled once received. The Lepton® module is extremely sensitive to electrostatic discharge (ESD). When inserting it into the breakout board be sure to use proper personal grounding, such as a grounding wrist strap, to prevent damage the module.
Includes:
- 1x FLiR Lepton® - Thermal Imaging Module
- 1x FLiR Lepton® - Breakout Board
Features:
- LWIR sensor, wavelength 8 to 14 μm
- 51-deg HFOV, 63.5-deg diagonal
- 80 (h) × 60 (v) active pixels
- Thermal sensitivity <50 mK
- MIPI and SPI video interfaces
- Two-wire I2C-like serial-control interface
- Fast time to image (< 0.5 sec)
- Low operating power, nominally 150 mW (< 160 mW over full temperature range)
Documents:
- Schematic
- Datasheet (Lepton®)
- Hookup Guide
- SDK
- Reverse-Engineering the Lepton®
- Product Page
- GitHub (Library, Example Code, & Design Files)
-
 FLiR Lepton Breakout Board V2
Special Price Current price: $51.35 Regular Price Original price: $64.95In stock
FLiR Lepton Breakout Board V2
Special Price Current price: $51.35 Regular Price Original price: $64.95In stock -
-
 FLIR Lepton 2.5 - Thermal Imaging Module
Special Price Current price: $179.95 Regular Price Original price: $209.95In stock
FLIR Lepton 2.5 - Thermal Imaging Module
Special Price Current price: $179.95 Regular Price Original price: $209.95In stock -
-
-
-
 Luxonis OAK-D-IoT-40
Special Price Current price: $164.44 Regular Price Original price: $199.95In stock
Luxonis OAK-D-IoT-40
Special Price Current price: $164.44 Regular Price Original price: $199.95In stock -
-
-
-
-
-
-
 Leopard Imaging Camera - 136 Degree FOV
Special Price Current price: $26.16 Regular Price Original price: $32.50In stock
Leopard Imaging Camera - 136 Degree FOV
Special Price Current price: $26.16 Regular Price Original price: $32.50In stock


-
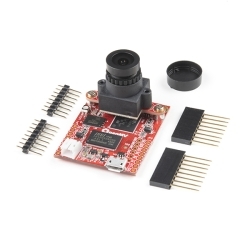
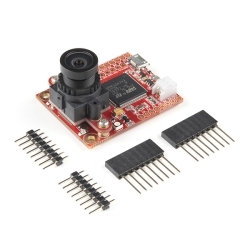
 OpenMV Cam PureThermal
Special Price Current price: $259.00 Regular Price Original price: $369.95Discontinued
OpenMV Cam PureThermal
Special Price Current price: $259.00 Regular Price Original price: $369.95Discontinued -
-
-
-
-


Features & Specs
- LWIR sensor, wavelength 8 to 14 μm
- 50° HFOV, 60° diagonal
- 80 (h) × 60 (v) active pixels
- Thermal sensitivity <50 mK
- Radiometric accuracy (35°C Blackbody) Greater of:
- High gain: ±5C @ 25°C
- Low gain ±10C @ 25°C
- Pixel Size: 17 micrometers
- Frame Rate: 9 Hz.
- Output Format: User-selectable 14-bit, 8-bit (AGC applied), or 24-bit RGB (AGC and colorization applied)
- SPI and I2C camera module interfaces
- Fast time to image (< 1.2 sec)
- Low operating power, nominally 150 mW (< 160 mW over full temperature range)
- Input Voltage of 3V to 5.5V
- 25-MHz reference clock (can be by-passed)
- Power Efficient 1.2V core voltage (can be by-passed)
- Dual Low Noise LDO for 2.8V voltage (can be by-passed)
Documentation
- Quickstart Guide
- Datasheet
- Lepton Software
- LeptonModule ( C )
- PyLepton ( Python )
- GetThermal Viewer ( Linux & macOS )
- FLIR's Lepton SDKs ( Behind EULA Wall )
- Product Page
- Breakout Board Datasheet
Customer Reviews
