SparkFun Ardumoto Shield Kit
Product Overview
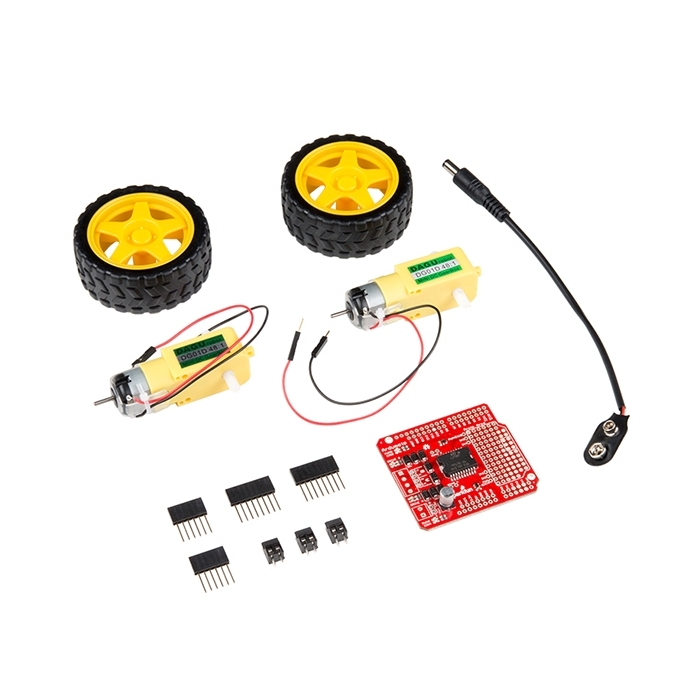
Robots are fun, and Arduinos are easy. So wouldn't it be nice if there were a kit that included everything you need to get your Arduino device set up to control a simple two-motor-circuit buddy? The SparkFun Ardumoto Shield Kit is perfect for any robot enthusiast and includes an Ardumoto Shield, as well as pairs of tires, motors, connectors and wires. And, of course, it’s all stuffed in a classic SparkFun red box (which may come in handy as a robot chassis).
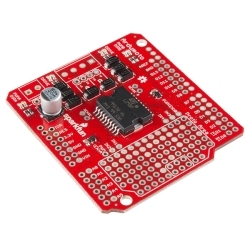
The Ardumoto Shield is an easy-to-use dual-motor controller for Arduino. Combined with an Arduino, the Ardumoto makes a fantastic controller platform for RC vehicles or even small autonomous robots. At the heart of the Ardumoto --- the big, black chip right in the middle --- is an L298, one of our favorite dual-channel motor drivers around, capable of driving up to 2A per channel. The board takes its power from the same Vin line as the Arduino board and includes blue and yellow LEDs to indicate active direction. All driver lines are diode protected from back EMF.
Note: The motors included with this kit are not compatible with the Wheel Encoder kit. Sorry for the inconvenience.
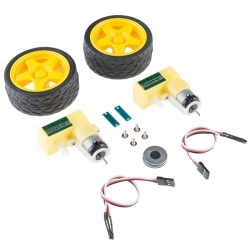
Kit Includes:
- 1x SparkFun Ardumoto Shield
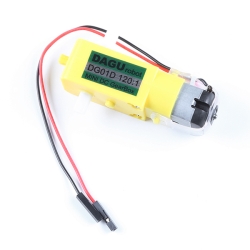
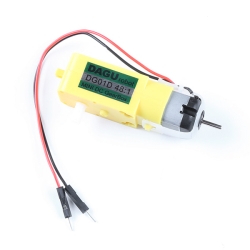
- 2x Hobby Gearmotor -- 65 RPM
- 2x Wheel -- 65mm (Rubber Tire)
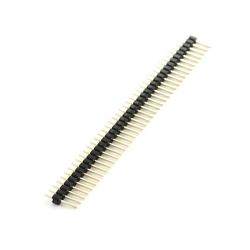
- 1x Arduino Stackable Header Kit
- 3x Screw Terminals 3.5mm Pitch (2-Pin)
- 1x 9V to Barrel Jack Adapter
- 2x Black Wire -- 5" Length (22AWG Solid Core)
- 2x Red Wire -- 5" Length (22AWG Solid Core)
Documents:


Documentation
Customer Reviews

Stock and Customer Discounts
Available Discounts
- $34.68 | 10+ units
- $32.85 | 25+ units
- $31.03 | 100+ units