
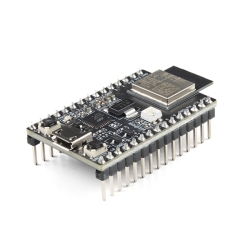
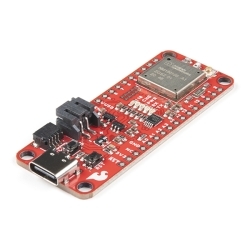
SparkFun Thing Plus - ESP32 WROOM (USB-C)
The USB-C variant of ESP32 Thing Plus is a development board with WiFi, SPP, BLE, Qwiic connector, 21 I/O pins, RGB status LED, and micro SD card slot.
Helpful Documentation
 Hookup Guide
 Schematic
 Datasheet (ESP32-WROOM-32E Module)
Product Overview
The SparkFun ESP32 WROOM Thing Plus with USB-C is a great place to get started with Espressif IoT ideations while still enjoying all the amenities of the original ESP32 WROOM Thing Plus. Espressif's ESP32 WROOM is a powerful WiFi and Bluetooth® MCU module that targets a wide variety of applications. At the core of this module is the ESP32-D0WDQ6 chip which is designed to be both scalable and adaptive. To make the Thing Plus as easy to use as possible, we've made the board Feather-compatible and it utilizes our handy Qwiic Connect System which means no soldering or shields are required to connect it to the rest of your system!
The SparkFun ESP32 WROOM Thing Plus with USB-C provides a few enhancements to the previous ESP32 Thing Plus. In addition to the standard Thing Plus form factor, we have included a µSD card slot, upgraded to a USB-C connector, integrated a RGB status LED and battery fuel gauge, and provided two voltage regulators; a separate 700mA current source for the board and Qwiic connector. It's also important to point out that a CH340C serial-to-UART bridge is used on this board; unlike previous variants.
The ESP32 Thing plus integrates a rich set of peripherals, ranging from capacitive touch sensors, SD card interface, Ethernet, high-speed SPI, UART, I2S and I2C, etc. The module also features 16MB of flash memory, 520kB of internal SRAM, an integrated 802.11 b/g/n WiFi transceiver with dual-mode Bluetooth® capabilities, and a JST connector to plug in a LiPo battery.
-
-
-
-
-
-
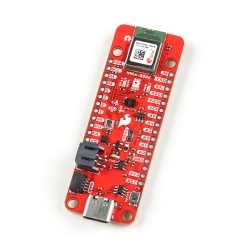
 SparkFun Thing Plus - DA16200
Special Price Current price: $14.95 Regular Price Original price: $34.95In stock
SparkFun Thing Plus - DA16200
Special Price Current price: $14.95 Regular Price Original price: $34.95In stock -
-
-
-
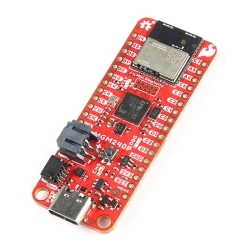
 SparkFun AzureWave Thing Plus - AW-CU488
Special Price Current price: $28.50 Regular Price Original price: $49.95In stock
SparkFun AzureWave Thing Plus - AW-CU488
Special Price Current price: $28.50 Regular Price Original price: $49.95In stock -
-
-
-
-


Features & Specs
SparkFun Thing Plus - ESP32 WROOM Features
- ESP32-WROOM Module
- 21 Multifunctional GPIO
- Up to thirteen 12-bit ADC Channels
- Up to two DAC channels
- Up to sixteen PWM outputs
- Up to eight capacitive touch pins
- Up to three SPI Busses (only one is configured by default in the Arduino IDE)
- An available I2S Audio Output
- Up to two I2C Busses (only one is configured by default in the Arduino IDE)
- Up to three UARTs (only two are configured by default in the Arduino IDE, one UART is used for bootloading/debug)
- Thing Plus (or Feather) Form-Factor:
- Dimensions: 2.55" x 0.9"
- Four Mounting Holes:
- 4-40 screw compatible
- 28 PTH Pins
- USB-C Connector
- 2-pin JST Connector for a LiPo Battery (not included)
- 4-pin JST Qwiic Connector
- SD Card Slot
- MAX17048 Fuel Gauge
- LEDs:
PWR- Red power LEDCHG- Yellow battery charging indicatorSTAT- Blue status LED- WS2812 RGB LED
- Buttons:
BOOTRST
ESP32-WROOM General Features:
- Operating Voltage: 2.3 to 3.6 V
- 2.5 µA deep sleep current
- 80 mA average operating current
- Operating Temperature: -40 to 85 °C
- Xtensa® Dual-Core 32-bit LX6 Microprocessor (up to 240MHz)
- 448KB of ROM and 520KB SRAM
- 16MB of Embedded SPI flash storage
- Integrated 802.11b/g/n WiFi 2.4GHz transceiver
- Integrated dual-mode Bluetooth® (classic and BLE®)
- Hardware accelerated encryption (AES, SHA2, ECC, RSA-4096)
Customer Reviews

Stock and Customer Discounts
Available Discounts
- $32.04 | 10+ units
- $30.36 | 25+ units
- $28.67 | 100+ units