PINECIL Soldering Iron Kit

Added to your shopping cart

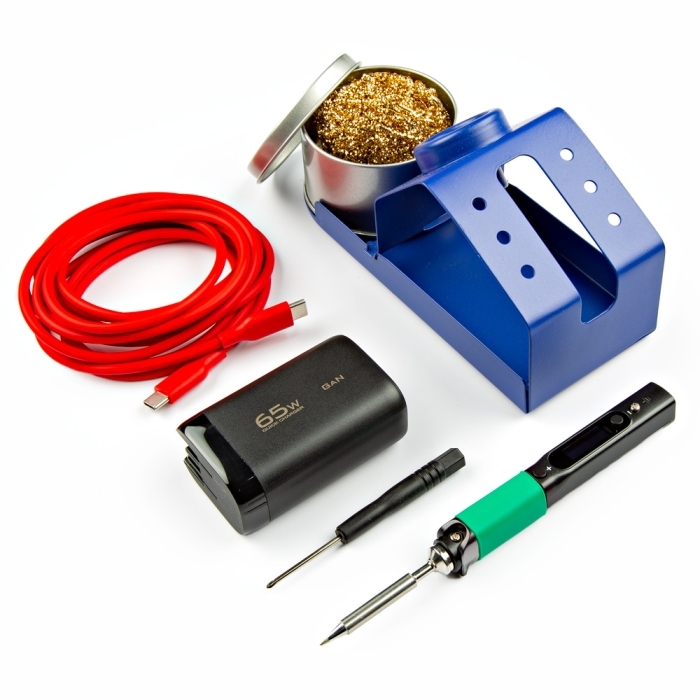
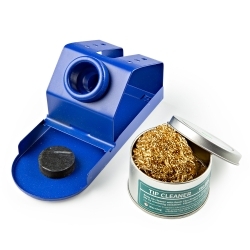
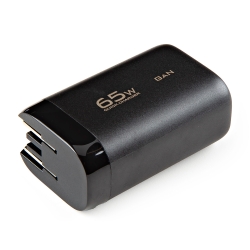
The PINECIL Soldering Iron Kit provides a compact powerhouse and everything you need to ignite your DIY dream. Inside, you'll find the game-changing PINECIL iron, renowned for its lightning-fast heat-up and pinpoint precision. A premium USB-C cable also ensures seamless power, while a sturdy soldering stand and brass sponge keep your workspace organized and safe. A PD wall adapter is included to extend your soldering sessions, ready to fuel your creative marathon. With everything in one place, the PINECIL Soldering Iron Kit empowers you to craft, repair, and personalize like never before.

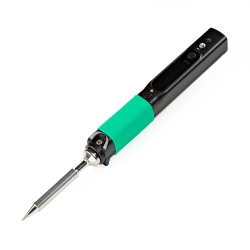
The PINECIL is a smart mini portable soldering iron with a 32-bit RISC-V SoC featuring a sleek design and a built-in IMU for auto standby. It heats up to an operating temperature in just six seconds! The adjustable soldering tip temperature can be set between 100° C and 400° C using the adjustment buttons around the easy-to-read OLED display.

PINECIL Soldering Iron Kit Product Help and Resources

How to Solder: Through-Hole Soldering

September 19, 2013

This tutorial covers everything you need to know about through-hole soldering.

Working with Wire

February 8, 2013

How to strip, crimp, and work with wire.

Core Skill: Soldering

This skill defines how difficult the soldering is on a particular product. It might be a couple simple solder joints, or require special reflow tools.

2 Soldering

Skill Level: Rookie - The number of pins increases, and you will have to determine polarity of components and some of the components might be a bit trickier or close together. You might need solder wick or flux.
See all skill levels


Core Skill: Electrical Prototyping

If it requires power, you need to know how much, what all the pins do, and how to hook it up. You may need to reference datasheets, schematics, and know the ins and outs of electronics.

2 Electrical Prototyping

Skill Level: Rookie - You may be required to know a bit more about the component, such as orientation, or how to hook it up, in addition to power requirements. You will need to understand polarized components.
See all skill levels


Comments

Looking for answers to technical questions?

We welcome your comments and suggestions below. However, if you are looking for solutions to technical questions please see our Technical Assistance page.

  • So, Pinecil v1 or v2? This is (kinda) important. I'm quite happy with my v1. However, you don't mention the Bluetooth that could be enabled with the newer BL-706. I don't need that personally, but I'd love to make an ACTUAL tiny RISC-V cluster out of soldering irons... It's just a thing for "old"-time RISC-V'rs.

    • Raventail / about 11 months ago / 1

      Looks like it's v2. The listing for the standalone Pinecil says it has the BL-706 chipset.

  • woodr / about 11 months ago / 1

    Are you planning on carrying any of the tip sets?

Customer Reviews
4.7 out of 5

Based on 3 ratings:

Currently viewing all customer reviews.

3 of 3 found this helpful:

Seems ideal for small jobs

This is a "5 minute" review (that's how long it took to unbox the kit, fire up the iron, and solder the 2 20-pin headers on a pico board). I almost just bought the pinecil, cable, and power supply individually, but then realized the kit with the stand/sponge was only a few dollars more (and definitely worth it).

I don't have space to keep a permanent work area set up, so I think this will be perfect for small jobs. For example, my fist use was to solder on the header pins on a pico board. I was finished in probably less time than it would have taken to pull out my Hakko and heat up the iron.

A few notes:

  • I've only barely taken a look at the pinecil menus. Looks easy to change temp and other settings.

  • Only about 6 seconds to hit operating temp and only about about a minute to cool back down.

  • The USB-C cable is very flexible.

  • I don't have a power bank with USB-PD, so I haven't tried to run it from anything other than the wall adapter.

1 of 1 found this helpful:

A lot of soldering iron in a small package.

So much more configurable and flexible than my clunky FX888D. Takes up less space too.

0 of 1 found this helpful:

Good, yet I needed to tinker a bit

I found that the POWER SOURCE, seemed a bit shy to provide ENOUGH wattage to heat the tip.

Might have been the Solder on the boards I was trying it out on, so my first item to look at was MORE READING.

The company website said the input could be VARIABLE, so I hooked it up to my "Bench Supply" a 12 VOLT Deep Charge battery meant for a boats troweling motor!

I ended up finding the proper BARRELPLUG, which was from a genaric 12 Volt to 20 Volt switch controlled Computer Power supply.

I then Hardwired an old 120 volt 14 guage wires to appropriate adapters, and POWERED it up with an 18 VOLT LiIon Cordless drill battery!

i had "instant" HEAT, anfd I might add, NEW symbols on the MAGNIFICANT SCREEN showing that I was using a HIGHER VOLTAGE.

I am very pleased with the outcome, and since I am "returning" to the hobby of Six PLUS Decades, it was FUN to troubleshoot!

IF the kit came WITH the needed off size barrel plug, and better guage wire, I would have given it TEN STARS, my First soldering iron was BUILT in the 40's, and my Dad, a former Navy Radio Tech, let me use (after training) AT AGE TEN years old!!! By the 1960's I had been making Radios for 3 years, but not soldered joints!

philip, "i fix your Shorts, NO sparks included"