
Sorry, the leader cheater has nothing to do with cheating, it’s just a silly name for a trick to add a leader to a cut tape that doesn’t have a leader.
First of all, what’s a leader and why do I care?

A reel of 5,000 470Ω resistors - $0.001 per resistor!
When you buy components like resistors and capacitors from Mouser and Digikey you often see the option for tape and reel. This is kind of what it sounds like: all the components / the components come on a reel and a piece of adhesive tape holds the reel closed.
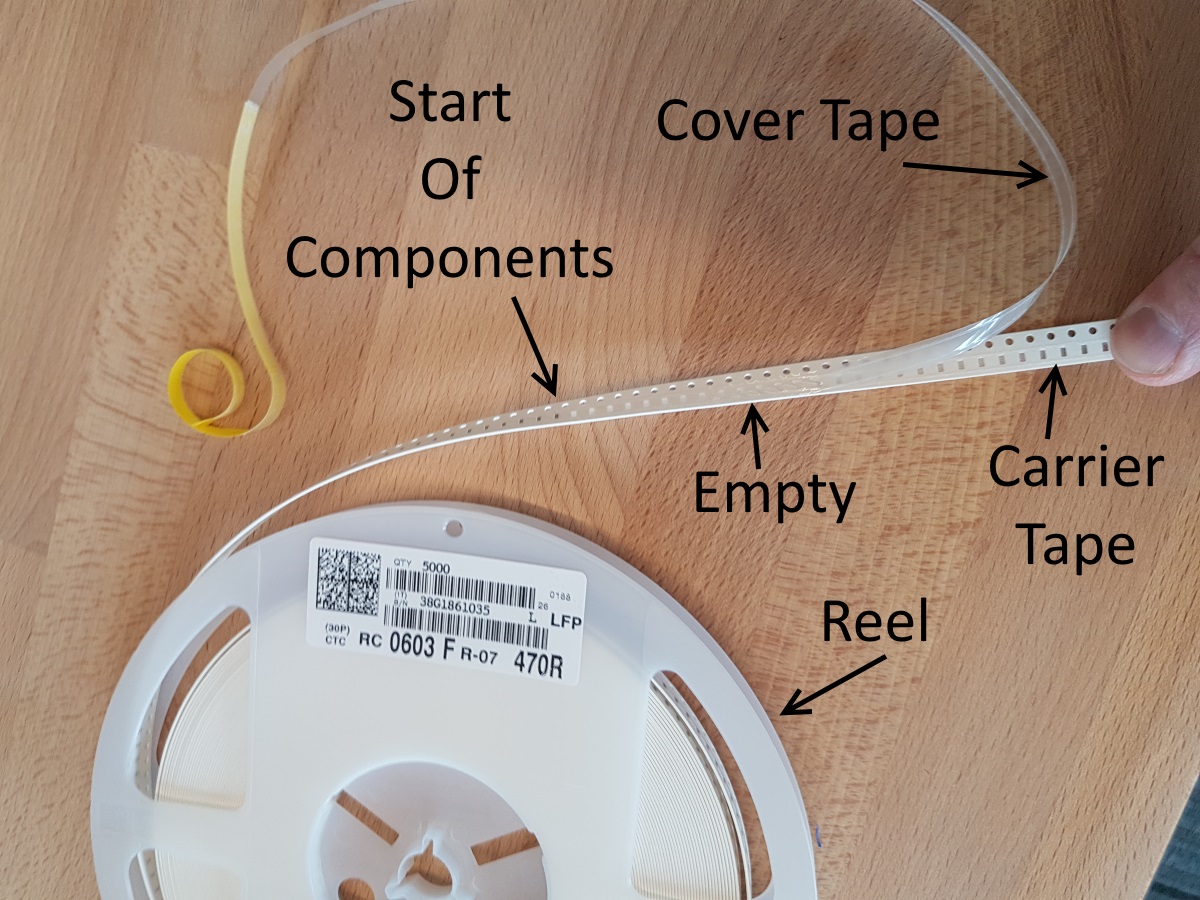
There are three parts to a tape and reel. There’s the reel which is just a cheap plastic reel. There’s the paper or plastic tape that contains the components, and then there’s the clear plastic cover tape. You can see we’re using the term ‘tape’ a lot. Sorry, there’s not a better word for it. I’ll use the term ‘carrier tape’ to indicate the tape that houses the components and ‘cover tape’ to indicate the thing that is peeled back.
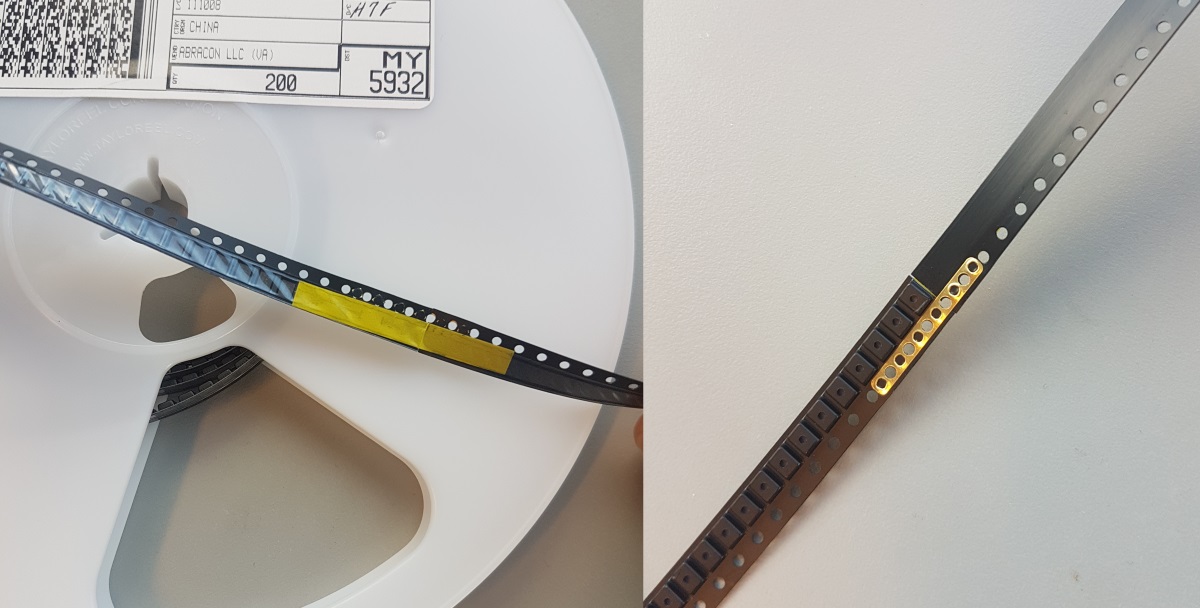
Once you remove the yellow adhesive tape, the carrier tape containing the components is released. If you look closely though, there’s no components! This is called the leader. It’s the sacrificial part of the reel. Why do you need a sacrificial part of the carrier tape? When you load a new tape and reel of components into a pick and place machine the feeding mechanism will absorb a few inches of carrier and cover tape in order to properly ‘load’ the feeder. The machine advances the tape until it reaches the start of the components and the feeder is ready. If the reel contained components to the very end of the carrier tape then a few inches worth of components would need to be sacrificed. Hence, all tape and reel components have a leader where there are no components so you can load the machine without losing any stock.
A few inches of carrier tape could be dozens of components! Resistors are cheap but imagine a few inches of a very expensive component. You could lose hundreds of dollars worth of parts. So leaders are very important but they only exist when you purchase a full reel. Full reels can be thousands of dollars! So I buy ‘cut tape’ or partial reels all the time.
How do we deal with cut tape?
First, ask yourself how expensive is the component? How many do you have? If I have a partial reel of a few thousand (tons!) 4.7k resistors (cheap!) and the leader has been cut off then I would create a leader by separating ~15 inches of carrier and cover tape trashing the components as I go. A few nickels of components is better than the leader cheater method. But if you have a component that is worth a few dollars then read on...
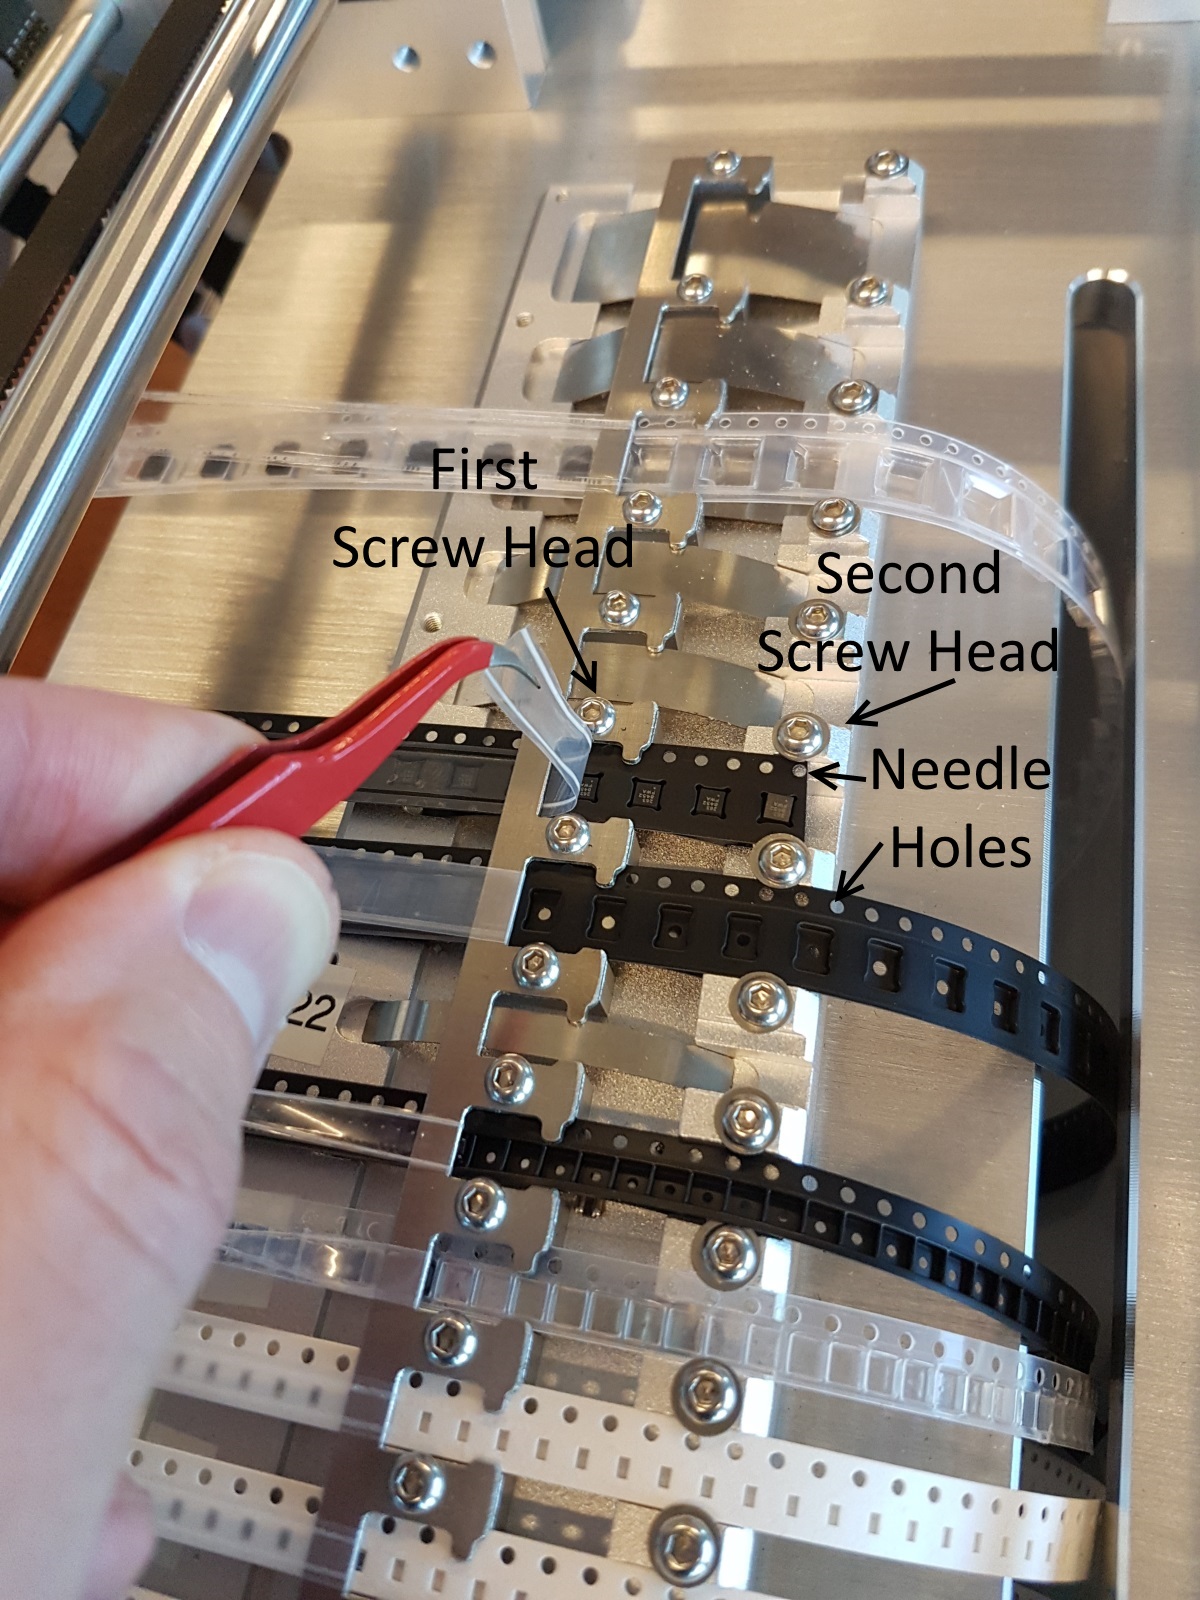
Leader Cheater Step 1) Insert the cut tape into the machine so that the tape goes a little past the second screw head. Be sure the holes are on the upper edge as shown. This is where the advance needle expects the holes to be. Peel back the cover tape and set the exposed components to the side.
A cut tape loads the same way into the CHMT36VA as a tape and reel but you have no reel and no leader. The lack of reel is no big deal, we just let the tape hang free. But without a leader we have to sacrifice a few components. Don’t worry, we’ll save them!
When loading a cut-tape component into the CHMT36VA you’ll need to expose enough carrier tape to get the tape under the second screw head. The machine advances the tape with its needle and this area is where it does that. If the tape is not inserted into the second screw head the needle can’t advance the tape. Depending on your component size this could be 5 to 10 pcs. Carefully remove any exposed components with tweezers and set them to the side.
Now we need to get the cover plastic back to the tension reels but there’s not enough! The SMD industry sells something called leader extenders or cover extenders which seem to work but can be prohibitively expensive. There are expensive options and cheaper options if you can wait a few weeks for delivery. I’m impatient so we started thinking about how we could make our own. The audio tape industry solved the ‘how do I attach two pieces of thin plastic?’ problem decades ago. We found 1/4" audio splicing tape to be an excellent substitute. 1/4" = 6.35mm so it fits nicely on the smaller 8mm tensioning pulleys.
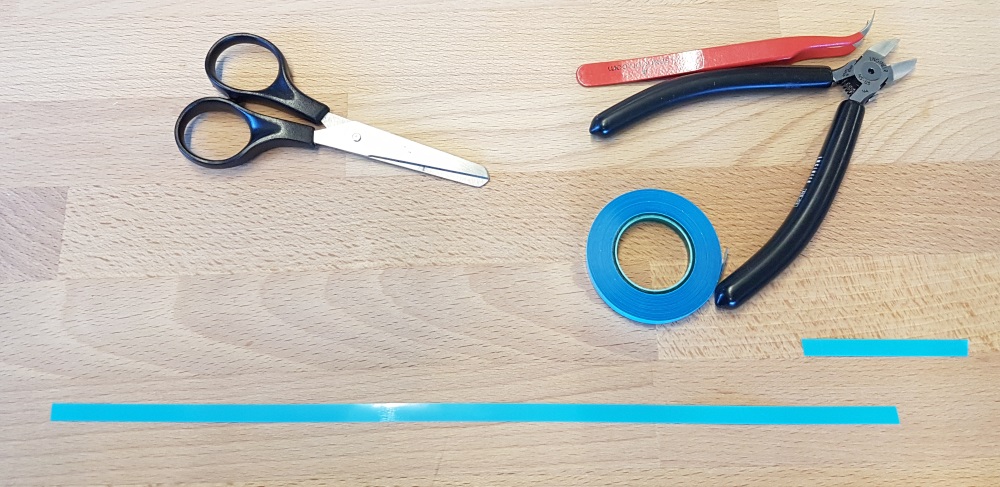
Step 2) Cut two pieces of tape: a long piece about 15 inches and a short piece about 2 inches.

Step 3) Lay the cover tape back down over the carrier tape. Then apply your blue audio tape on the cover tape. About 1 inch of the blue tape should be on the cover tape and 1 inch should just be hanging in the air.
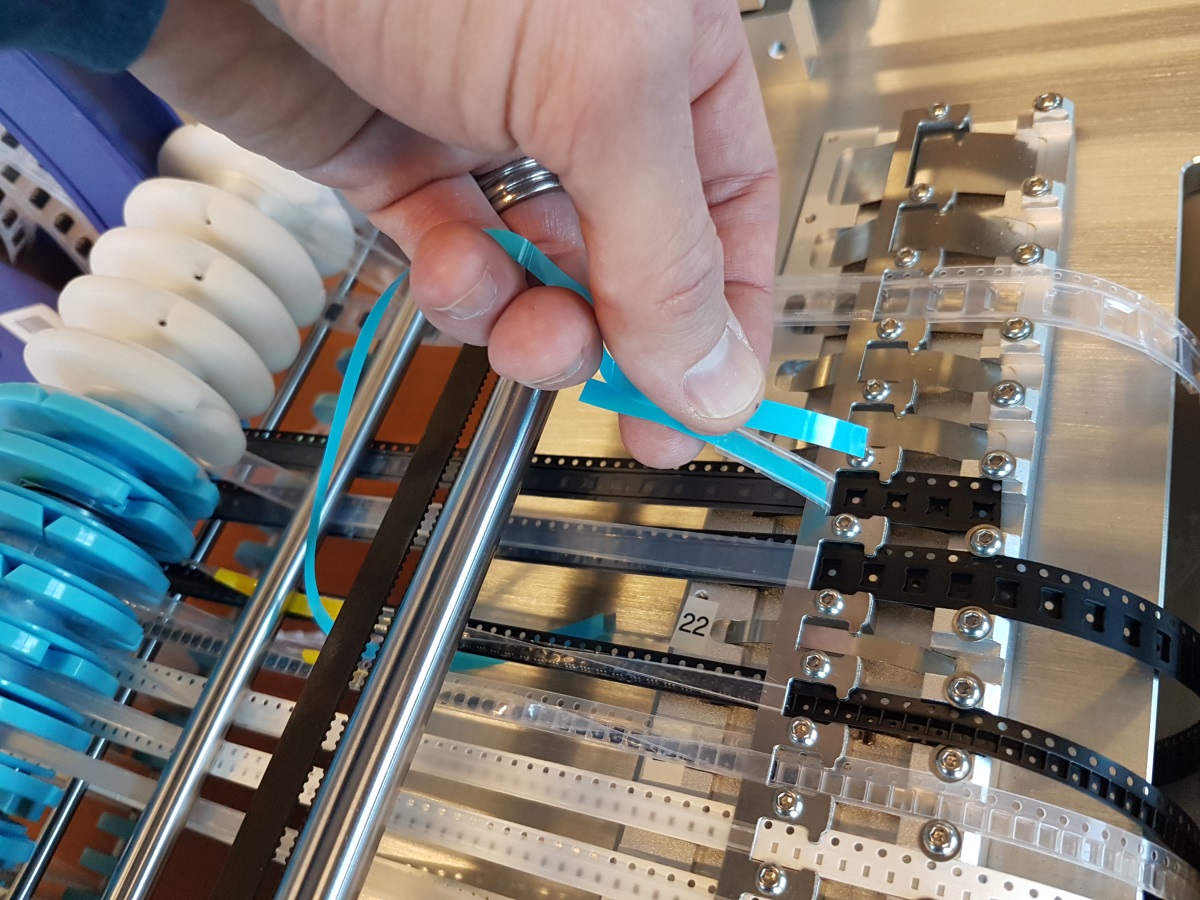
Step 4) Flip the cover tape back and apply the longer blue tape.
This way you have sandwiched the cover tape between two pieces of blue tape making a strong hold.
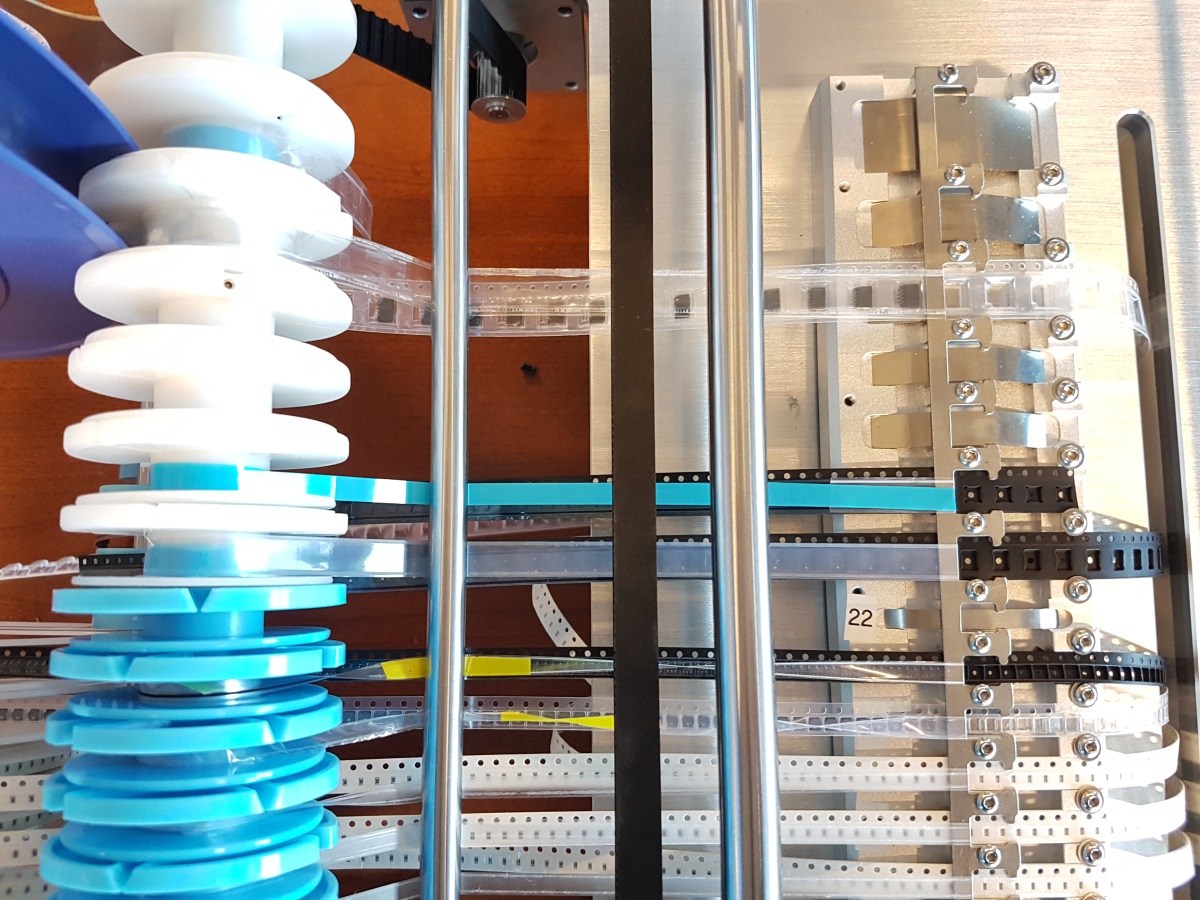
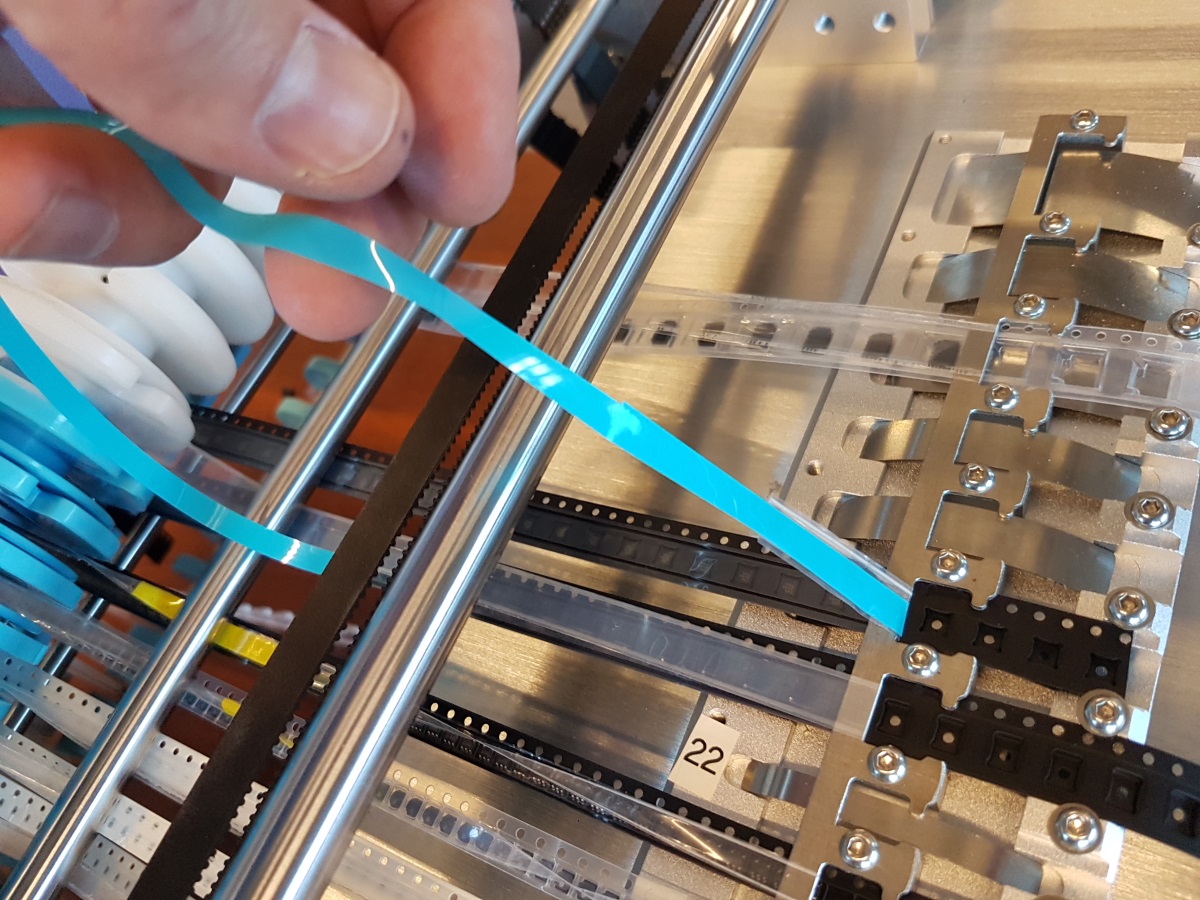
Step 5) Run the blue tape under the various bars and belts. The tape is obviously sticky so go slow. Place the end of the blue tape on the tensioning pulley and press the end down with a pen, stick, or a pair of tweezers. Rotate the tension wheel a number of times to pull up the slack in the blue tape. There should be enough extra blue tape to go around the tensioning pulley a few times creating a good strong hold when it sticks to the pulley and itself. When complete you should see the same thing as above.

Counter-clockwise (lefty loosy) to reduce pulley tension
Step 6) Make sure the friction on your tensioning pulley is light by backing off the set screws. The reason: the tensioning motor will twist the bar causing all the pulleys to go under tension every time a component is picked (regardless of the feeder it is picking from). If the blue-tape pulley has a lot of friction with the bar it will pull hard on the blue tape causing the sandwich with the clear cover tape to come apart and then you get to redo your work.
What do I do with the ICs I saved?
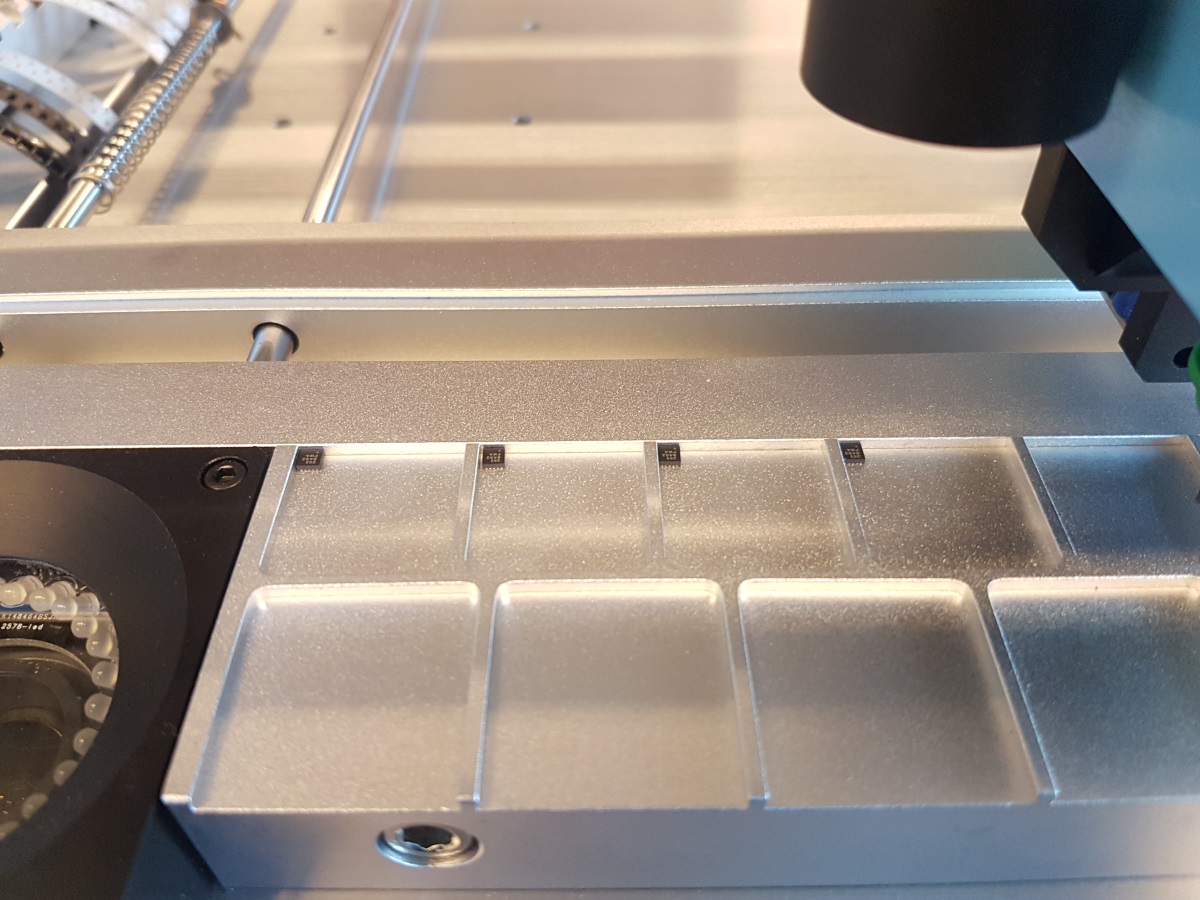
You can load them into the top left corner of the pick tray. That’s a whole other tutorial but by setting your feeder ID to 80 you’ll be able to pick these parts.
What about Digi-Reels and MouseReels?
These are services where the distributor cuts a length of tape from a larger reel, adds a leader (through various methods) and puts the cut tape on a reel. It costs around $7 per reel. I have used this service a few times and the results stink. The leaders are added with some metal or plastic banding that tends to bind in the feeders on the CHMG38VA causing the tape to rip and/or the advancing needle to get bound up in the tape. These special reels probably work fine on larger machines but for our machine it makes more sense to expose ~5pcs of the expensive sensor, place them to the side and use the leader cheater tape method to extend the cover tape.
Thanks for reading! Please checkout the other posts on our desktop pick and place machine.
Do you have one of these machines? Want to share your tips and tricks and ask other owners a question? Join the Desktop Pick and Place google group!
Related Pick and Place Blog Posts:
- Unboxing the $2800 desktop pick and place machine
- Creating a Leader for Cut Tape Components
- Installing the Charm High Software
- A better English Translation for the Charm High Software
- An EAGLE ULP script to create a CHMT36VA work file and start placing components in less than a minute!


Thanks Nate, do you know the size of the hex key for the feeder tensioning screws? I recd a coupld of hex keys w my 36V, but they are all too big... Wayne
Hi Wayne - Ours measured at 1.5mm.
Thanks Nate, you're spot on 1.5mm fits perfect
Thanks for this, it is most useful. If you need blank component reels, I have made a generic 3D model that can support all sizes, and snaps together with no hardware. Find it here
Cheers, Egil
Glad you got use from it! Thanks for the 3D printable reel - neat design!