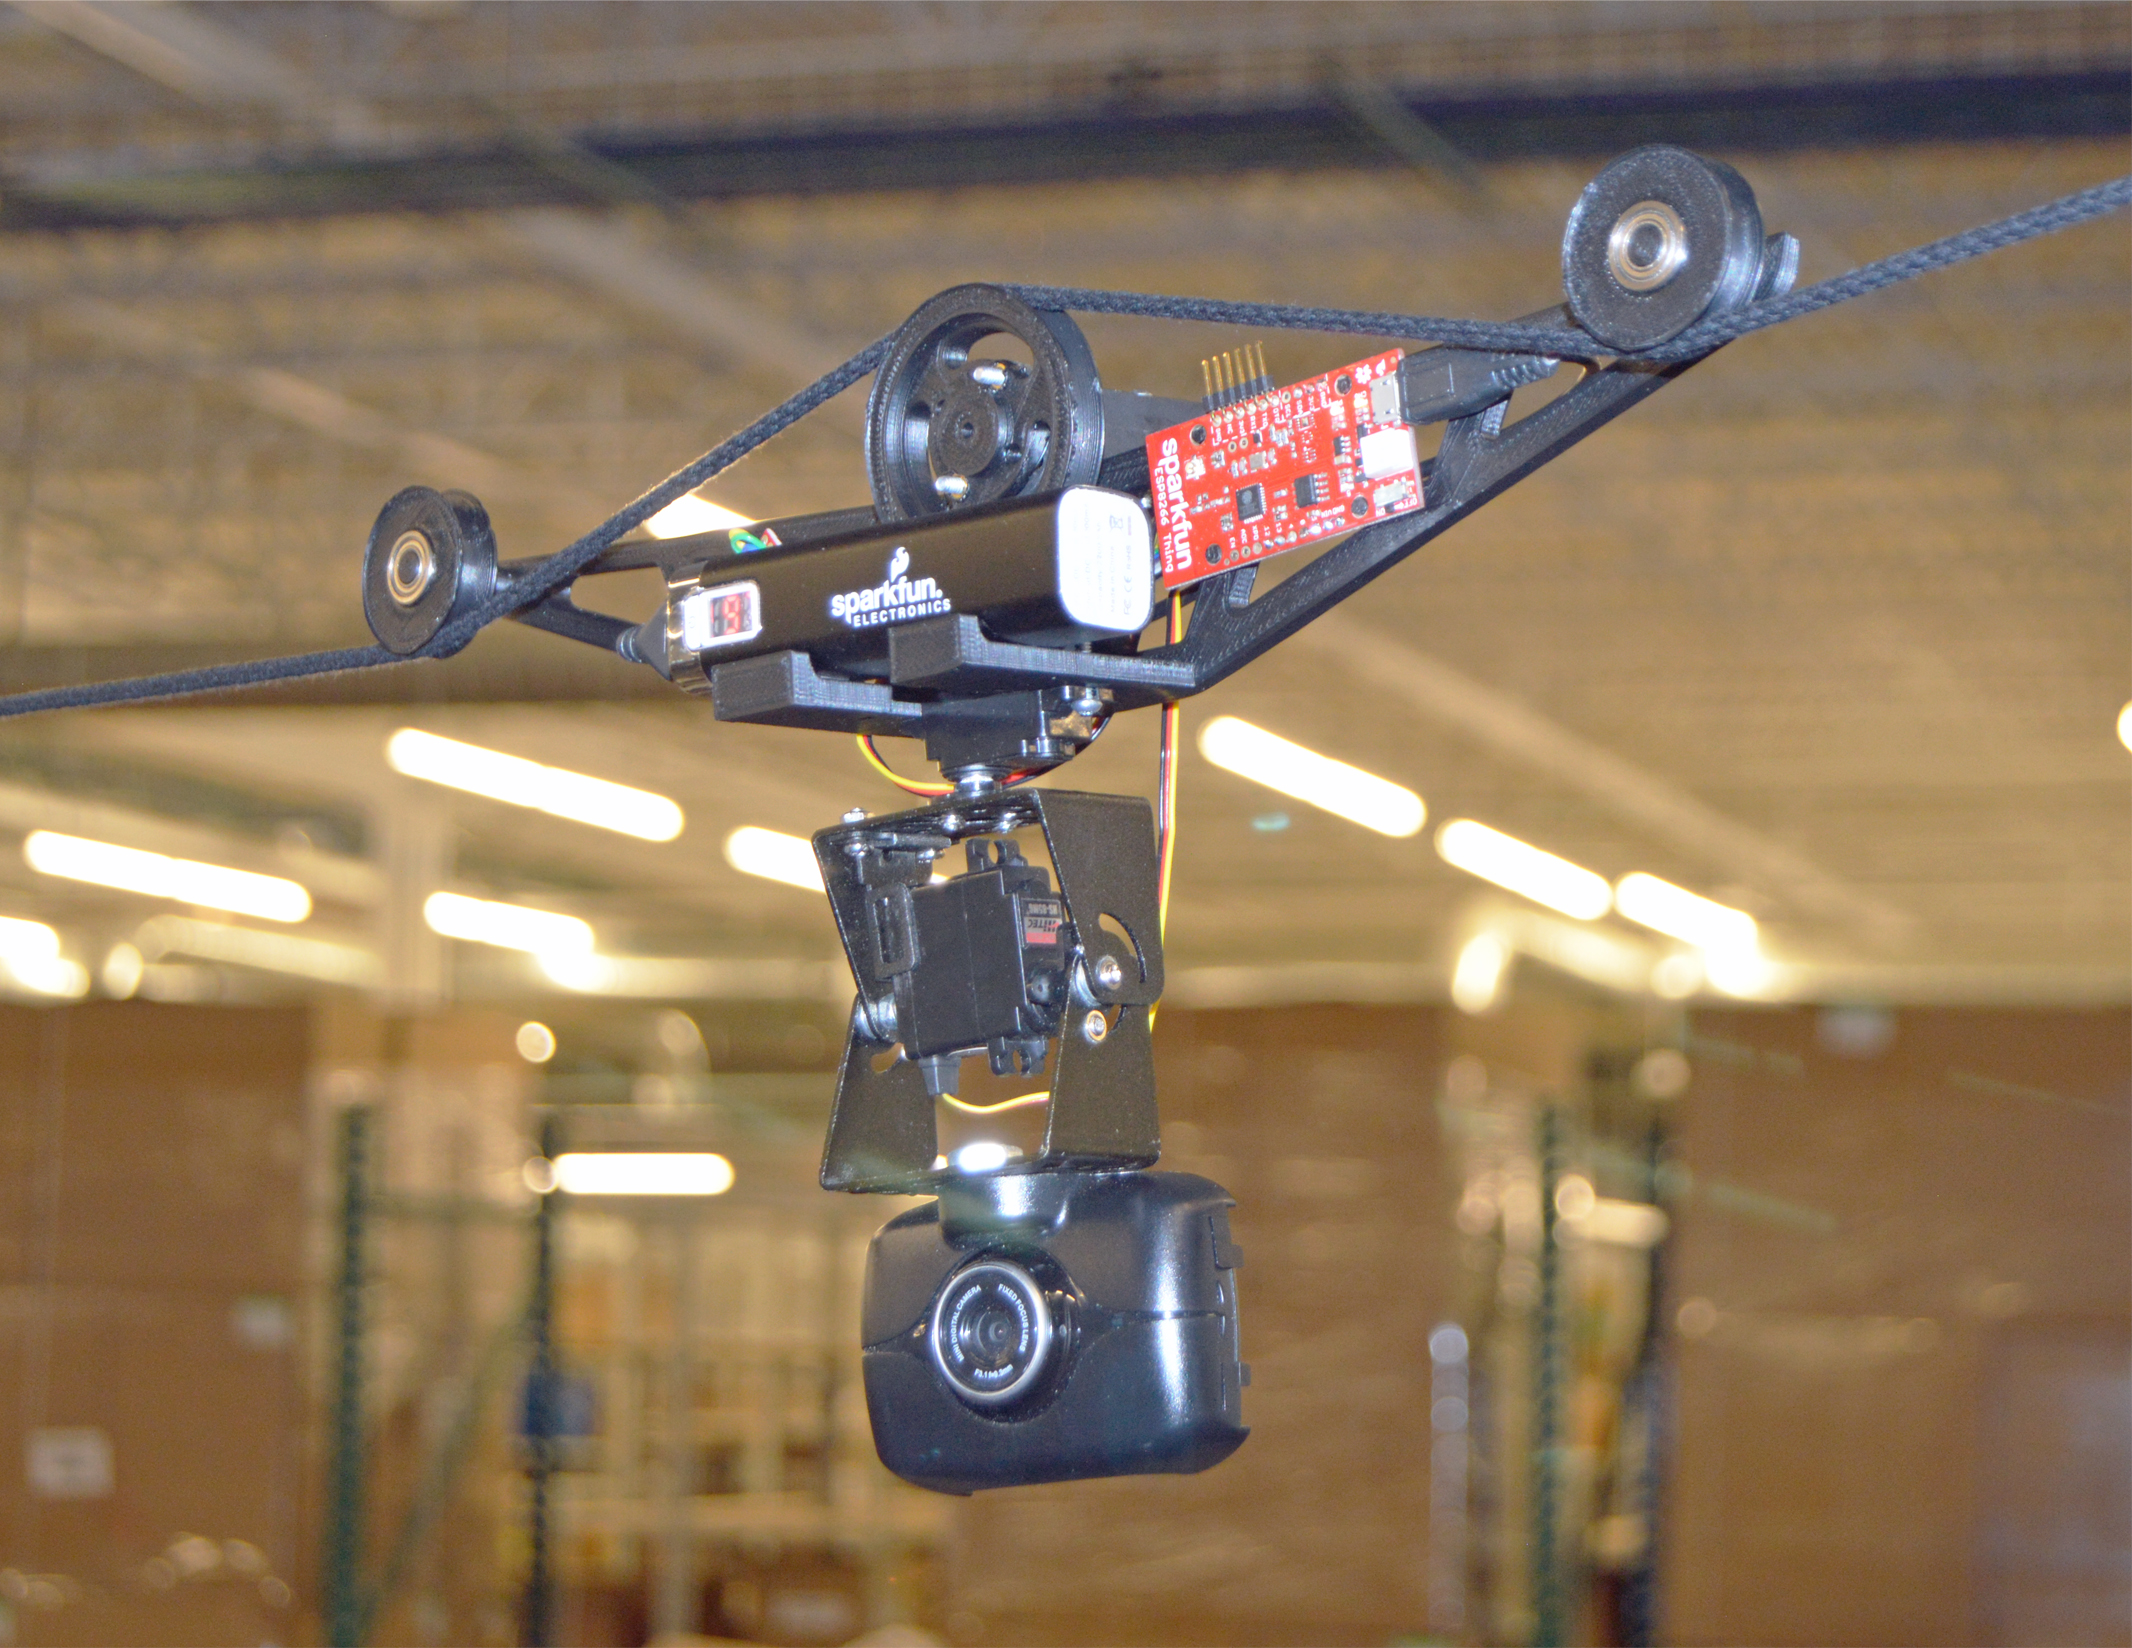
Look, up in the... ceiling!
How about some drone-style footage, indoors and without a drone? With a 3D printer and a few simple components, it might be easier than it sounds!

Like millions of people around the world, I spent the first month of the summer watching as many World Cup matches as I could blast at my face. (Allez les Bleus!) But unlike most, I spent a large part of that time watching the often dizzying Cable Camera feeds. Now we all know that overhead shots and UAV-style video are big right now - try to find a decent real estate listing that doesn’t have a drone shot of the property. However, people tend to get a little squirrely when there’s a drone buzzing overhead indoors. So I wanted to see if I could make a fast and simple Cable Cam unit - the hacker’s version of what I had been watching for a month - using a few parts and a 3D printer.
Eye in the sky
I have been working in 3D computer design for a really long time. How long, you ask? My early 3D design and animation work was done on an Amiga 500 computer. It was, at the time, quite a bit more advanced and a lot less expensive than anything else being offered. I’ve worked with, among other programs, Sculpt 3D, trueSpace, TurboSilver, Imagine, Lightwave 3D, Blender, Vectorworks and SolidWorks. Most of these programs are either outdated, not ideally suited for this particular task, or prohibitively expensive for the average hobbyist. So I thought it was time to learn another modelling program that is more readily available, and well suited for this particular build.
Fusion 360 seemed like an excellent choice. And while the trial version does have a countdown clock with number of days until you need to register (at a cost of $310 a year, or $1535 for Fusion 360 Ultimate), if you are a student, teacher, educational institution, hobbyist or small business making less than $100,000 per year, there is a free license that you can use. And you still get the full program. A sweet deal, really!
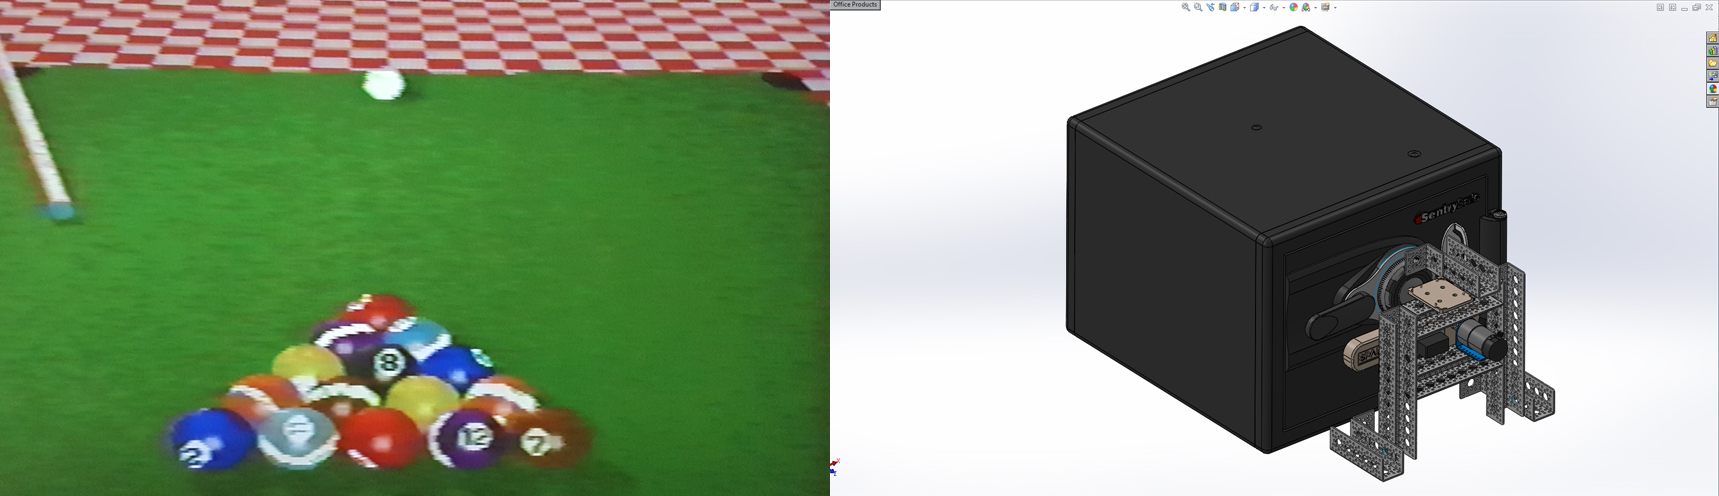
Billiards, 1991, designed in trueSpace; safe with robot safe cracker, 2016, designed in SolidWorks
3D design is really just a series of adding and subtracting shapes to achieve your desired object. Want a box? Start with a rectangle, pull it up into a cube, then remove a smaller cube from the middle. Voila, a box! Want to add a screw hole? Remove a circle from it. In its simplest form, this is the essence of 3D design. More advanced designs will get into deformation, mirroring, extrusions and a ton of other options, but everything you 3D print is ultimately just a combination of more basic shapes.
Opening up Fusion 360, the user interface is fairly intuitive. Admittedly, it helps me a great deal to be as familiar as I am with general 3D modeling. Knowing the difference between a chamfer and a fillet, or a revolve and a sweep, allow me to move quicker, create faster and get less frustrated trying to figure out how to get the program to do what I want to do.
It’s one thing to know that you don’t want two faces to meet at a hard right angle, but rather, have a soft curve between them - but modeling will be much easier and quicker if you know that a fillet will do just that. That all comes with time, and there will be frustration along the way. But you can always undo steps, and try something else, and undo that and try something else until you get the desired result. In fact, Fusion 360 has a timeline of each step of your build along the bottom of the window. You can go back to certain steps and remove them, move through the steps, or even play through them using the play button next to the timeline.
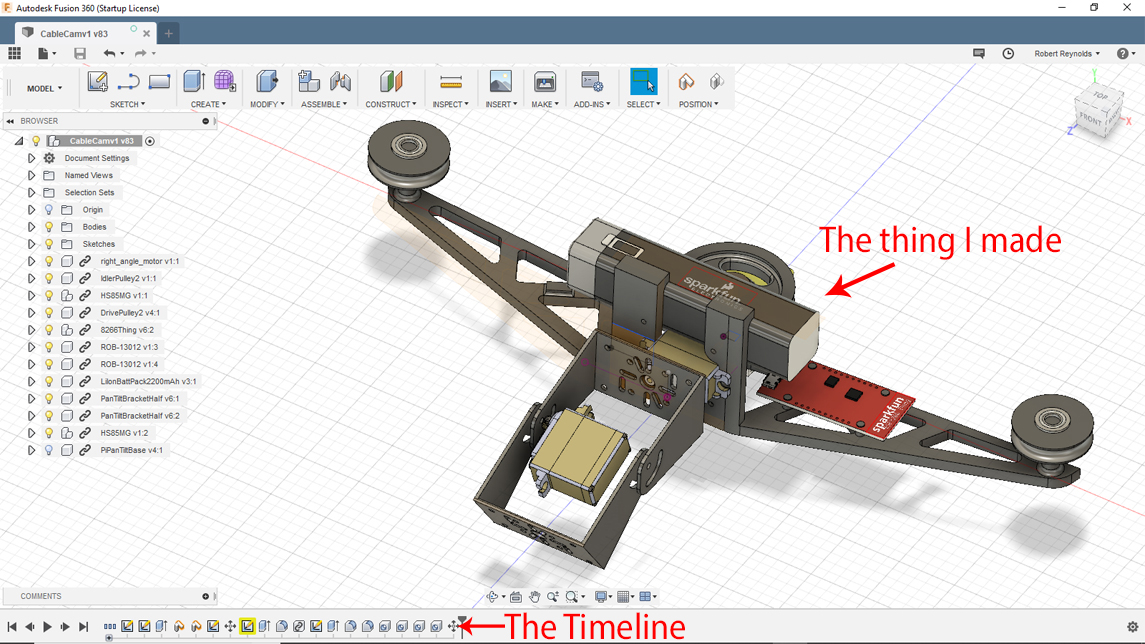
The 3D environment in Fusion 360
A quick search gave me an idea of what a Cable Cam might look like. From there, I created some shapes, basing their size on components I planned on using, chief among them my cheap sports camera and our Pan/Tilt Bracket Kit. Some of the known objects I planned to use already had existing 3D models, like the Right Angle Motor and the Servo Motors. GrabCad is a great resource for existing models, and they are free. For higher end stuff, you can try sites like Turbo Squid, whose models range from free to, “Well, if I sell my car…”
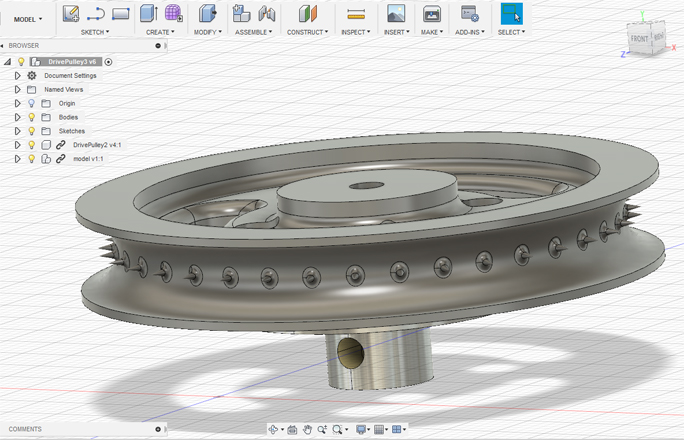
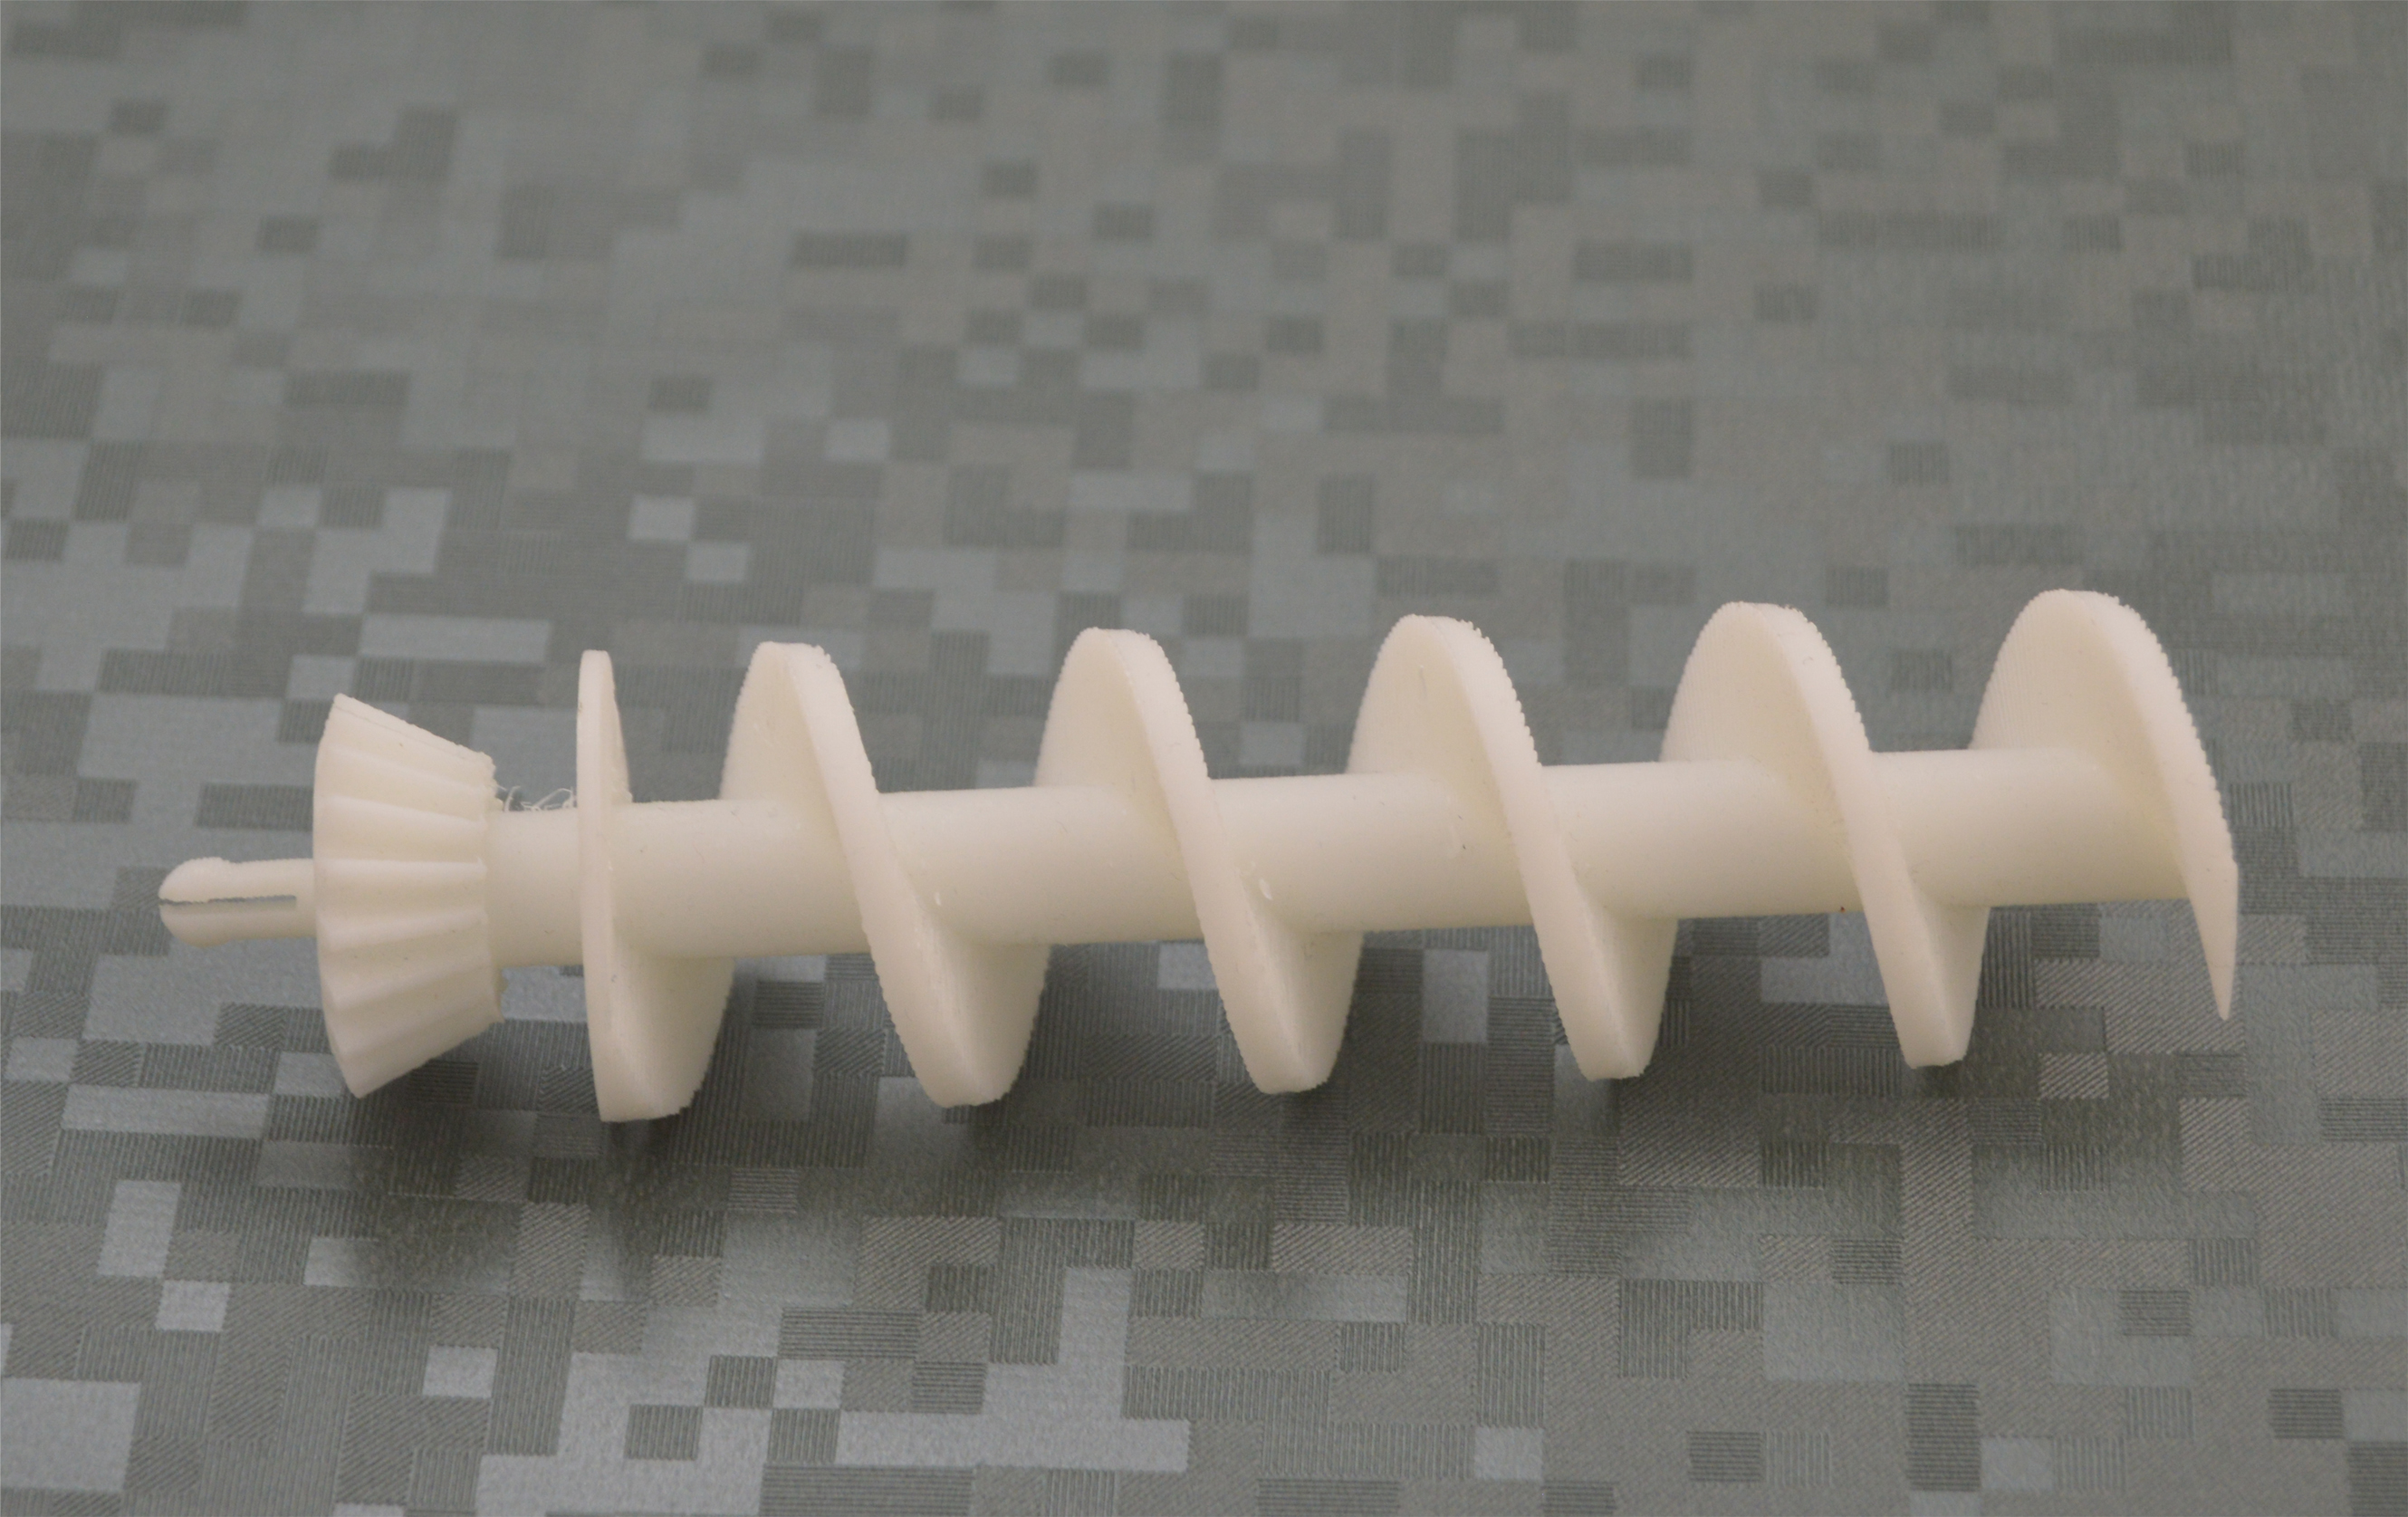
The components that I created were the main body of the unit (in two halves, left and right), the drive pulley on the DC motor, the two idler pulleys on either side of the unit, and the DC motor support. To make sure I was creating things in the right size, I also made models of the pan/tilt bracket and the Lithium Ion Battery Pack - 2.2A, as well as the Thing Board itself. I did all of this simply using calipers.
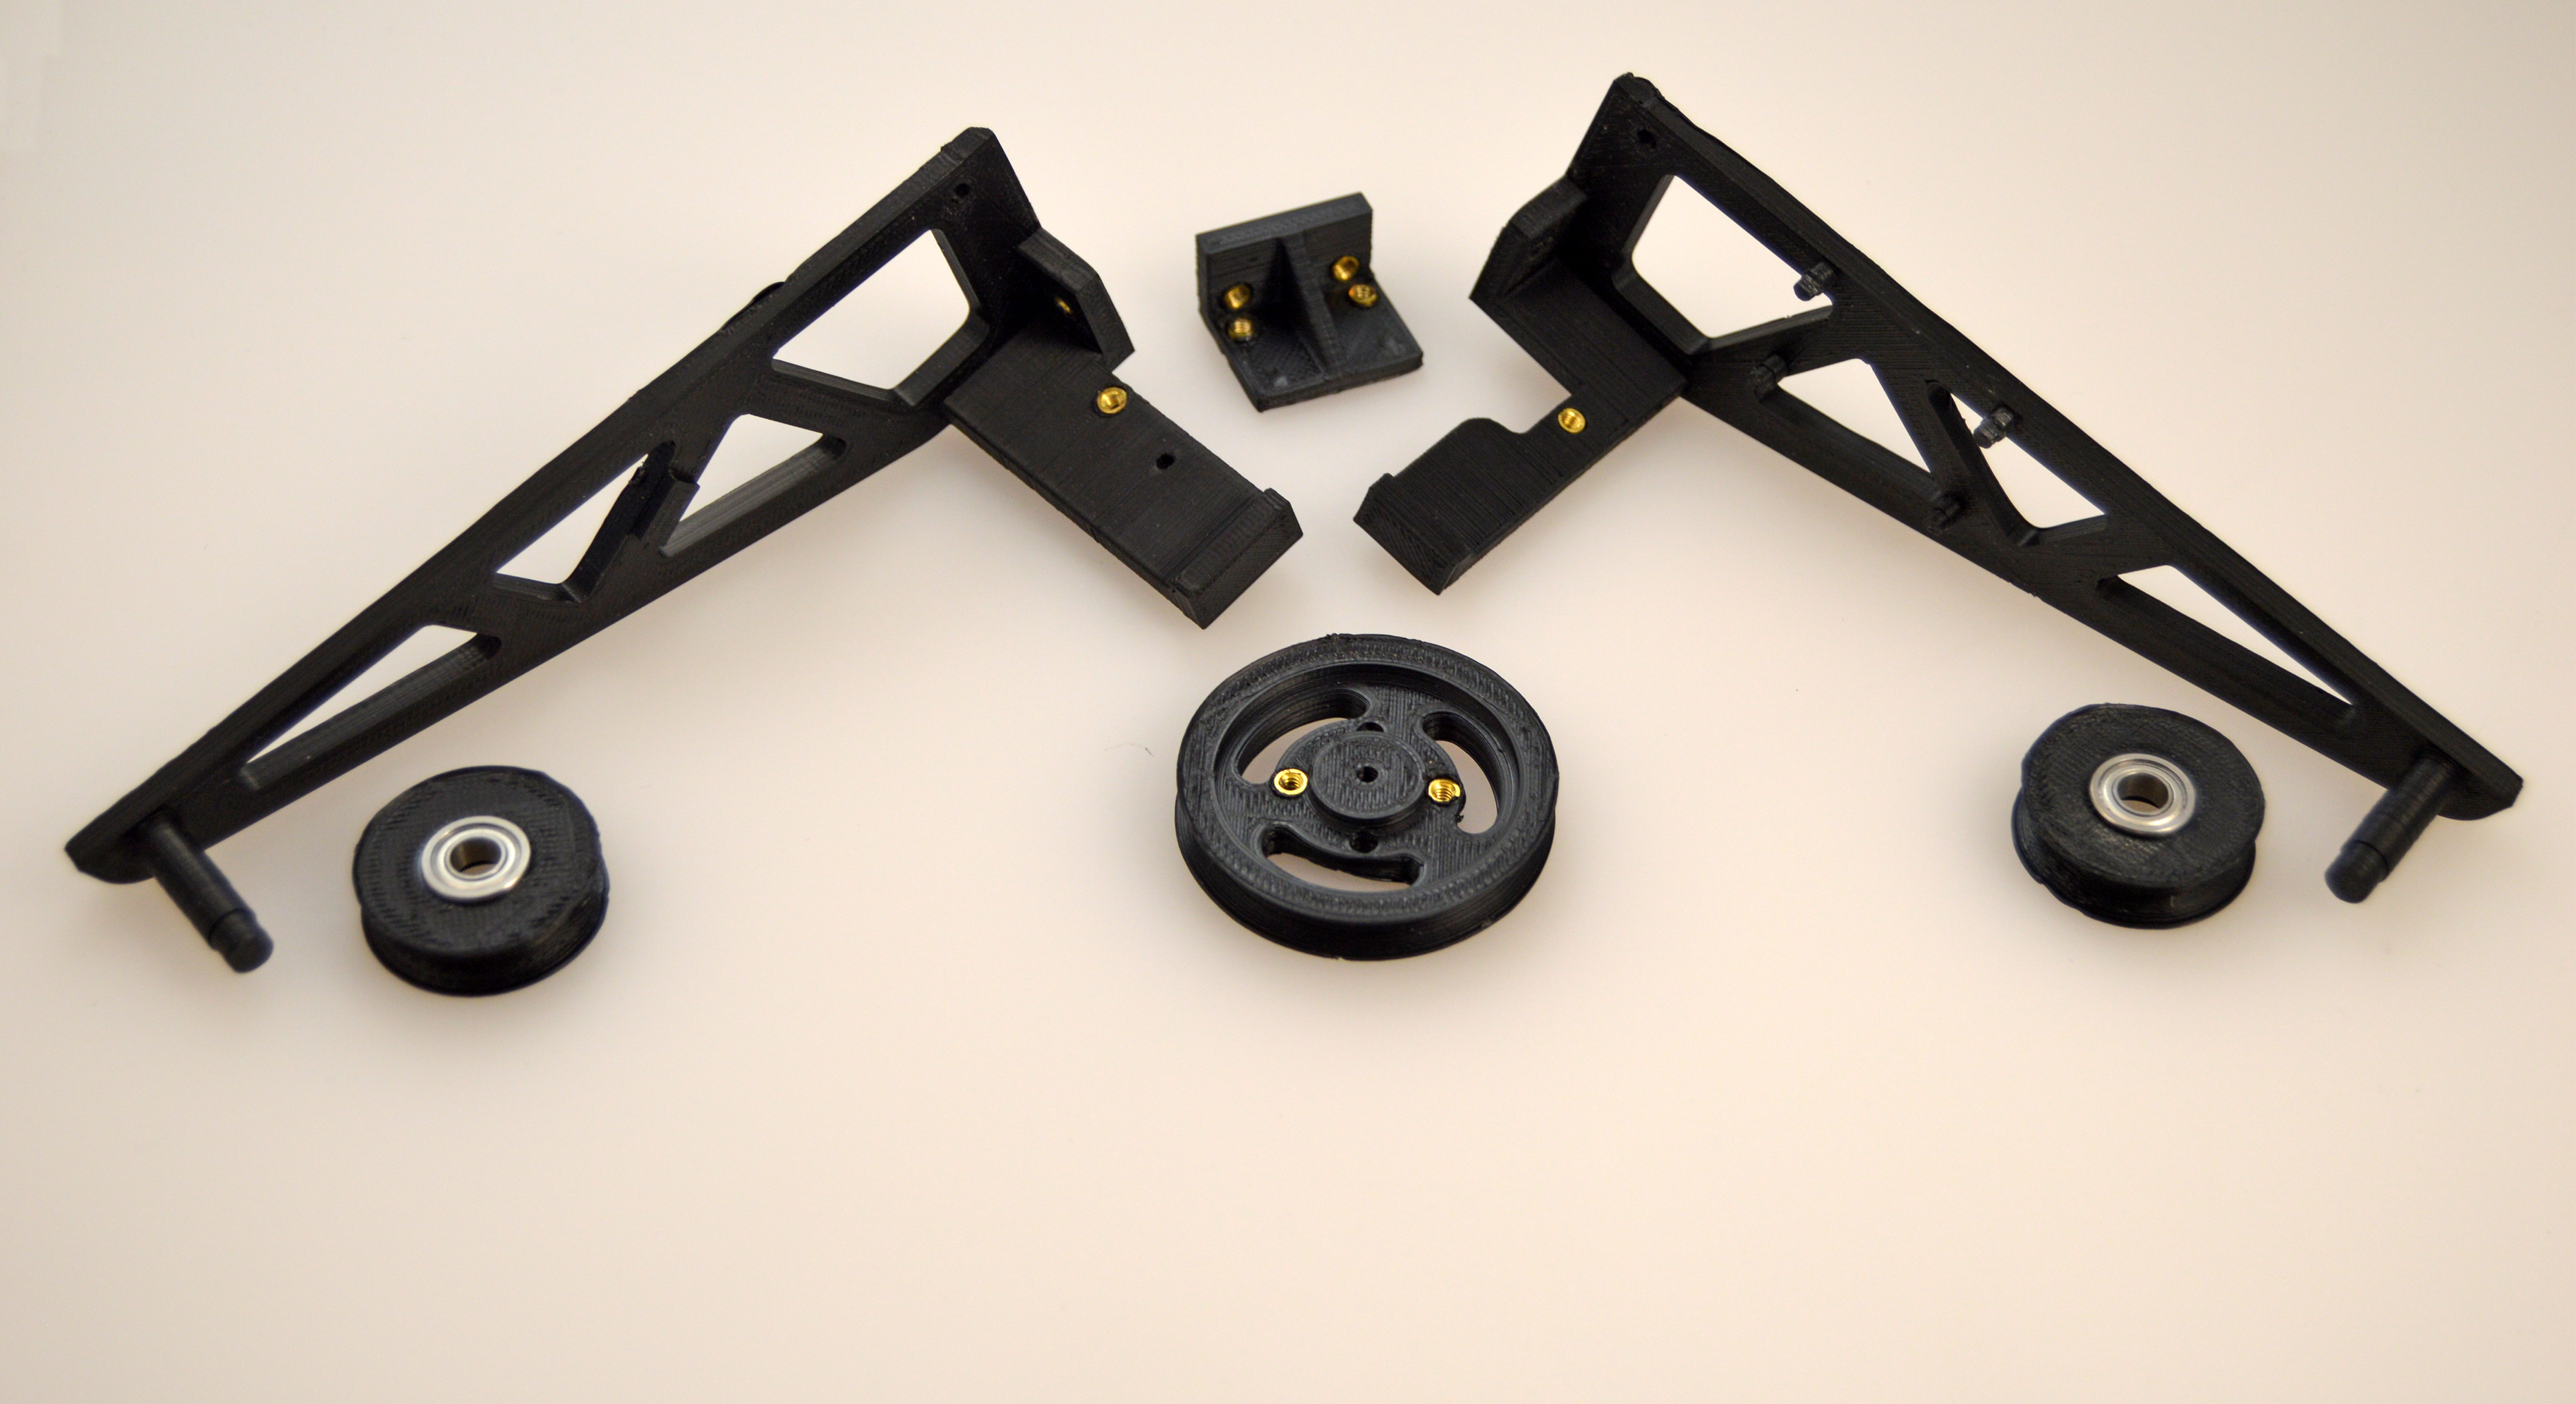
The printed parts, with hardware installed. I didn't bother cleaning them up with acetone, just straight from bed to build
As my focus for this build was more on the 3D printed elements than the electronics, it admittedly is not the most elegant of solutions. But the aim was speed and simplicity, which I think I achieved. A Sparkfun ESP8266 Thing and a TB6612FNG Dual Motor Driver run the whole operation, along with a pair or servo motors and a DC gearmotor. I’m using the 2.2Ah Lithium Ion Battery Pack for its 5V output, and the Blynk app made control a breeze.
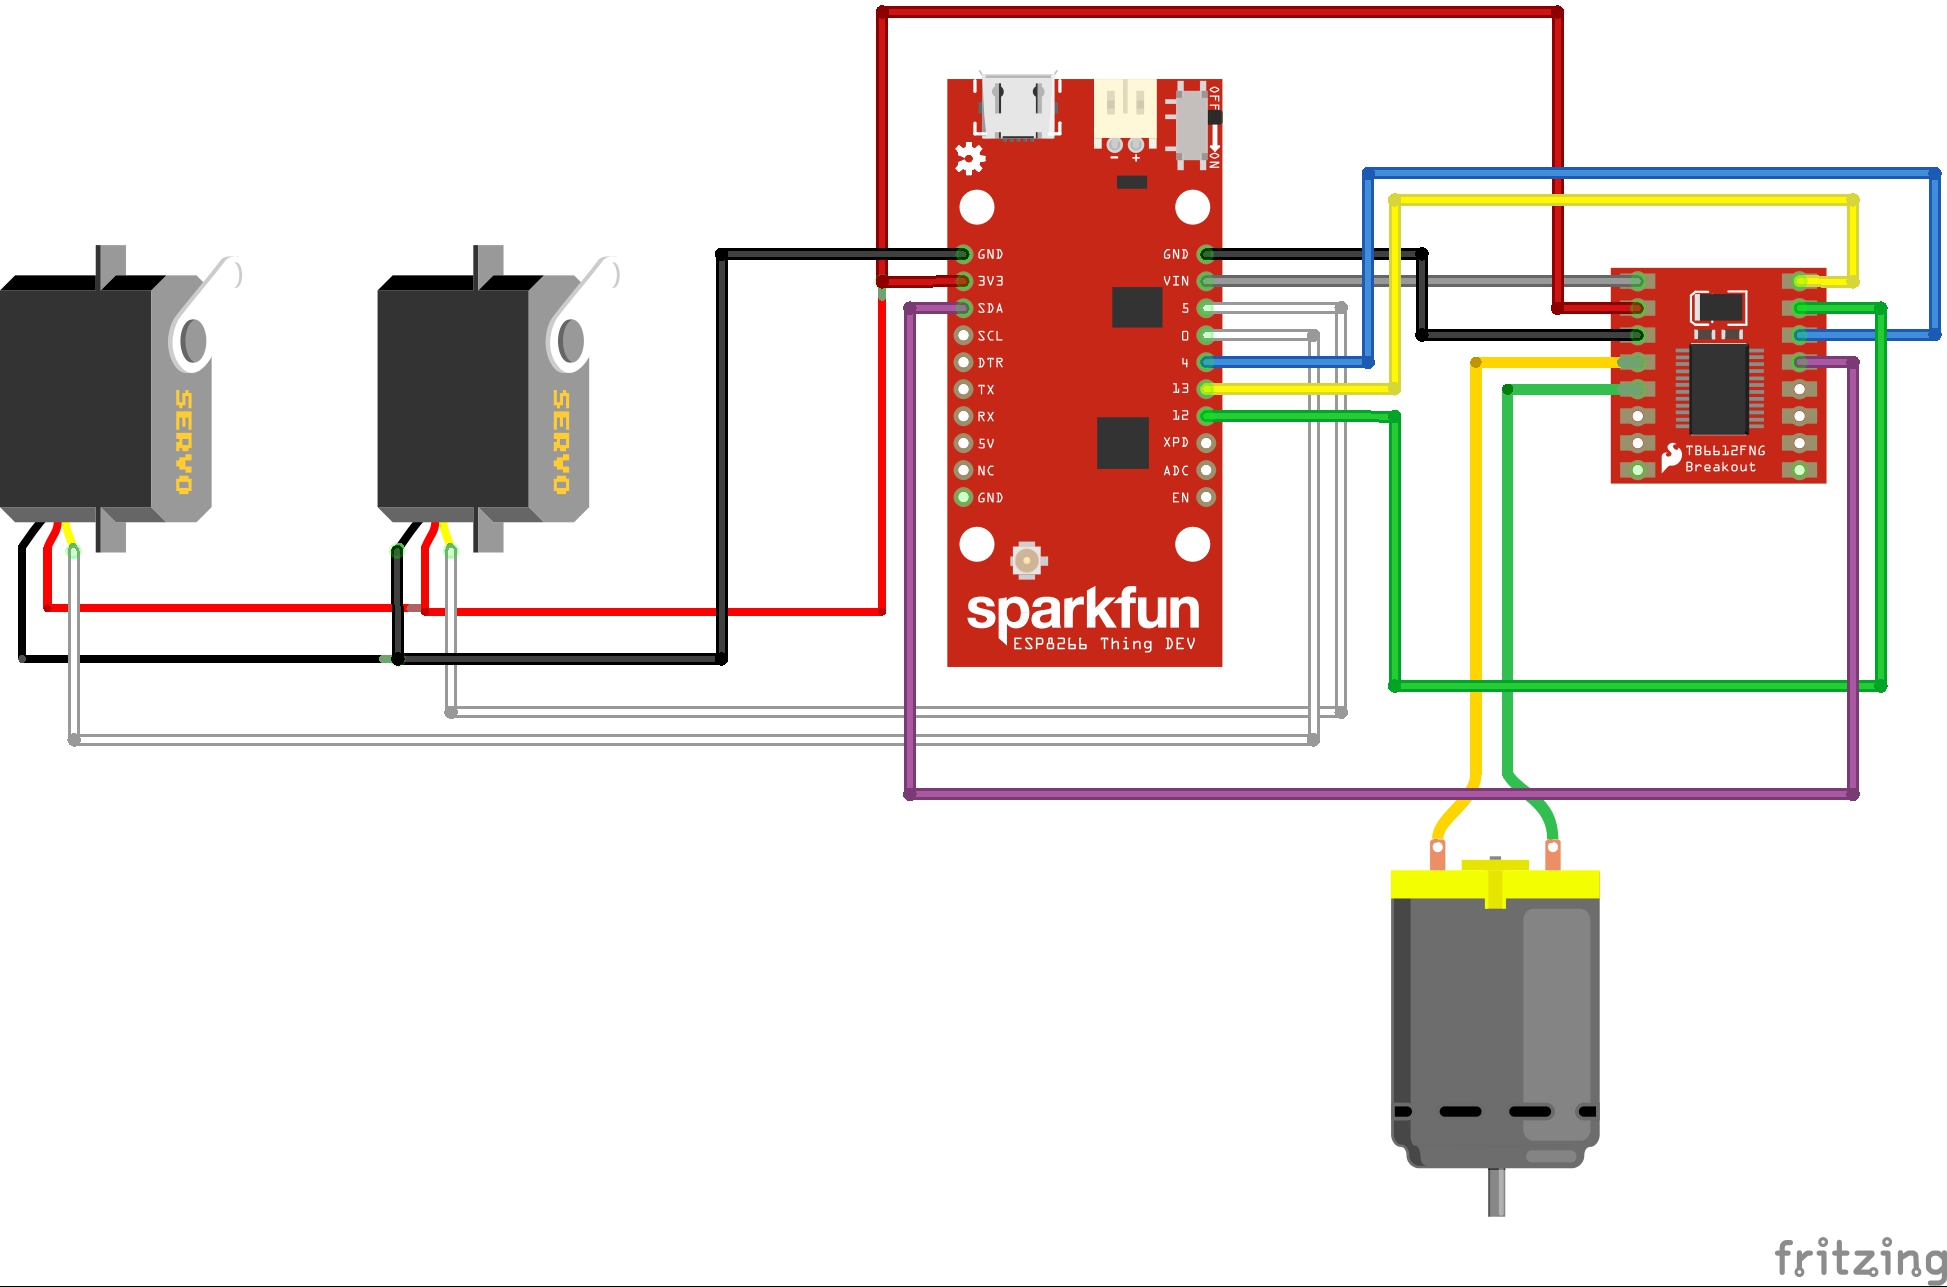
The very simple setup
If at first you don't succeed...
My first attempt used a Right Angle Hobby Motor because I knew it would be simple to mount (and I had one on my desk within arm’s reach). This proved to lack the torque needed to move the Cable Cam consistently, but also gave me a little insight on the drive pulley. While there were times when the motor would simply stall, there were also times when the drive pulley would slip, so I wound up adding a bit of texture inside the drive pulley for its final build. And by texture, I mean cool spikes! And I switched the motor to a 90RPM Micro Gearmotor.
So punk!
At first I thought I would have to alter and reprint the entire frame. However, looking at the housing for the new, smaller motor, its placement dictated that it would be simpler to just create a small extension that attached to the back of the existing frame, onto which the motor housing could easily be mounted. I also placed the battery holder on the front to better balance the unit, and added holes so that it would also be possible to use the Pi Cam and the smaller pan/tilt bracket. This could allow for streaming video, but that’s a post for another day.
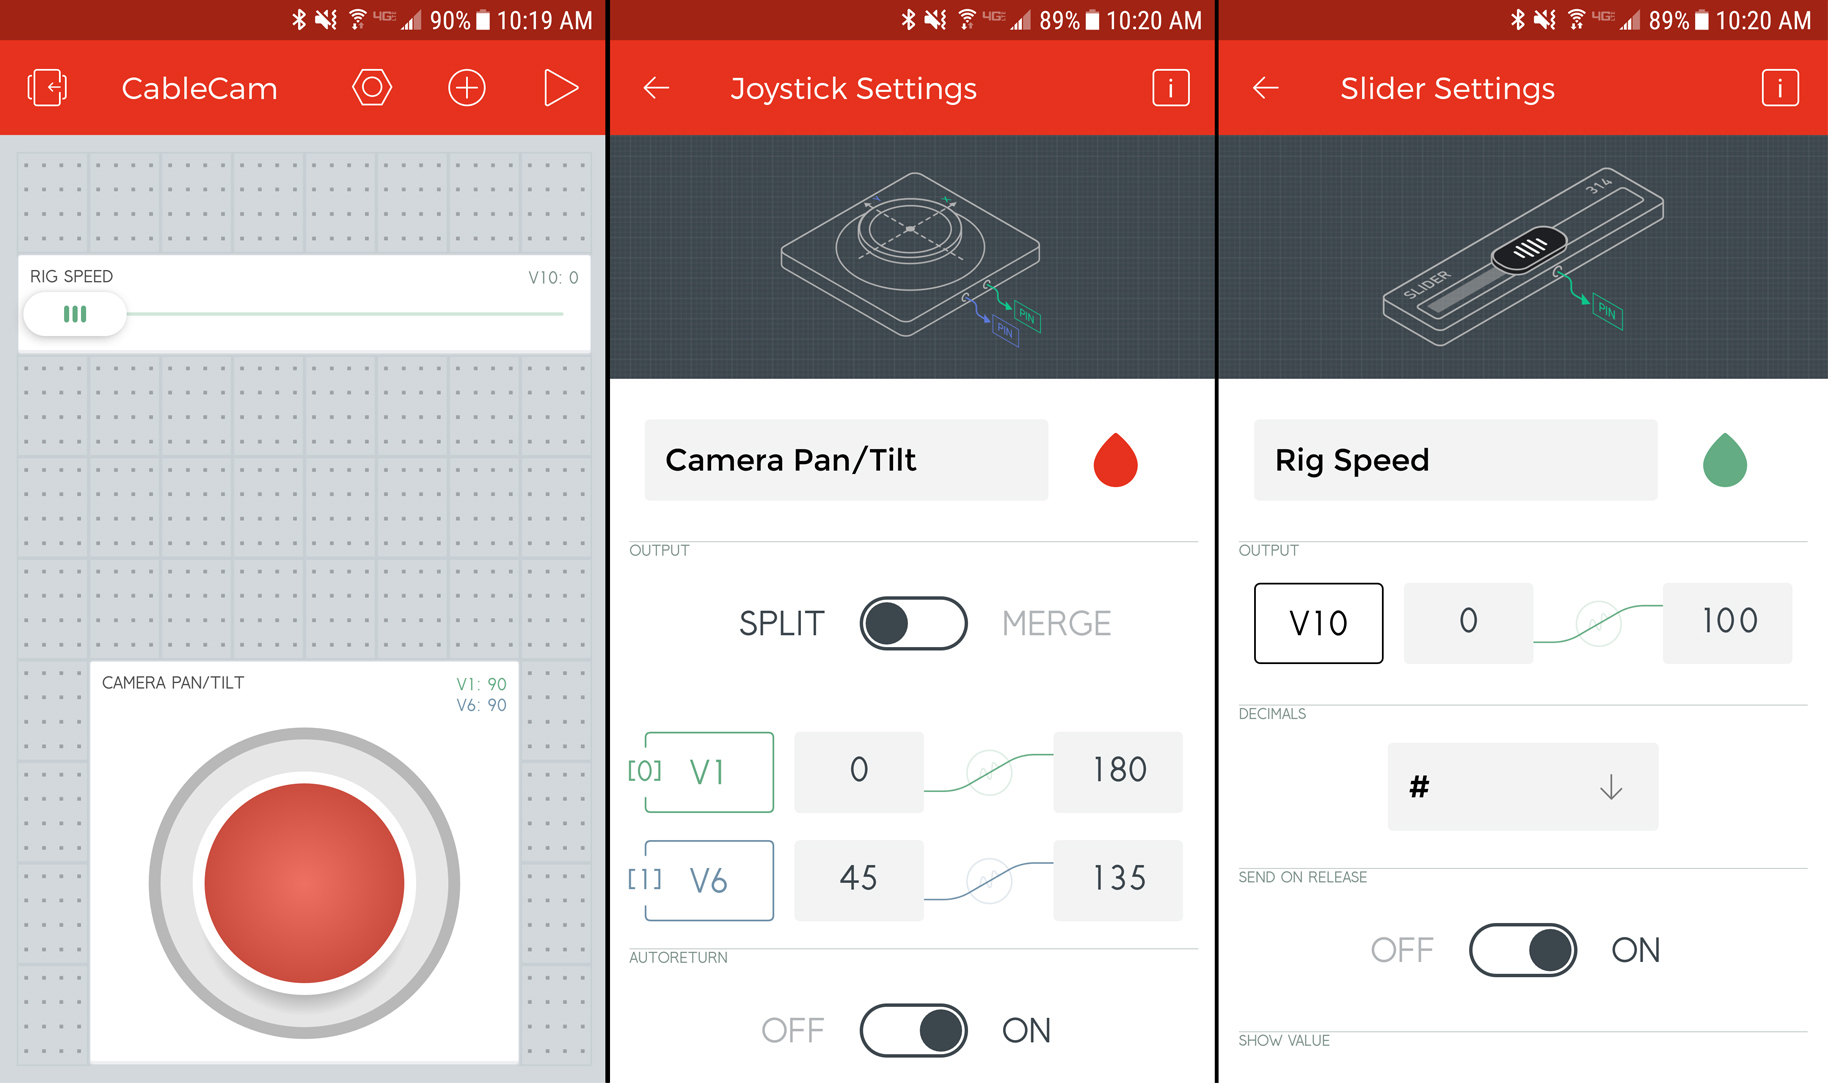
The Blynk app main screen, and setting screens for both widgets
The Blynk app is incredibly intuitive to use. Add a widget, set what that widget does, connect to your project and Bob’s your uncle. You’ll notice that I have the rig speed range set from 0 to 100. In the code uploaded to the Thing, we map this to a range of -1024 to 1024. The reason for this is twofold; the Blynk app won’t accept a negative number for this output range, but the motor driver uses positive integers to travel one direction, and negative integers to travel the other. And the reason I didn’t use a range of 0 to 2048 is because I wanted the center range, where the motor sits idle, to be a bit easier to hit. I also make sure that the rig speed control slider is always at center on startup, so the Cable Cam doesn’t immediately take off.
You can control the rig with one hand whilst petting a pup with the other!
So as you can see, the servo motion is a little jerky, and it causes a bit of swing on the cable when it moves. In addition, the travel speed was much slower than I had hoped. But over an eighty foot span, quite a lot of pressure was placed on the motor. I'm also under-powering the motor by a lot, so a boost regulator would probably do wonders. Another option might just be to use a continuous rotation servo for the travel motor. But since this build was more about 3D printing the rig than creating something that FIFA or the NFL or even the local theatre is going to be clamoring for, I think it was a success.
The toughest part about 3D printing is the design phase. Lots of people get a 3D printer and then just download existing files to print. That certainly has its place, but the first time you visualize something that doesn’t currently exist and are able to design it on the computer, and a few hours later be holding it in your hand... well that, friends, is a feeling that stays with you. Now go out there and start seeing the world around you as the collection of primitive shapes that it is!
Where it all began - my very first 3D print, circa 2013
Code and .stl files are in this Github repository.


This is a great project! I wonder if the cable camera could take a turn, say at a 90 degree angle. Any idea about how this could be done? Many thanks in advance!
Very cool!
How did you prevent the battery back from powering down after 30-40 seconds? I used the same pack for a project and had to plug in a smartphone via a USB hub to prevent the pack from shutting off.
Thanks!
I think because I was running the travel motor pretty much non-stop, there was enough power being drawn to keep the battery from powering down. (During the design/build phase, that was a concern I had as well.) As long as the battery's circuit detects a certain amount of current draw, it will remain powered up. It would stink if the entire thing powered down mid-span!
While hoping for a different answer, I'm also sort of glad I didn't miss anything glaringly obvious.
Thanks!