A few years back, just after I first started at SparkFun, Jim released the SparkFun 9DoF Razor IMU M0. Like most products, this wonderful board had its own little quirks, but it got me digging into the example firmware and datasheet for the IMU. If you have never played around or used an IMU before, you should check out this According to Pete video on IMUs, and some extra research online never hurts. Since the release of the SparkFun 9DoF Razor, I have found some really cool applications for the board. I will go over my recent project and a commonly requested task from when I was in technical support.
Serial Output over TX pin and Bluetooth
These are some of the more commonly requested items for this board from technical support. Since the two can be tied together, I decided to provide an example that applies to both.
Serial Output over TX pin
If you haven't done so already, you should start with the 9DoF Razor IMU M0 Hookup Guide. Specifically, the comment in the hookup guide where my coworker Bobby has already detailed the changes needed to output serial data over the TX pin. Otherwise, you should to look over the example firmware and configuration file, and you will notice the changes that need to be made. I have also provided a modified code below for you to download. The baudrate for the serial output is set to 115200bps; this can be changed, but I am using it for the Bluetooth module in the next section.
Adding Bluetooth
To add Bluetooth capability to the SparkFun 9DoF Razor IMU, I am using the BlueSMiRF Silver, a few jumper cables and the Bluetooth USB Module Mini on my PC. Again, if you haven't done so already, you should start with the Using the BlueSMiRF hookup guide. (*I used the BlueSMiRF because we had one lying around, but all modules listed in the BlueSMiRF hookup guide are essentially the same except for the pin layout and range.)
Troubleshooting Tip: Not all computers will be compatible with the BlueSMiRF modules. Mac computers can have issues with them due to the licensing required by Apple for Bluetooth devices.
With the modified code linked above, this is how I setup the hardware connections. There is no need to modify the code, because the default baudrate of the Bluetooth module is the 115200bps already. Additionally, the default password for pairing the Bluetooth module is already known to be 1234.
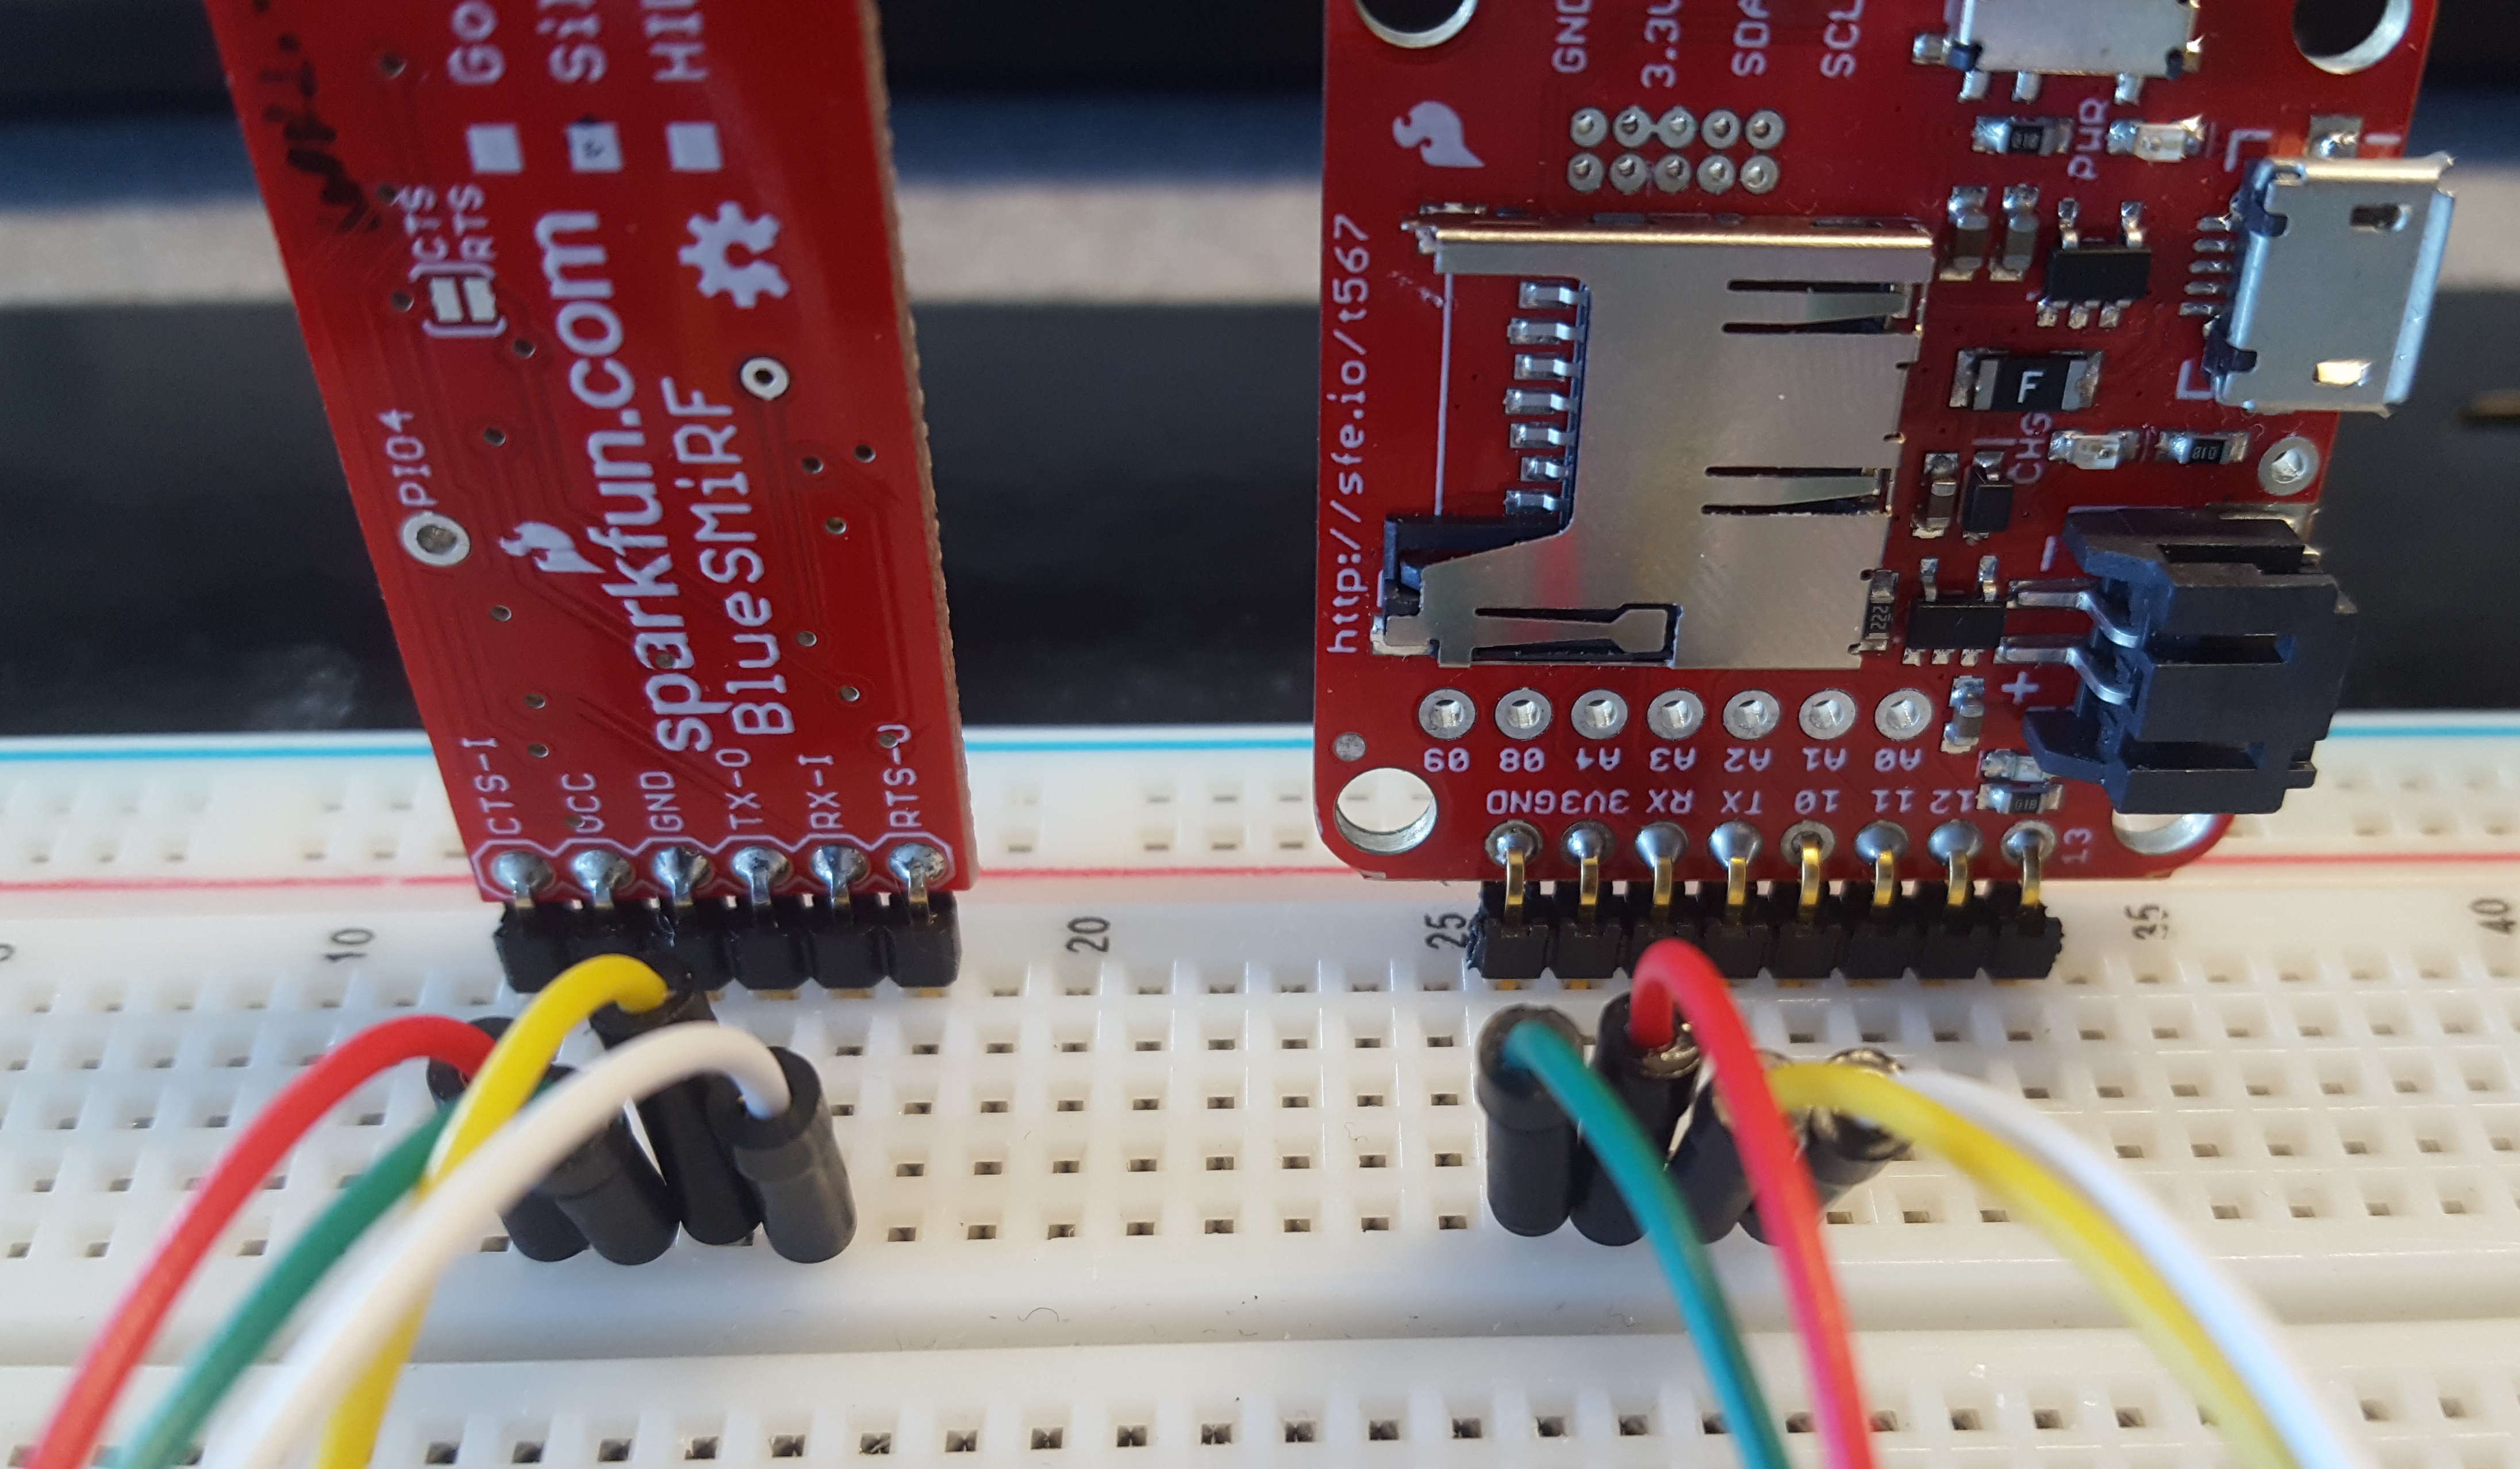
Hardware pin connections between the BlueSMiRF Silver and the SparkFun 9DoF Razor IMU.
Once you have paired your Bluetooth module to your computer and opened a serial terminal for the COM port of that connection, you should see a green light on the Bluetooth module. Double check that the baudrate is set to 115200bps and you should see the output from the SparkFun 9DoF Razor IMU.
Starting on a VR Headset
If you've been part of the recent first-person shooter gaming craze, then you are already familiar with the titles PUBG or Fortnite. What if I told you there was a program that allowed you to VNC to your desktop with minimal lag... and what if that program also allowed you to connect from a Raspberry Pi?
Well, Parsec, a gaming streaming company that came onto the scene a few years ago, has done just that. How does this all work? Well, the short version is that Parsec takes advantage of UDP to reduce lag or traffic needed to verify each frame in a TCP-based connection. From a gaming perspective, each frame marks only a split second on your screen – who cares if it isn't perfect, you will have a new frame in a few milliseconds anyways.
That's right... I have been playing Fortnite remotely using a Raspberry Pi! Well, at least when I don't want to drag my desktop with me. There are a few caveats to this setup: Parsec does have minimum requirements to run, the graphics settings in the game need to be on low, and the frame rates drop to about 30 fps on the Raspberry Pi. However, the game is still playable and if you are up to tweaking the settings, you can get slightly better graphic renderings and frame counts.
- Parsec's Network Requirements
- Hardware Requirements For Hosting A Gaming Session On Parsec
- Hardware Requirements For Connecting To Another Computer With Parsec
You can also use Parsec for other things like streaming your XBox games to your PC and over to a Raspberry Pi!!!

Mic Drop!
How does this all tie into a VR headset? Well, if you are familiar with the mouse library in Arduino, then you can start to see the light at the end of the tunnel. If you aren't familiar with this library, you can the find details on the Arduino website. However, the quick and fast detail is that the SAMD21 microcontroller on the SparkFun 9DoF Razor IMU M0 can be used to emulate a mouse. Together with the IMU, this means that you can take rotational movements from your head to look around in the game.
Now this is just part of the interface you need to control your character, but it does demonstrate that it can be done with hobbyist electronics. Again, you will want to start with the example firmware code, the 9DoF Razor IMU M0 Hookup Guide and the mouse library. Unfortunately, this is about as far as I have taken this project but if you have anything you'd like to add, please let me know in the comments below; I have also made my code available below for you to continue without me. It is a modified version of Jim's original example firmware adapted to work with the mouse library.
I do have a few things to add:
- I have only gotten Parsec to run on larger screens. I have had issues trying to run Parsec on smaller 3.5" or 5" screens with lower resolutions. However, I haven't really dug into the issue or reached out to Parsec for help yet.
- You do need to manually adjust the mouse sensitivity in the Arduino code. I thought of using a potentiometer to possibly dial that in without constant reprogramming.
- The code takes movements from the gyroscope to create mouse movements. I envisioned using the Euler angles to get more accurate readings without having to home the mouse position, but I would need to dig into how to define an exact mouse position on the screen and adjust for scaling.
- Once programmed, the SparkFun 9DoF Razor IMU will move to its secondary COM port and will be unavailable for programming. To reprogram the board, you need to force it into the bootloader mode by holding the SCL pin LOW on start up. Then, you can upload new code to it using the available COM port.
To setup Parsec on your Raspberry Pi head over to their web page, or you can follow their instructional Youtube video:
They also have setup guides online:
Once you have Parsec running on your Raspberry Pi and your SparkFun 9DoF Razor IMU coded, all you need to do is plug your Razor into the Pi with a USB cable. You should start seeing the Razor act as a mouse once it is recognized as a device. I usually turn off the Razor until I am logged on to the host computer and up and running on the game. Have fun and enjoy!


