Simple Wireless Notifier Project
Sometimes you need the real-time interaction that only a meeting can provide. Keep family members from wandering in on your important meetings with this simple alert!

With many families working and schooling from home, letting everyone know when you’re in a video meeting, Zoom conference, or anything that might require a little quiet time, has become a new reality (it certainly is in my home).
I knew I could have spent a little time in Gimp or Photoshop and printed out a sign to simply hang on the door when I was shooting a video. I could have gone really old school and just hung a tie on the doorknob every time I went into a meeting. But both of those would require me to walk all the way up the stairs, and neither would allow me to work on a sweet electronics project. So I dug through my parts drawer to see what I had available, and came up with this notifier.
Rogue video shot by me in my workshop
It’s simple and straightforward. As long as I’m not in a meeting, the LED on the receiving unit remains green, and a small wheel shows Madeline Kahn being very welcoming. When it’s time for me to head into a video meeting I press the red button, and the LED upstairs goes to red, while the graphics wheel spins 180° to show John Candy letting everyone know that they shouldn’t come downstairs.
Everything You Need
Chances are, you may have some or even all of these parts, so pick and choose what you need. Or if you’re like me, get the entire parts list because even if you already have some of them, you can never have too many components in your workshop.

Didn't bother attaching the blue line from the RGB LED since I'm only using red & green
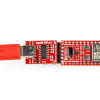
Both circuits are pretty straightforward. I did do a little soldering to wire up the RGB LED on the receiver, but I made everything else plug and play with jumper wires. I kept the code simple and straightforward, too.
Transmitter Sketch
/*
 * I'm In A Meeting Notifier
 * by Rob Reynolds
 * rob.reynolds@sparkfun.com
 * March 27, 2020
 * I slapped this together during the Covid-19 pandemic as
 * a response to the Shelter In Place rules. I found myself WFH
 * down in my workshop, while my wife was WFH upstairs, and
 * our kids were online schooling at their desks. I put a small
 * transmitter downstairs with me, with a receiver
 * upstairs that would alert everyone, using LEDs and a graphic
 * controlled by a servo, to let them know when I was in an
 * online meeting.
 *
 * Want to help support open source? Consider purchasing these
 * parts from SparkFun www.sparkfun.com
 *
 * This code is free, released under the beerware license. If you
 * find it useful, and see me (or any SparkFun employees) at the
 * local, you buy us a round.
 */

 // We use Software Serial to communicate with XBee
 #include <SoftwareSerial.h>

//For Atmega328P's
// XBee's DOUT (TX) is connected to pin 2 (Arduino's Software RX)
// XBee's DIN (RX) is connected to pin 3 (Arduino's Software TX)
SoftwareSerial XBee(2, 3); // RX, TX

// Define pinouts for buttons and LEDs
const int greenButtonPin = 6;
const int redButtonPin = 7;

const int greenLED = 8;
const int redLED = 10;

int greenButtonState, redButtonState;         // variable for reading the pushbuttons


void setup() {

  pinMode(greenButtonPin, INPUT);
  pinMode(redButtonPin, INPUT);

  pinMode(greenLED, OUTPUT);
  pinMode(redLED, OUTPUT);

  Serial.begin(9600);
  XBee.begin(9600);

  digitalWrite(greenLED, HIGH);

}

void loop() {
  // read the state of the pushbutton value:
  greenButtonState = digitalRead(greenButtonPin);
  redButtonState = digitalRead(redButtonPin);

  // check if the pushbutton is pressed. If it is, the buttonState     is HIGH
if (greenButtonState == LOW) {
    XBee.write('O');
    Serial.println("O");
    digitalWrite(greenLED, HIGH);
    digitalWrite(redLED, LOW);
    delay(5000);
  }
  else if (redButtonState == LOW) {
    XBee.write('C');
    Serial.println("C");
    digitalWrite(greenLED, LOW);
    digitalWrite(redLED, HIGH);
    delay(5000);
  }

  delay(50);  //

}
Receiver Sketch
/*
 * I'm In A Meeting Notifyer
 * by Rob Reynolds
 * rob.reynolds@sparkfun.com
 * March 27, 2020
 * I slapped this together during the Covid-19 pandemic as
 * a response to the Shelter In Place rules. I found myself WFH
 * down in my workshop, while my wife was WFH upstairs, and
 * our kids were online schooling at their desks. I had a     small transmitter
 * downstairs with me, while there was a receiver upstairs that
 * would alert everyone, using LEDs and a graphic controlled by
 * a servo, to let them know when I was in an online meeting.
 *
 * Want to help support open source? Consider purchasing these
 * parts from SparkFun www.sparkfun.com
 *
 * This code is free, released under the beerware license. If you
 * find it useful, and see me (or any SparkFun employees) at     the
* local, you buy us a round.
 */

 // We use Software Serial to communicate with XBee
 #include <SoftwareSerial.h>

 #include <Servo.h>
 Servo myservo;  // create servo object to control a servo
// twelve servo objects can be created on most boards
int pos = 0;    // variable to store the servo position

//For Atmega328P's
// XBee's DOUT (TX) is connected to pin 2 (Arduino's Software RX)
// XBee's DIN (RX) is connected to pin 3 (Arduino's Software TX)
SoftwareSerial XBee(2, 3); // RX, TX

//const int greenButtonPin = 6; // Used only on Transmitter
//const int redButtonPin = 7;  // Used only on Transmitter

const int greenLED = 8;
const int redLED = 10;

char msg;

void setup() {

  pinMode(greenLED, OUTPUT);
  pinMode(redLED, OUTPUT);

  myservo.attach(9);  // attaches the servo on pin 9 to the servo object

  XBee.begin(9600);
  Serial.begin(9600);
  digitalWrite(greenLED, HIGH);
  myservo.write(pos);

}

void loop() {
  if (XBee.available() || Serial.available()) {
    if (XBee.available()) {
      msg = XBee.read();
    }

    else if (Serial.available()) {
      msg = Serial.read();
    }
    Serial.write(msg);
   if(msg == 'C')
         {
          for (pos = 0; pos <= 180; pos += 1) { // goes from 0     degrees to 180 degrees
 // in steps of 1 degree
    myservo.write(pos);              // tell servo to go to position in variable 'pos'
    delay(20);                       // waits 15ms for the     servo to reach the position
  }
  digitalWrite(greenLED, LOW);   // turn the LED on (HIGH is the voltage level)
  digitalWrite(redLED, HIGH);    // turn the LED off by making the voltage LOW
  delay(5000);                       // wait for a second
         }

   else if(msg == 'O'){
     for (pos = 180; pos >= 0; pos -= 1) { // goes from 180 degrees to 0 degrees
          myservo.write(pos);              // tell servo to go to position in variable 'pos'
          delay(20);                       // waits 15ms for the servo to reach the position
        }
  digitalWrite(greenLED, HIGH);    // turn the LED off by making the voltage LOW
  digitalWrite(redLED, LOW);   // turn the LED on (HIGH is the voltage level)
  delay(5000);                       // wait for a second

   }

  }

  delay(1000);
}
Putting It All Together
I didn’t create any kind of housing for the transmitter. It just sits on my workbench, and I plug it in with a simple power supply. For the receiver, which sits upstairs in plain view of people who aren’t me, I put in a little more effort.
I didn’t go crazy, especially with the housing (note the fine, high quality enclosure!), but I did put in a bit of time on the graphics wheel. I knew straight away that I would be using Madeline Kahn and John Candy, but of course I had to find just the right still and font, and decide which style of drop shadow to use and, well, you get the idea. I used a battery pack for the receiver so I could set it up anywhere without proximity to an outlet. Be aware that a battery pack with a barrel jack won’t give you the power you need, as it wants 7-12 volts. However, the 6 volts from four AA batteries will work just fine if you run it directly into Vin on your RedBoard.
I could have simply used an LED, but John Candy and Madeline Kahn make everything better!
There are, of course, other ways to build a similar unit, depending what you have in your parts drawer. Perhaps you have a SparkFun ESP32 Thing, or a couple of SparkFun Bluetooth Mates, or maybe even a couple of micro:bits on your workbench. Have you build a project to let others in your home know when you're busy? We want to see it! Tell us your idea or drop us a link in the comments. In the meantime, stay safe, be kind to each other, and Happy Hacking!


Neat project, Rob! If I may suggest an enhancement...
If I recall correctly, the XBees are, in essence bidirectional. I'd be inclined to modify the boxes so that the system is "closed loop". This can be done entirely in software. The receiver would reply to the transmitter when it has received a message. The transmitter would send a message, and put the appropriate LED into a "blink" mode (rather than a constant on), and when it receives the response from the "receiver" it would switch to a "constant" mode on the LED. This should take less than one "blink" cycle, so the only time you would see a difference is if there is something wrong at the "receiver" (e.g., low batteries). This could be done entirely in software, with no modification to the hardware.
Yeah, that would be a really nice mod to my quick and dirty build. I'd like to say I might get around to re-coding them, but I just got a new 3D printer, so I have a feeling I will be, how shall I say... Distracted?
Hi Rob, thank you for sharing. I have a few XBee 2mW Chip Antenna - Series 2 layering around. After studying the code, I could not find a reason this shouldn't work with them as well. Are there any significant differences between series 3 and 2 I should be aware of?