Enginwedginursday: Hacking Childhood Memories
Reliving childhood memories through the magic of Legos and 3D printing.

Your regularly-scheduled Enginursday post was moved up a day to prepare for our final Google Hangout with Intel for the Edison! Be sure to check back tomorrow to join in the Edison fun!
Like many children, Legos were one of my favorite toys growing up, and Christmas time usually meant receiving some great Lego gifts. One of my all-time favorite sets was the 1996 set Cargo Railway. The following discusses how I used 3D printing and a little copper tape to bring back that same excitement I had when I was a child with the very same Lego set, 20 years later.
At some point, all my childhood toys got handed down to my younger brother. Unlike me, who kept every thing in its place and and could rebuild any Lego set at any time, my brother was a toy destructor, ripping every leg, arm and hand off of every figure, mixing and maiming many classic characters. I feared the worse for my beloved collection, coming to the conclusion it would never be whole again.
However, about three years ago, I began hunting around my parent's house for the lost Lego bits and pieces that were no longer of interest to anyone there. I wanted to enjoy some of the perks of being a Lego enthusiast in the technology age. For starters, almost every old set has its instructions posted somewhere online. There are several great sites, such as Brickset.com, where you can find your old instruction booklets digitized. There are also lots of Lego modders and spin-offs out there. You can get tons of custom heads online, as well as other parts. SparkFun also sells Build Upons, which are Lego-shaped LEDs. And, there's the many Arduino and Raspberry Pi Lego shields that offer a whole new spin on the classic Lego Robotics found in many classrooms. Plus, there's this:
Google Lego Great Ball Contraption to see more amazing videos.
Miraculously, I was able to recollect a large portion of all my old sets. The first step was sorting. Oh, how I did not miss the sorting! I like my Legos to be somewhat organized, but this was an absolute mess. The pieces were all dirty and there were countless non-Lego pieces intermingled. By the time I got through cleaning and organizing, I had enough of the old Legos for one Christmas.
But last year, with a freshly cleaned and sorted pile of pieces, I could finally begin building. Out of all the old sets, I wanted to rebuild that train the most. After hours of digging, I finally managed to get most of the train cars built. But, there was one major problem: I couldn't find the engine piece anywhere! Without it, the train was useless. A quick look on eBay returned results, but the engine piece alone was as much as the entire set was new back in 1996! No way was I going to spend that kind of money. So, I put the call out to my father, the keeper of the junk. I knew if it was anywhere around their house, he'd eventually find it. So I put the Legos away again for another snowy day.
Fast forward to just a few months ago, I randomly got a text from my father saying he'd found the train engine! I retrieved it as soon as I could. The question remained: Would it still work after all these years? The original set came with enough track to make an oval and a control knob to change the speed and to go forward or backward. With that oval built and the controller in place, it was time to test it out. To my surprise, it worked. It was intermittent, but it worked. With a little soldering on the controller-to-track connection, it was up and running as it was almost 20 years ago! This particular set runs off of 9V AC. For a full rundown of the different style of Lego train tracks over the years, check out this video.
Despite my excitement, an old thought popped into my head almost as soon as I got the train running again, something I had wished since I first got the set: I wanted more track. Again, I looked on eBay to see what the going price of 9V train track was. Some vendors have reasonable prices for straight and curved pieces, but the crossover track piece, one I always wanted, was very overpriced. However, there was one thing I have now that I didn't when I was a child, a 3D printer. A search on Thingiverse returned exactly what I wanted. In particular, these straight and curved models by barspin and this crossover model by Vascilliator.
There was one major flaw in my plan: the newer Lego trains all run on DC motors that are controlled via an RF remote, and that means all the new Lego tracks do not have metal embedded across the tracks and are not conductive. I realized these 3D models were most useful to those who have that style of Lego trains. But, I wasn't going to stop me from having my fun too. There had to be a way to make them conductive. Then I remembered I had a few rolls of copper tape lying around. It sounded crazy, but maybe I could line the top of the 3D printed track pieces with copper tape.
I printed several test tracks with white ABS. I then cut strips of copper tape to length and attached it to the track. Using some of the Lego pieces, I smoothed over the tape for an almost professional-looking piece of track.
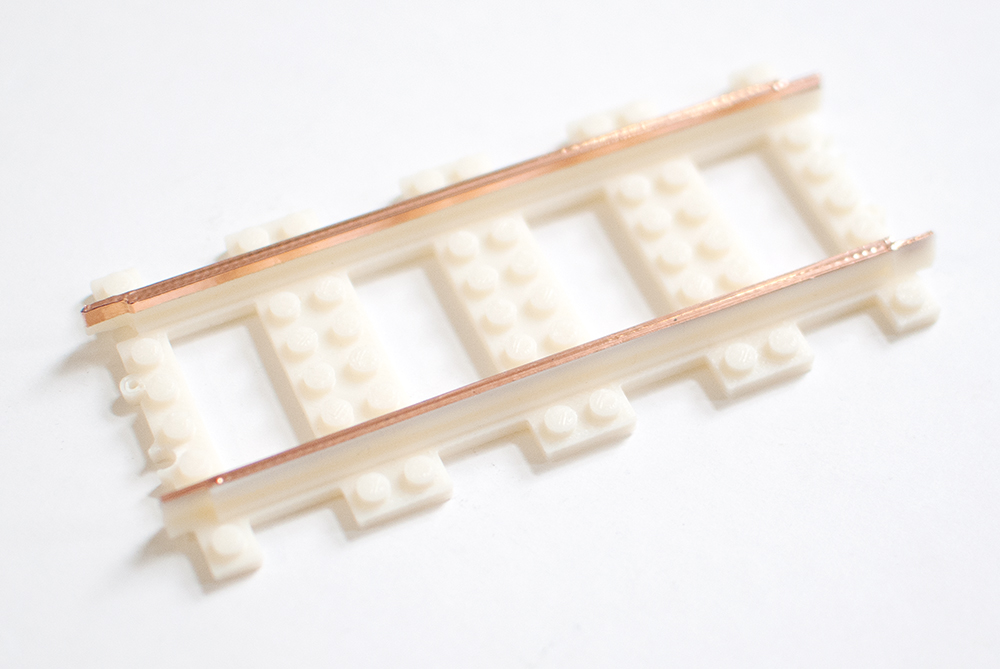
A straight Lego track printed with ABS filament.
I added my one test piece to the existing oval, and it worked! Not only did it work, but the train sped up significantly for the few moments it was on the new track, which shows the age of the old track. The downside was that the ABS took a little force to get the 3D printed track to mate with the original.
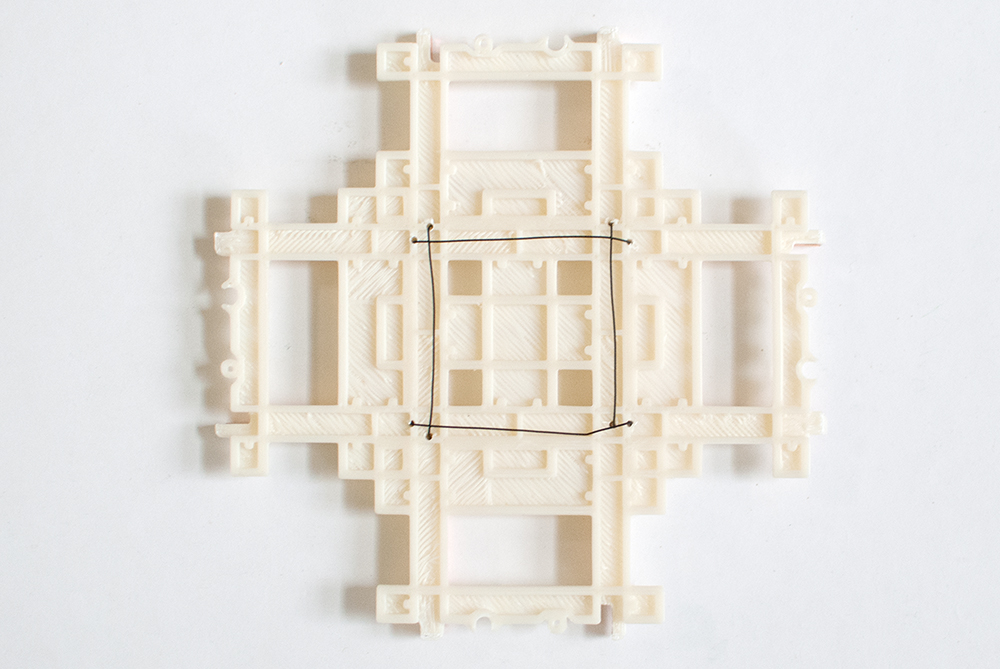
Now it was time for the true test. Could I make a working crossover track? I printed one out, and set to work laying the copper tape. I realized there was no way for power to conduct from one side of the track to the other. It took some pondering, but I came up with a simple solution. I drilled some tiny holes near the cross sections. Then very small gauge wire was ran from one side of the track to the other and soldered to the copper tape on the other side.
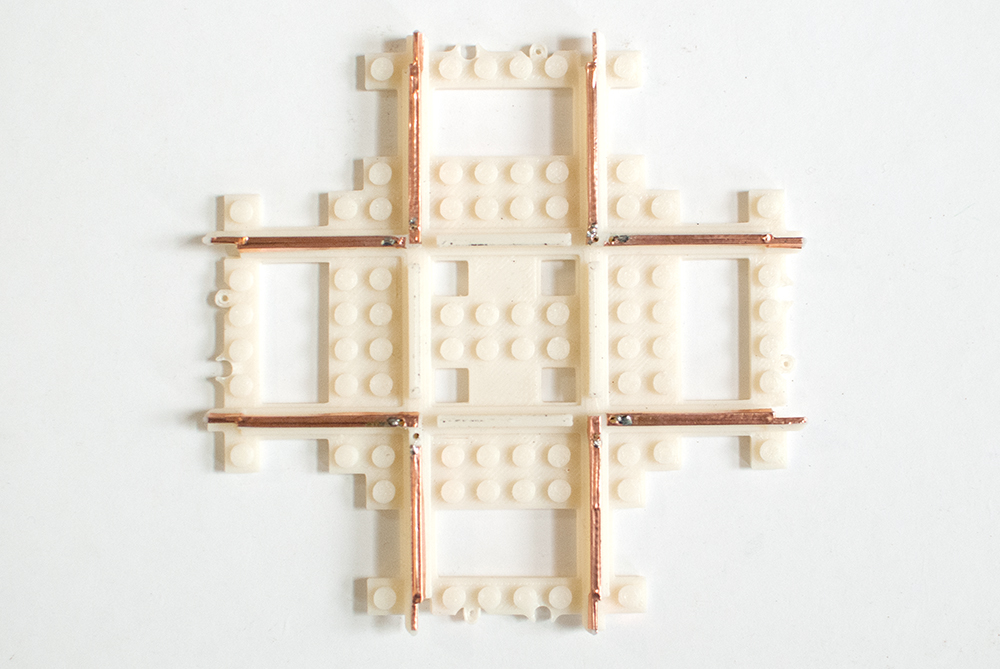
Topside
Bottomside
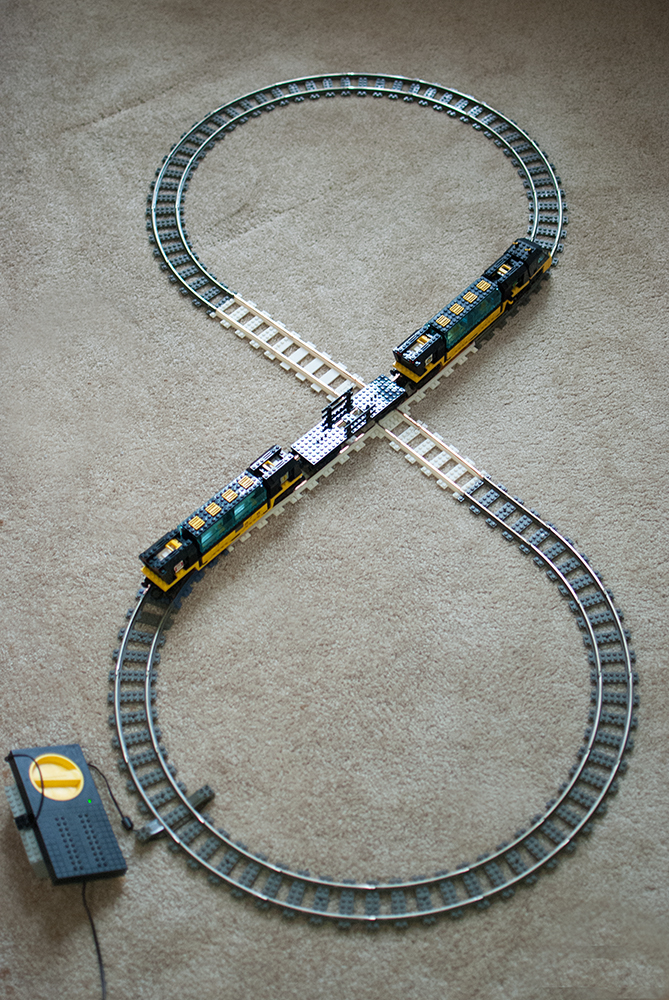
With that, I could finally build the infinity track I had always wanted.
Now that I knew it could be done, I wanted to perfect it. I ordered some light gray filament. I already knew how the ABS held up, so I got some PLA and some HIPS. The package arrived just last week, and I've already printed some more track. The color doesn't quite match, but it's much better than the white. And, I've found that the HIPS is great for simulating the same plastic used in the original Lego pieces. It is a strong plastic, and you get the same satisfying click when you connect it as you would hear from an authentic Lego track piece. The round nubbins still aren't perfect, but they're purely aesthetic in this case.
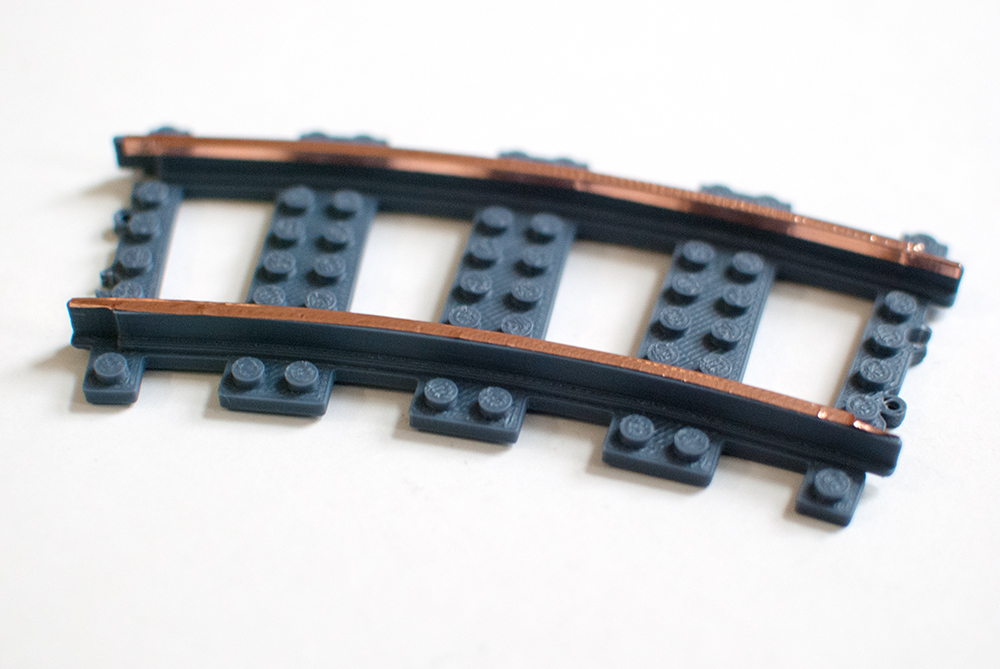
A gray curved piece printed with HIPS filament.
From there, the track building possibilities are endless, so long as you're willing to put the time into adding tape to all your prints. Next stop, third loop on the infinity track, Choo Choo!


The Lego Train Tracks Full Rundown video is missing.
Woops, link is fixed now. Thanks.
This is a nice write up, Joel. Keep them coming!