
Don't let the fear of throwing a lame party hold you back this holiday season! We have you covered with “Jamdelier,” a chandelier that just wants to dance.
In this video, check out how “Jamdelier” dazzles, wiggles and gets the dance party started.
Not only is “Jamdelier” a ton of fun; it’s also super easy to make with the following electronics supplies:
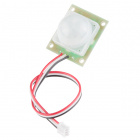
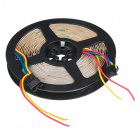
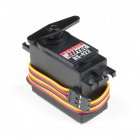

Connect the LED strip to pin 6 on the RedBoard, the motion sensor to pin 4, and the servo motor to pin 9. Your final circuit should look like this:
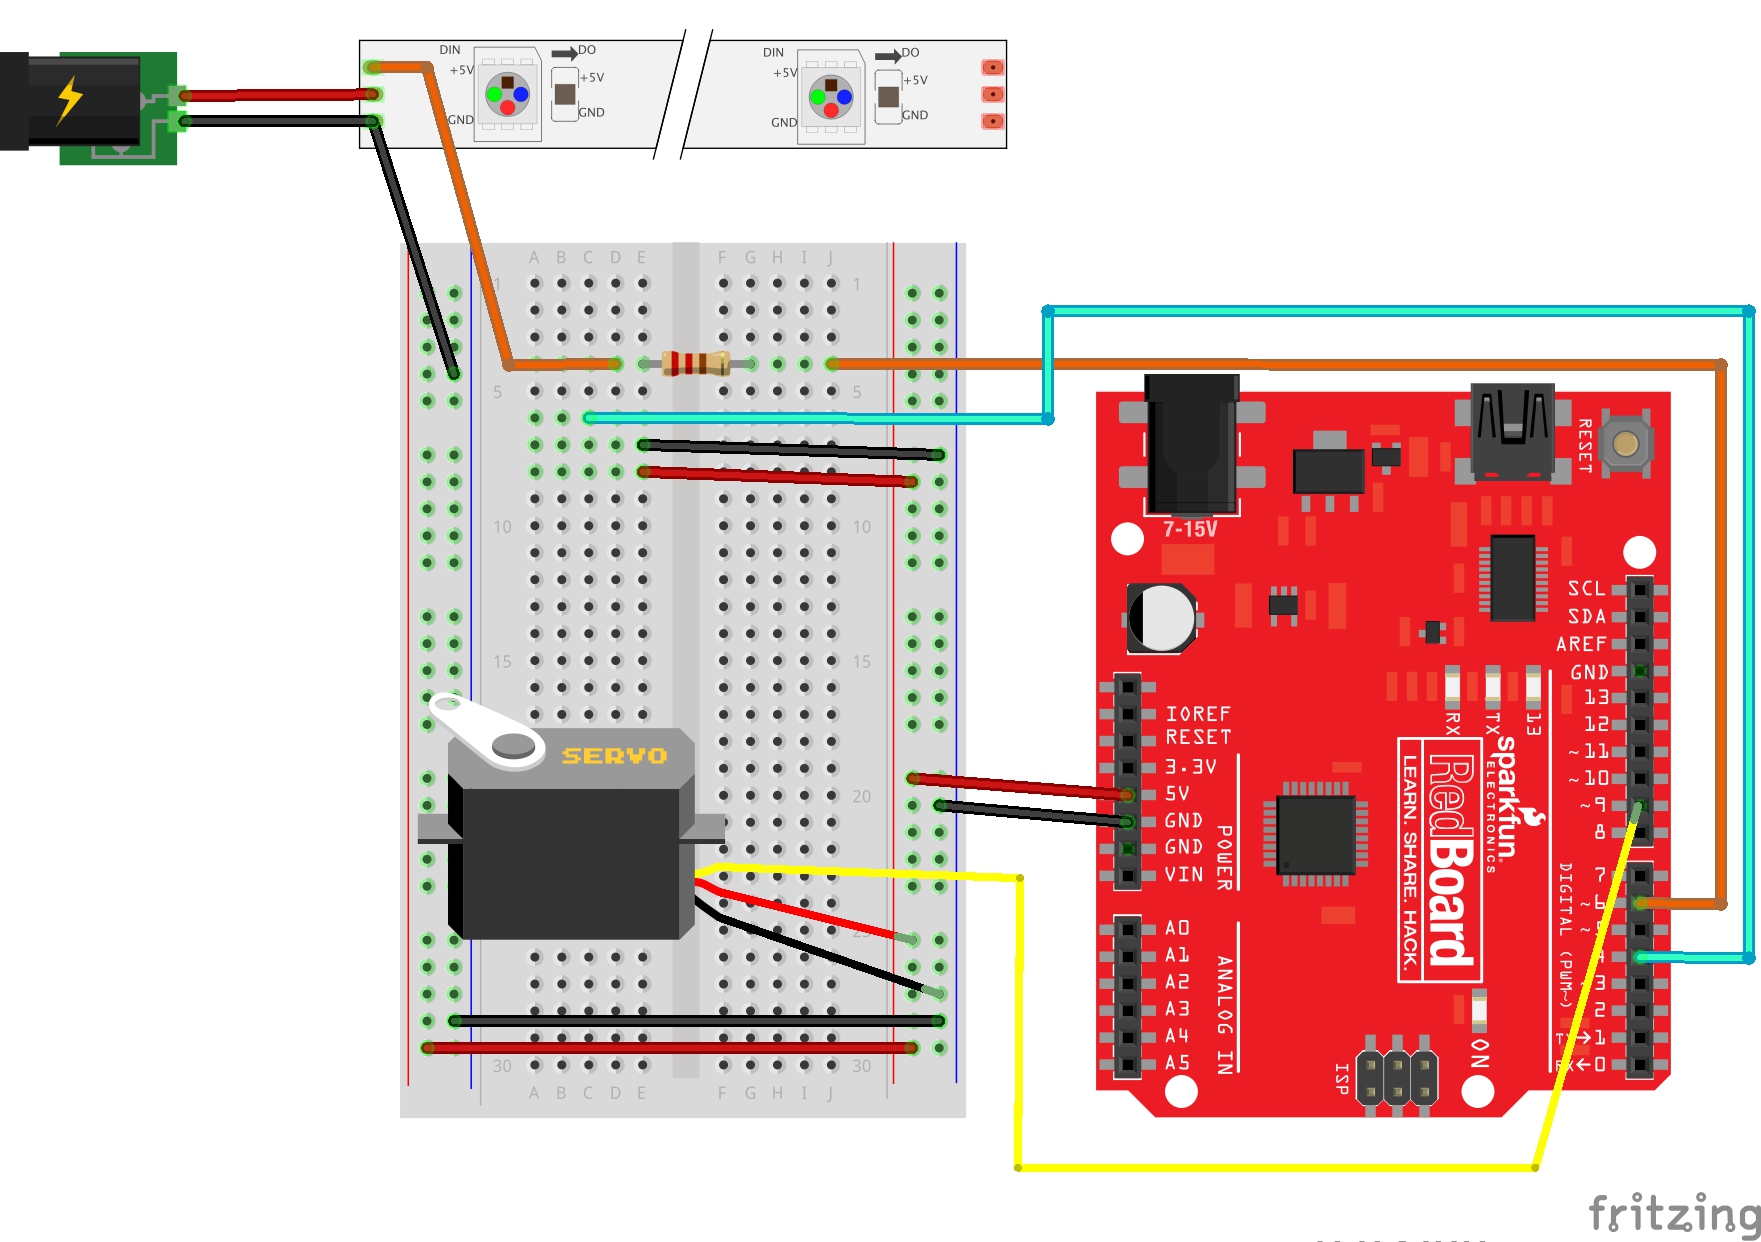
Having a hard time seeing the circuit? Click on the wiring diagram for a closer look.
Copy the following code and upload it to your RedBoard.
/*
  Jamdelier Sketch

  by FELDI

*/


#include <Adafruit_NeoPixel.h> //includes neopixel library
#include <Servo.h> //include the servo library


Servo myservo;  // create servo object to control a servo

const int STRIP = 6;  //declare LED strip to pin 6
int NUMPIXELS =  250; //declare the number of LEDs on the stip
int LEDlevel = 200; //declare the brighness of the LEDs (0-255)
const int MOTION_PIN = 4; // Pin connected to motion sensor
int pos = 0;    // variable to store the servo position


// When we setup the NeoPixel library, we tell it how many pixels, and which pin to use to send signals.
// Note that for older NeoPixel strips you might need to change the third parameter--see the strandtest
// example for more information on possible values.
Adafruit_NeoPixel pixels = Adafruit_NeoPixel(NUMPIXELS, STRIP, NEO_GRB + NEO_KHZ800);

void setup()
{
  Serial.begin(9600);
  pixels.begin(); //initiates communication with neopixels

  // The PIR sensor's output signal is an open-collector,
  // so a pull-up resistor is required:
  pinMode(MOTION_PIN, INPUT_PULLUP);

  myservo.attach(9);  // attaches the servo on pin 9 to the servo object

}

void loop()
{
  int proximity = digitalRead(MOTION_PIN); //read motion sensor and store in proximity variable
  if (proximity == LOW) // If the sensor's output goes low, motion is detected
  {
    Serial.println("Motion detected!"); //alert that the motion sensor should trigger the LED strip

    theaterChase(pixels.Color(LEDlevel, LEDlevel, LEDlevel), 50); // triggers LED animation function
    pixels.show(); // This sends the updated pixel color to the hardware.

    //sends continuious motion to the servo motor
    for (pos = 0; pos <= 180; pos += 1) { // goes from 0 degrees to 180 degrees
      // in steps of 1 degree
      myservo.write(pos);              // tell servo to go to position in variable 'pos'
      delay(15);                       // waits 15ms for the servo to reach the position
    }
    for (pos = 180; pos >= 0; pos -= 1) { // goes from 180 degrees to 0 degrees
      myservo.write(pos);              // tell servo to go to position in variable 'pos'
      delay(15);                       // waits 15ms for the servo to reach the position
    }
  }
  else
  {
    for (int i = 0; i < NUMPIXELS; i++) {
      pixels.setPixelColor(i, pixels.Color(0, 0, 0)); //sets all neopixels to zero brightness, turning them off
      pixels.show(); // This sends the updated pixel color to the hardware.

    }

    myservo.write(90); // tell servo to move to position and remain still
  }
}


//pixel animation function
void theaterChase(uint32_t c, uint8_t wait) {
  for (int j = 0; j < 10; j++) { //do 10 cycles of chasing
    for (int q = 0; q < 3; q++) {
      for (uint16_t i = 0; i < pixels.numPixels(); i = i + 3) {
        pixels.setPixelColor(i + q, c);  //turn every third pixel on
      }
      pixels.show();

      delay(wait);

      for (uint16_t i = 0; i < pixels.numPixels(); i = i + 3) {
        pixels.setPixelColor(i + q, 0);      //turn every third pixel off
      }
    }
  }
}
Once the electronics are taken care of, it’s time to fabricate the actual chandelier. This is your opportunity to get creative! You can repurpose an old light fixture and breathe some new life into it or, like me, build something entirely from scratch.
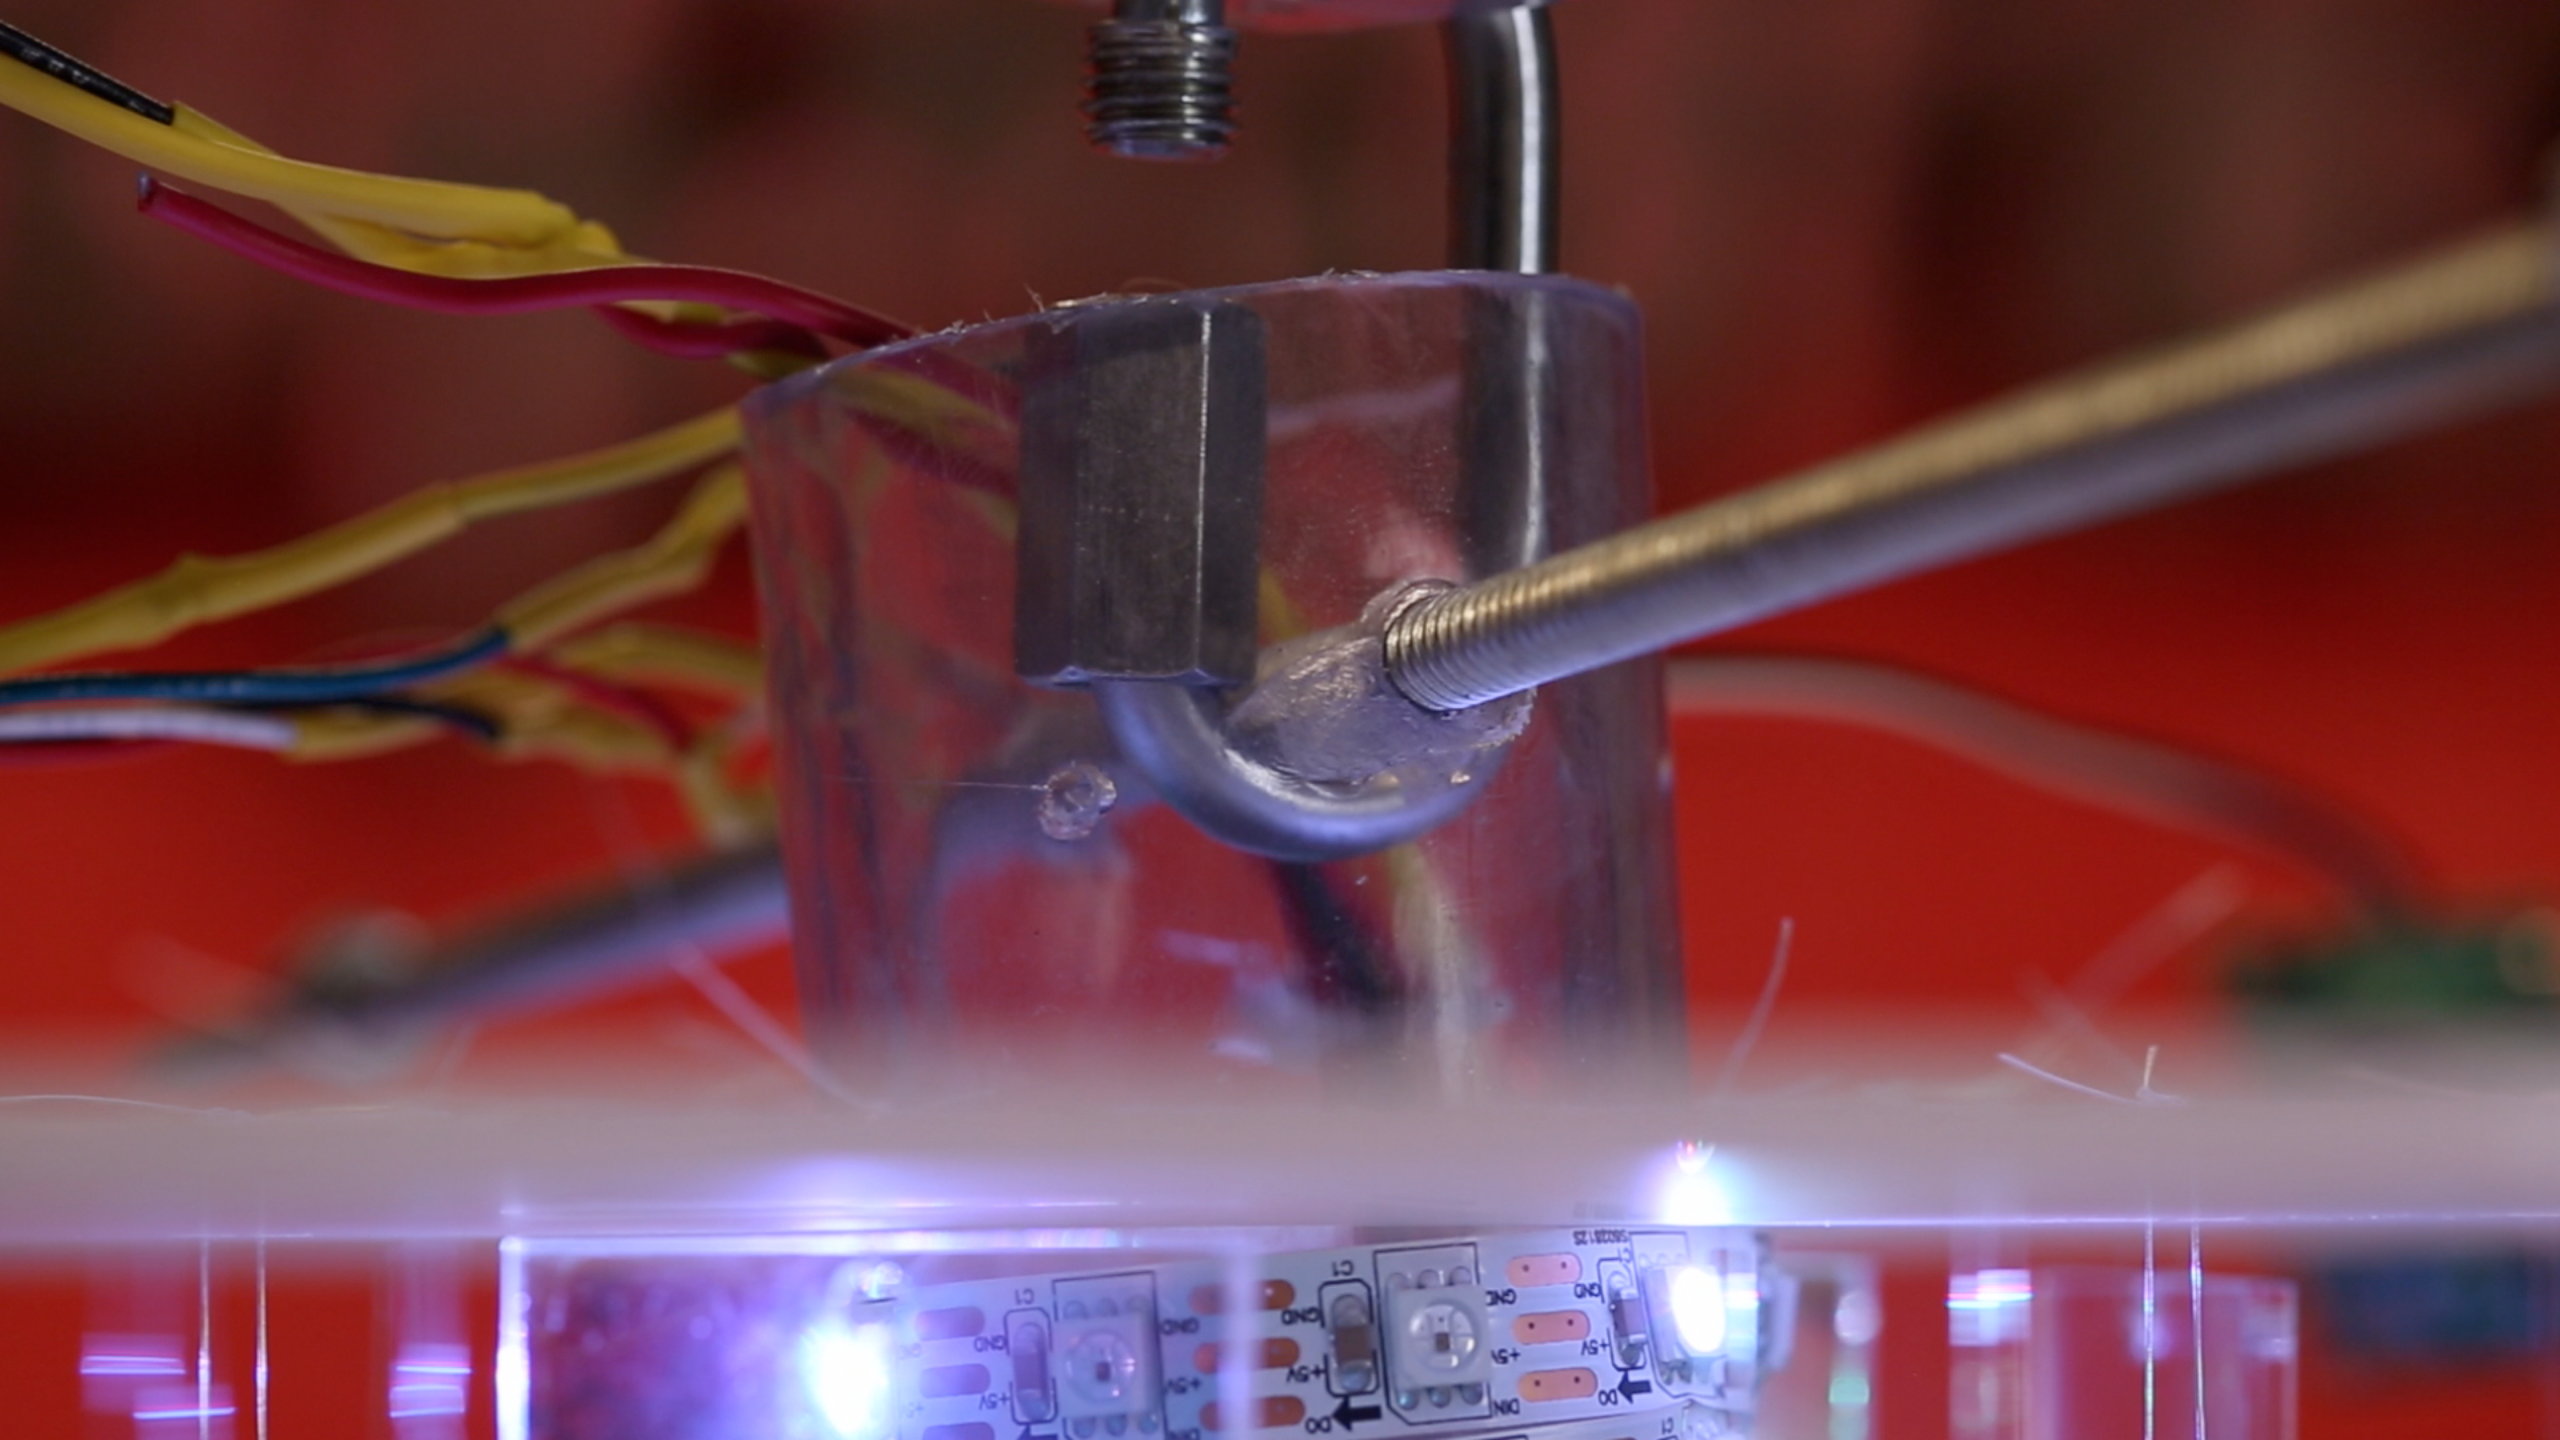
I used clear tubing for the chandelier body, which is held in place by an acrylic canopy made using the laser cutter and wrapped in the LED strip.
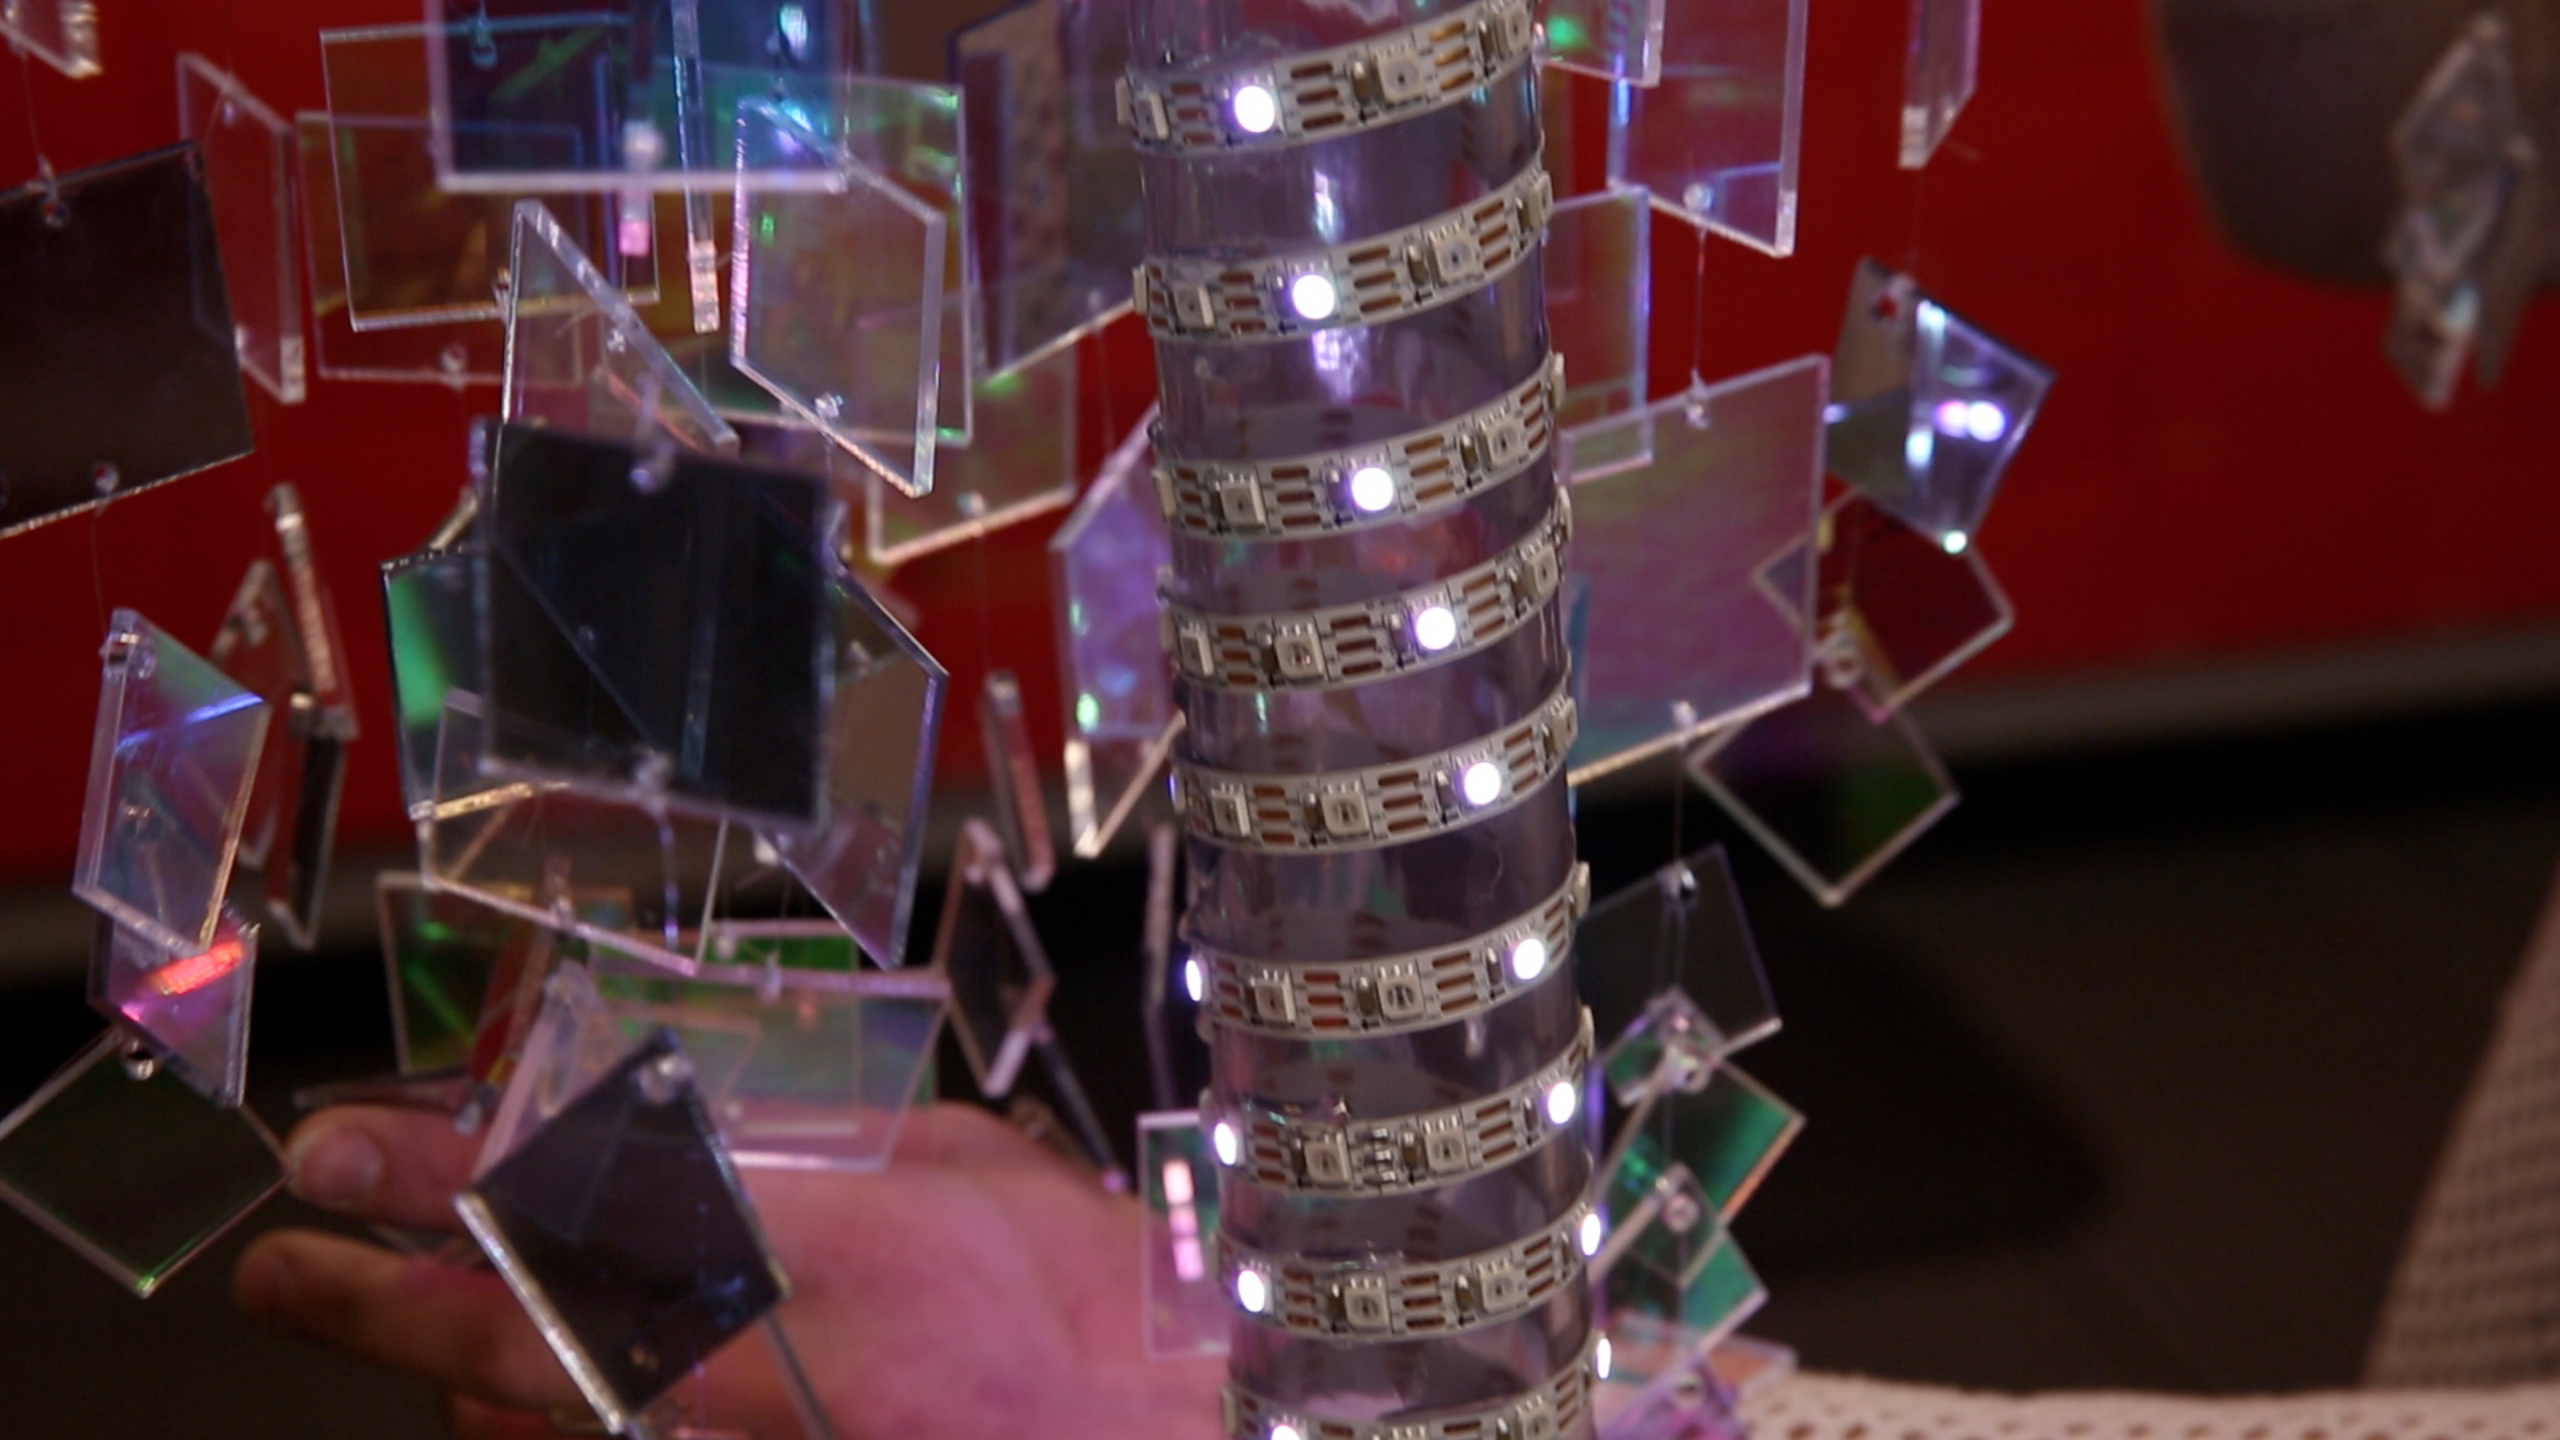
I rigged together a hanging mechanism by sticking about an inch of clear tubing out the top of the canopy and drilling a hole on either side, through which I placed a shaft and then hooked on a D-ring.
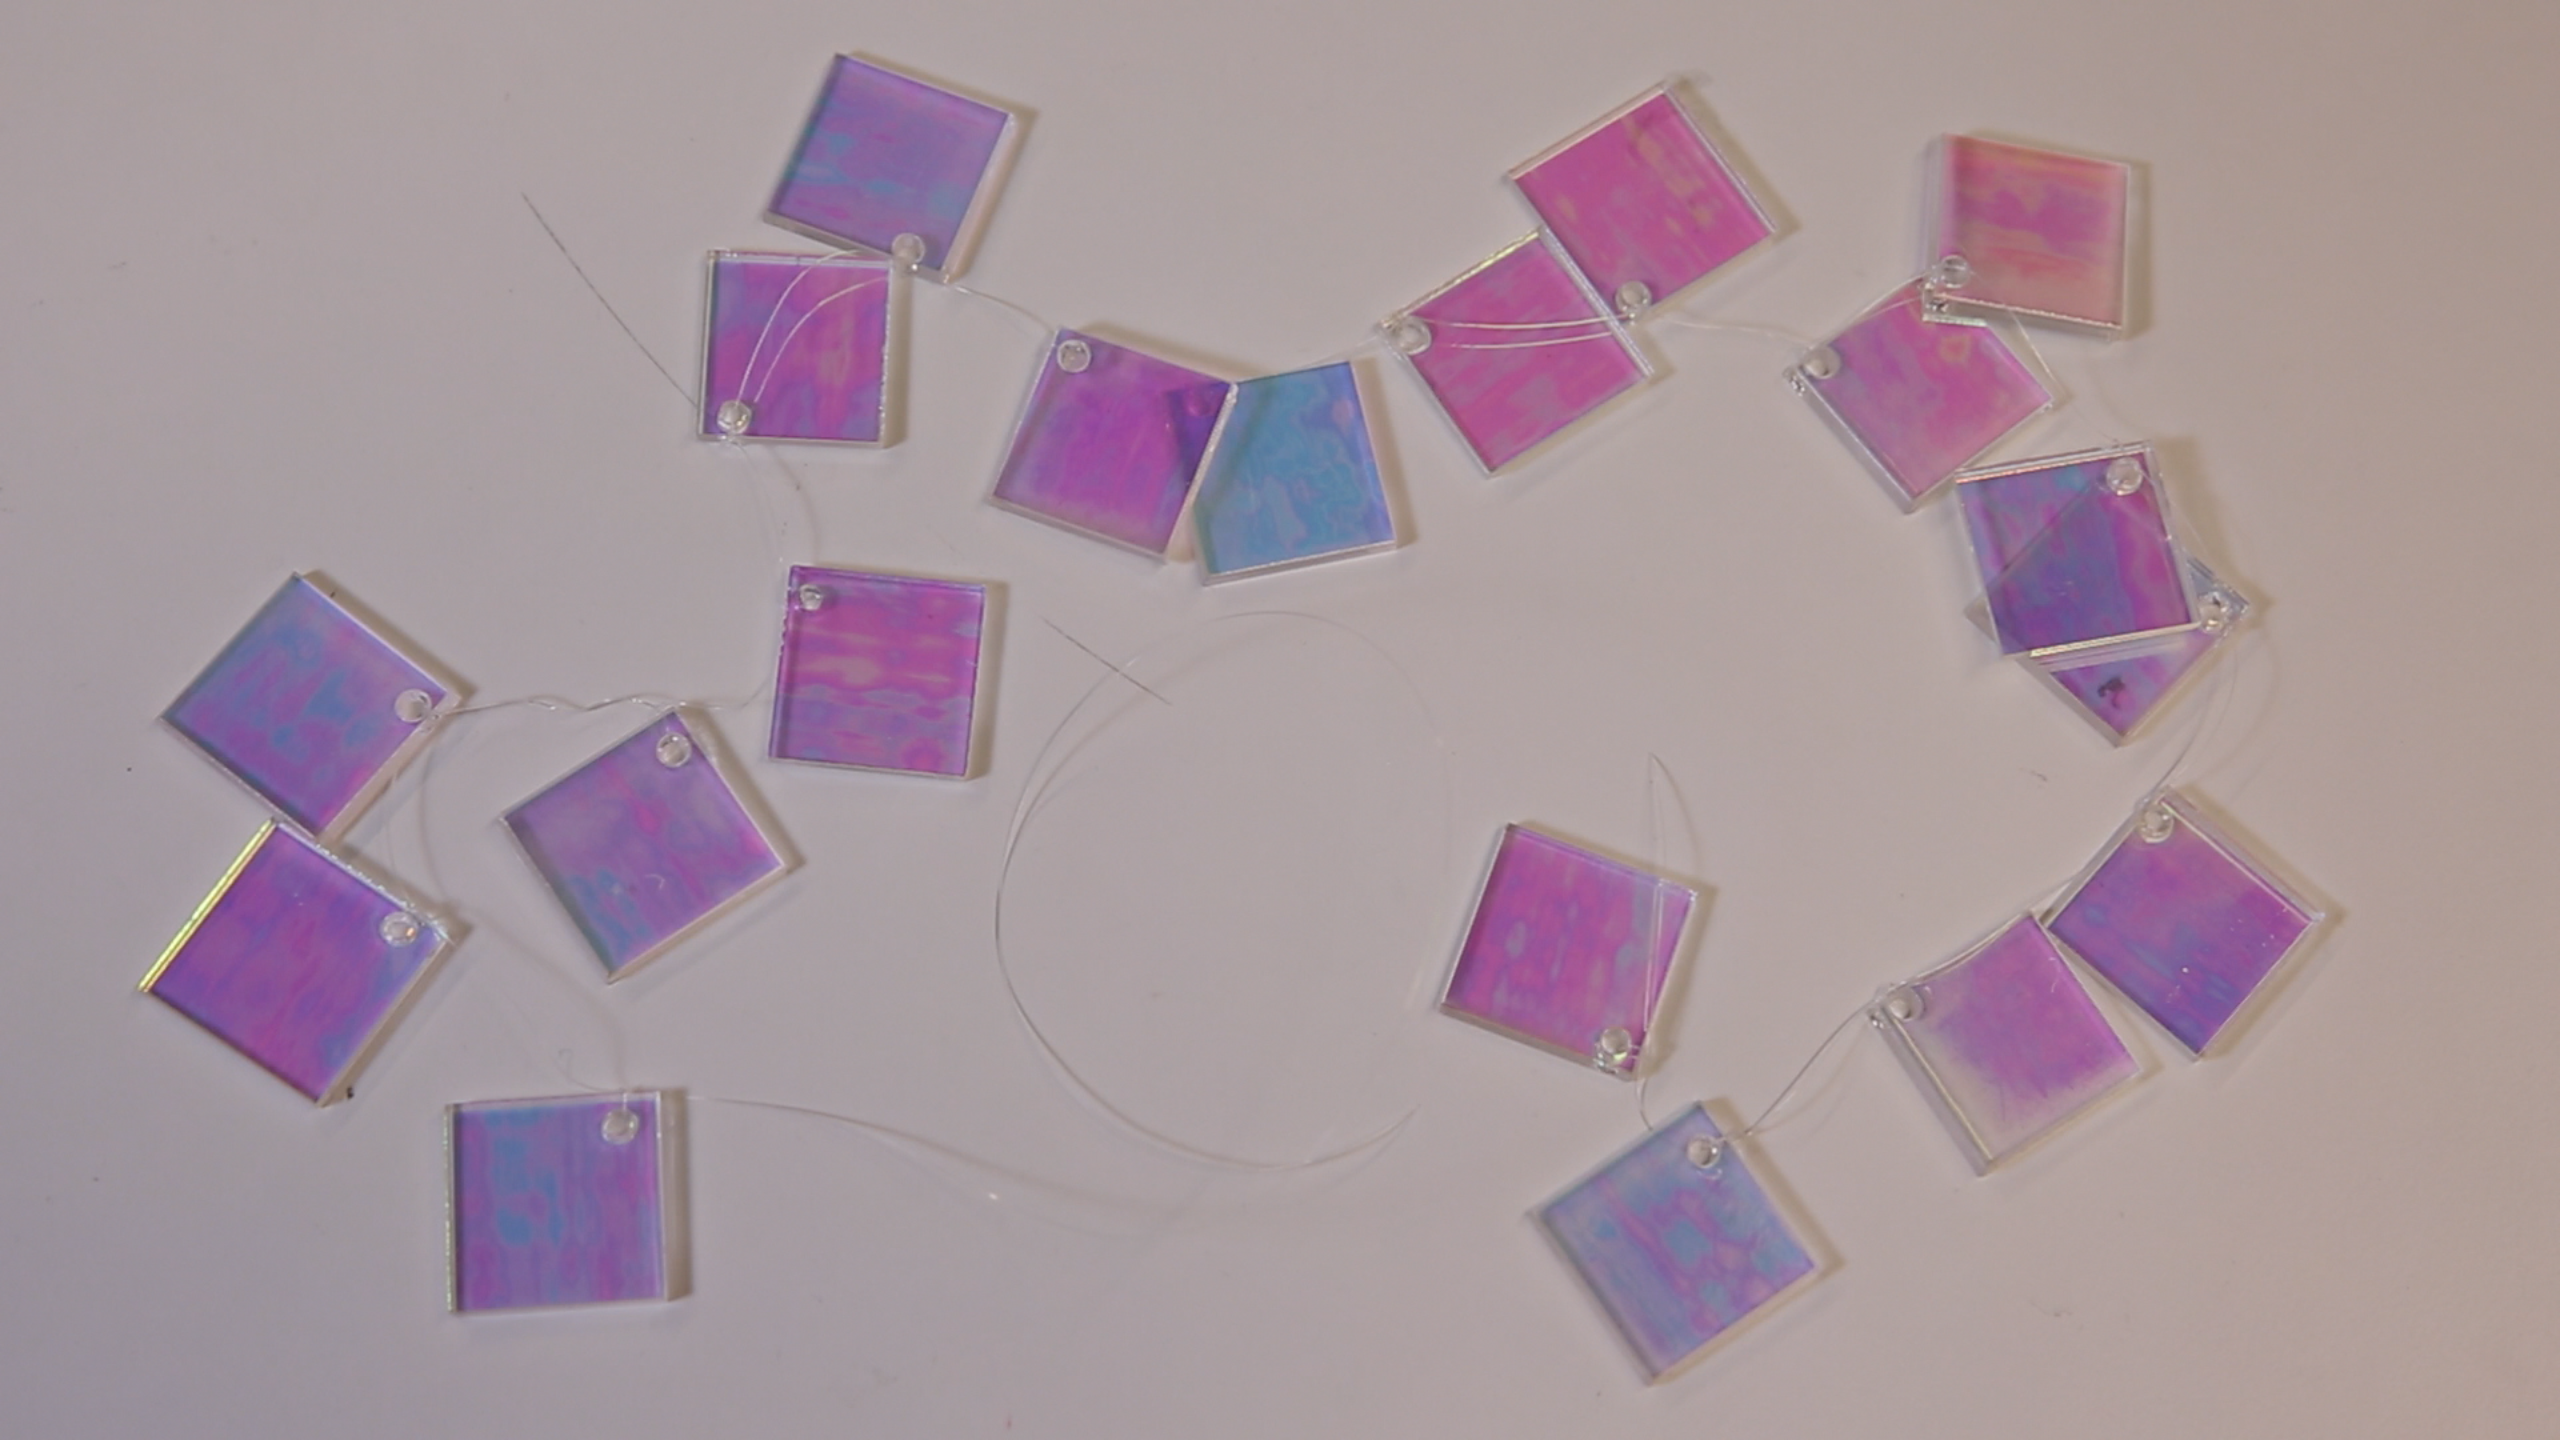
Then I chained together pieces of recycled iridescent and mirrored acrylic and hung them from the canopy in a starburst pattern.
The final task is making “Jamdelier” move. I built a hanging rig using aluminum channels, which also encases a servo motor with an arm attached to the edge of the shaft in the hanging mechanism.
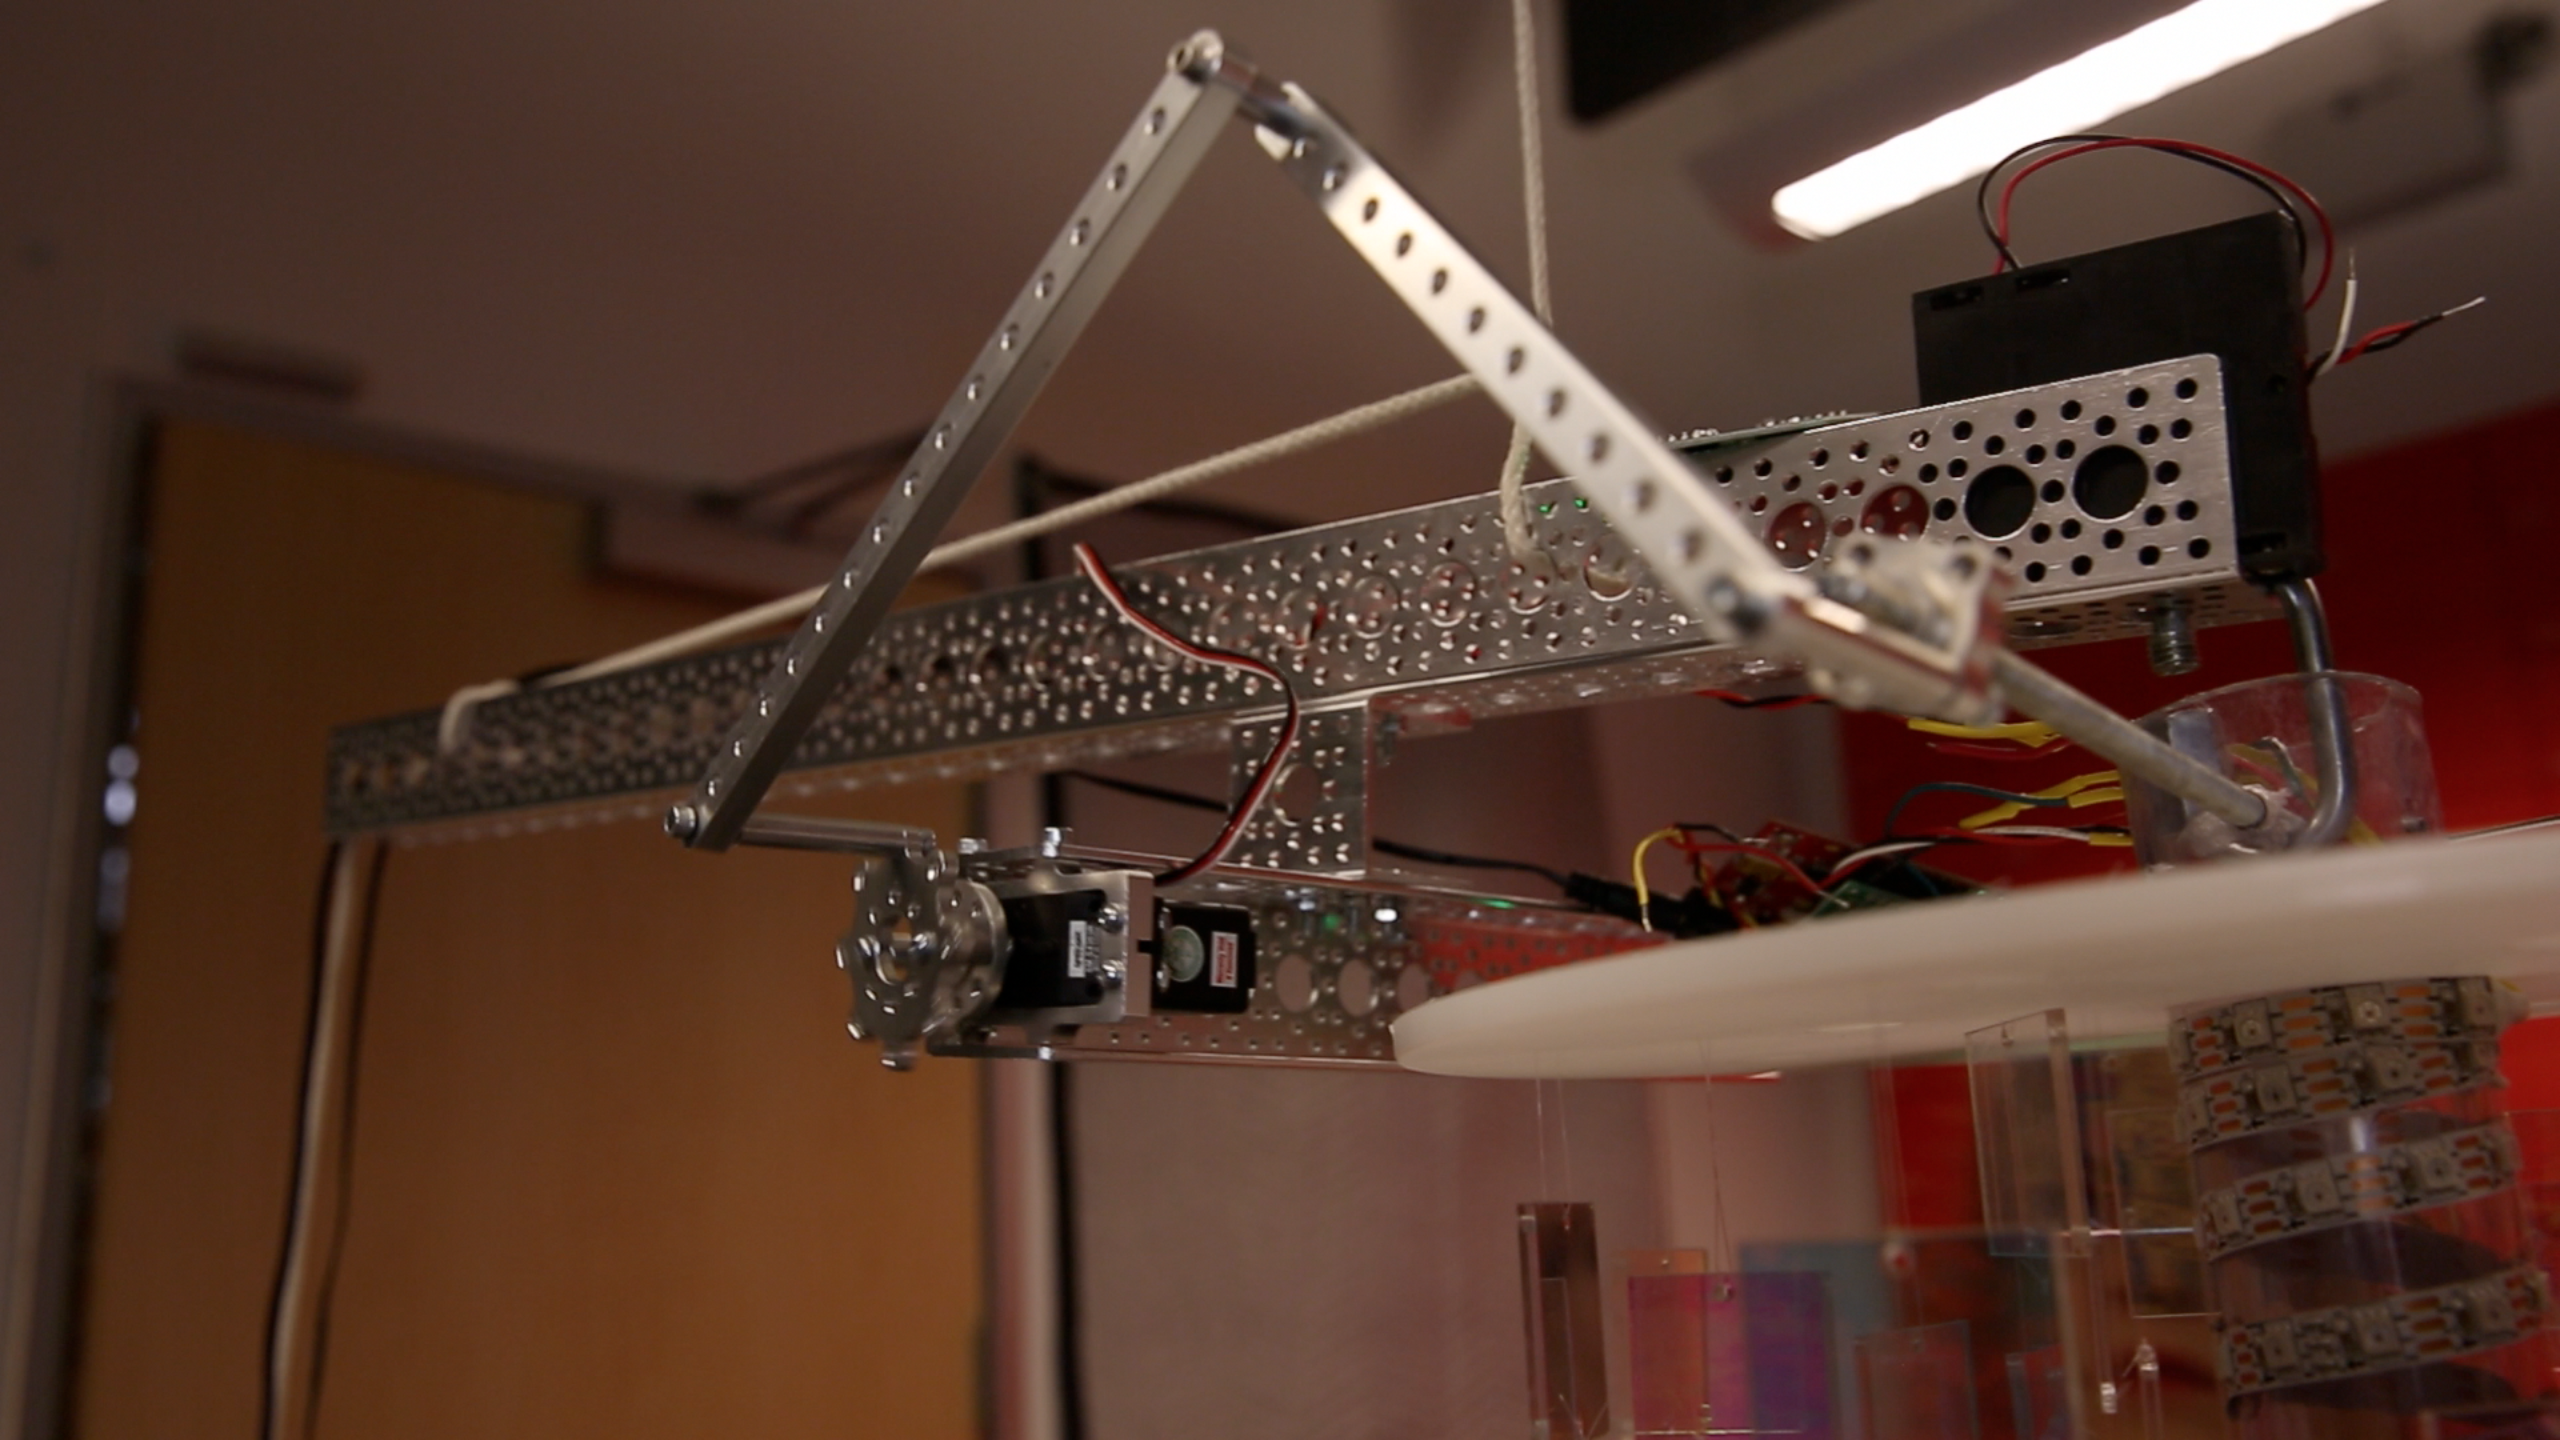
Turn the servo on, and it starts pushing the chandelier back and forth as it spins.
“Jamdelier” is a killer party companion! And what’s even better is that it can be reprogrammed as a regular chandelier when party season is over. Just remove the motion sensor and servo motor functionality. With 250 individually addressable RGD LEDs, there are countless ways to customize the colors and brightness of your strip---each configuration giving “Jamdelier” a completely new look!


Are you planning a party project? Share your work and ideas with us on Twitter and in the comments below!


Can we please get some more interesting videos / projects / tutorials from some of the classic sparkfun presenters like Nick (the beard guy)? "Creative Technology" videos shouldn't be ONLY leds and variations of leds and el-wire on clothing but lately it's like that's all that comes out of sparkfun. Back like 2013 - 2014 projects used to be more fun, and more.... engaging (I remember the video where Nick was building an rc plane and it didn't really work but it was fun watching him try).