
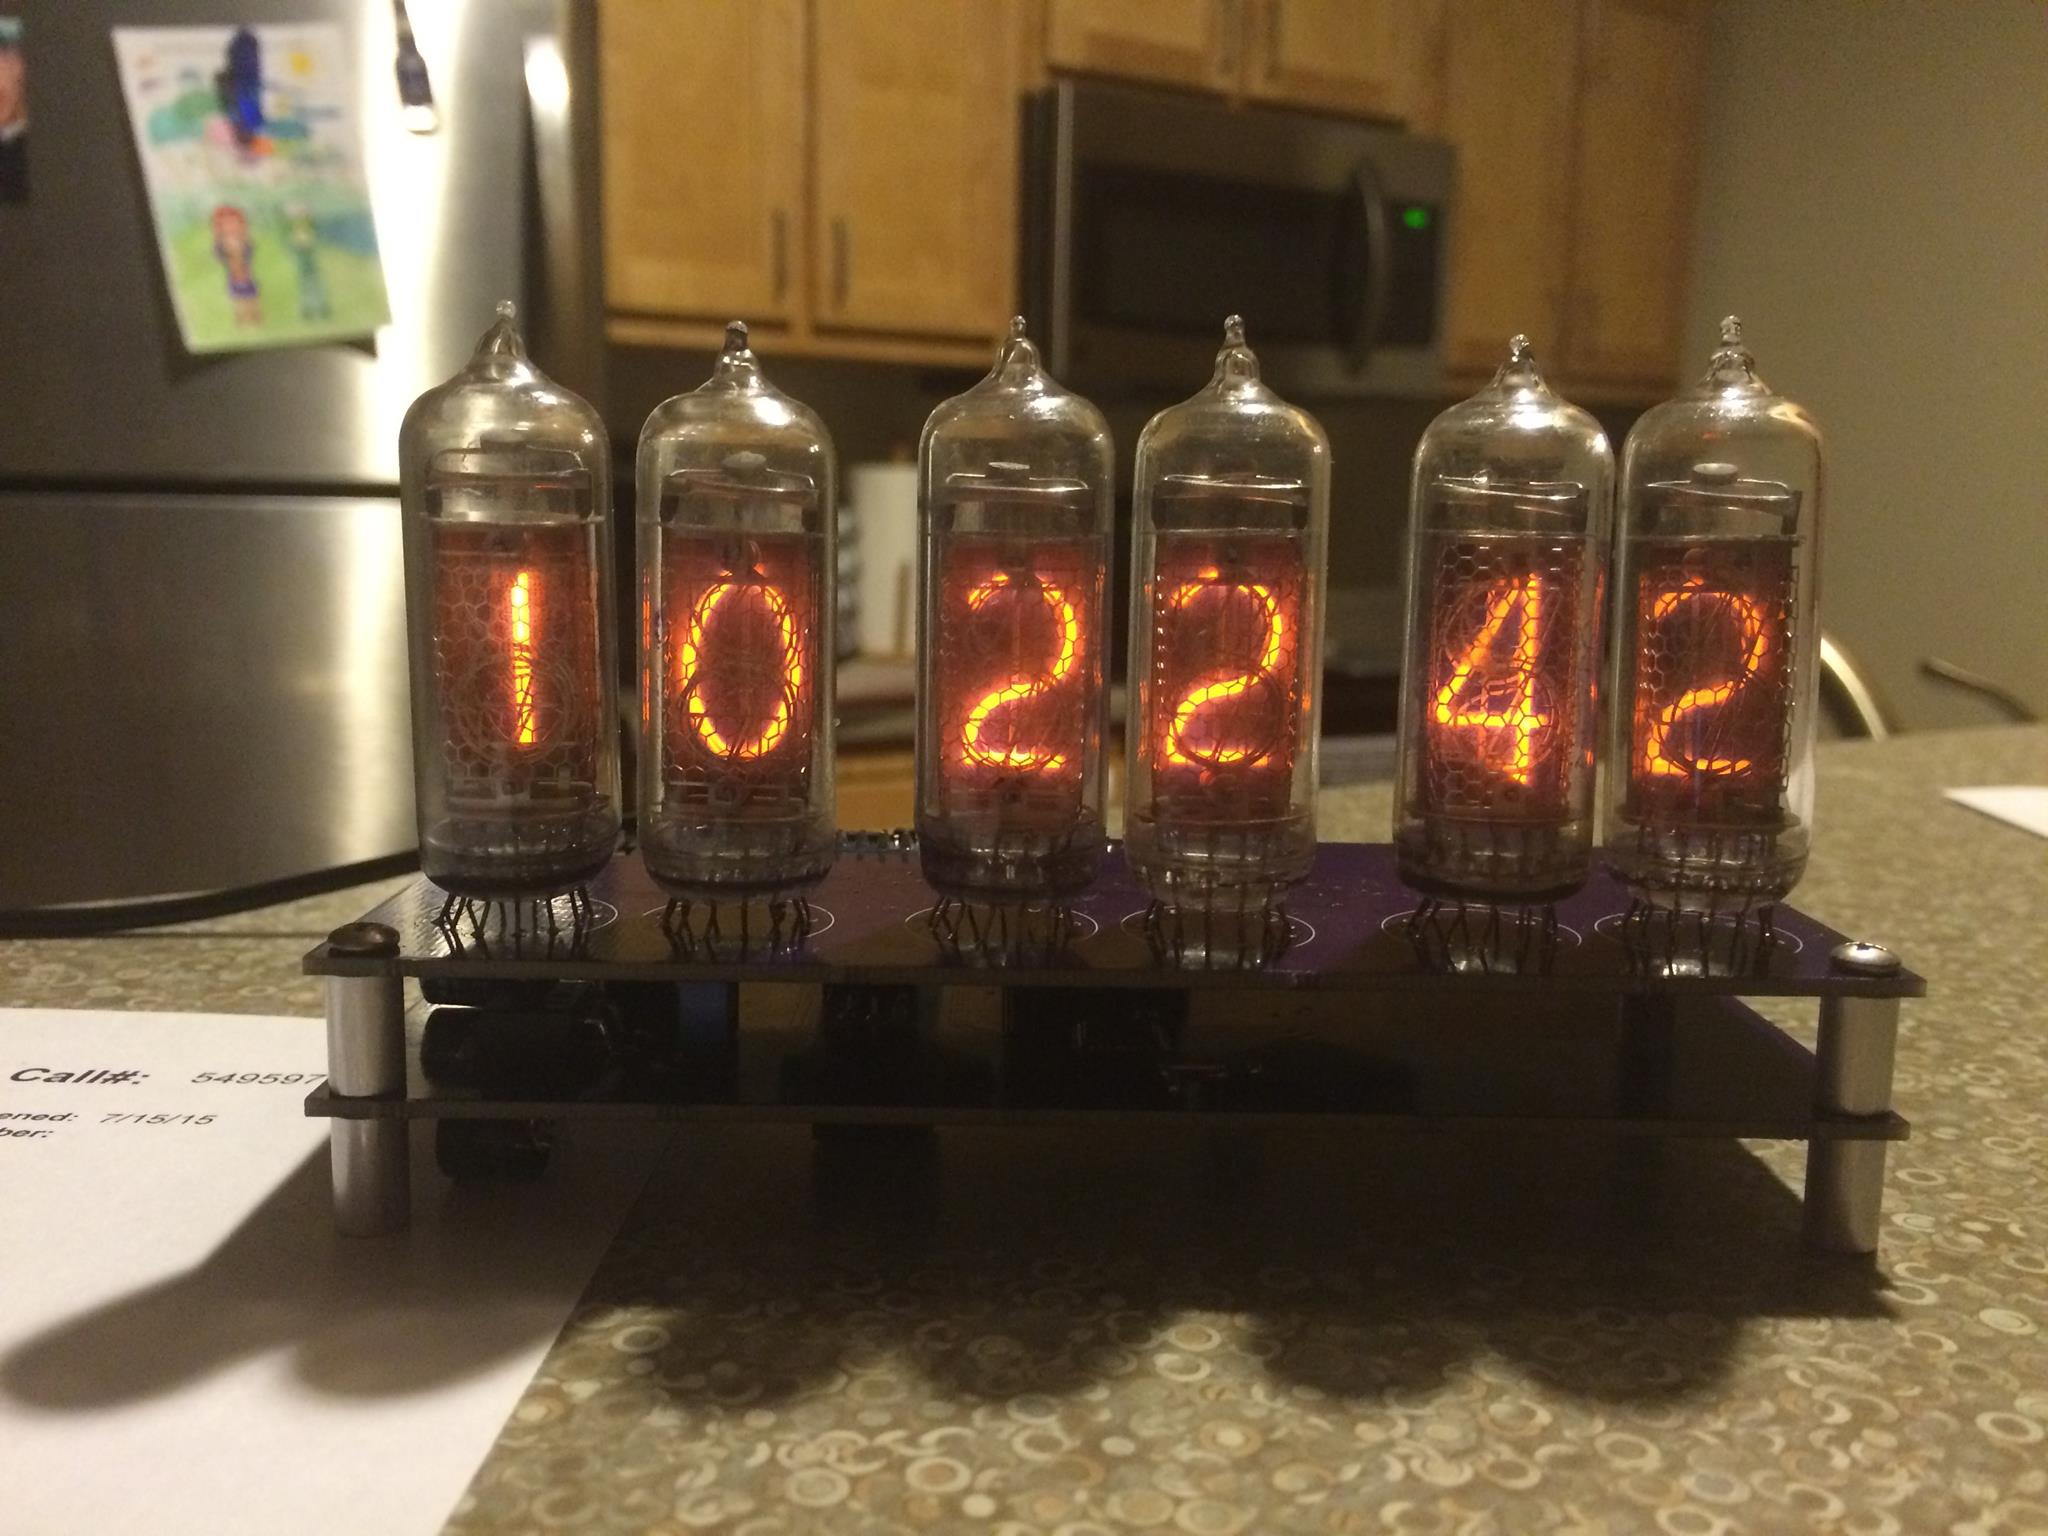
I'm not exactly sure why, but I've had an interest in clocks for a while now. A few years ago, I designed a nixie tube clock with an ATmega328 and ESP8266. Due to discrepancies between the defined clock speed and actual clock speed, the ESP8266 connected to a Network Time Protocol (NTP) server was cheaper to implement than using an RTC.
Nixie tubes came into existence during the time of vacuum tubes and before LEDs (at least in the context of the Soviet Union). Once LED technology made its way into the USSR, nixie tubes began to fade out. Even today when shopping for nixie tubes online, all of the tubes I've purchased have been sent from either Russia or Ukraine. It seemed fitting that I would follow in history's footsteps and switch over to the cheaper, easier and safer LED technology (I may or may not have shocked myself a few times on the 170VDC supply when testing).
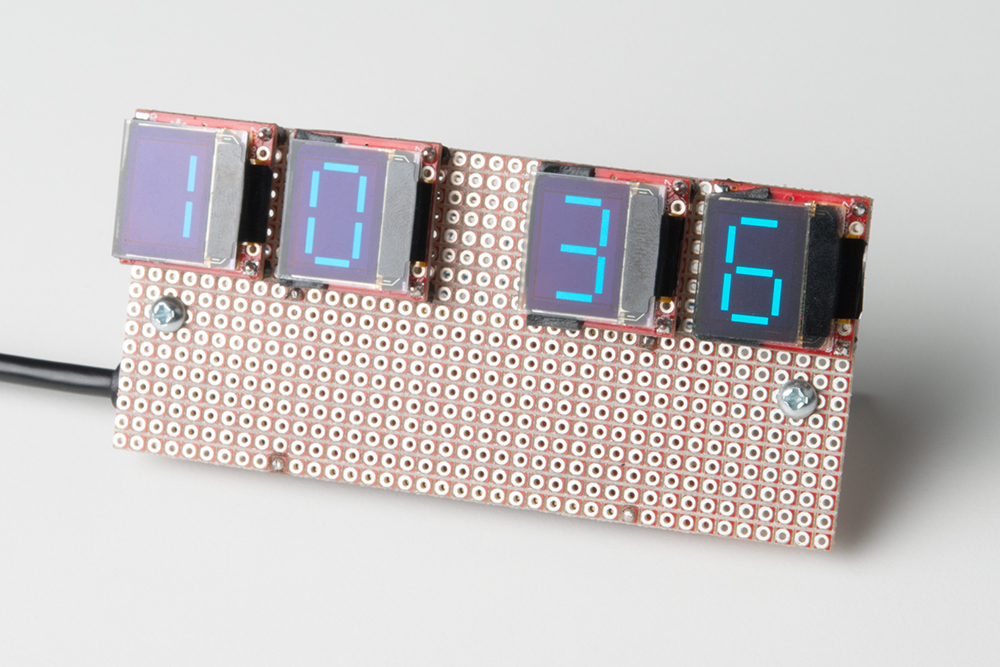
Seven-segment displays would be a great solution, but those are a dime a dozen today. I wanted something different, something that you don't really see commercially. As a programmer, binary clocks interested me, but I really wanted to stick with a digital display and kept going back to the 7-segment variety.
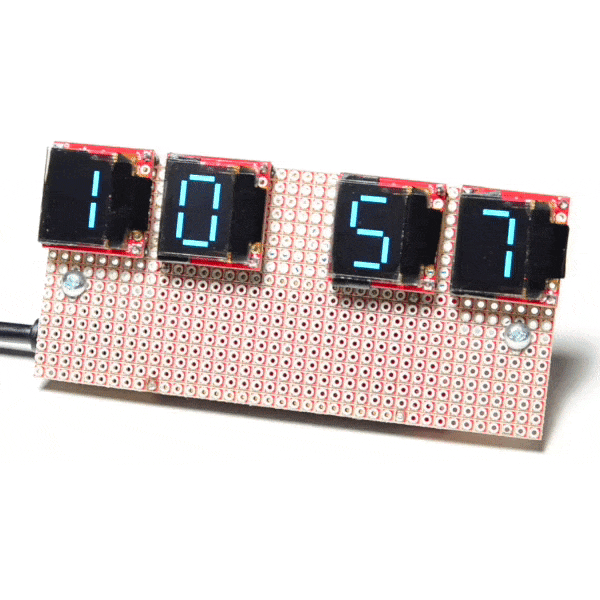
Using our OLED breakout allowed me to recreate the look of a 7-segment display, but I can add animations when the digits change. I added animations that make the individual segments drop in and fall off of the display when the time changes.
In my old clock, I first tried having the ESP8266 control both the WiFi and the nixie tubes, but the WiFi stack was just too large to avoid seeing the multiplexed nixie tubes flicker any time the 8266 needed to do something WiFi-related. This meant that I had to have two controllers on the board; an ATmega328 would handle the nixies, and the ESP8266 would be responsible for the time and web GUI for settings. When the SparkFun ESP32 Thing was announced, having two cores --- one to handle the WiFi stack and the other for programming --- I immediately thought of my clock and how much easier it would be to just have one device to program and not worry about how I would transfer information between the two.
Where the Clock Stands
Currently, the clock is still a work in progress. Right now, the code requires hard coding the SSID and password for the wireless access point. I really liked the web GUI I made, which I can access from the ESP8266 to change settings for the access point's SSID and password or to select the NTP server location, time zone and whether or not to adjust for daylight saving time.
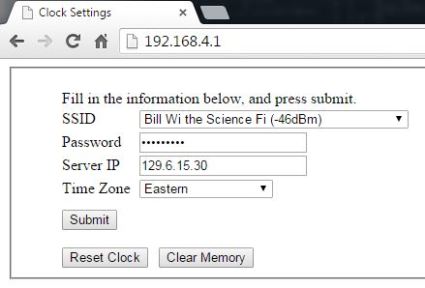
I haven't been able to implement the GUI quite yet due to library changes in WiFi.h to serve web pages, and this is where I could use some help. If you've made a web server for your ESP32, please let me know how you handled multiple pages. I've been scratching my head throughout the build on how to get this done. With the ESP8266, there's on(const String &uri, handler function), but that seems to have been removed on the ESP32.
The second problem with both clocks is how I handle daylight saving. Currently with the nixie clock, I have a selection box that removes an hour, but I would like to have that happen automatically. The NTP time returned will allow me to figure out the date, but given that daylight saving time begins on the second Sunday of March and ends on the first Sunday of November, how would you efficiently program in that functionality?
The clock is far from finished, and aside from the problems I've mentioned above, there are some minor things I would like to touch up and a couple of extra features I'd like to add. If you'd like to check out my code as is, you can view it on my GitHub here. If you'd like to build your own, the parts I used are in the wishlist below.


Checkout this Timezone library. https://github.com/JChristensen/Timezone
Basically, the RTC (or time source) is kept in UTC, and then the object automatically gives you local time based on a specified timezone (UTC offset) combined with summer time rules.
i recommend using this wifi manager https://github.com/tzapu/WiFiManager as it does not require hard coding of the wifi details. When first connecting to the wifi router it will prompt the user for details and store them on the esp8266 module.
Love your clock! I want one!
What about placing everything on one web page using div's (or similar) to contain what you would have otherwise placed in the individual pages and changing the display (none/block) property as you needed them?
(This was meant to be a comment on MDANCER's comment below) To make my Plotclock account for daylight saving I used the Arduino Time library and the following to update the RTC. I know it works in March, but it hasn't yet been tested in October. It looks a lot tidier in a monospaced font. // // Adjust for daylight saving changes // Clocks go forward at 2am on the last Sunday in March // and back at 2am on the last Sunday in October // if ( (tm.Month == 3 ) || (tm.Month == 10) ) // Is it March or October? { if ((tm.Day >= 25) && (tm.Wday == 0) && (tm.Hour == 2)) // Is it the 25th or later ? { // - i.e. the earliest date which can be the last Sunday of the month if ((tm.Month == 3) && (SpringUpdate != tm.Year)) // Is it March? Have we already changed the clock? { ChangedHour = tm.Hour + 1 ; // Save the new value for the Hour SpringUpdate = tm.Year ; // Set the flag to indicate that the change has been made tm.Hour = ChangedHour; // Update the RTC to the new time RTC.write(tm); } // if ((tm.Month == 10) && (AutumnUpdate != tm.Year)) // Is it October? Have we already changed the clock? { // The Update flag really matters here, because otherwise // we would continually reset the time back to 1am every time it reached 2am ChangedHour = tm.Hour - 1 ; // Save the new value for the Hour AutumnUpdate = tm.Year ; // Set the flag to indicate that the change has been made tm.Hour = ChangedHour; // Update the RTC to the new time RTC.write(tm); } }
}
I've thought about a project that uses multiple OLED screens before, but they all either have fixed i2c/spi addresses, or only two options. How did you solve this problem to use four of the same display on a single microcontroller?
As Sembazuru said, I used SPI. All the displays share the MOSI and SCK lines as well as the D/C pin. Each display only needs two independent IO lines for CS and reset. I wanted to use I2C to simplify the IO pins, but for this application I2C is just too slow and creates a noticeable lag when the number change.
The OLED modules that Alex is using can support either I2C or SPI. Looking at his schematic on GitHub it appears that he is using SPI.
If you really want (or need) to use I2C, this module only allows for two different addresses, so for more than 2 of these modules (or more than 1 i2c device with a non-configurable address) you can use a chip called an I2C multiplexer. See this Sparkx Blog entry for an explanation of I2C multiplexing.
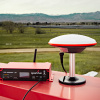
I recently made a clock using the Sparkfun 6.5-inch 7-segment display digits. My clock uses a GPS module to get the time. I opted to add a hardware switch for DST, because the clock is now permanently installed in a large venue and I didn't want to have to reprogram it if/when legislation changes DST timing again.
I was recently in a Hospital room in Minneapolis. There on the wall was an LCD display, showing the hands of an ANALOG clock. And doing a really poor job of it too! It was very hard to tell the Hour hand from the Minute hand. You know, this was in a hospital room, where people might need to know the exact time easily... Really poor deployment of that technology.
I took a class in processing (yay for an easy art credit for an EE!) and we had to program a clock. A lot of people went with an analog looking clock and a lot of those were hard to read. I can't imagine an actual product would go down the same path on a even lower res display than a 720p monitor.
For the Daylight Savings Time calculation, you can readily determine day of week by first converting the (Gregorian) date to Julian Date (https://en.wikipedia.org/wiki/Julian_day). If I were going to write the program, I'd precompute a lookup table which provides the starting and ending day of year as well as Julian date of January 1st for each year. Then each day, convert the date to Julian, calculate day of year using the January 1st reference, and if the day of year falls between the start and end days, apply the DST offset.
The usual way of finding the day of week is Zeller's Congruence. It's been used for decades.
I had never heard of Zeller's Congruence. I guess as a Aerospace Engineer I was taught to use the Julian date as it is also used as a convenient time base for time-of-flight calculations. Interestingly though, when I did a google search for Zeller's Congruence the calculation is very similar to that for calculating the Julian Day Number (JDN in the link I provided). So it looks like Zeller's Congruence is embedded in the conversion from Gregorian to Julian dates. Looks like I learned something new today.
I'd be open to switching to a 13 month Calendar