
In 1898, William Ramsay and Morris Travers succeeded in isolating neon gas from the atmosphere. Their subsequent Geissler tube tests inadvertently created an entirely new lighting technology: neon lighting.
The neon lighting that we're most familiar with today, the neon tube sign, hasn't actually changed that much since it was first demonstrated in 1910. Despite being a century-old technology (!) the neon sign industry survives to this day! There may be alternative technologies like LEDs and flourescent lights, but nothing perfectly imitates the glow of neon.
That said, let's try.
Electroluminescent wire is often compared to neon because of its soft glow and serpentine shape, and while it does look somewhat like neon, it lacks some of the clunky charm. Neon tubes, being glass, require heavy mounting brackets and fancy wire boots, little details that give neon a distinctive look. Not to mention, most EL wire is relatively thin diameter when compared to neon tubes. One's first thought might be to insert EL wire into bent glass tubing, and if you have lampworking supplies, then why not give it a shot? But the rest of us who are chasing that neon aesthetic might need to resort to slightly cheaper and less hazardous options. Enter: Rigid Plastic Tubing.
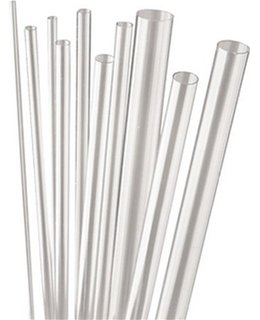
Image Credit: Amazon user "Lee's Pet Products"
You can buy rigid polycarbonate tubing at many pet supply shops for use in aquariums, it comes in a variety of diameters and is optically clear. At first glance, this tubing really does look like glass. However, polycarbonate has a lot of advantages over glass: it's not fragile, it's inexpensive to buy and ship, and it has a much lower melting point, which means we can bend it with a heat gun!
If you've never bent tubing before, it can be a challenge. On making a sharp bend, the tube will want to collapse flat, and there are a variety of ways for dealing with this. The first is the method that glass workers use: As you're making the bend, blow into the closed tube to create pressure in the bend, which prevents the walls from collapsing. This actually works fairly well with the plastic tubing! I've also seen people bend plastic tubing by inserting a length of silicone tubing inside of it, which will resist the heat during bending and is flexible enough to be pulled back out after the bend is made. Check out aquarium forums for good resources on bending rigid plastic tubing.
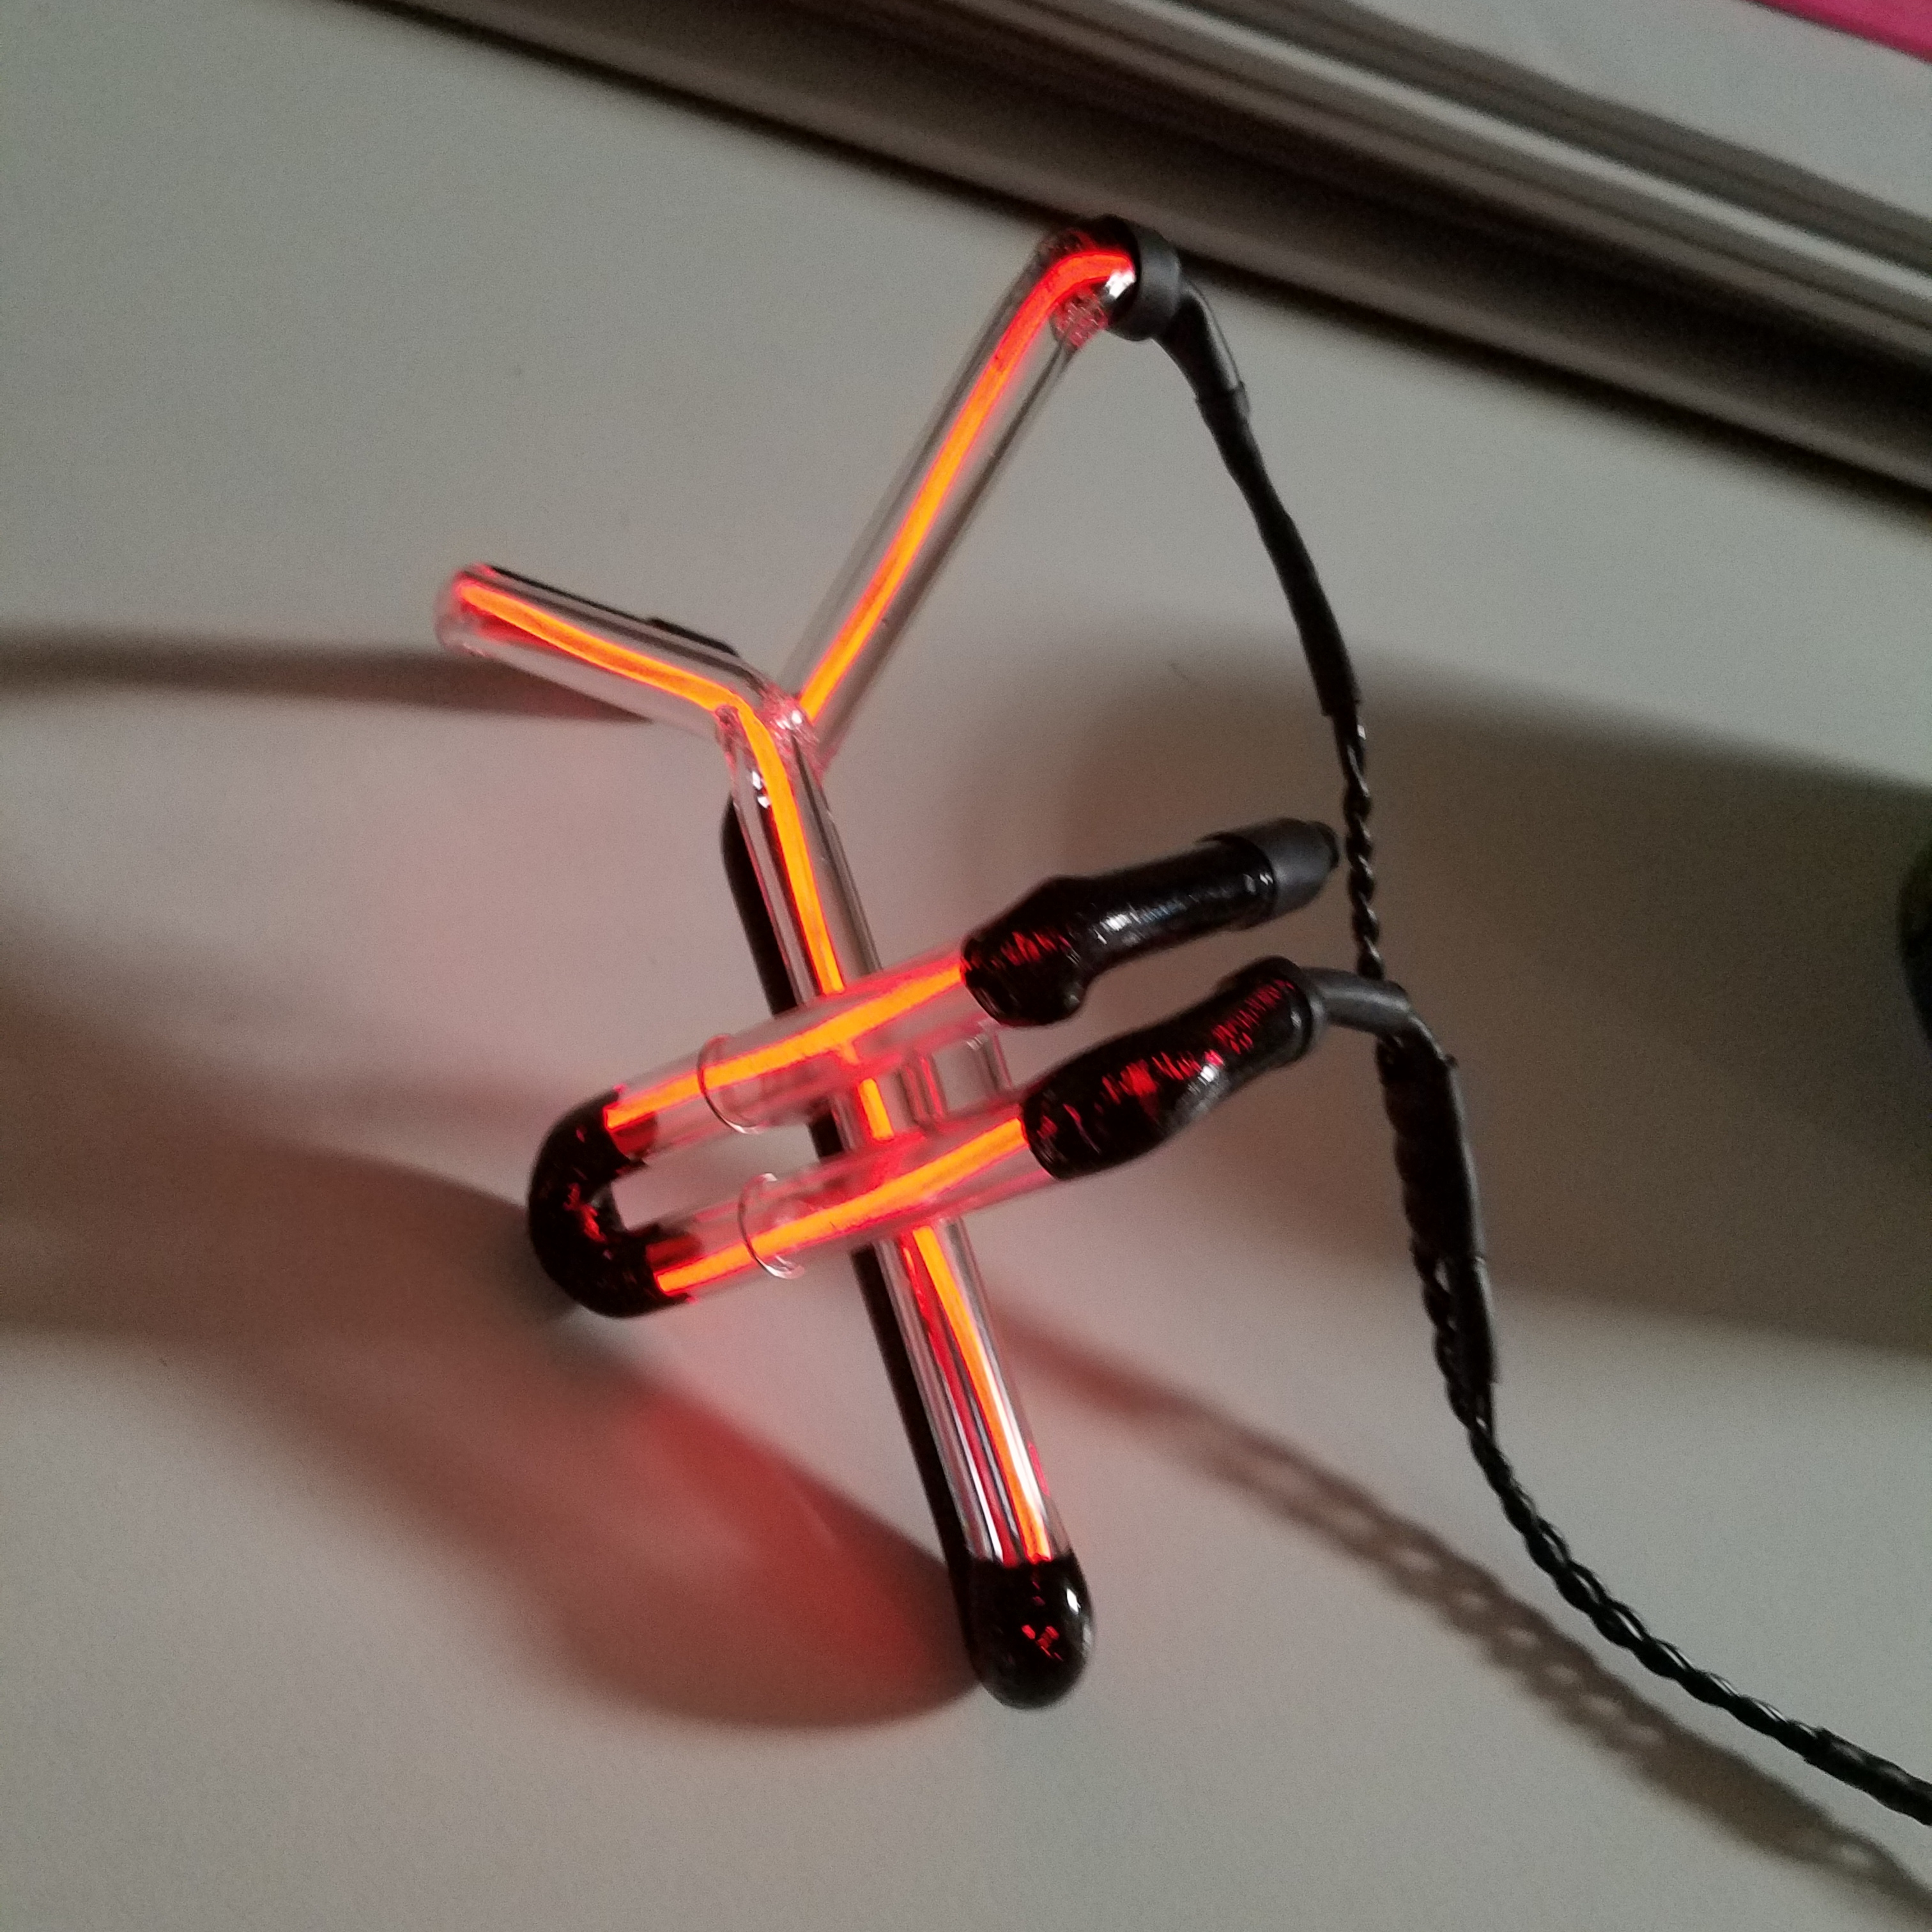
The method that I eventually came up with was to insert the EL wire before bending the tubing, as it can be hard to push it through tight bends after the fact. Then I heat one end of the tubing and twist it off, trapping the EL wire and sealing the end of the tube. Next, I make my bends by slowly heating the site of the bend over an upturned heat gun and blowing gently into the tube while bending. Careful not to heat the plastic too much, or else bubbles will form! Below is a time lapse of my first attempt at making a sign:
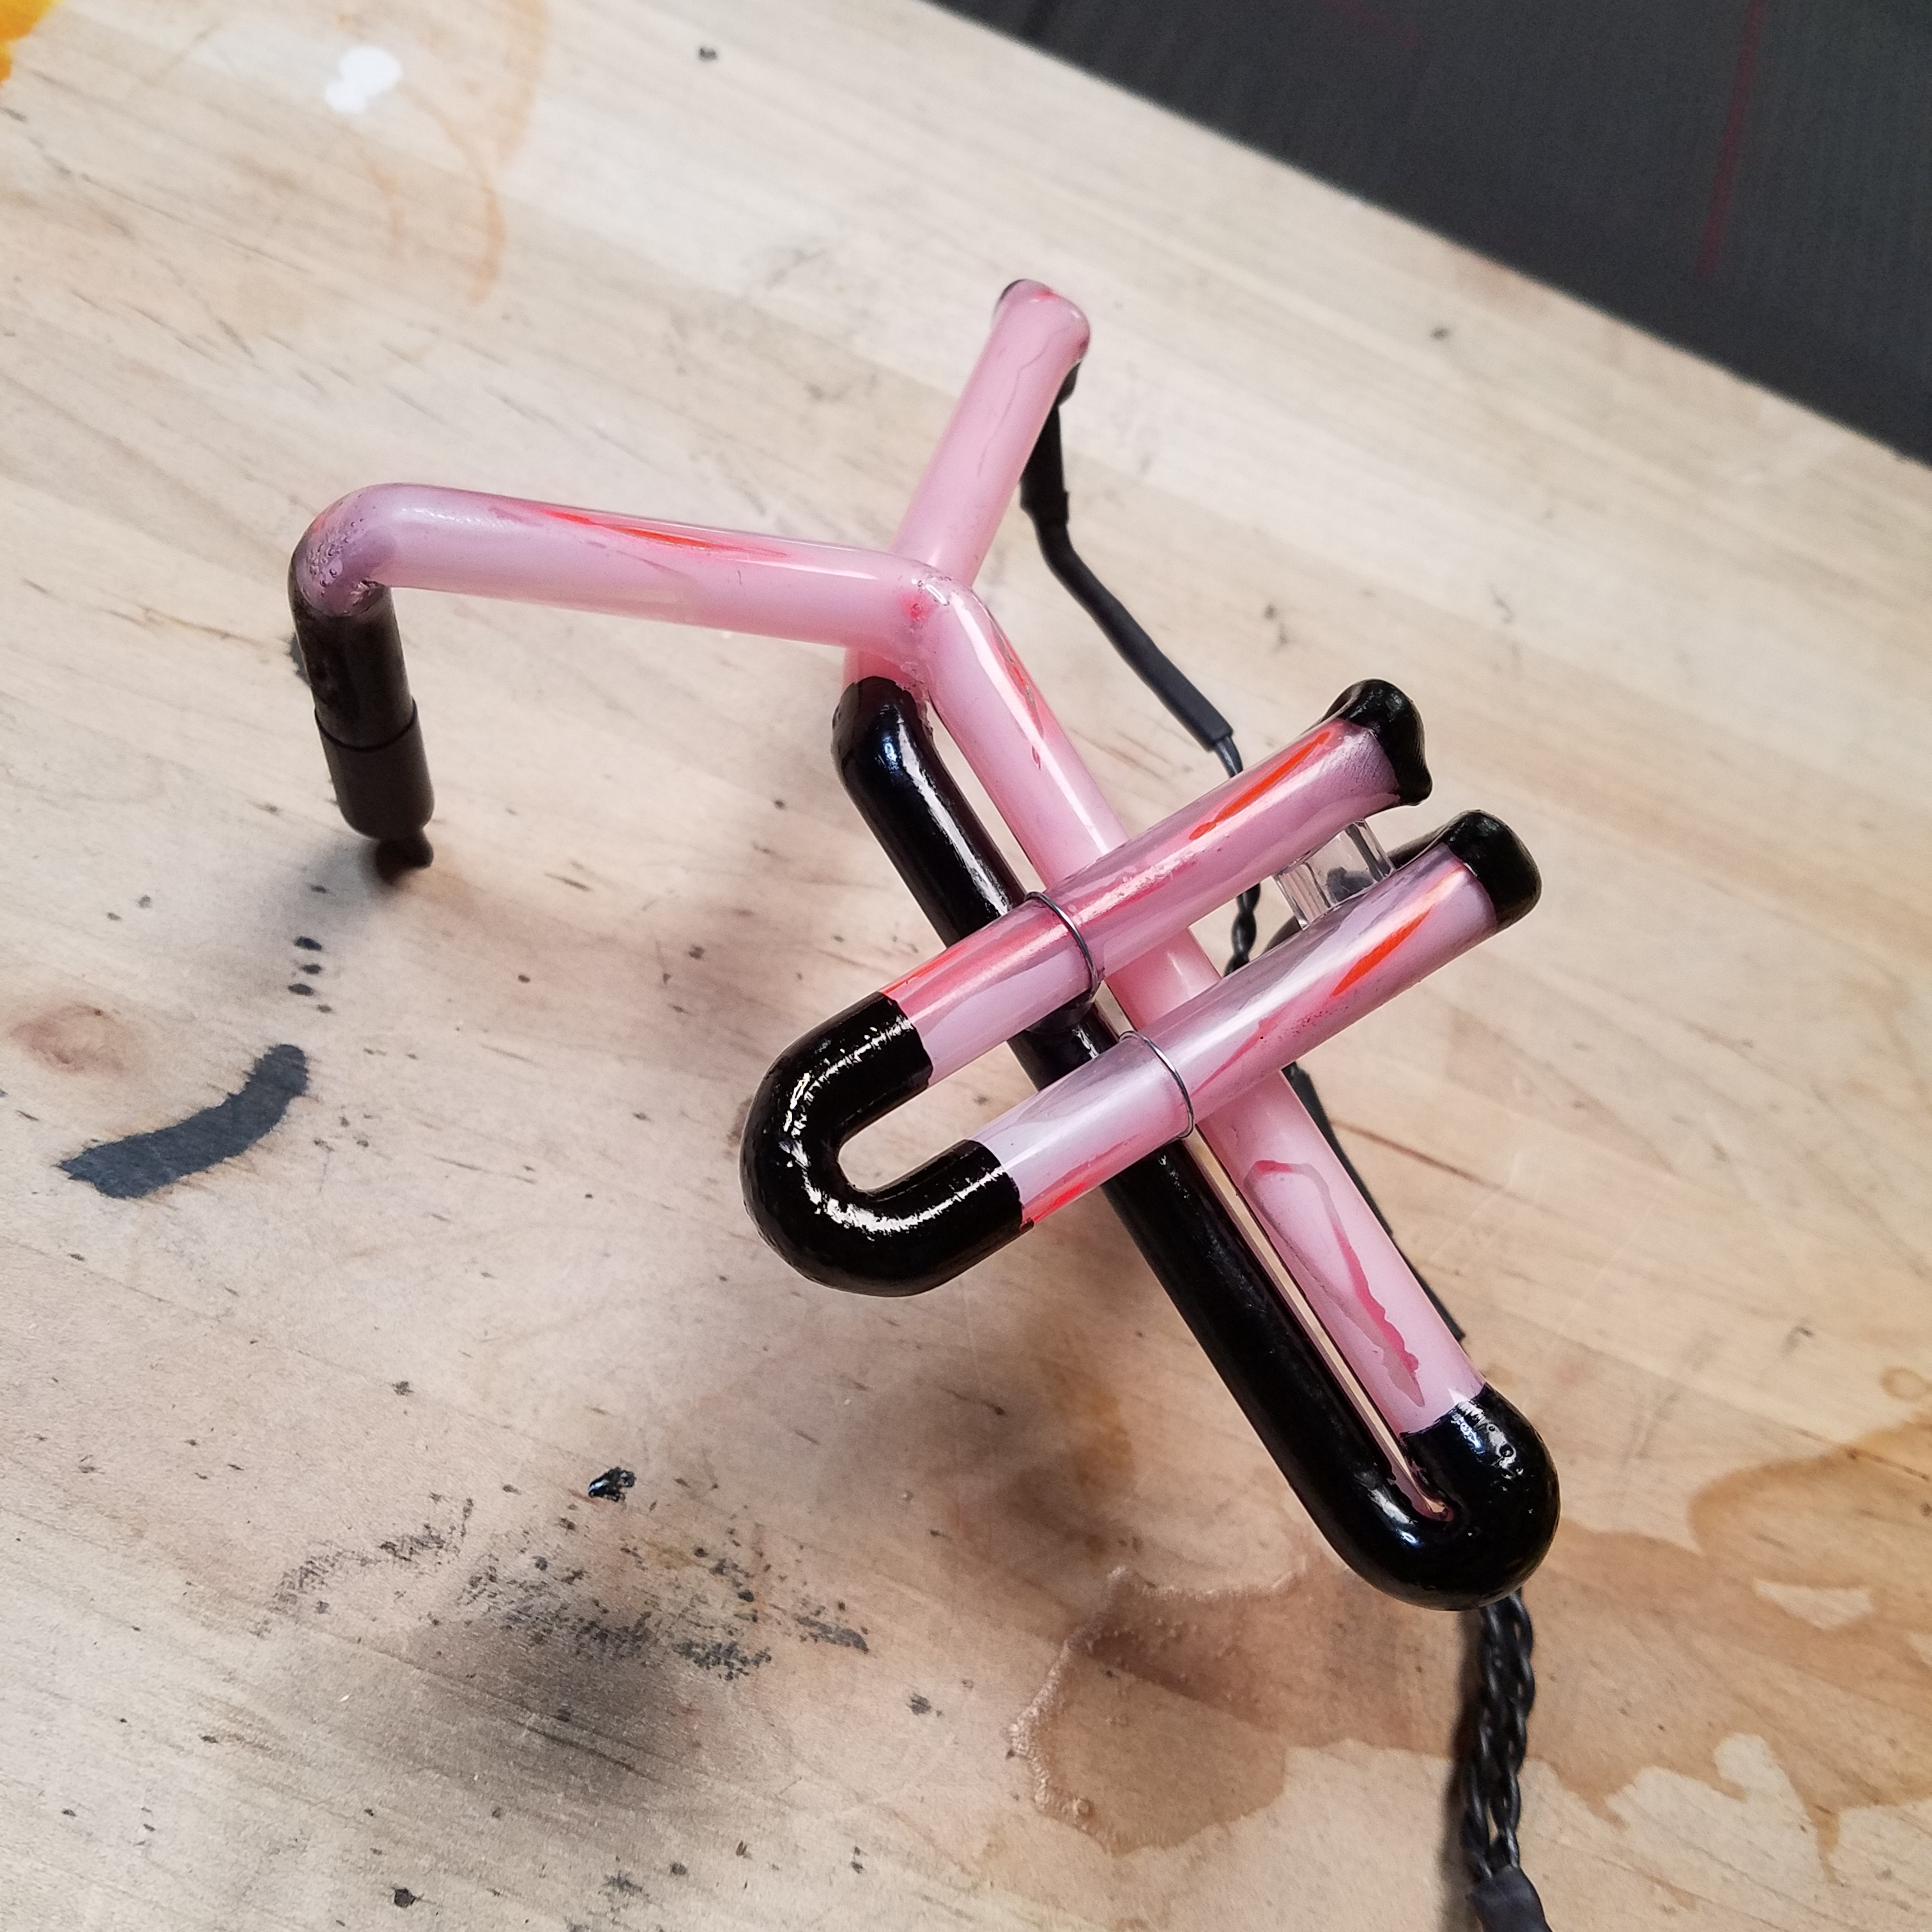
The bending went pretty well, but I ran out of tubing... so I ended up cutting the Yen sign off and keeping it because it looked the best. The next step in making it look like neon was to black out the portions of the tube that aren't supposed to be seen. Because neon tubing is one continuous light emitter (much like EL wire) and because the process of evacuating, charging and sealing a glass tube is expensive and difficult, a neon sign is often made of as few lengths of tubing as possible. This leads to parts of the tubing passing behind or between the letters or active shapes, which need to be blacked out so they don't muddle the overall appearance. I blacked my "neon tubes" with a black Sharpie paint marker.
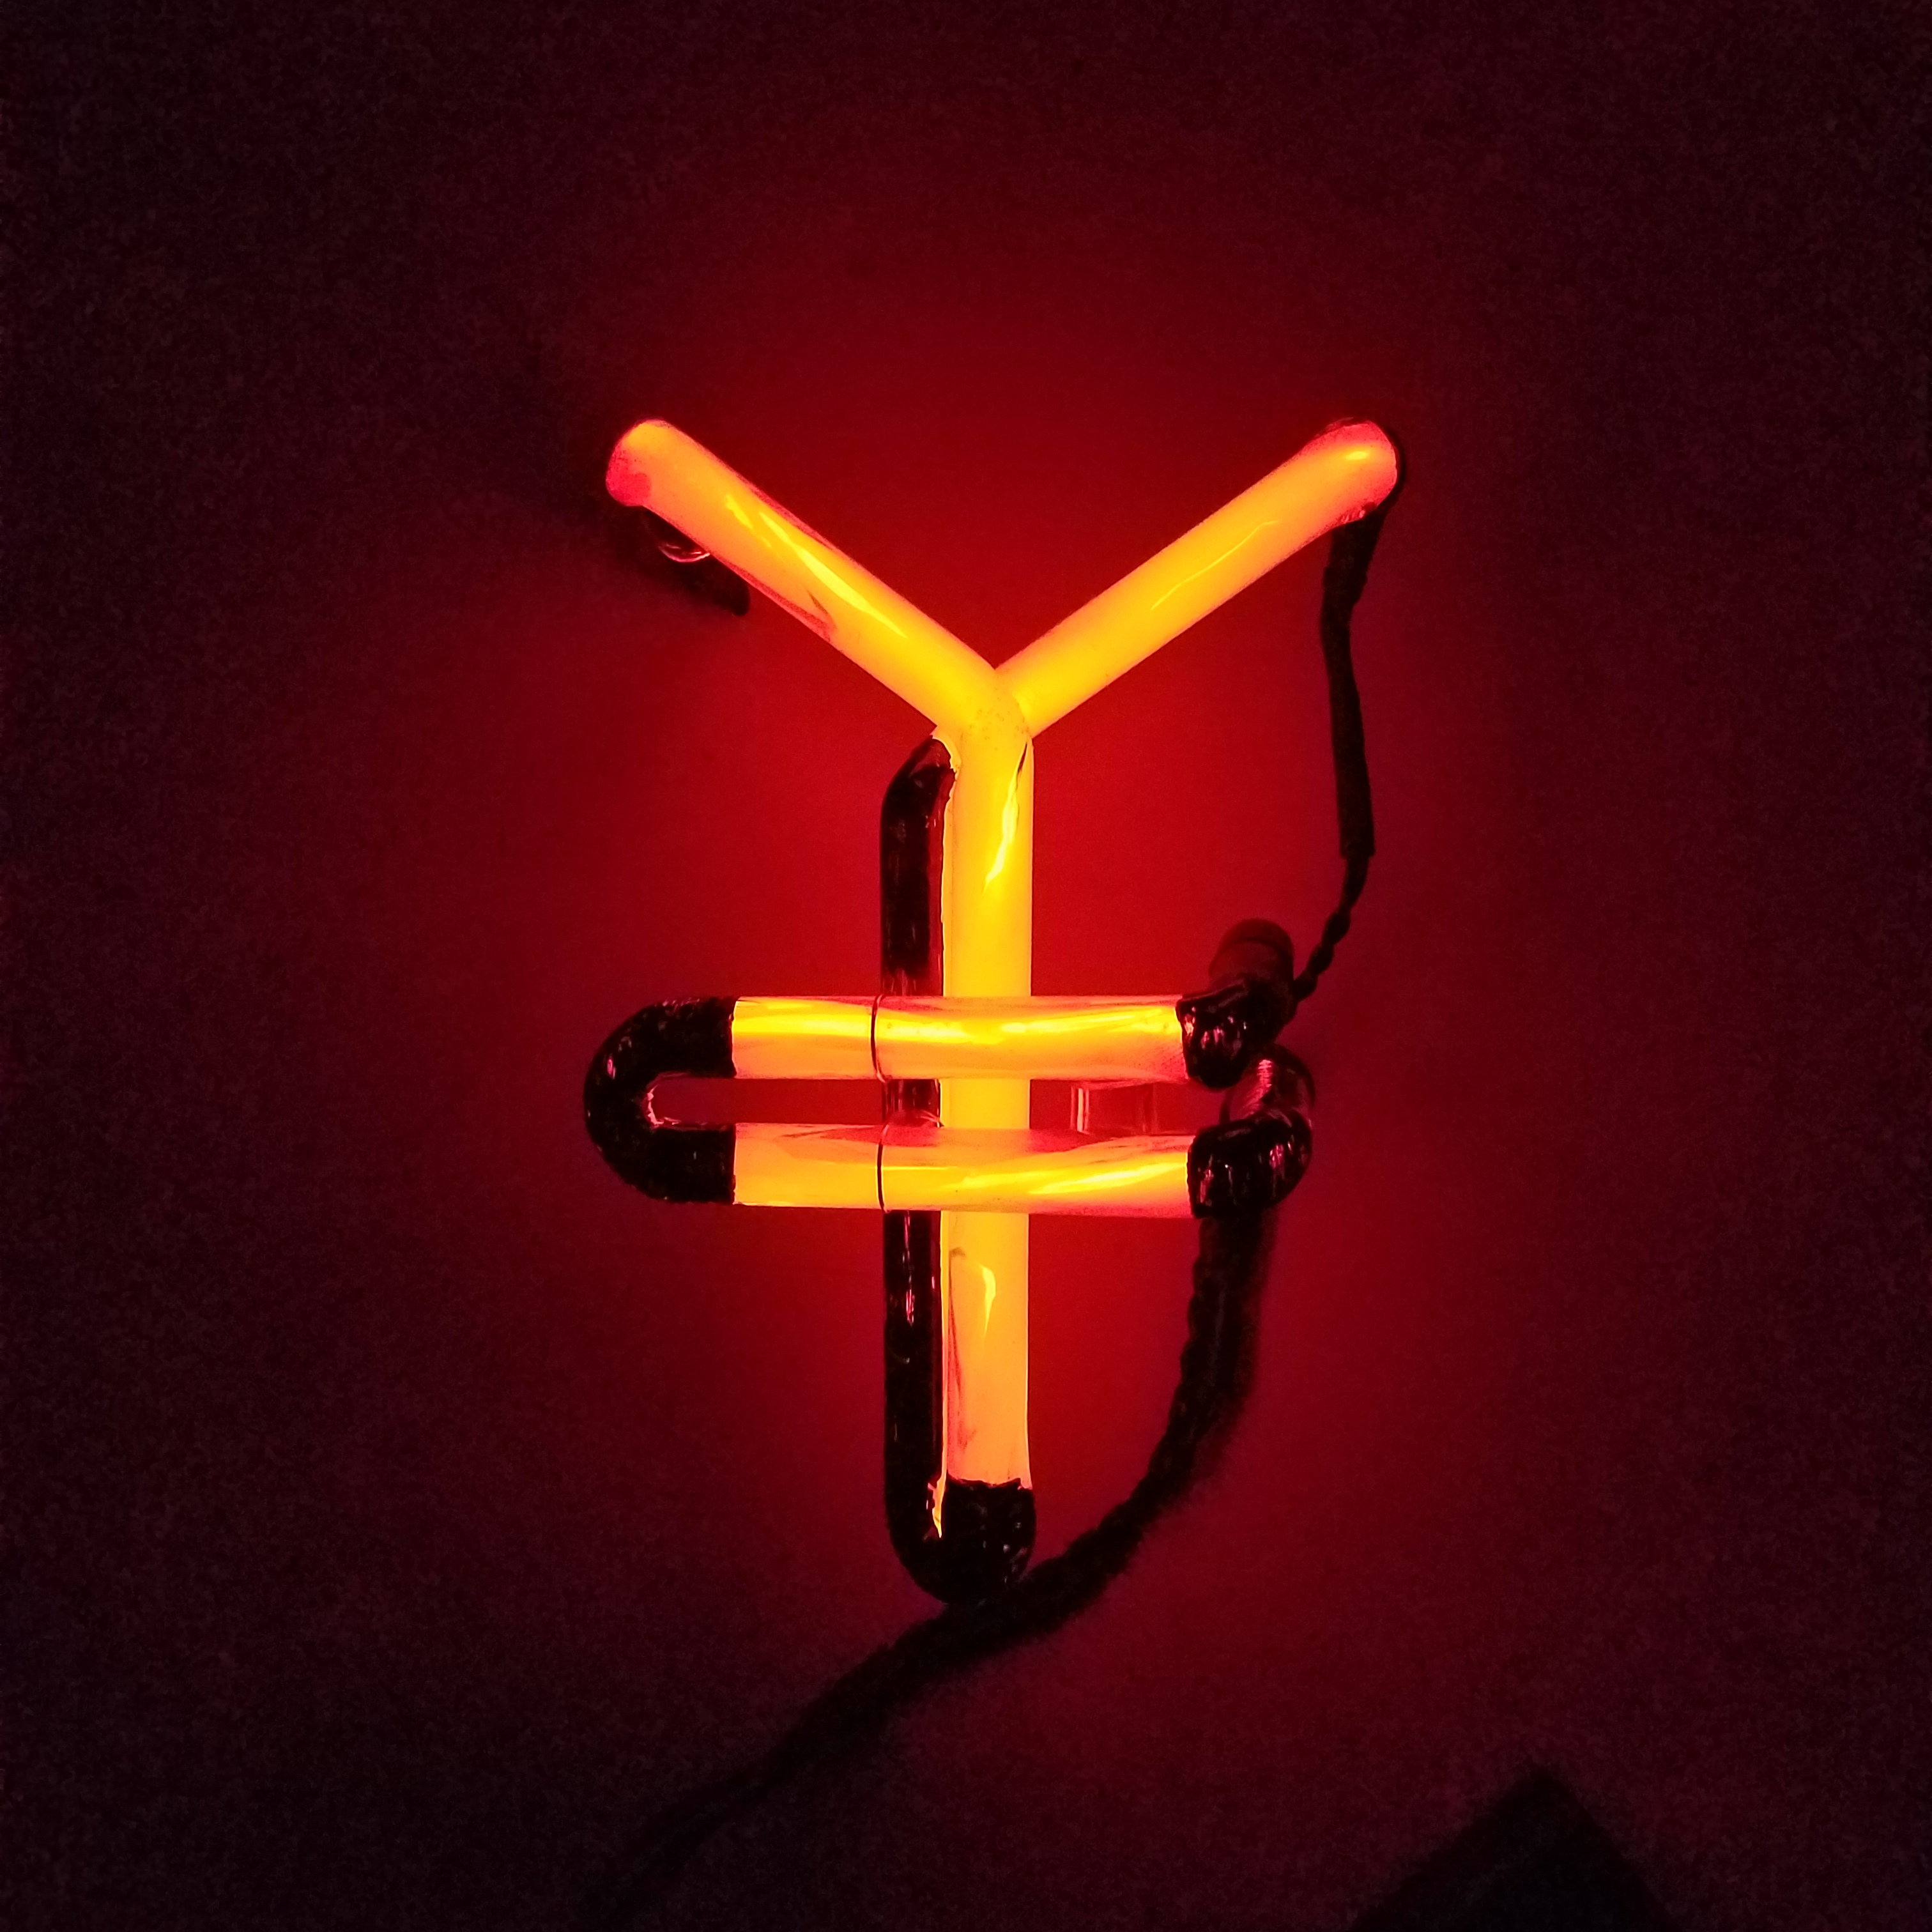
Finally, I capped the ends with thick heat-shrink tubing to emulate the look of electrode end-caps. Once the EL wire was hooked up, this is what it looked like:

I think it's pretty convincing, but in the dark there's really no sense that the plastic tubing is there at all, and because the EL wire is strung loosely, the shape looks a little wavy. What we need is a diffuser. Luckily, I may have a solution! Polycarbonate is soluble in acetone, so by filling the tubing with acetone and shaking it around a bit, we should be able to dissolve a portion of the inner wall and redeposit it. This will give the powdery white appearance of phosphor-coated glass. Unfortunately, the acetone will also attack the PVC jacket on the EL wire so the redeposited polycarbonate will be tinted the color of your EL wire. You may be able to avoid this by treating the tubing before inserting the EL wire and bending it, but you'll likely lose a portion of the frosting in the bends, as the heat will polish the inner wall down a bit. After a pretty rough acetone treatment, the sign lost a little of its daylight charm, but it looks much better in the dark! I think if you take a little more care in the application, the acetone frosting method could work quite well!
I'll keep working on this because I have a few projects that I think would look really nice with some "neon" signage. If you have any questions, ask me in the comments! If you've done something like this before, I'd love to see it!


Nick...how about frosting the outside of the tube with a fine grit(1000?) sandpaper. You lose the gloss appearance of the glass tube, but gain a great diffusion element. Also, I worked in the telco industry for a while. Better than using compressed air to blow a wire through is to use a vacuum to pull it. A shop vac and a good seal will pull a hell of a lot through a tube. For this I would do two stages. Pull a piece of high strength fishing line and then the wire. To counteract the slipperiness of the wire use a half hitch knot around the wire in at least three spots, taping in front (from the pulling side) of the knot. This way when you pull it the the line will cinch down on the wire and bite into the tape.It's hard to describe but it works. We have had this setup actually pull the sheathing off of a cable rather than the knots slipping free.
Edit: if you need I can post a video on YouTube explaining the process.
I wonder if you'd be able to pull the EL wire through after the bends are done by using the same trick teleco's do when putting fiber into ducts: Compressed air. Basically you send air through the tubing and feed the EL wire in along the same path: The air creates a buffer along the walls that should help the wire navigate any turns it runs into.
That's not a bad idea
You could also just have a string through the whole thing and when done tie the el wire and pull it through.
I tried this but there wasn't anything in the shop that was thin and strong enough. I suspect some high-test fishing line might work, but the other issue is tying onto the end of the PVC-coated EL wire, it's pretty slippery.
It would probably help if you sprayed some teflon dry lube into the tubing, as well.
Hey, I made one of these with a lot of mistakes and trial and error. It turned out kinda bad, but I'm working on another one and it's coming out MUCH better. Here's the finished piece. [example][http://www.josephclagg.com/projects/neonsign.jpg]
Here's some stuff I learned.] 1. I wasn't very good at blowing air into the tube to keep it from collapsing. I tried several things and filling the tube with table salt worked best. There happens to be a chemistry lab where I work, so I found to tiny rubber stoppers to keep it in. You can blow it out later with compressed air. Just don't get it wet, it will turn into a rock. 2. I found that I didn't have the patience to hold the softened plastic long enough to keep the shape and also would sometimes reheat bends while trying to heat another part. I have access to a laser cutter, so I made a cardboard jib which you can see in the photo for another piece that says "lounge". This makes it way easier to get a perfect shape. You could use an x-acto knife in lieu of a laser. 3. As for putting the wire in first or last and how to pull it through. I tried putting it in first and also the vacuum and compressed air settings. The vacuum method worked ok, but tight bends were out of the question. What I ended up doing was using a Dremel to cut out slots in the back of the tube near tight bends that way you can force it through a little at a time. You can't see the cuts at all from the front and it makes it easy to get all the salt out. 4. I wasn't satisfied with the level of diffusion the acetone gave me. I'm still experimenting.
Hello, I am wondering if you needed to mount the 'neon light' onto a backboard like the real ones or whether it really is sturdy enough to hold up on its own? Thank you and look forward to hearing back
Hey! I was wondering what size of el wire you were using. 3mm or 5mm? this would also depend on the size of tubing but I figured you were using a size of 3/8ths. Look forward to hearing back as I am really excited to do this myself!
I used the red EL wire that we sell, which I believe is about 2.5mm, probably 3 nominal. The tubing is indeed 3/8 OD that I bought from this listing: https://www.amazon.com/gp/product/B000OMHI0E/
Good luck! Hope your project goes well!
Thank You!
what diameter tube are you using?
There are also frosted-glass spray coatings available that are typically used to create privacy glass from clear windowpanes. I haven't tried them on PC tubing, but if it sticks to glass it'll stick to nearly anything. Most big home improvement stores will carry it or Amazon, of course.
I really like the final effect. You did a great job dressing it up to look like real neon. The color seems close as well, although my monitor isn't calibrated, so it could be way off.
For rigid tube bending look to the custom PC industry. They've been using it for years and have all sorts of bending jugs, bending cord and the like available for doing it nicely.
Performance-PCs sells a lot of rigid tube accessories: http://www.performance-pcs.com/acrylic-tube-tools
I know with copper they will fill it with sand to keep it from pinching. I thought the sand might be rough on the surface of the tubing, but it may actually help the texturing. There are also benders that look like floppy springs you sleeve over the tubing and tube benders that are made for stainless tubing.