Hardware Hump Day: Game Day Spirit Fingers
Take your Big Game party to the next level with some electronically embedded fan gear!

Ah, early February. The magical time of year when the holiday buzz has burned out, but winter keeps on persisting. It can be a tough time of year as we eagerly anticipate long, warm days...unless you happen to love football. Then it’s your time, sports fan! The Big Game is this Sunday, and we want to help you bring your fan gear to the next level.
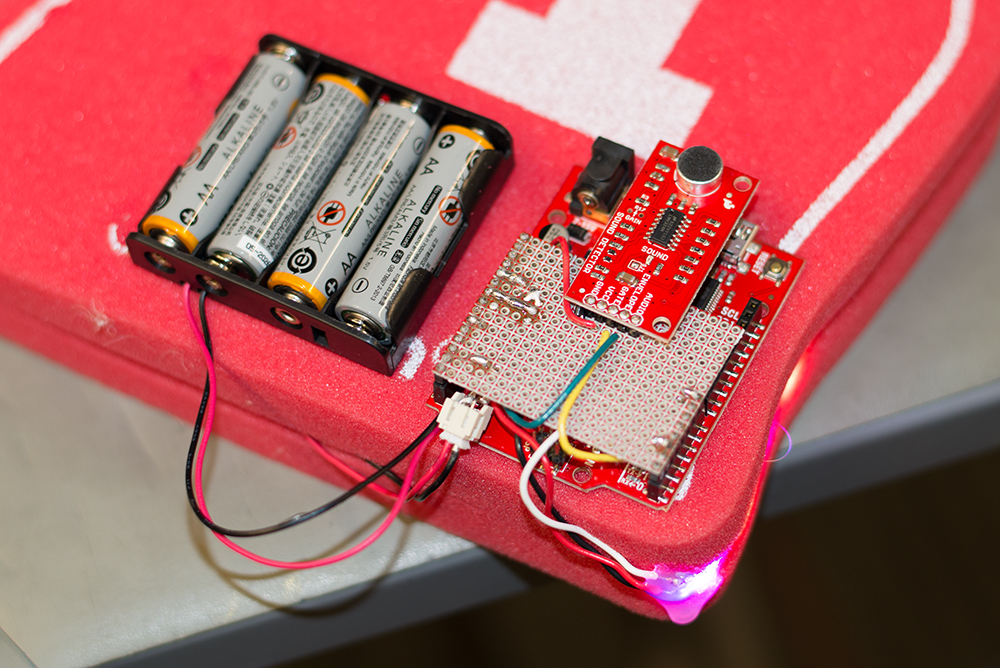
Impress friends at your game viewing party with our Spirit Finger!
The Spirit Finger is a foam finger embedded with a sound detector and an LED strip --- both controlled by a SparkFun RedBoard. The sound detector continuously listens to noise levels in the room. When the volume increases to a super loud level (think cheering for a touchdown), the LED strip is triggered. The idea is that the Spirit Finger will animate whenever you and your friends start cheering.

Whether you are a Falcons fan or a Patriots fan, we have you covered. I’ve written an Arduino sketch for both teams and built out both options. If you want to make a Spirit Finger for another team entirely, just change the RGB values assigned to the LEDs in the sketch to your team colors! No matter who you cheer for, the hardware remains the same.
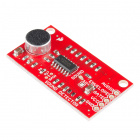
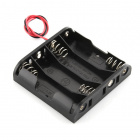
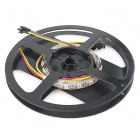
To build your own Spirit Finger, you will need the following materials:

The following diagram illustrates my circuit:

Having a hard time seeing the circuit? Click on the wiring diagram for a closer look.
Below are the Falcons and Patriots sketches, respectively. I’ve commented where to change the RGB color value to adjust to your team colors in both sketches.
Please note that you will need to download the Adafruit NeoPixel Library. If you are unfamiliar with Arduino libraries, feel free to check out our tutorial.
Falcons:
//Spirit Fingers:Falcons by Melissa Felderman for SparkFun Electronics

//include adafruit neopixel library
#include <Adafruit_NeoPixel.h>
#ifdef __AVR__
  #include <avr/power.h>
#endif

//define neopixel pin
#define PIN 7

int thresh = 40; //define threshold for sound detector
int pixNum = 57; //define number of neopixels on your strip

Adafruit_NeoPixel strip = Adafruit_NeoPixel(pixNum, PIN, NEO_GRB +            NEO_KHZ800); //define neopixel strip


 // Define hardware connections for sound detector
#define PIN_GATE_IN 2
#define IRQ_GATE_IN  0
#define PIN_LED_OUT 13
#define PIN_ANALOG_IN A0

// soundISR()
// This function is installed as an interrupt service routine for the pin
// change interrupt.  When digital input 2 changes state, this routine
// is called.
// It queries the state of that pin, and sets the onboard LED to reflect that
// pin's state.
void soundISR()
{
  int pin_val;

  pin_val = digitalRead(PIN_GATE_IN);
  digitalWrite(PIN_LED_OUT, pin_val);
}

void setup()
{
  //start serial communication
  Serial.begin(9600);

  //  Configure LED pin as output
  pinMode(PIN_LED_OUT, OUTPUT);

  // configure input to interrupt
  pinMode(PIN_GATE_IN, INPUT);
  attachInterrupt(IRQ_GATE_IN, soundISR, CHANGE);

  //initialize LED strip
  strip.begin();

  //set LED strip to off
  for(int i=0; i< strip.numPixels(); i++){
      strip.setPixelColor(i, strip.Color(0,0,0));
     strip.show();
   }
  //update LEDs
  strip.show();

  // Display status
  Serial.println("Initialized");


}

void loop()
{
  int value; //variable to store volume level

  // Check the envelope input on sound detector
  value = analogRead(PIN_ANALOG_IN);

  // print the value in the serial moniter for debugging and calibrating
  Serial.print("Status: ");
  Serial.println(value);

  //keep LED strip off when volume is less than the threshold
  if(value < thresh)
  {
    for(int i=0; i< strip.numPixels(); i++){
      strip.setPixelColor(i, strip.Color(0,0,0));
     strip.show();
   }
  }
 //trigger LED strip when volume is about the threshold
  else if(value > thresh)
  {
    //assigns white to every other LED - even numbers
    for(int i=0; i< strip.numPixels(); i = i +2){
      strip.setPixelColor(i, strip.Color(255, 255,255)); //change RGB value here to color1
     strip.show();

   }
   //assigns off for everyother LED - odd numbers
   for(int i=1; i<strip.numPixels(); i= i+2){
    strip.setPixelColor(i, strip.Color(0,0,0)); //change RGB value here to color2
    strip.show();
   }

   delay(100);

   //assigns off for every other LED - even numbers
    for(int i=0; i< strip.numPixels(); i = i +2){
      strip.setPixelColor(i, strip.Color(0, 0,0)); //change RGB value here to color2
     strip.show();

   }
   //assigns white for every other LED - odd numbers
  for(int i=1; i<strip.numPixels(); i= i+2){
    strip.setPixelColor(i, strip.Color(255,255,255)); //change RGB value here to color1
    strip.show();
   }
   delay(100);
  }

}
Patriots:
//Spirit Fingers:Patriots by Melissa Felderman for SparkFun Electronics

//include adafruit neopixel library
#include <Adafruit_NeoPixel.h>
#ifdef __AVR__
#include <avr/power.h>
#endif

//define neopixel pin
#define PIN 7

int thresh = 40; //define threshold for sound detector
int pixNum = 56; //define number of neopixels on your strip

//define neopixel strip
Adafruit_NeoPixel strip = Adafruit_NeoPixel(pixNum, PIN, NEO_GRB + NEO_KHZ800);


// Define hardware connections
#define PIN_GATE_IN 2
#define IRQ_GATE_IN  0
#define PIN_LED_OUT 13
#define PIN_ANALOG_IN A0

// soundISR()
// This function is installed as an interrupt service routine for the pin
// change interrupt.  When digital input 2 changes state, this routine
// is called.
// It queries the state of that pin, and sets the onboard LED to reflect that
// pin's state.
void soundISR()
{
  int pin_val;

  pin_val = digitalRead(PIN_GATE_IN);
  digitalWrite(PIN_LED_OUT, pin_val);
}

void setup()
{
   //start serial communication
  Serial.begin(9600);

  //  Configure LED pin as output
  pinMode(PIN_LED_OUT, OUTPUT);

  // configure input to interrupt
  pinMode(PIN_GATE_IN, INPUT);
  attachInterrupt(IRQ_GATE_IN, soundISR, CHANGE);

  strip.begin();//initialize LED strip

  //set LED strip to off
    for(int i=0; i< strip.numPixels(); i++){
      strip.setPixelColor(i, strip.Color(0,0,0));
     strip.show();
   }
  strip.show();   //update LEDs

  // Display status
  Serial.println("Initialized");


}

void loop()
{
  //variable to store volume level
  int value;

  // Check the envelope input
  value = analogRead(PIN_ANALOG_IN);

  // print the value in the serial moniter for debugging and calibrating
  Serial.print("Status: ");
  Serial.println(value);

   //keep LED strip off when volume is less than the threshold
  if (value <= thresh)
  {
    for (int i = 0; i < strip.numPixels(); i++) {
      strip.setPixelColor(i, strip.Color(0, 0, 0));
      strip.show();
    }
  }
  //trigger LED strip when volume is about the threshold
  else if (value > thresh)
  {
     //assigns red to every other LED - even numbers
    for (int i = 0; i < strip.numPixels(); i = i + 2) {
      strip.setPixelColor(i, strip.Color(255, 0, 0)); //change RGB value here to color1
      strip.show();
    }
    //assigns off for everyother LED - odd numbers
    for (int i = 1; i < strip.numPixels(); i = i + 2) {
      strip.setPixelColor(i, strip.Color(0, 0, 255));  //change RGB value here to color2
      strip.show();
    }
    delay(100);
    //assigns off for everyother LED - even numbers
    for (int i = 0; i < strip.numPixels(); i = i + 2) {
      strip.setPixelColor(i, strip.Color(0, 0, 255)); //change RGB value here to color2
      strip.show();
    }
    //assigns red to every other LED - odd numbers
    for (int i = 1; i < strip.numPixels(); i = i + 2) {
      strip.setPixelColor(i, strip.Color(255, 0, 0)); //change RGB value here to color1
      strip.show();
    }
    delay(100);

  }

}
What projects are you making for the Big Game --- and for which team? Share with us in the comments below!
Interested in learning more about LEDs?
See our LED page for everything you need to know to start using these components in your project.


I will offer a caution regarding this design. It is shown with 4 AA cells in series, directly connected to the LED strip power. The WS2812 LED spec sheet list the rated voltage as "+6.0 ~+7.0". Four new AA cells can add up to > 6.0V, so there is already a risk of damage. Worse, there will be a plug-in transient, when the wiring inductance builds up a large current charging the 60 ceramic caps of the strip, causing an overshoot theoretically to as much as double the battery voltage. In the circuit depicted, the wires are short, limiting overshoot. Adapting the design to use longer wires would increase the damage risk. I broke a WS2812 strip in this way. Full protection can be had by regulating the strip supply to 5V. Mitigation only of the transient can be achieved by adding even a fractional-ohm resistor in series with the strip supply.
The NeoPixel Uberguide recommends a 300-500 Ohm resistor between the Arduino data out pin and the NeoPixel data in pin. Also, a 1000 µF cap across the battery + and - is recommended. If you apply the battery power to the Arduino, then you can use its 5V regulated output pin, which can theoretically provide up to 1 amp. That would mean you could connect 16 NeoPixels at full power, or 32 at half power, etc.
The data-line resistor prevents transmission line overshoot, if at the driving end. The 1000uF capacitor likely has ESR to diminish the connection transient, if located at the load end (only makes it worse at the battery end). Neither improvement addresses >6VDC supply voltage. Regulated voltage with limited current is indeed the way to go.
Doh! My mild dyslexia kicked in pretty hard here. I thought the title had 'fidget spinner' in it.
Any who, nice project and go sport ball!