IoTuesday: Healthier Eating – Fabricating the Digital Pantry
In this next-to-last installment of the Digital Pantry project, we do some enclosure fabrication and build our own vacuum molding table!

This article serves as Part 4 to my IoT Smart Pantry project. You can check out Part 2 right here as well as Part 3 here. We're nearing the end of the build, so look out for the completed project next time!
---Nick
Last time I wrote an update on this project, I was successfully scanning UPCs and retrieving nutritional information via the Nutritionix API. Also, the last time I checked in, I had started to build a food storage system in the form of a carousel in the enclosure of the Smart Pantry. However, you all had a few really good comments about wanting the food scale functionality more than automated food storage and retrieval. So I decided to tear down the enclosure that I had started to build and trim everything down to a smaller form factor.
This enclosure started out the same way as the original, with a bunch of foam core board and masking tape. I like working in foam core and tape because it's easy to cut, shape and rearrange things --- sort of "sketching" as you go. Foam core also has a flat, smooth surface and enough structural rigidity to give the impression of a more substantial material.
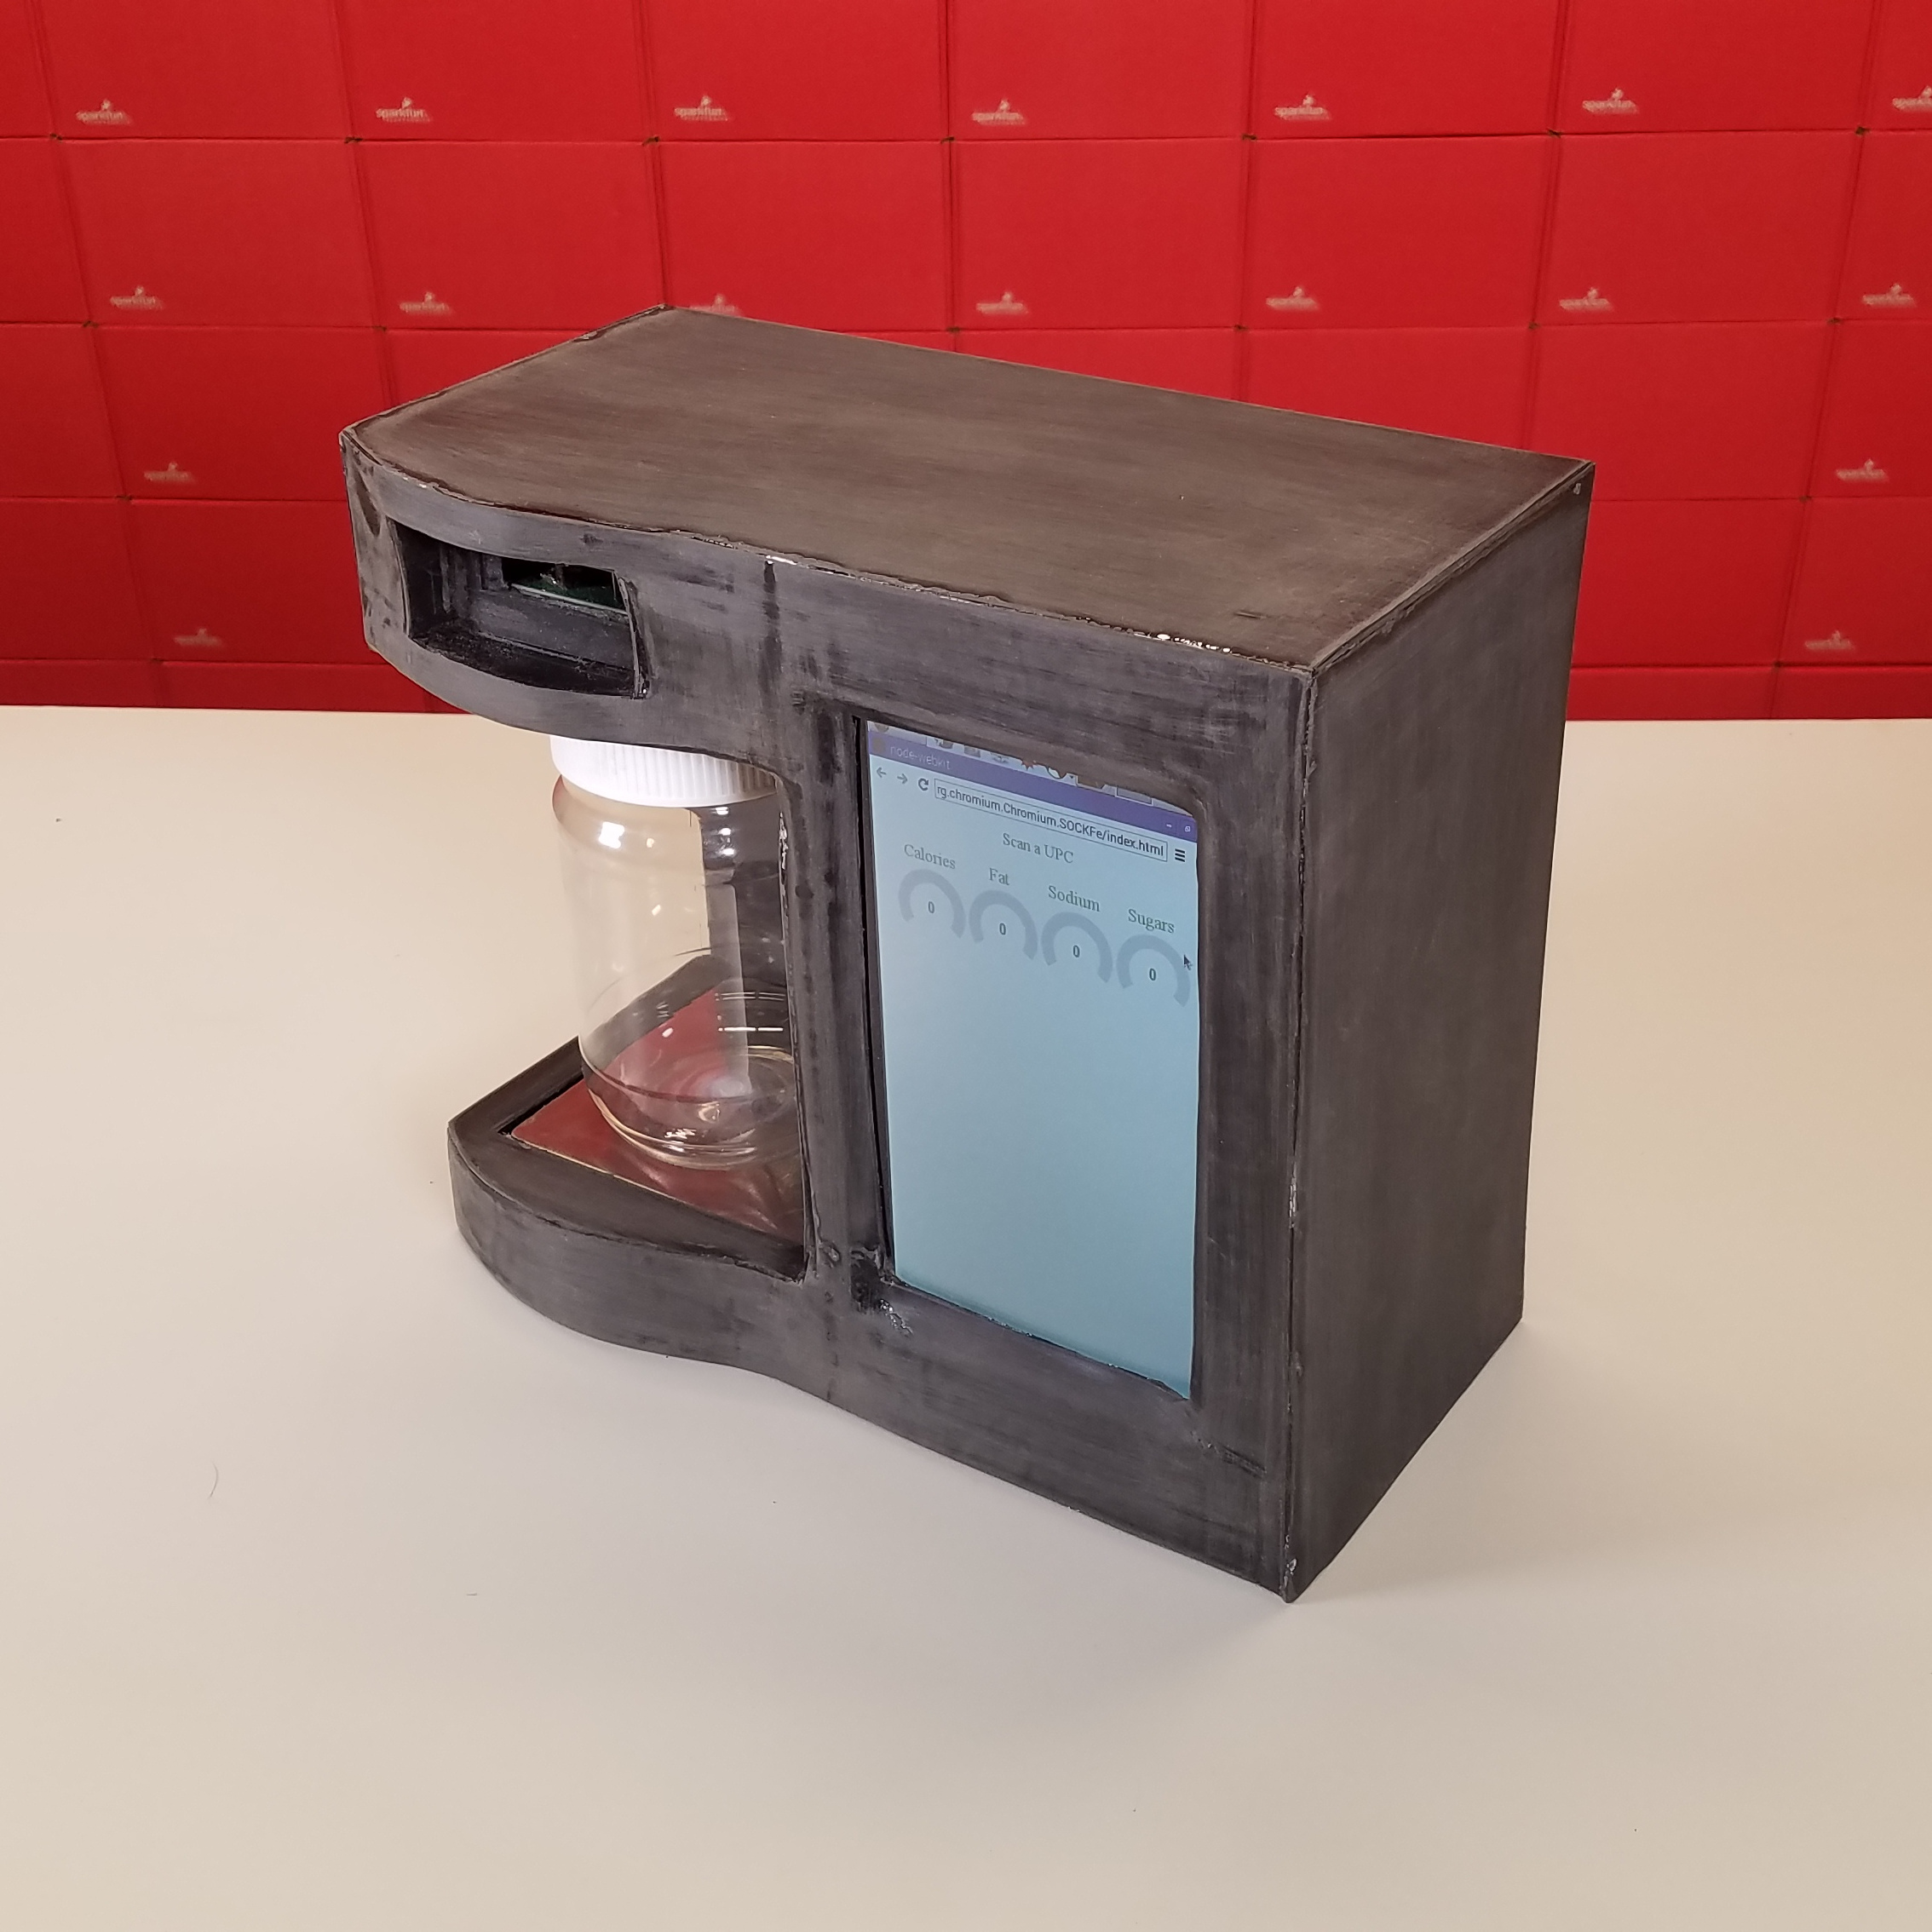
After a process of trial and error, I finally came up with this design:
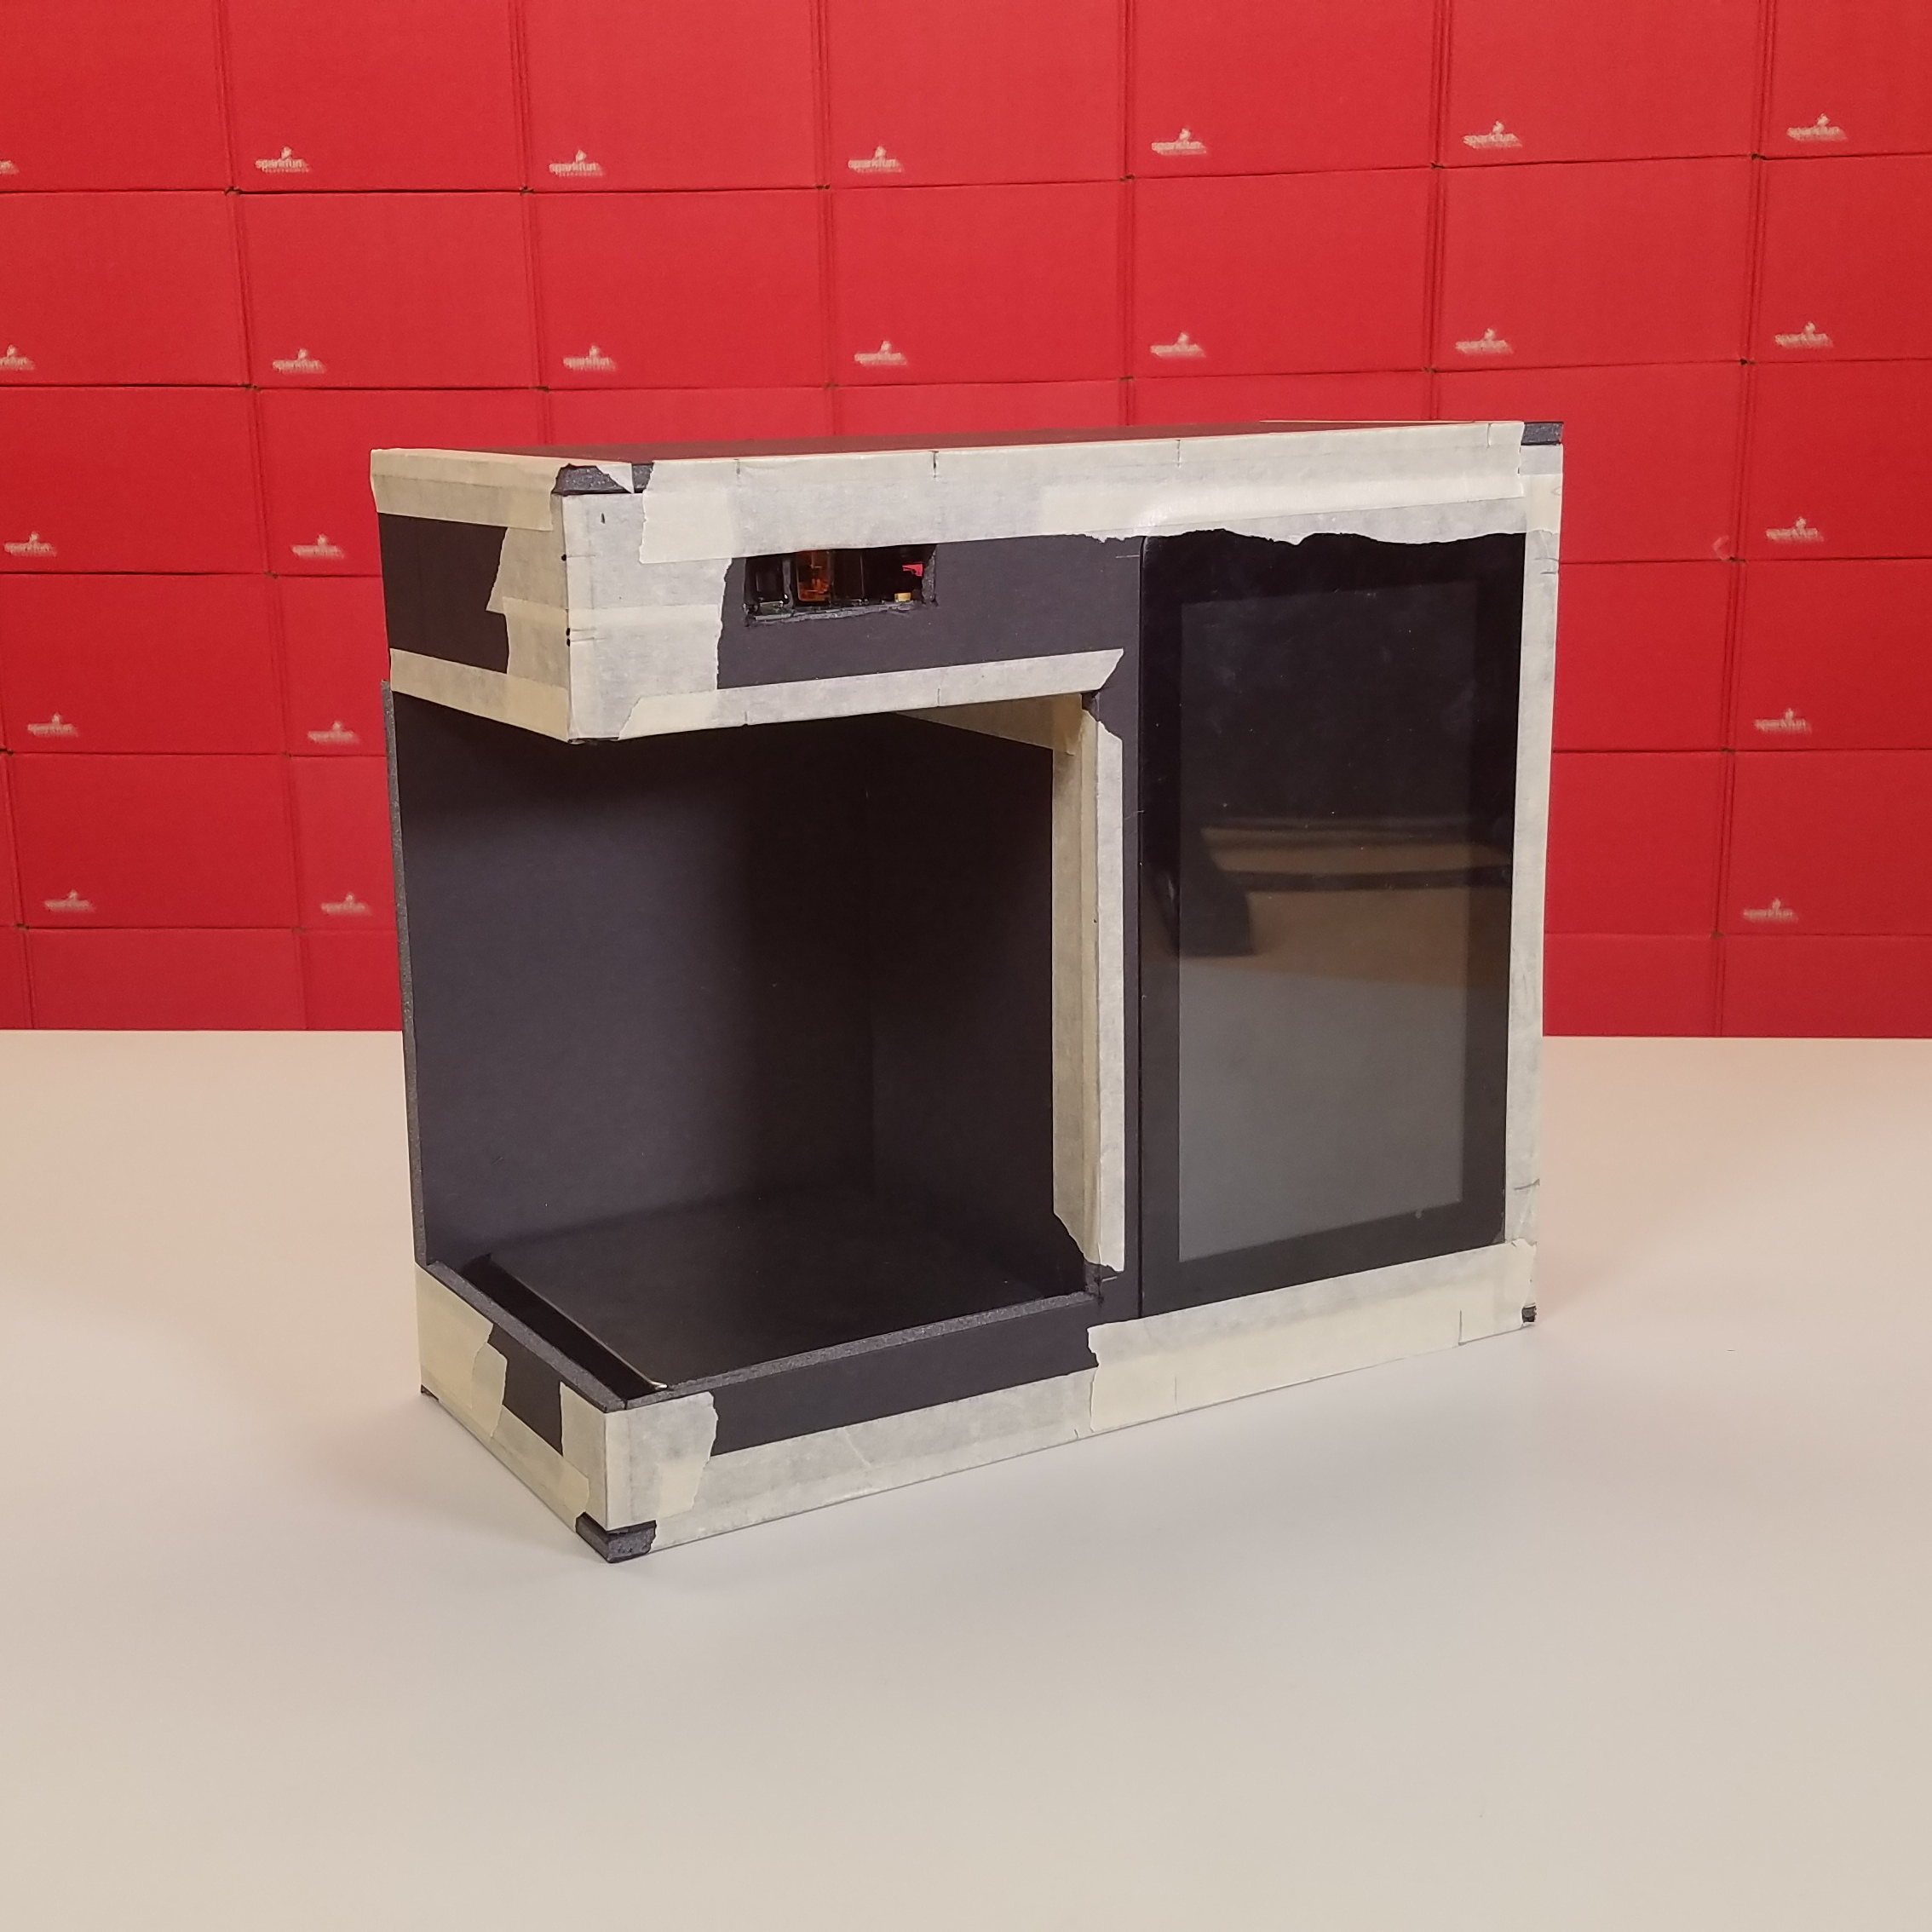
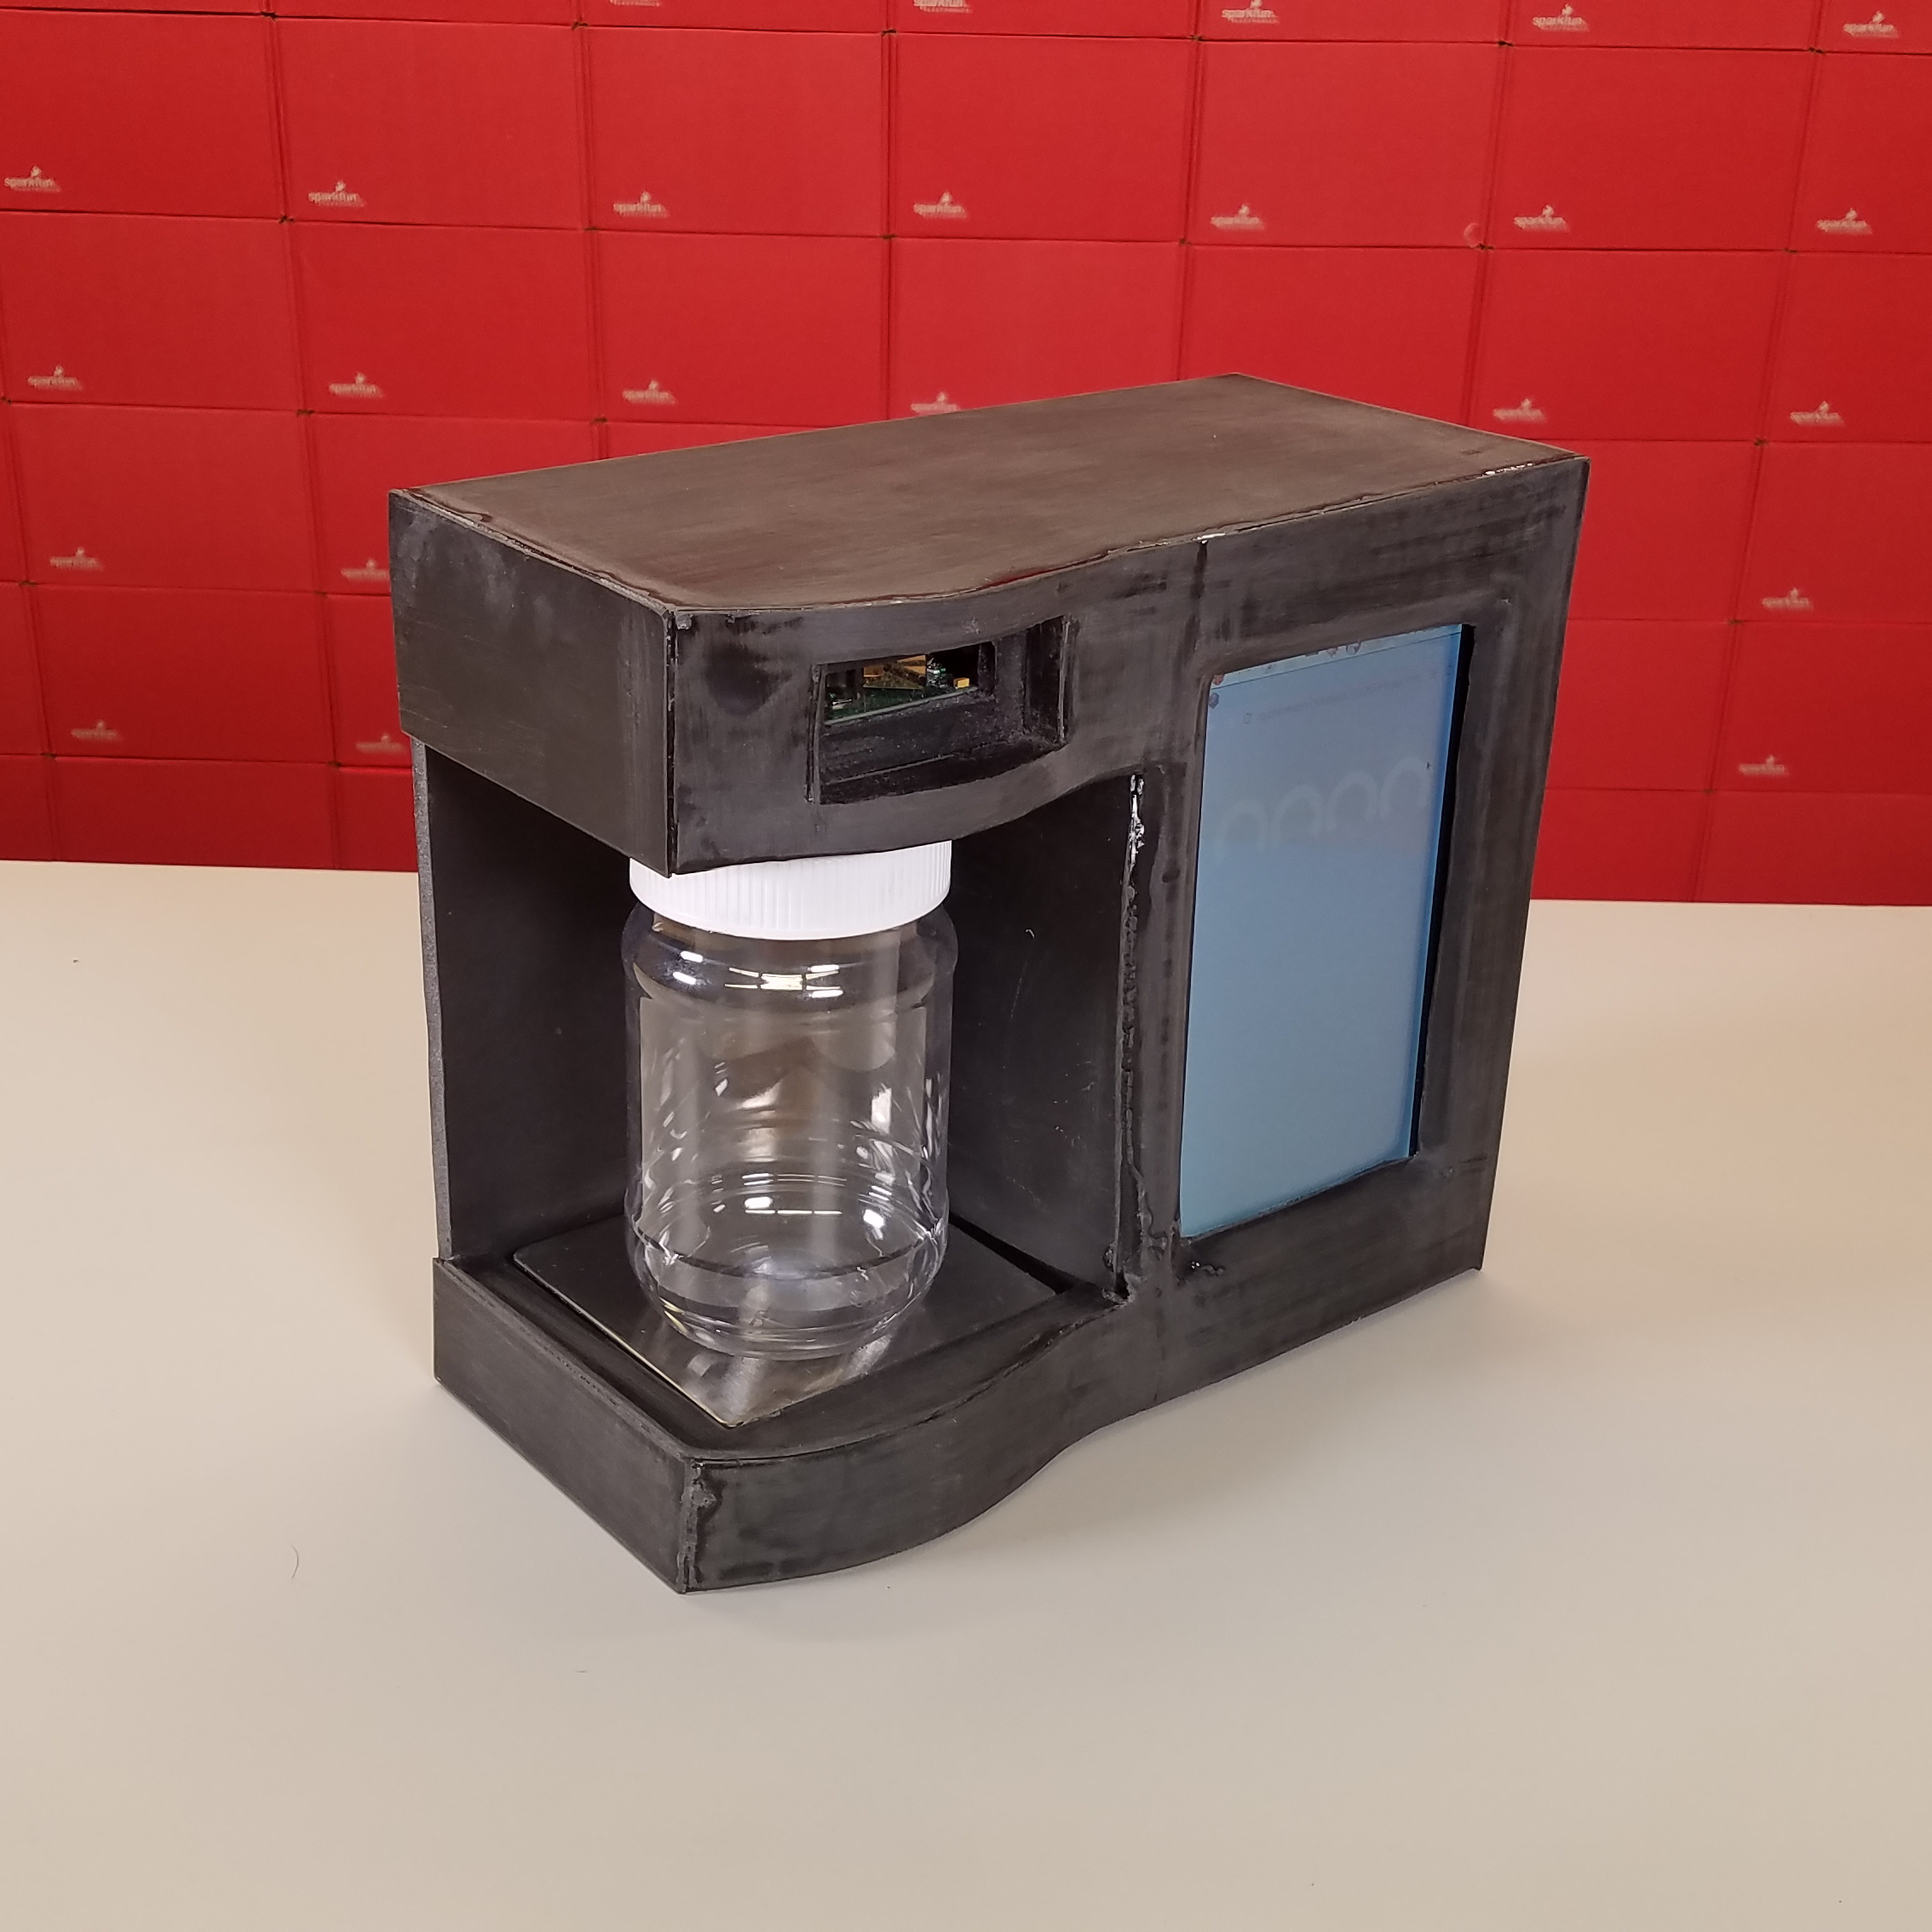
This is basically as small as you can make it while keeping the 7" touchscreen. I took some design cues from small kitchen appliances, and that's why it looks a lot like a coffee machine. The idea is that this unit would sit on the kitchen counter or would be attached to the wall and allows the user to weigh, measure and index their foodstuff before placing it in traditional pantry storage. The hardware hasn't changed since the last post (except, of course, that I removed the motor and motor controller for the carousel). Here you can see all of the parts stuffed in:
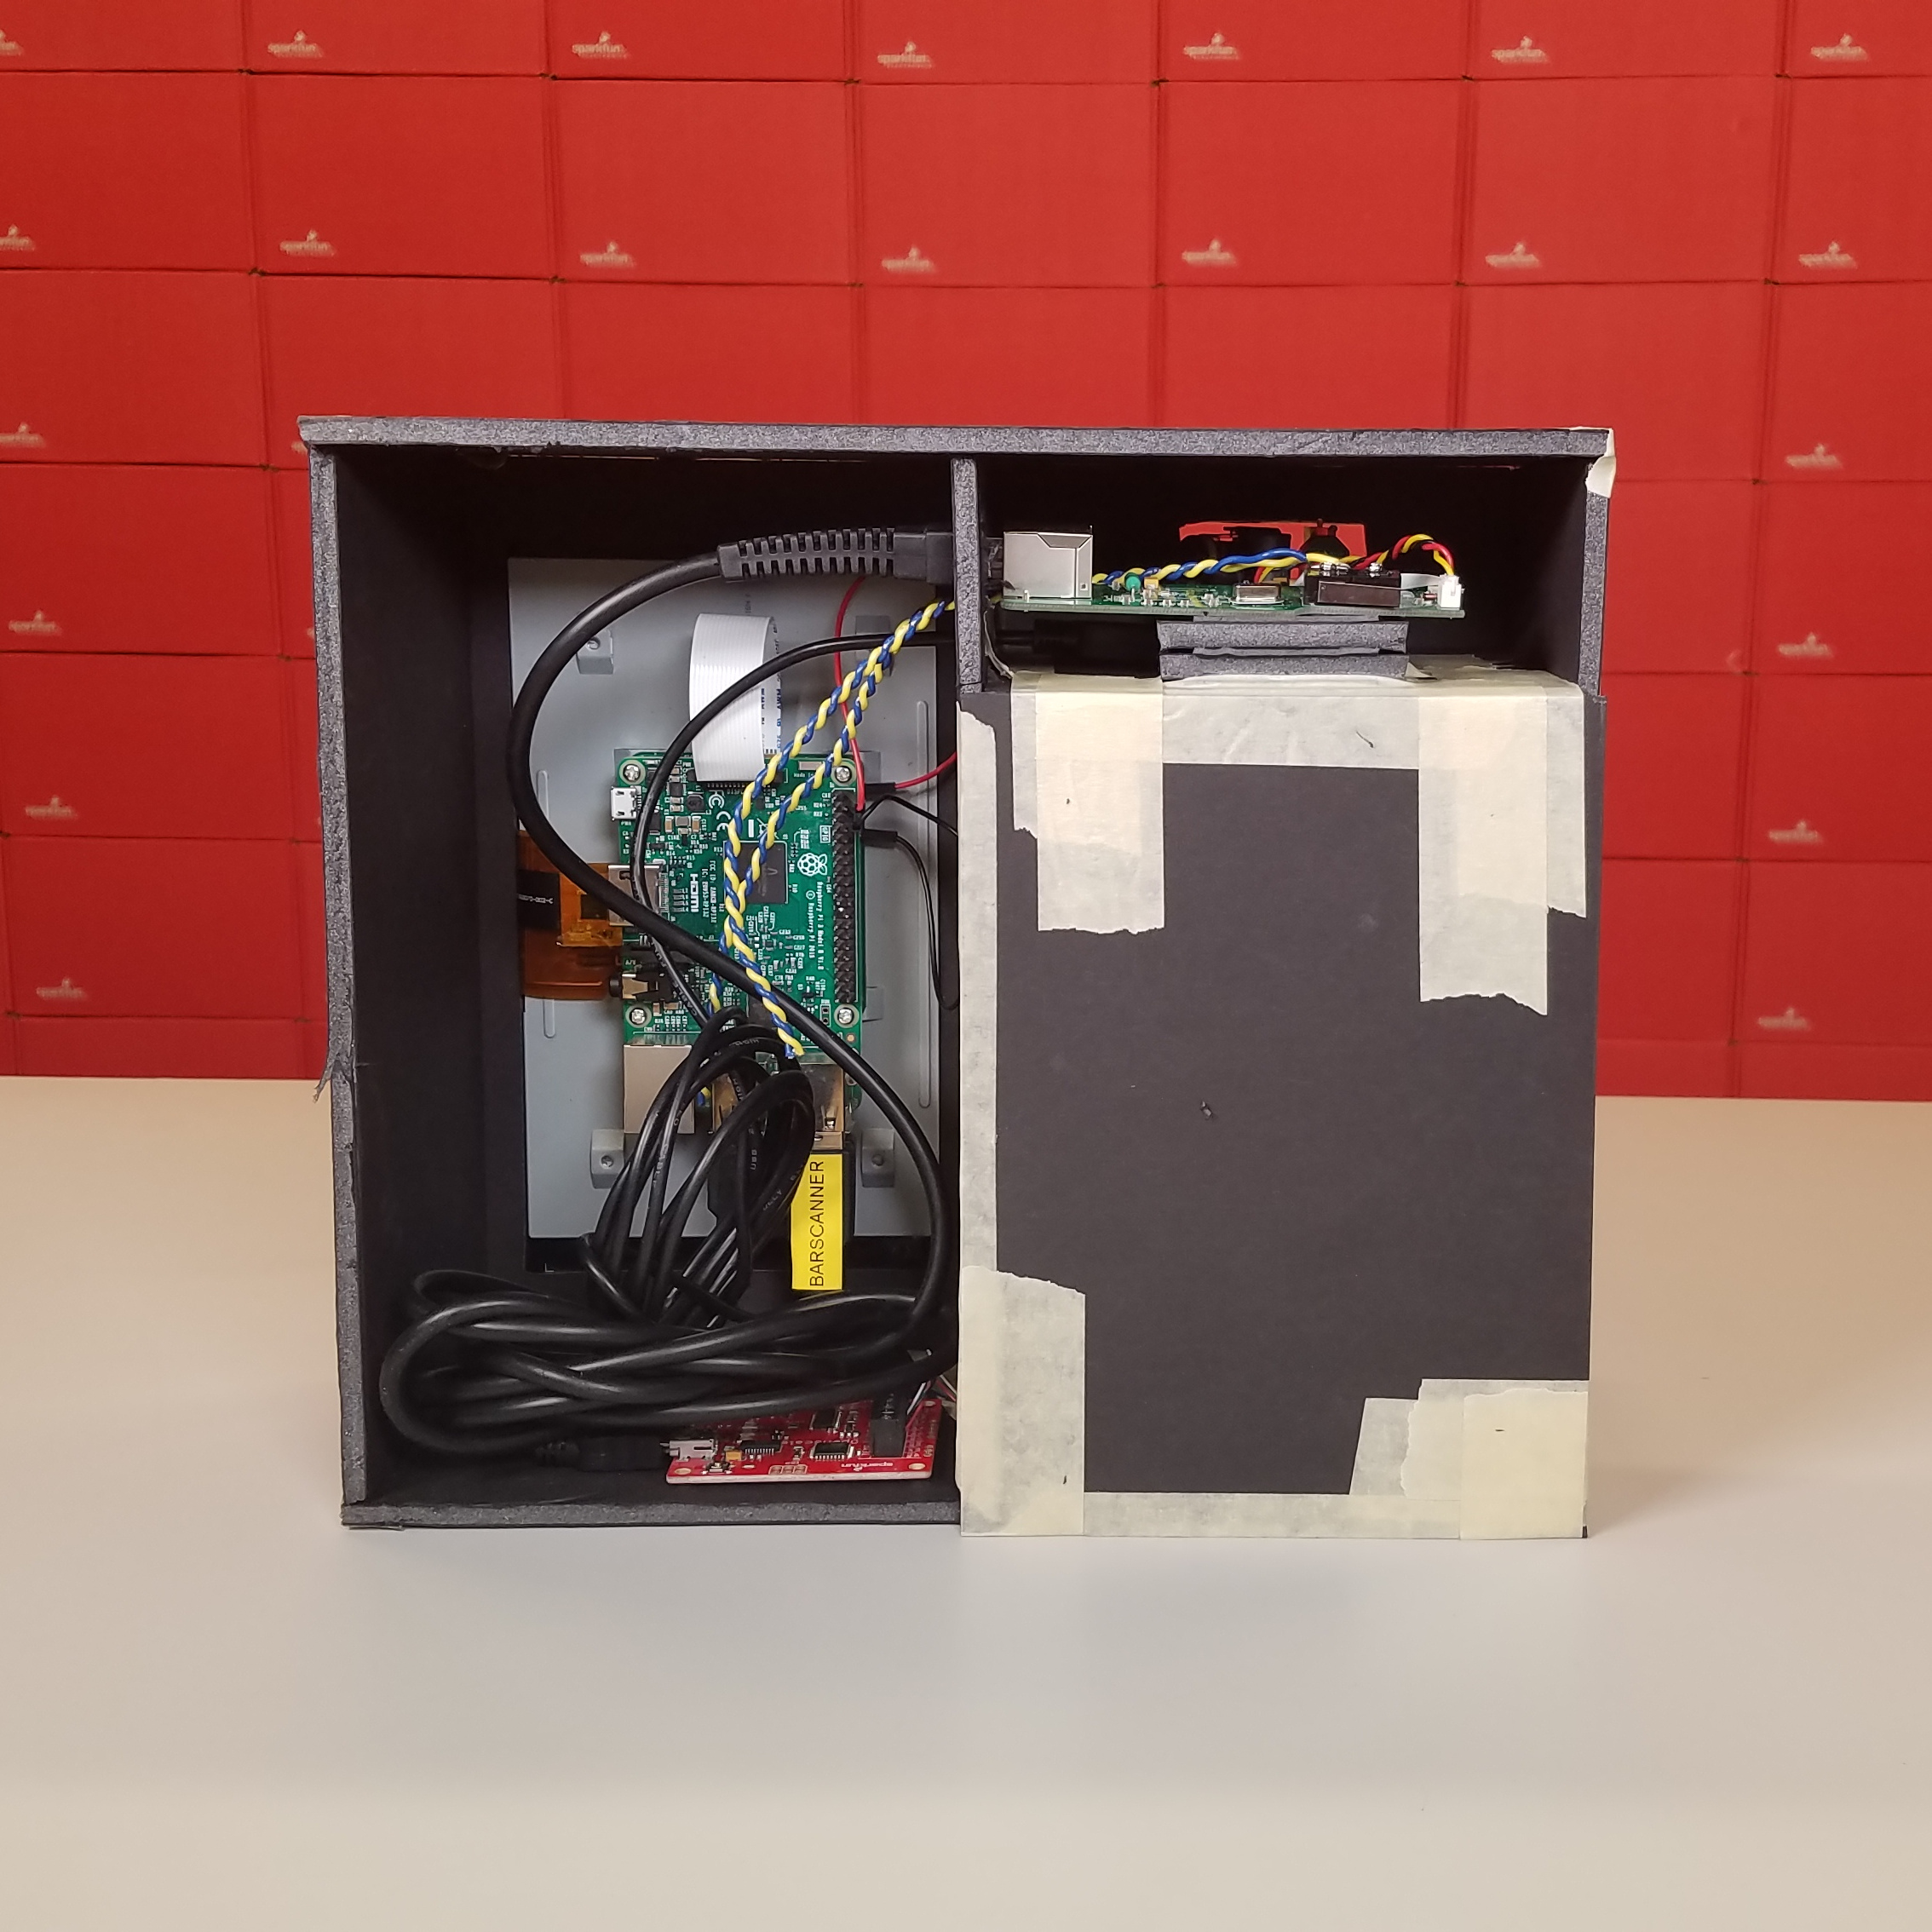
Everything is still connected using USB, and everything will get its own udev name on the Raspberry Pi so it can be easily and repeatedly addressed. If you want to learn more about naming your USB devices on Raspberry Pi, check out this blog post. The only thing you can't see in this photo is the RFID reader (an ID-12LA) hidden under the guts of the bar-code reader.
This basic shape is fine, but before I spend time building an attractive JavaScript UI for this thing, I'd like to make the physical object of it a little bit more...snazzy. So I'm going to design and vacuum form my own bezel for the front. Before I can do that, I'll need a vacuum forming table; luckily, that's a pretty quick and easy build with the right tools. Check out the vacuum table that I put together in an afternoon:
DIY Vacuum Forming
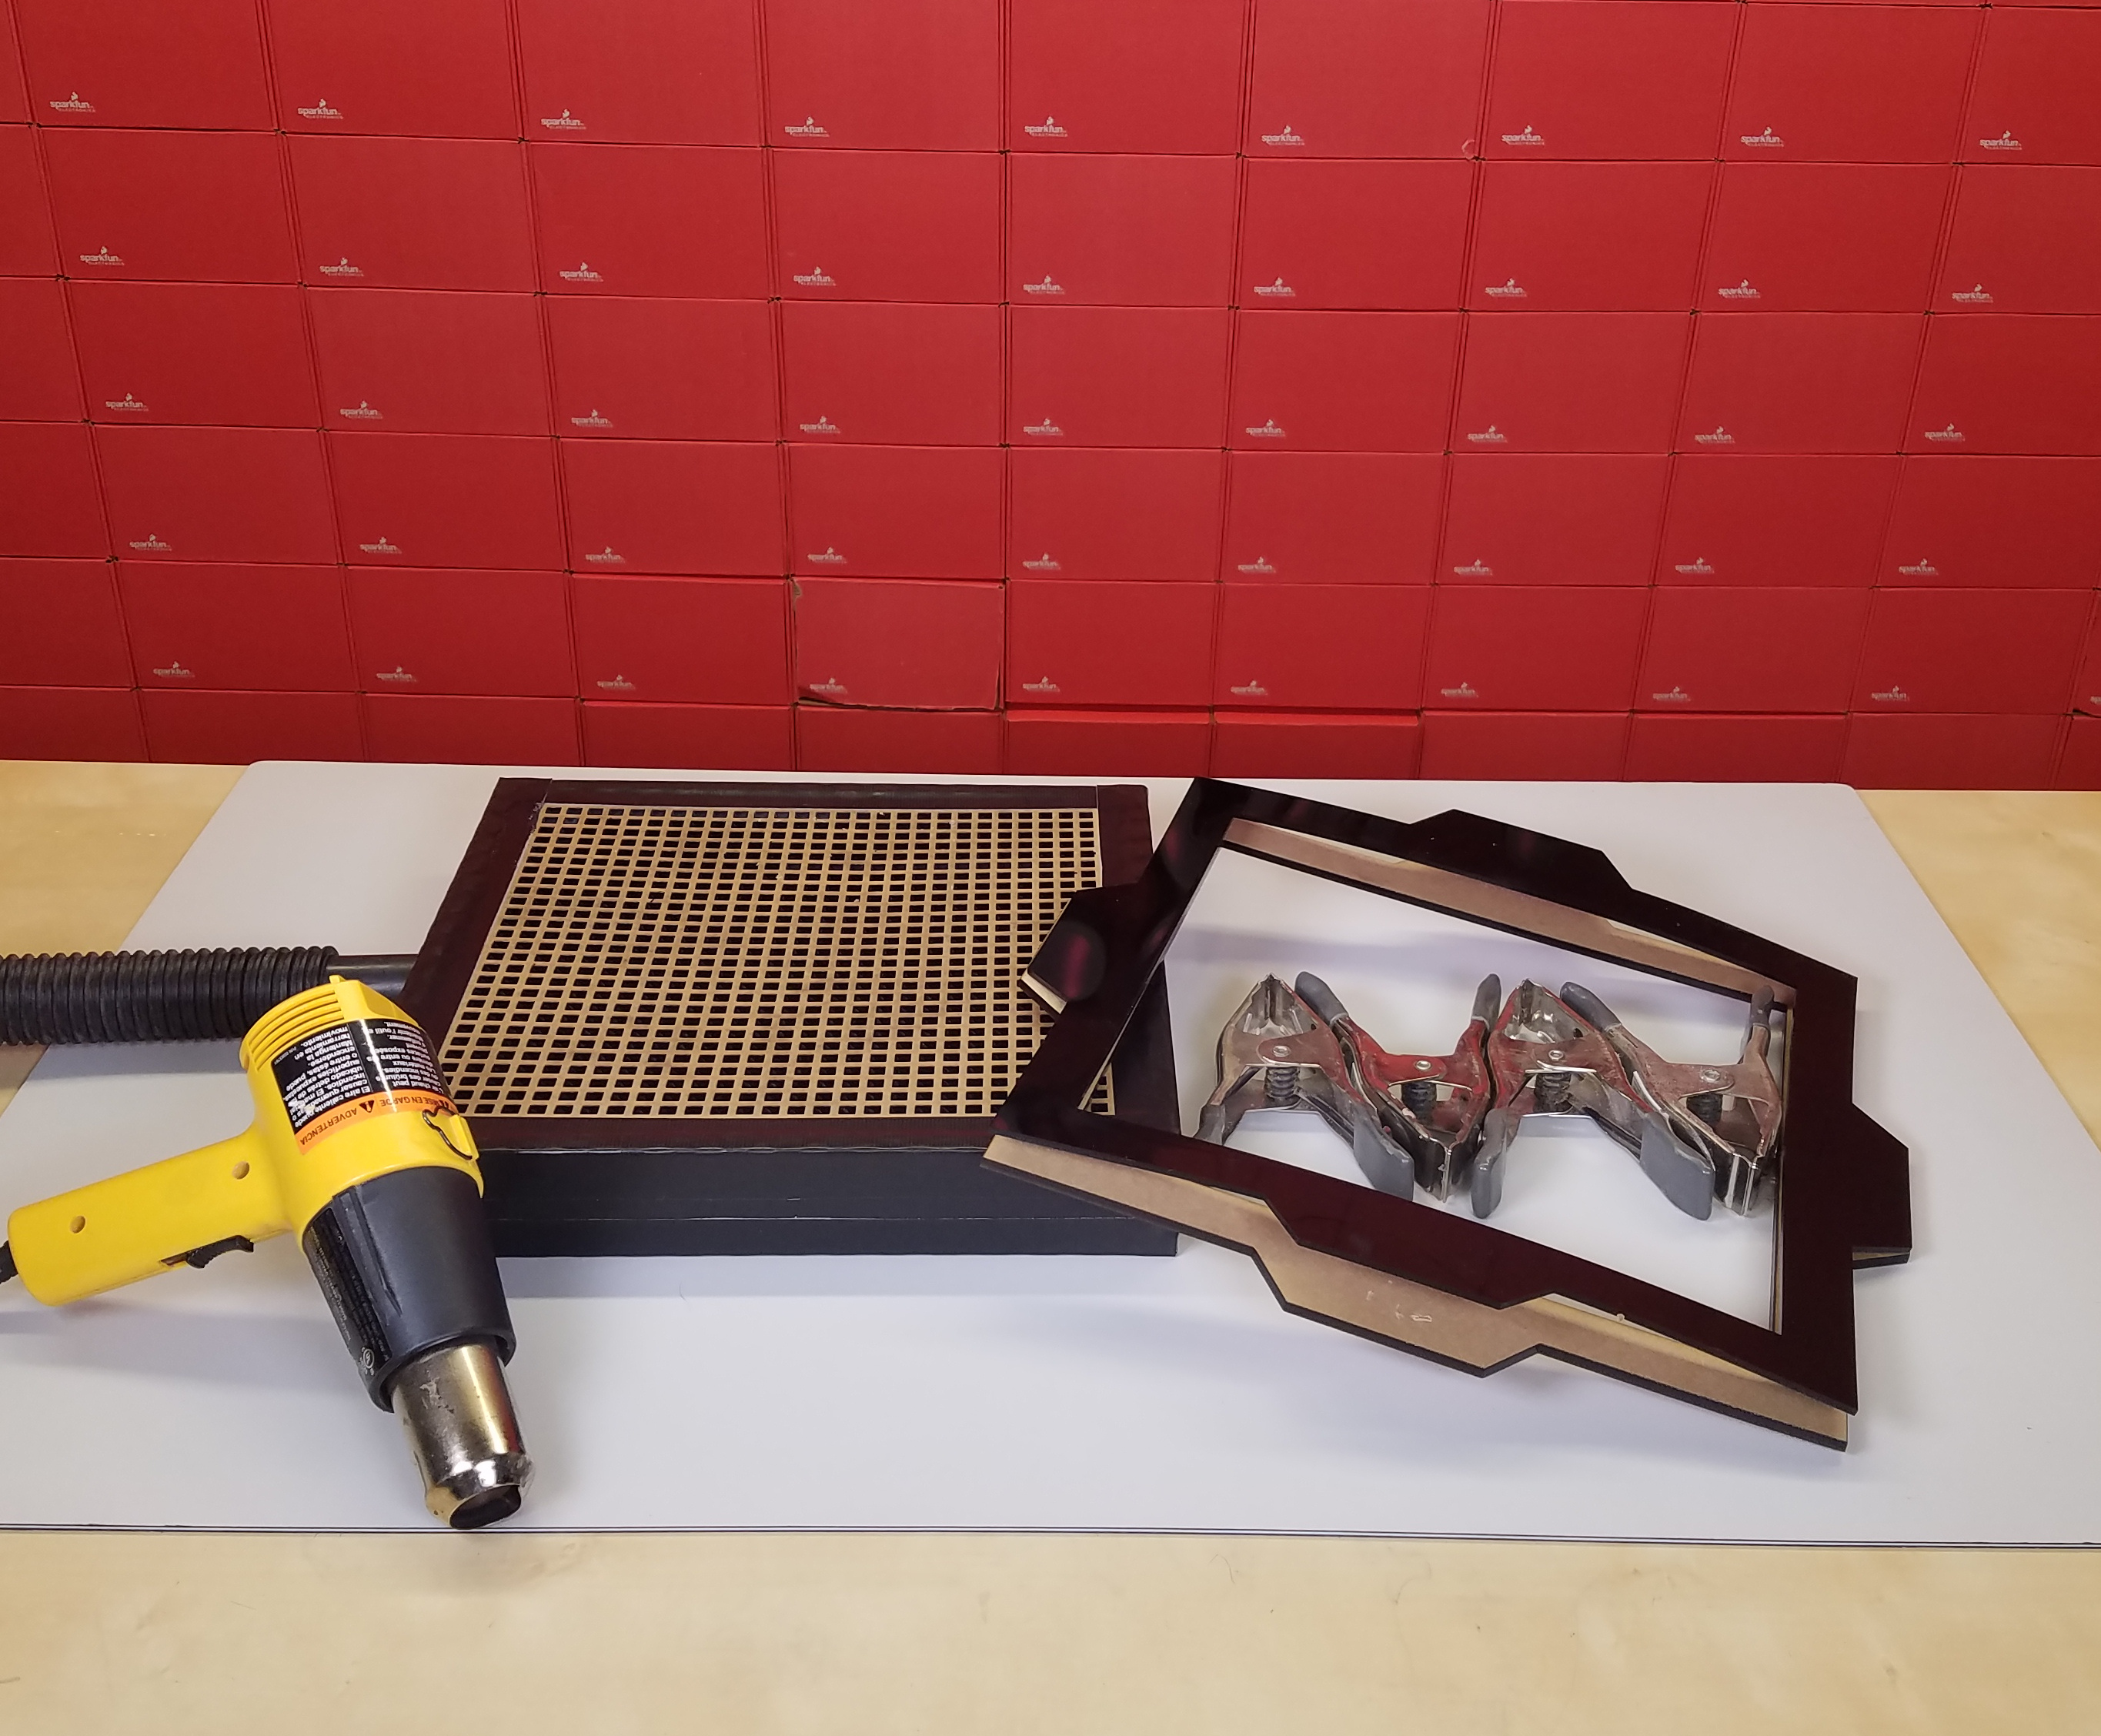
Every part of this is made from 3/16" acrylic sheet, which is surprisingly resilient in the relatively low heat that it takes to soften polystyrene. Nothing is glued together; the box is joined using finger joints, and everything is wrapped in Gorilla tape, which holds the box together and seals it against vacuum leaks. Now, I do have access to a laser cutter, which made the fabrication of the vacuum table really easy, but there's no reason you couldn't also cut every piece from wood by hand. If you want to build your own vacuum forming table using my design, you can download the vector PDF files right here:
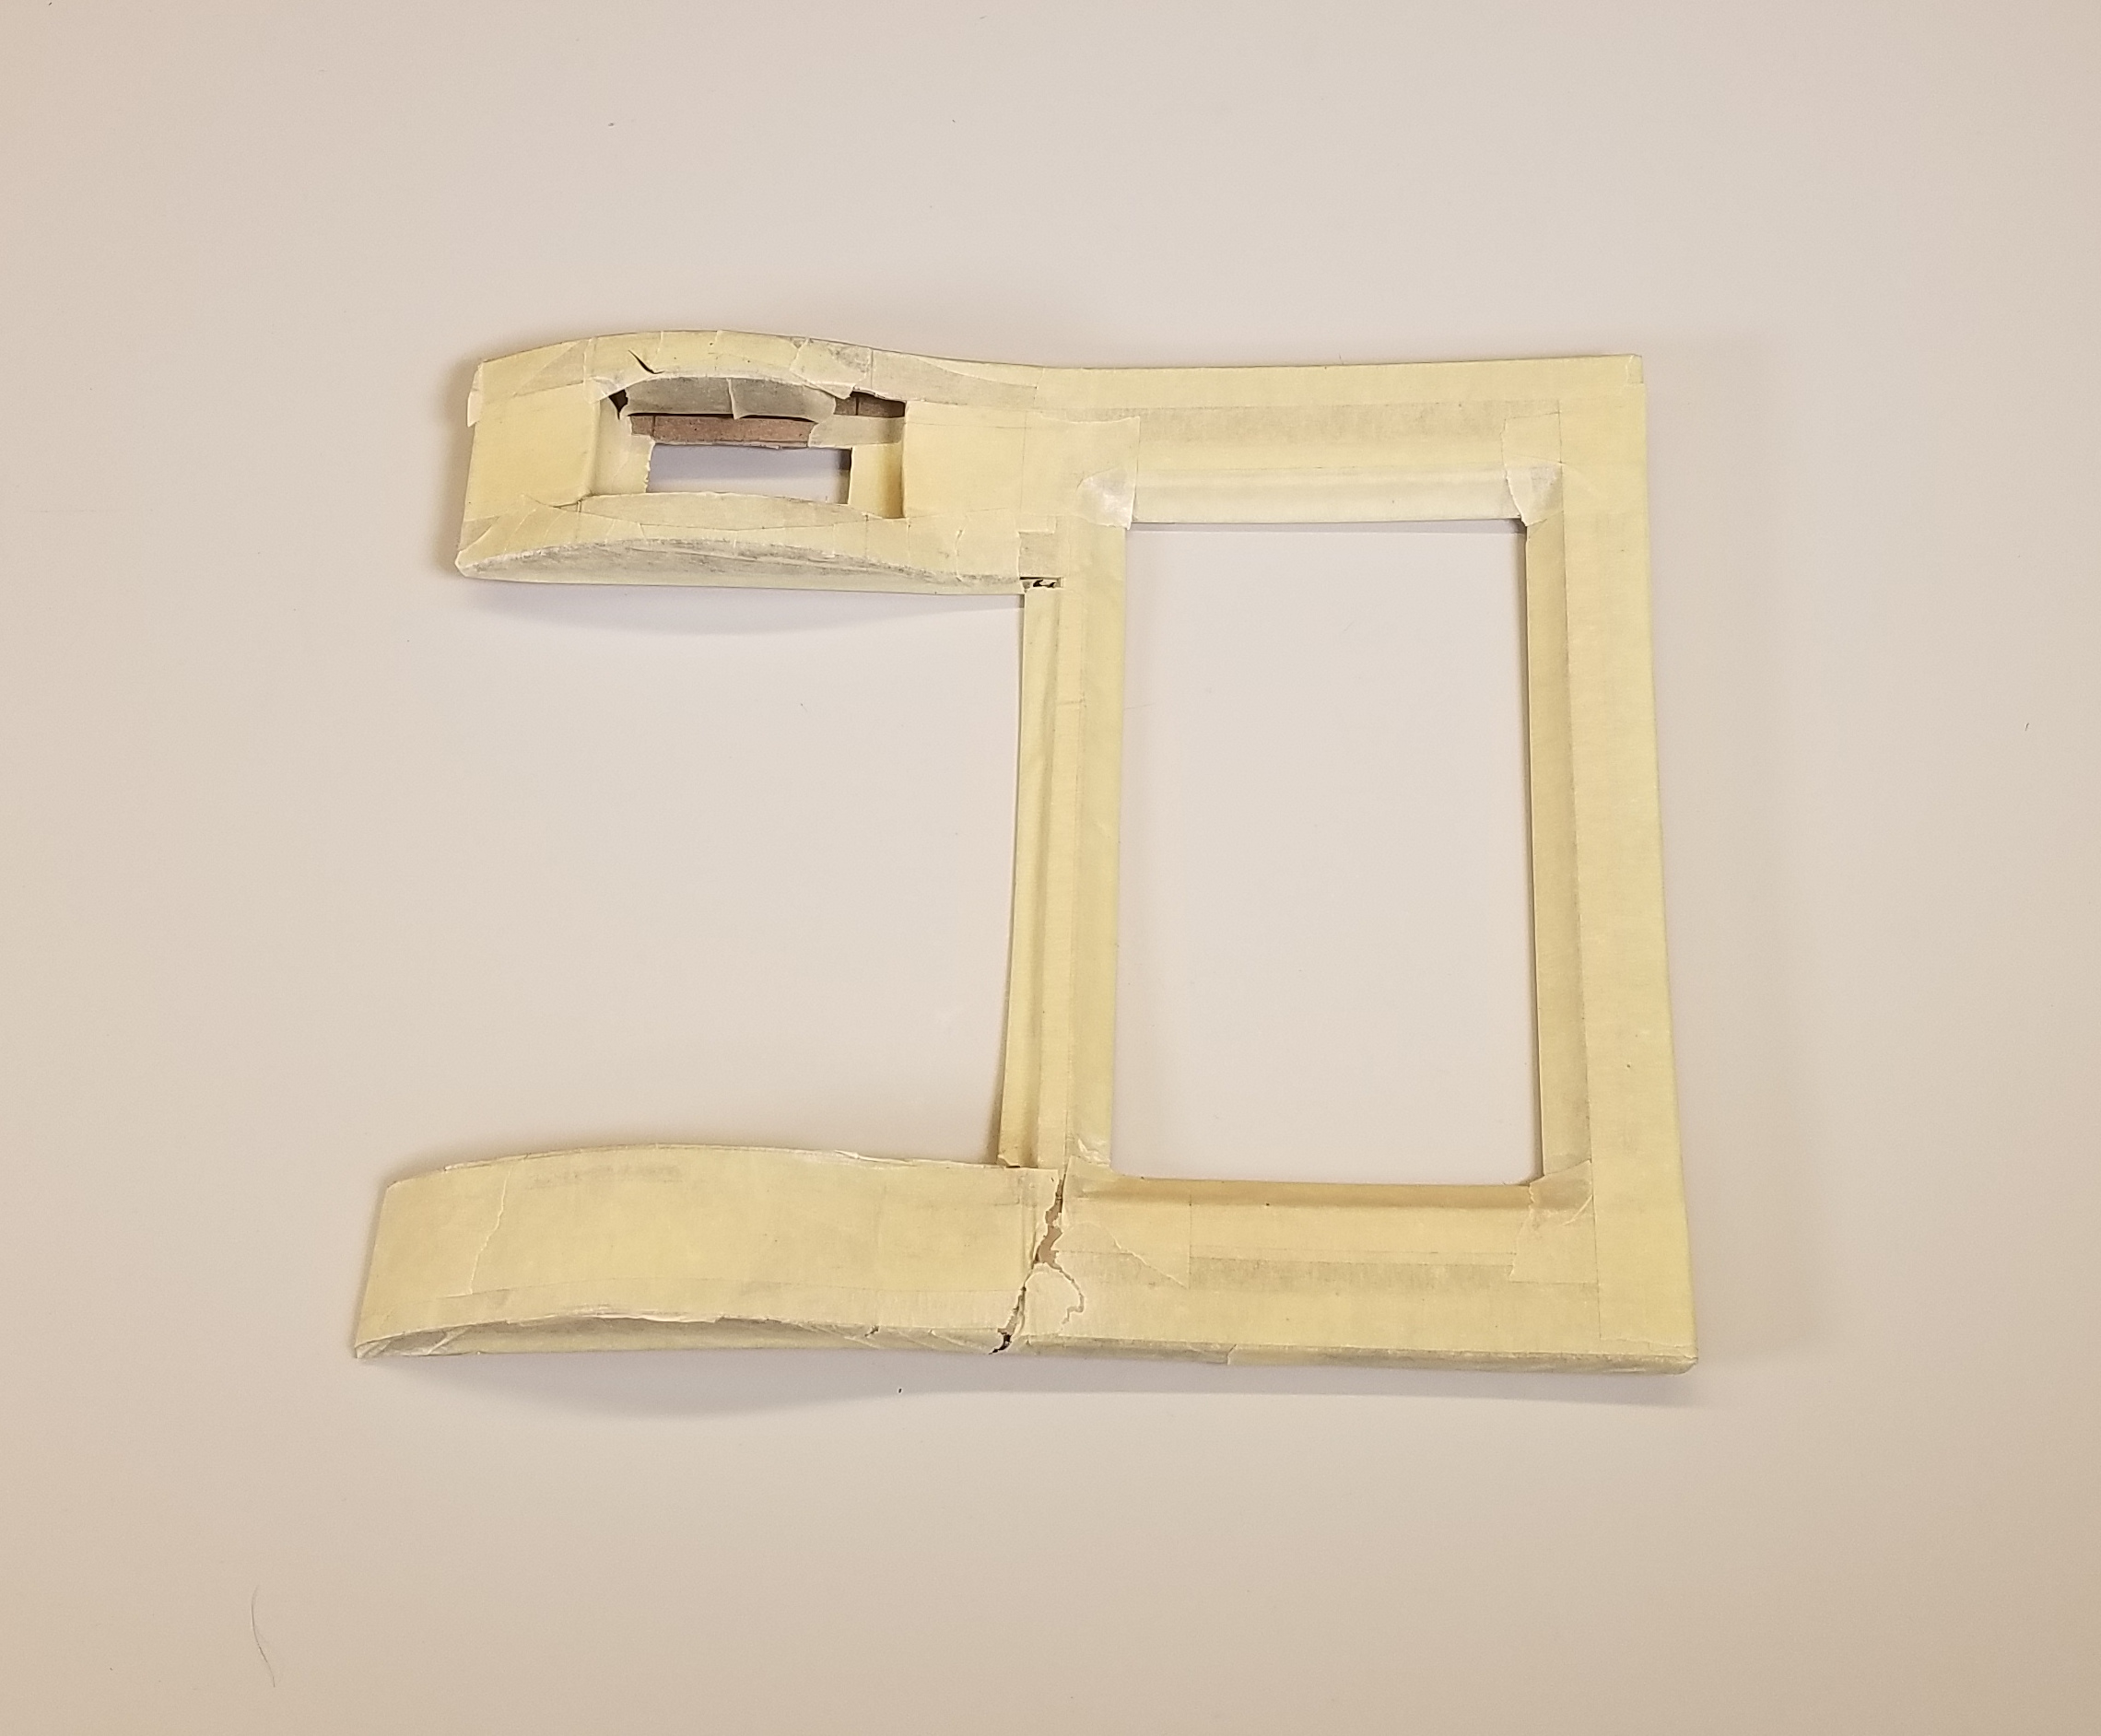
If you've never heard of vacuum forming before, you might want to check out this ancient video from five years ago(!) where I explain how it works. Basically, you soften a sheet of thermoplastic and then drape it over a positive mold (a "buck") and use a vacuum to pull the softened plastic around the buck to form your part. I made my buck from chipboard (basically thin cardboard), foam board and masking tape. It doesn't have to be super sturdy, since I'm only pulling one part off of it. Here's what I came up with:
With the buck complete, it was time to actually do some vacuum forming. Before you watch the video below, there are a few things I'd recommend you do differently if you choose to try this. First of all, I'm using a heat gun to soften my thermoplastic, but at this size it would be much more effective to use a large heating element like an oven or a large toaster oven. I'm also using a very thick polystyrene sheet, which would be fine if I softened it in an oven, but it was difficult to get enough heat into it using just a heat gun. Finally, my frame could use some work; as you could probably hear, I had trouble making a seal against the table at first, which caused me to lose precious molding time.
Oh, and heads up, sections of the following video are very loud (RIP headphone users)!
So that's all there is to it. Of course, if your sheet plastic is hot enough to begin with, you don't need to go in with the "aftertouch" and try to clean up your work as I did. But I was able to make it work, and with a little bit of trimming I ended up with this:
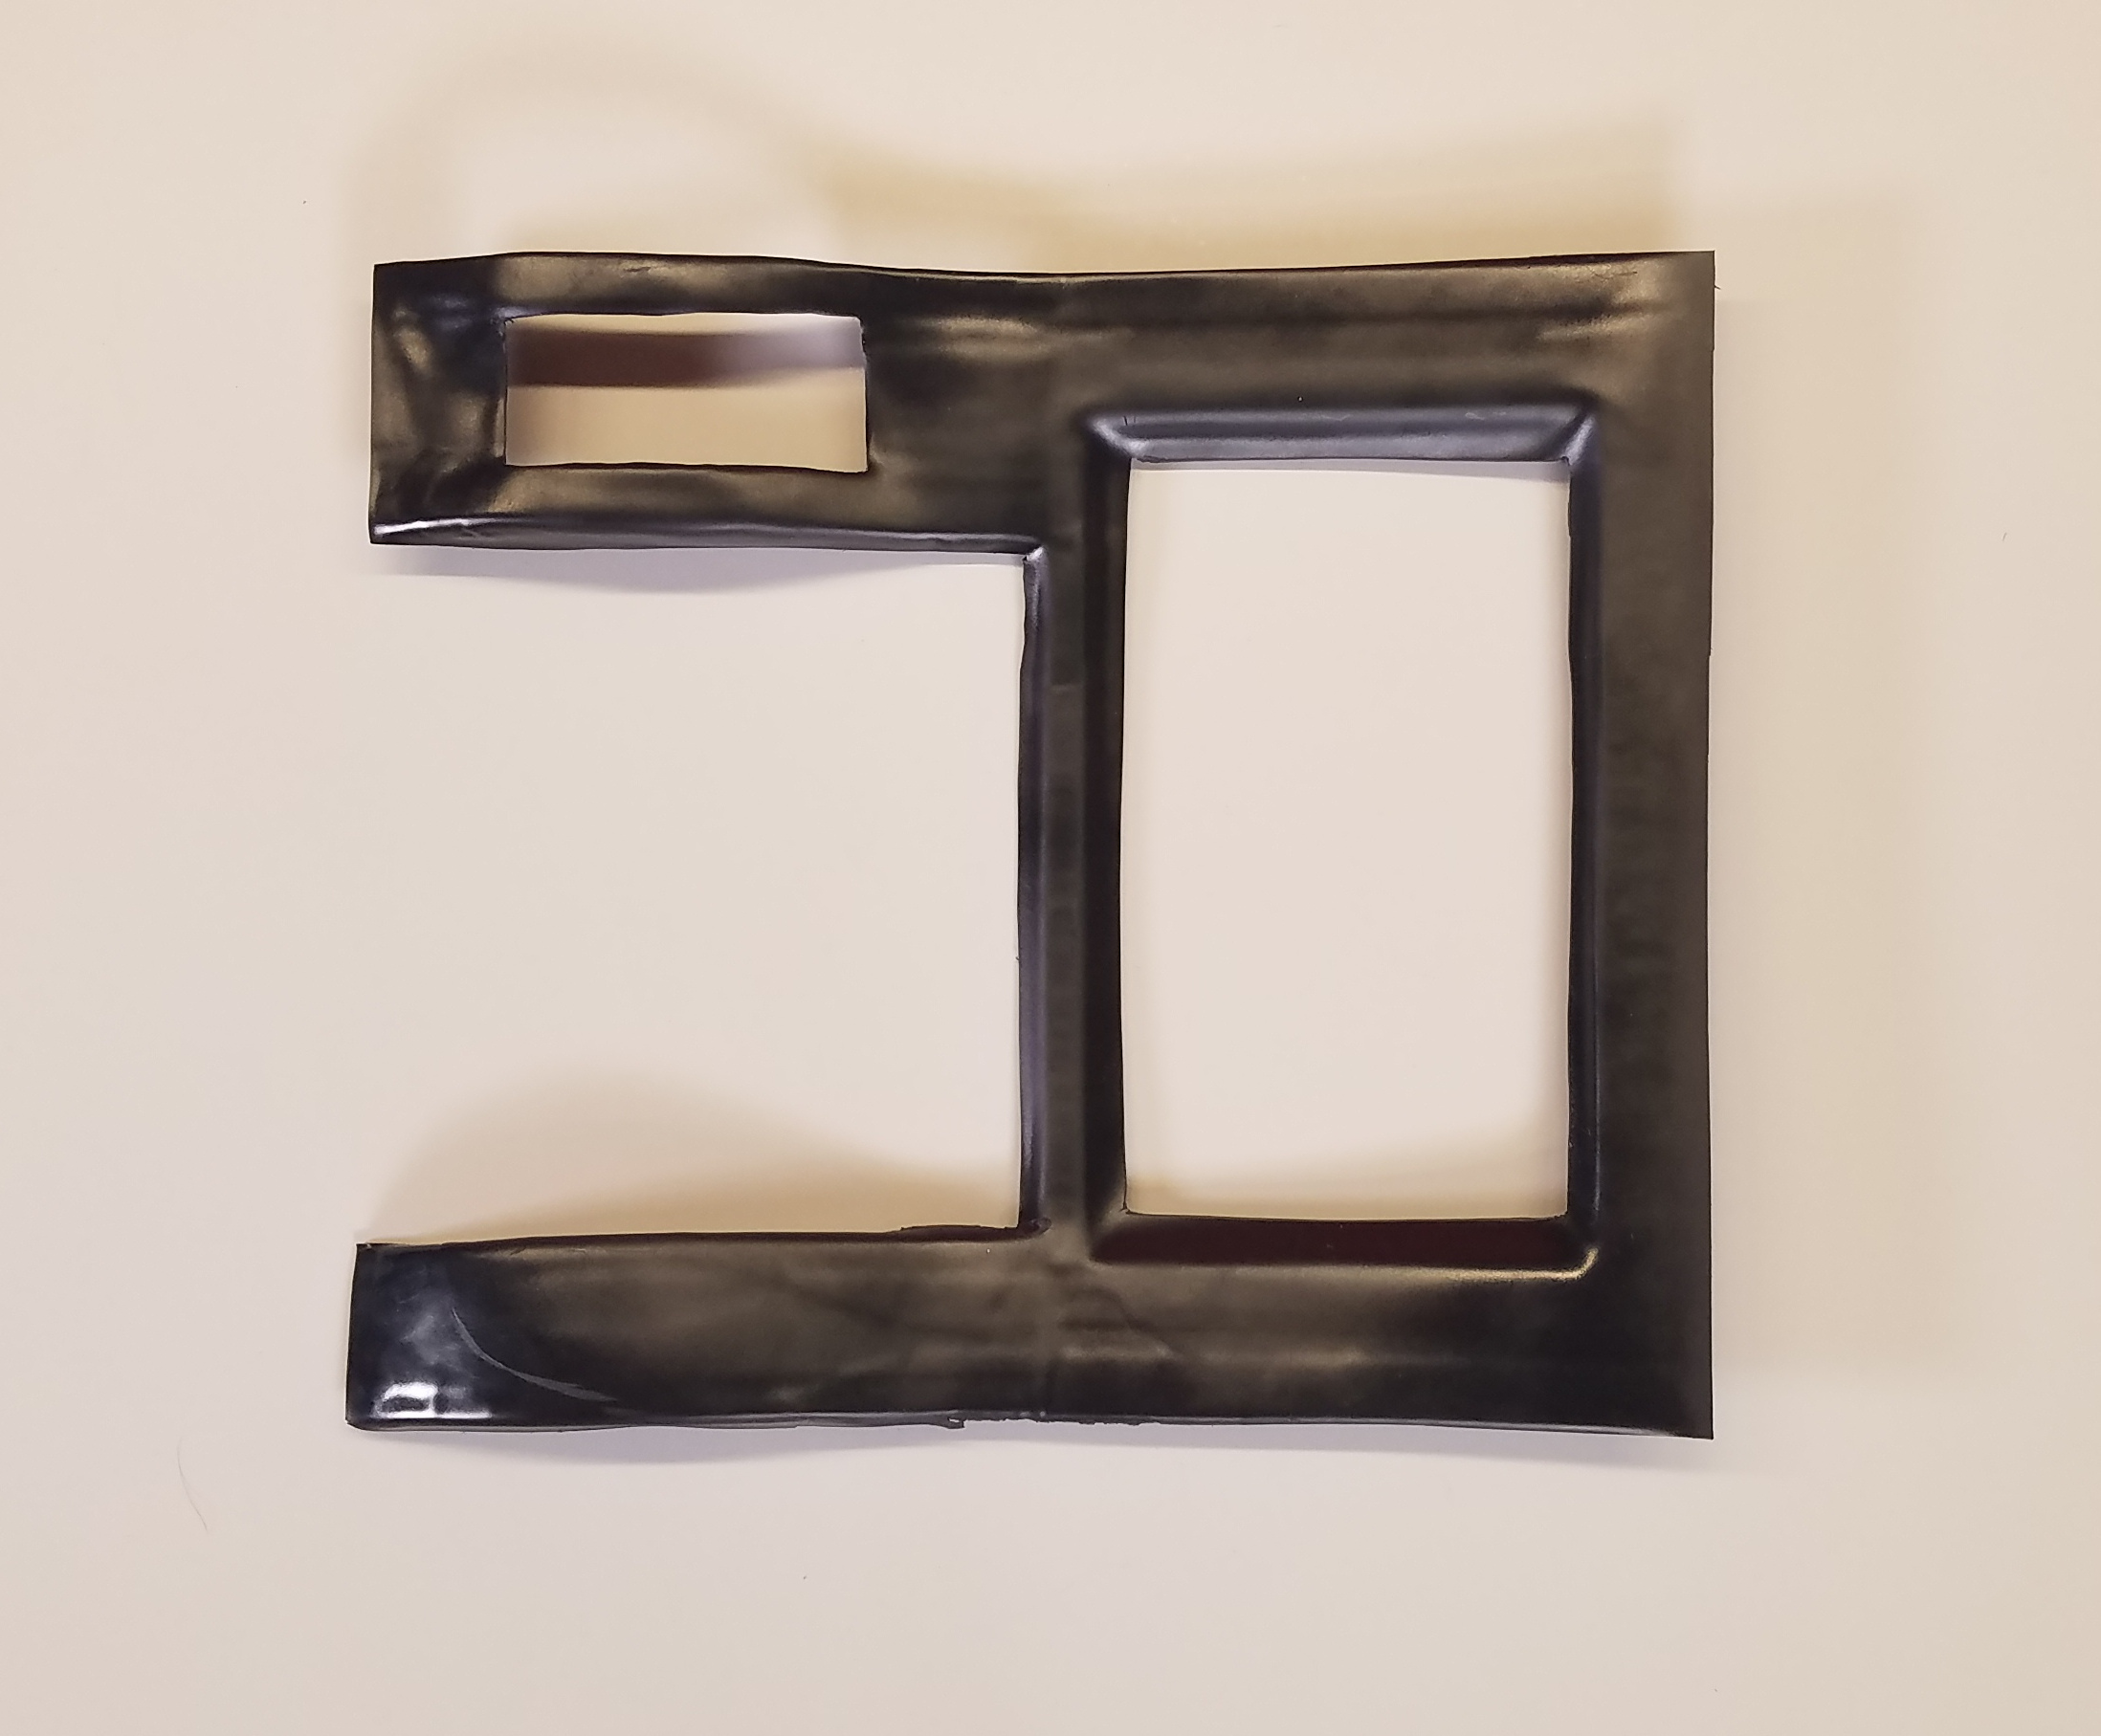
It may not look like much, but it represents kind of a difficult shape to make from sheet plastic any other way.
Putting It All Together
I glued my bezel to the front of the enclosure and then decided to clad the whole box in polystyrene and sand down the imperfections that the vacuum form picked up from my masking tape buck. After a little sanding and a lot of CA glue, I ended up with a somewhat respectable build:
Is it perfect? No. Is it pretty good? Well...I'm not even really sure about that. I'll give it a C+, but that grade will go up with a good paint job. What it is most certainly, however, is a thing. And it was not a thing just a few hours ago, so it's trending in the right direction.
Join me next time when I finally finish this project and demo the completed system. Also, if you have vacuum forming tips or tricks, or have a question you'd like to ask me about vacuum forming, leave a comment! Thanks for following the project so far, and happy hacking!


Cool project! I like your improvised vacuum forming setup.
We used to do this in wood shop (back in the day...) and there are a lot of instructables that show how if searching DIY vacuum forming. Most of them look pretty much like the setup we used (or you used) except to say it is much easier if you use an oven to heat up the plastic. We could form 1/4" thick plexiglass fairly easily.
Hadn't thought of that for a project container.... great idea!
Did you consider 3D printing for that bezel? Yes, that arch would need supports, but the rest of it is pretty flat.
I did think about it but it's the flatness that actually had me worried. My printer isn't enclosed so the temperature fluctuations can cause large, flat pieces to warp pretty significantly.
Maybe a piecemeal 3d printed approach? Then JB Weld the pieces together... maybe that's too janky. Or CNC some wood for a nice... um, woody sort of thing. In any case, nice work!
Time for another project, a printer enclosure. Or go PLA?
That one's been on my list for a while now, it may finally be time.