From Trash to Flash
A simple and inexpensive way to add a little flare to some thrift store treasures.

If you're like me and love digging through other people’s castoffs at the thrift store, then you probably have a lot of weird artwork in your house. I have been looking into ways to jazz up some of my old pieces, and I came up with just the thing to do it!
I thought about all of the resources we have for paper circuits and decided to adapt some existing projects for this purpose. If you are new to paper circuits, getting started with a paper circuit greeting card, or light-up pin is a good way to introduce yourself. I am a novice in the realm of electronics and technology, so I love that paper circuits offer a low barrier-to-entry. I combined my love of thrift store treasure hunting and my professional work to create this fun project!
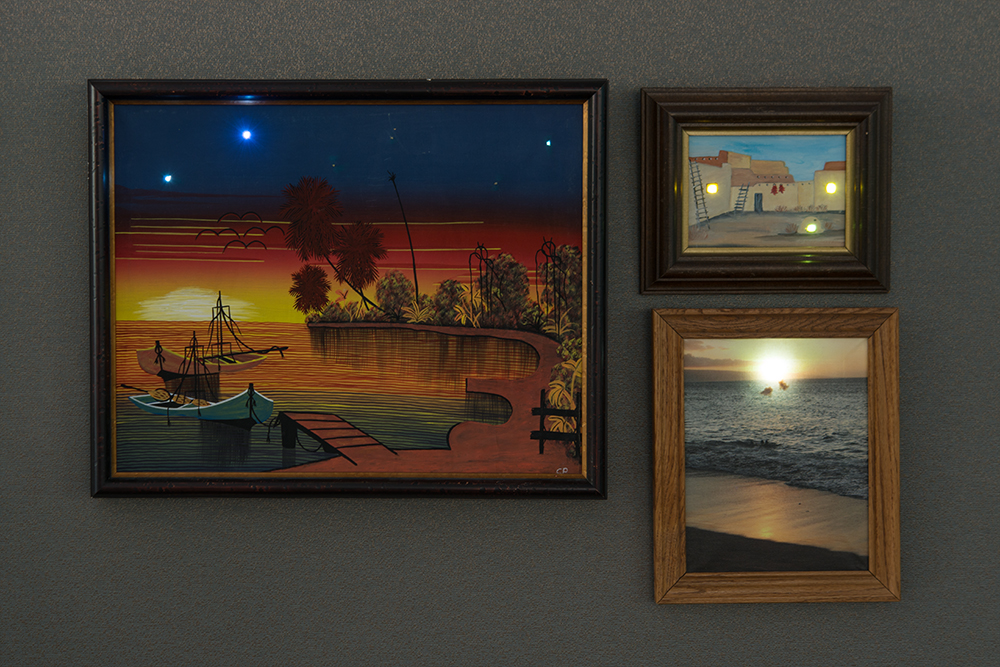
The first step was to head to the thrift store to pick up a few abandoned paintings to light up. I tried to search for and identify aspects of the artwork that would look good with lights. My goal was to seamlessly incorporate the electronics with the existing artwork, and I based my selections on what I thought would work best. I ended up purchasing four pieces of artwork, totaling a whopping $11!
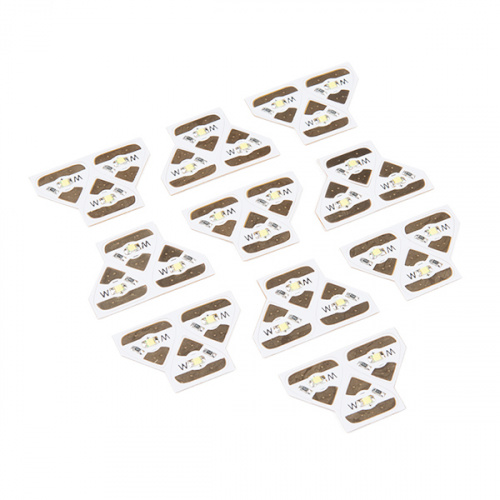
Once the art was obtained, I searched the SparkFun catalog to determine the best hardware for the job. I knew I wanted to use copper tape and our newly restocked Chibitronic LED stickers. After consulting a few more experienced makers, I decided to use the LilyPad Battery Holder as the power source and the LilyTwinkle and LilyTiny for two of the paintings with multiple LEDs.
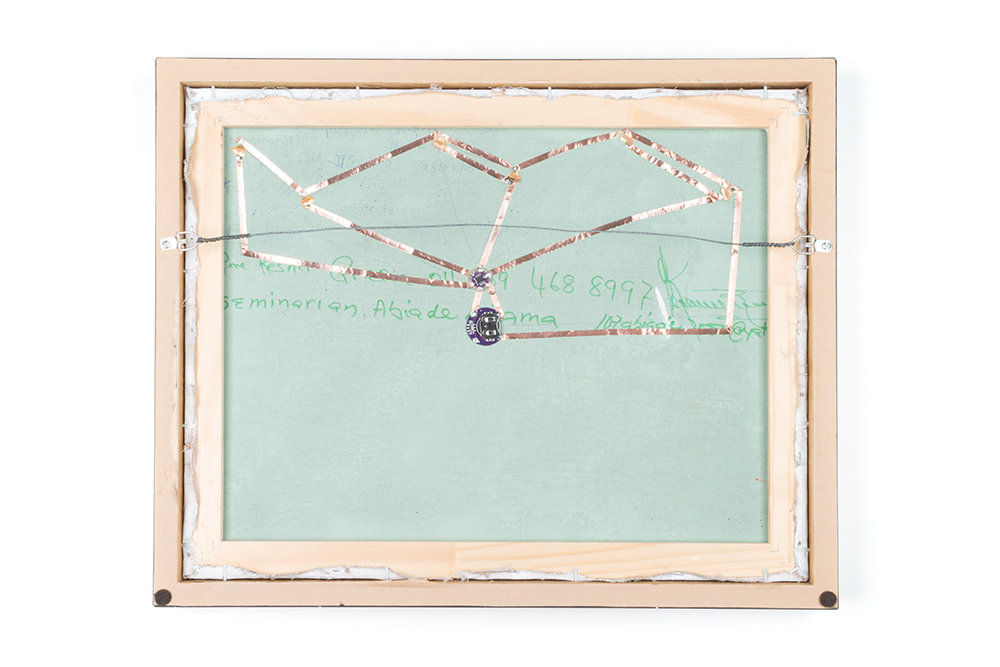
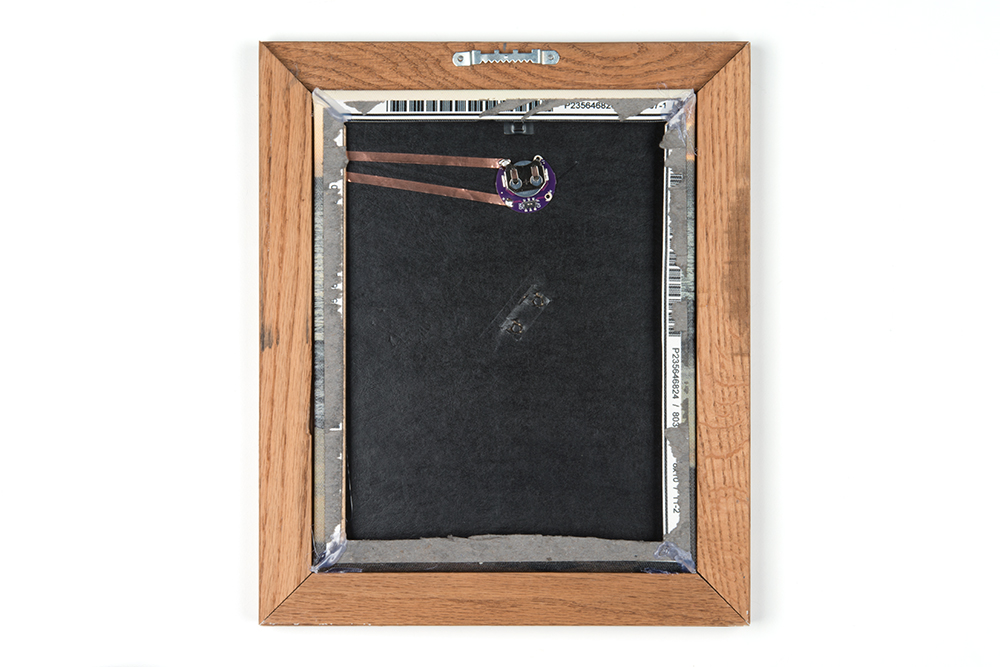
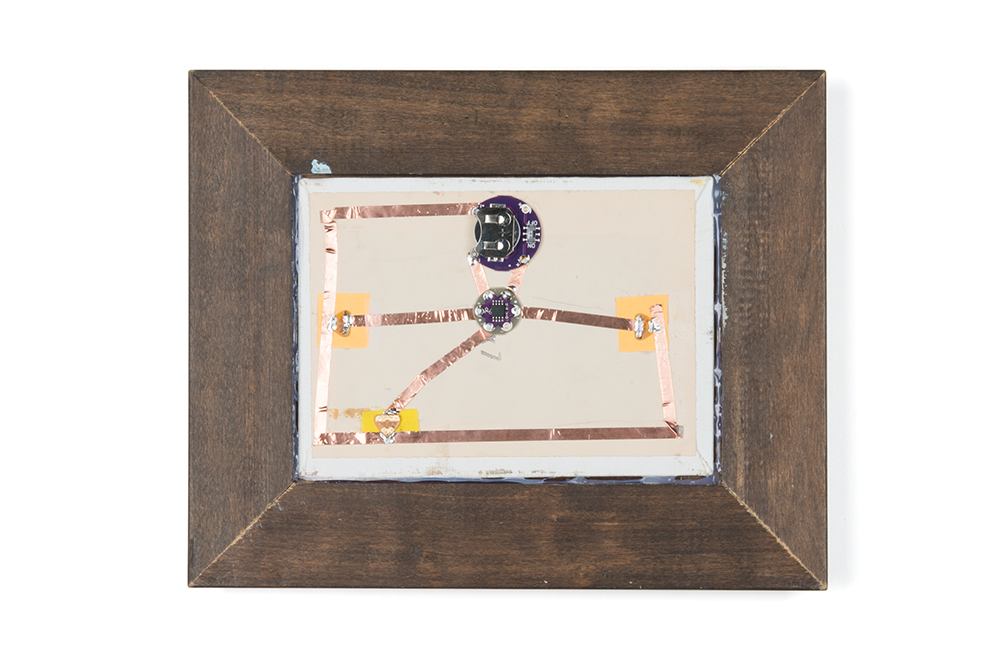
After identifying the parts I wanted to light up, I laid out my LED stickers in the correct orientation and created a circuit to connect the lights to the power source and LilyPad board. I decided to solder the boards, lights and copper wire for a more secure connection.
Here is what the individual circuits look like from behind!
Here is the finished collection, which I turned into a gallery wall!
There are a couple things I would have done differently, but I think the result was successful and I am happy with the way things turned out. I have even gotten a few requests to turn regular old art around the office into light-up art!
Interested in learning more about LEDs?
See our LED page for everything you need to know to start using these components in your project.


Did you make holes in the pictures for the light to shine through?
For the smallest and largest pictures, I did. For the sunset photo, I just let the light shine through the canvas.
Do you have any details and/or hints&tips for using the Chibitronics stickers upside-down (adhesive side away from mounting surface)? Is this what the solder was primarily for?
Hi! I did go through a couple stickers before realizing that I should be soldering to the top pad on the sticker instead of the adhesive side. After completing the whole thing, I realized that the stickers may not have been the best piece for this project. If I were to do it again, I would probably use the LilyPad LEDs. Sometimes these projects take a little trial and error before you find the best fit. I still think the result was pretty cool!
Top-right of the gallery wall is changing my life right now. I want to apply this technique to children's books now.
Yes! I love that idea!