SIK Project Ideas: Vote Counter
Check out this neat project using parts that can be found in the SparkFun Inventor's Kit.

The SparkFun Inventor’s Kit is an awesome beginner's kit for Arduino. It comes with a handy guide book that teaches users how to take advantage of all the components included in the kit. Through a series of cumulative projects, you can learn the fundamentals of working with Arduino and programmable electronics and start designing your own projects! But what happens when you finish the book and don't know what to do next? There are endless projects to be made using the SparkFun Inventor’s Kit, so we decided to show off some of our favorite project ideas that didn’t make it into the guidebook.
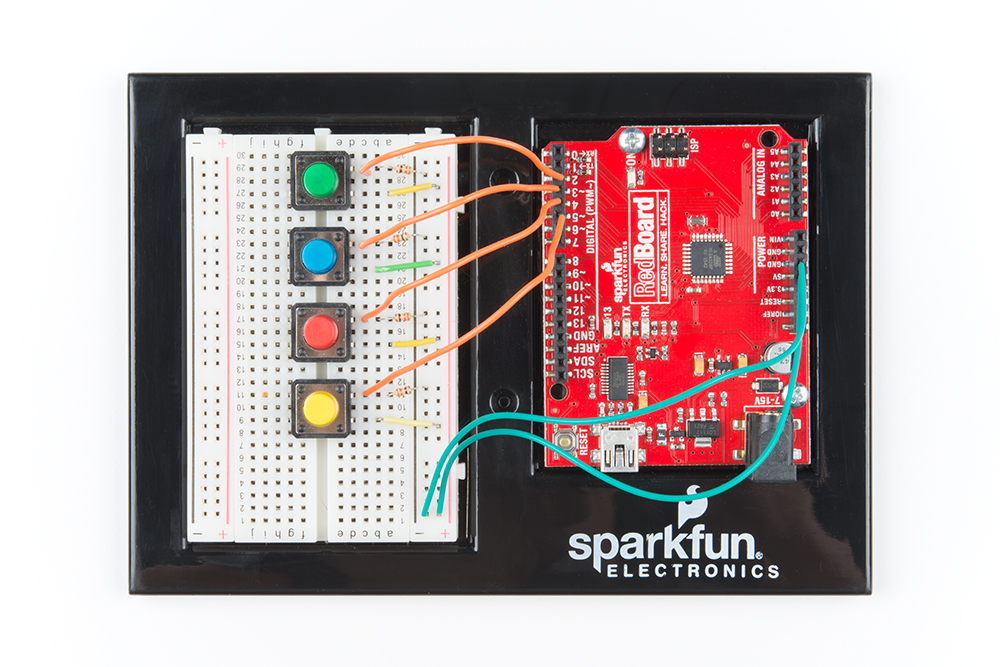
This week I made a digital vote counter. The project uses a SparkFun ReadBoard, a breadboard, the SparkFun Base Plate, four buttons, four 330 ohm resistors, the USB cable and jumper wire. Each button is a different color: green, blue, red and yellow. These each can represent a different person or item to vote for. By pressing a button of a certain color, the vote count for the color will increase by one. Results are displayed on the Arduino serial monitor. Let’s take a look at the circuit!
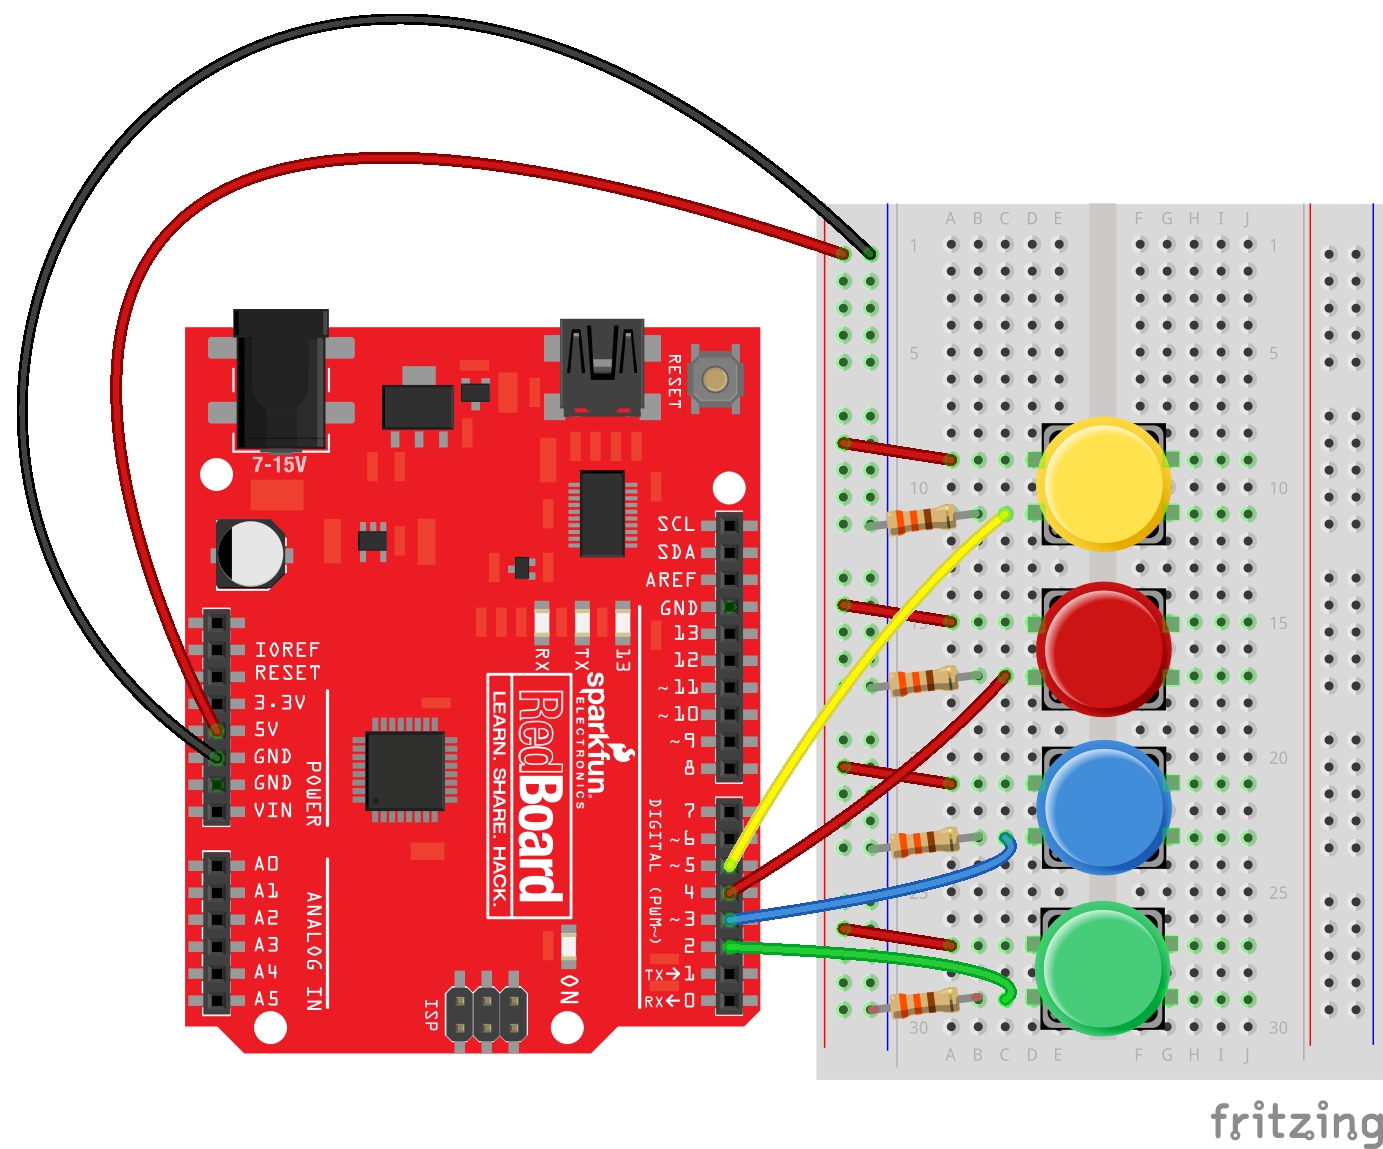
Having a hard time seeing the circuit? Click on the wiring diagram for a closer look.
As illustrated in the diagram above, one side of each button is connected directly to VCC. The other side is connected to an individual IO pin: the green button to pin 2, blue to pin 3, red to pin 4 and yellow to pin 5. You will also notice that on the IO pin side of the buttons, our leads are also connected to GND via a 330 ohm resistor. This is called a “Pull Down Resistor,” and it helps our Arduino get clean readings when the button is not pressed. Each digital pin will read the voltage of the circuit it is connected to. As electricity follows the path of least resistance, when the button is not pressed, the pin will read LOW or 0 because electricity is traveling via the resistor to GND. However, when the button is pressed, the electricity will travel across the button to the VCC connection because it is not blocked by a resistor, allowing us to get a clear and clean HIGH or 1 reading.
To activate the vote counter, you can use the program that has been provided below. I have added comments throughout the program to demonstrate how it works.
//Vote Counter for by Melissa Felderman for SparkFun Electronics

//declaring the digital IO pin value for each button
int greenBut = 2;
int blueBut = 3;
int redBut = 4;
int yellowBut = 5;

//variable to hold button reading
int greenVal;
int blueVal;
int redVal;
int yellowVal;

//variable to hold the total vote count
int greenTotal = 0;
int blueTotal = 0;
int redTotal = 0;
int yellowTotal = 0;

//variables used in debounce functions to make sure on press = one vote
bool greenBool = false;
bool blueBool = false;
bool redBool = false;
bool yellowBool = false;
unsigned long lastDebounceTime = 0;
unsigned long debounceDelay = 200;

void setup() {
  //initiate the serial moniter
  Serial.begin(9600);

  //let Arduino know that the digital pins are recieveing input
  pinMode(greenBut, INPUT);
  pinMode(blueBut, INPUT);
  pinMode(redBut, INPUT);
  pinMode(yellowBut, INPUT);

}

void loop() {
  //read the value of the buttons and store them in a variable
  greenVal = digitalRead(greenBut);
  blueVal = digitalRead(blueBut);
  redVal = digitalRead(redBut);
  yellowVal = digitalRead(yellowBut);


  //if statements below allow us to press the button and get several HIGH readings with one press, but only register one vote per press
  if ((millis() - lastDebounceTime) > debounceDelay) {
    if ((greenVal == HIGH) && (greenBool == false)) {
      greenBool = true;
      greenTotal++;
      Serial.write(0);
      lastDebounceTime = millis();
    } greenBool = false;


    if ((blueVal == HIGH) && (blueBool == false)) {
      blueBool = true;
      blueTotal++;
      Serial.write(1);
      lastDebounceTime = millis();
    } blueBool = false;


    if ((redVal == HIGH) && (redBool == false)) {
      redBool = true;
      redTotal++;
      Serial.write(2);
      lastDebounceTime = millis();
    } redBool = false;


    if ((yellowVal == HIGH) && (yellowBool == false)) {
      yellowBool = true;
      yellowTotal++;
      Serial.write(3);
      lastDebounceTime = millis();
    } yellowBool = false;
  }

  //serial print commands to show results in the serial monitor
  Serial.print("Green: ");
  Serial.print(greenTotal);
  Serial.print(" ");
  Serial.print("Blue: ");
  Serial.print(blueTotal);
  Serial.print(" ");
  Serial.print("Red: ");
  Serial.print(redTotal);
  Serial.print(" ");
  Serial.print("Yellow: ");
  Serial.println(yellowTotal);

}
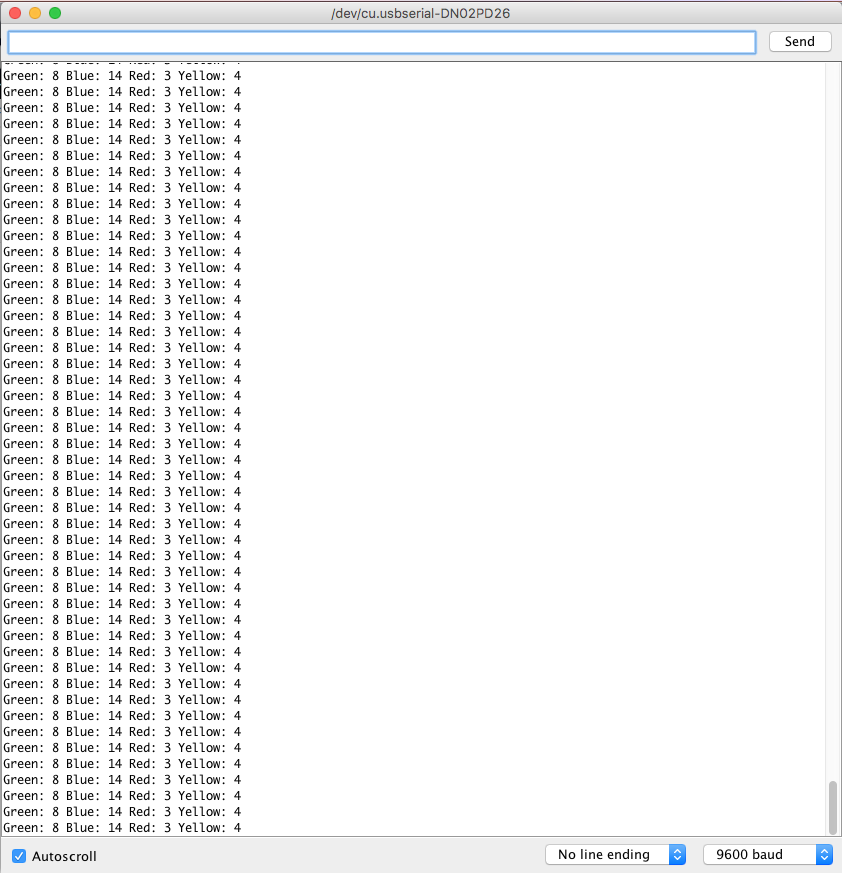
Once you have uploaded the code to the Arduino, you can open the serial monitor to see the vote counts!
We hope this project inspires you to push the boundaries of your SparkFun Inventor's Kit beyond the guidebook. Share your feedback and ideas in the comments below!


I actually made something very similar to this to use in my classroom. As the students left each day, they press buttons numbered from 1 to 5 to indicate how well they feel they understood the lesson. So it had 5 buttons, an LCD screen to show the data, and a reed switch to clear the data and find an average score. This allowed me to get a general read of the class and how well they understood the lesson, allowing me to reteach if necessary. If anyone is curious, I can post pics/code.
Wow! That's an amazing idea. I teach a course out here and I might actually make one for myself! I would love to see your documentation. Thanks for sharing!
Good project, though I can add an "exercise for the reader": It appears to me that it would be possible to press more than one button simultaneously, e.g. green and red, so add code to prevent more than one button from being pressed (and counted). (Many/most questions are "vote for one of these".)
That's a great point, and a great way to push this project even further! Thanks for the input!