Wearable Tech at Dragon Con: Part 2
Let's take a look at some of the amazing costumes and props from Dragon Con!

In Part 1 of our Dragon Con coverage, I talked about my costumes and some of the panels and workshops happening at the event, but I know what we all really want to see are more costumes! Here is a selection of costumes utilizing electronics, robotics and 3D printing that we came across in our journey through the costume floor, and a few that showed up to the Electronic Costuming and Wearable Tech Meetup I hosted Saturday night.
Check out some of the fun times we had around the con in our recap video:
Team Cold
I ran into this amazing group cosplay Saturday afternoon while crossing through one of the hotel lobbies. Dragon Con was a great place to see themed group costumes. It was a treat to find a group with so much wearable tech happening - light, sound and even smoke effects.
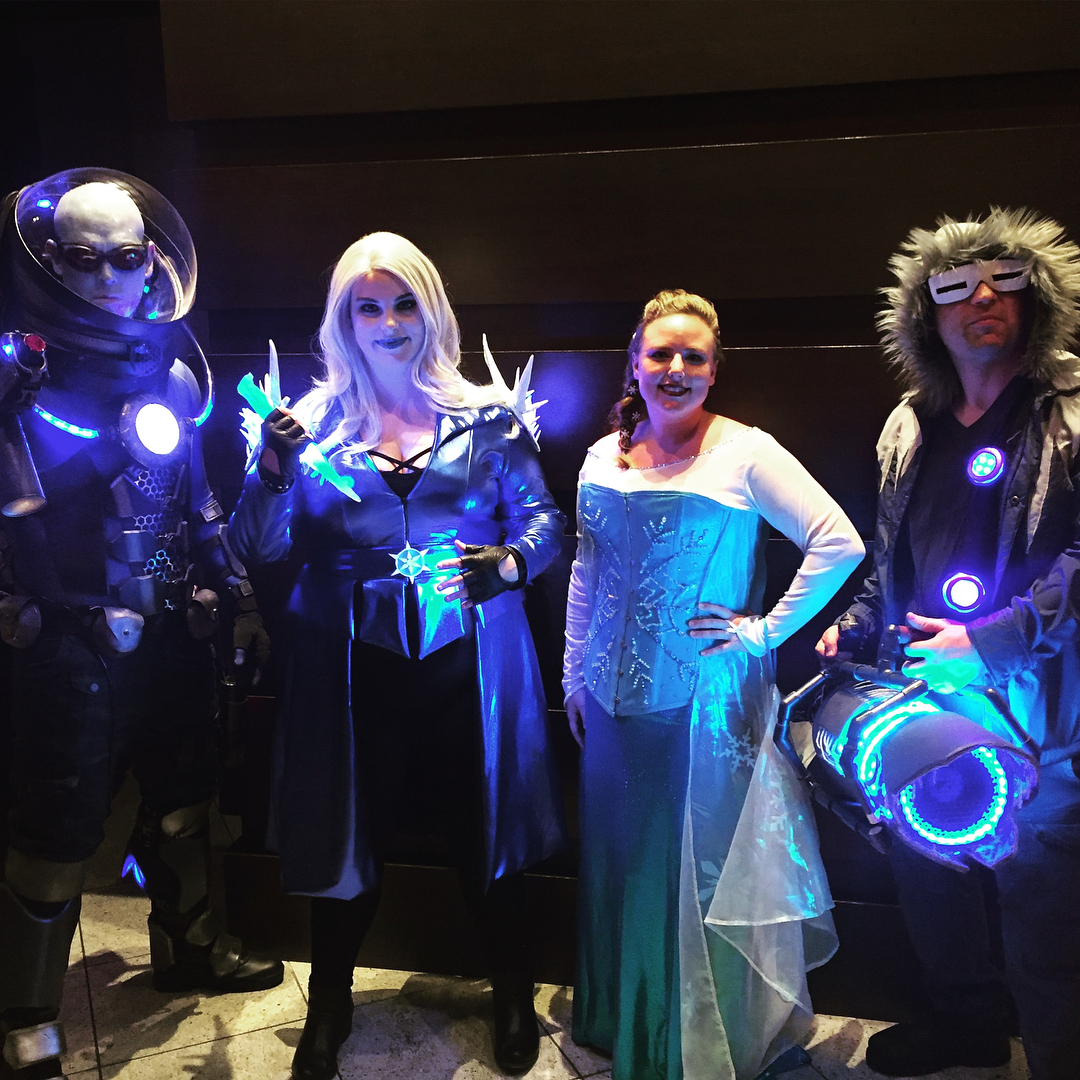
Team Cold poses for a group photo. Image courtesy of High Voltage Threads
Creators:
- Rob Morrow as Mr. Freeze
- Jonathan Coleman as Captain Cold
- Lori Morrow as Killer Frost
- Aimee Coleman as [Elsa](https://en.wikipedia.org/wiki/Frozen_(2013_film)
Jonathan had this to say about the concept and build process for Team Cold:
"Our concept for Team Cold originated from Rob's Mr. Freeze that he has rebuilt and brought to Dragon Con three prior years, and the group thought it would be "cool" to do freeze-themed super villains (pun intended). Elsa was mentioned as a joke but was too funny to pass up, so we ran with it."
"The build process was a challenge because it was everyone's first collaborative build. The most difficult part was working around each other, but after weeks of bouncing ideas back and forth we came up with the best process for building as a team. All of the foamsmithing, painting and resin work were done by Rob and his wife Lori. The sewing, 3D printing, electronics and sound effects were done by myself and my wife Aimee."
Mr. Freeze
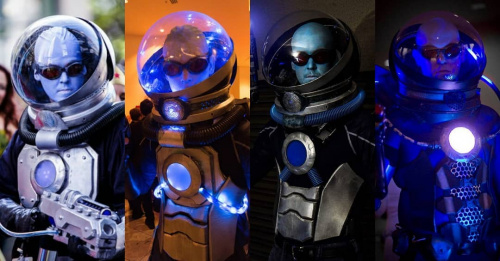 The evolution of Mr. Freeze. Image courtesy of Rob Morrow.
Rob used 660 NeoPixel RGBW LEDs for the lighting effects, driven by seven individual Arduino Nanos throughout the costume pieces and powered by 18650 lithium ion batteries. He also included a helmet ventilation system and audio amplifier, and uses a vape atomizer for the fog effects. The suit is constructed out of EVA foam, Worbla TranspArt, PlastiDip, tubing for the LEDs and an acrylic hemisphere.
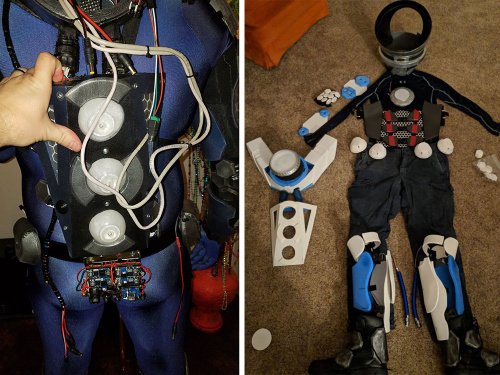 Image courtesy of Rob Morrow.
Check out more build photos of the Mr. Freeze project on Rob's Instagram.
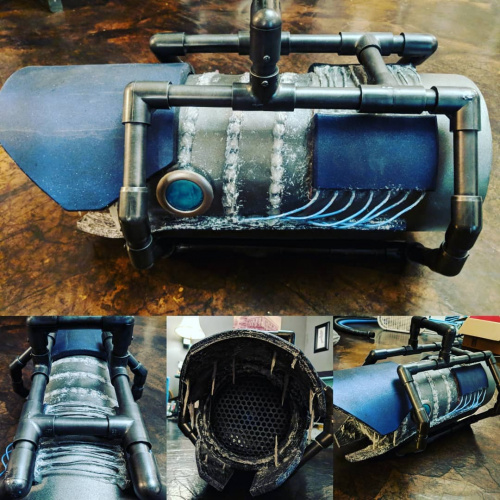
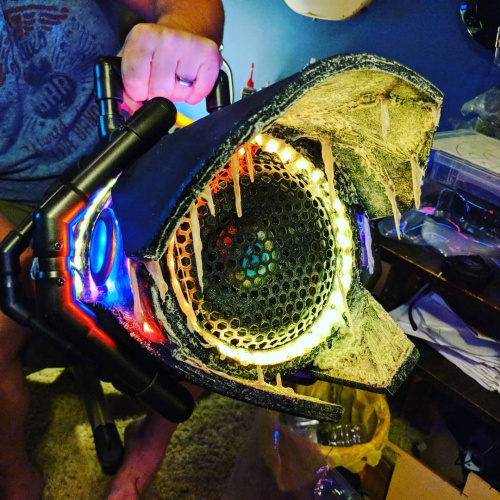
Captain Cold
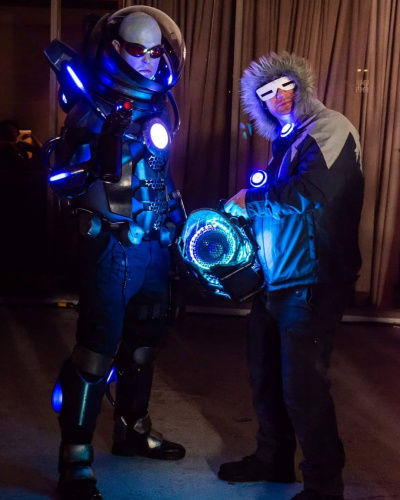 Image courtesy of Rob Morrow.
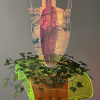
Captain Cold's cannon was built from a 6-inch, 300 watt sub woofer with 200 NeoPixels controlled by an Arduino Nano. Custom foam work and detailing hid the parts and adds some icy aesthetics. The hooded jacket was custom made, and his glasses were trimmed with foam and covered with PlastiDip.
 Images courtesy of Rob Morrow.
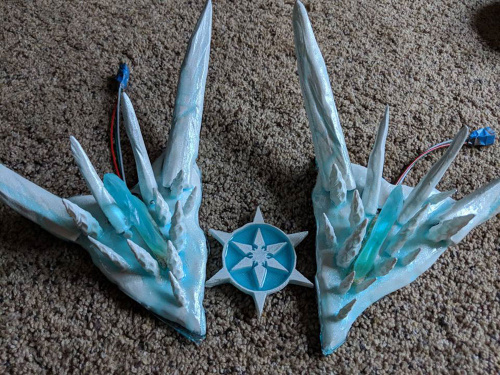
Killer Frost
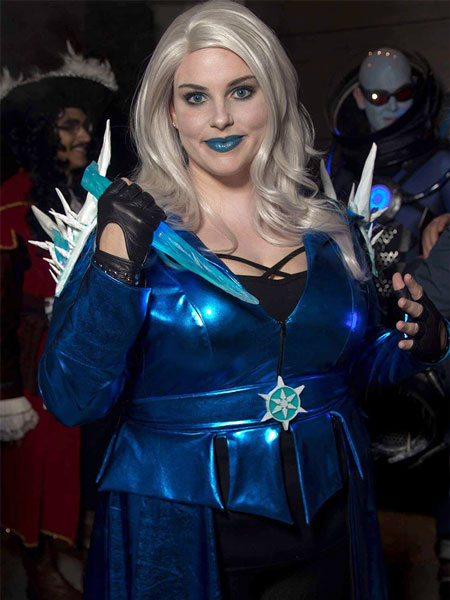
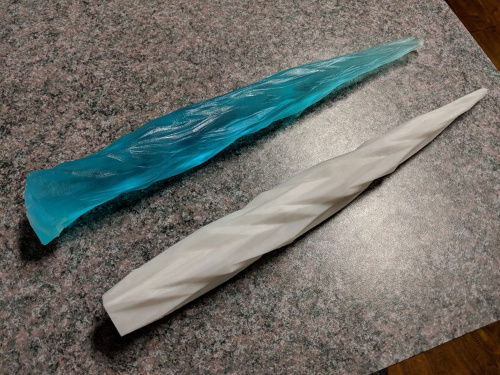
Killer Frost's custom jacket was embellished with a 3D-printed belt emblem and trimmed with resin. Her icy shoulder pads were created with a combination of foam, resin and 3D prints. The ice pick prop was 3D modeled and printed, then cast with resin from a silicone mold. The blue glow in the shoulder pads and ice pick is created using RGBW NeoPixel LEDs and an Arduino Nano.
 Images courtesy of Lori Morrow
Elsa
While Elsa's costume did not include any special effects, it was an elaborate fabrication project with hours of design, sewing, applique and hand-placed beadwork. For the skirt, top and cape, she used (and altered) Simplicity pattern 1215. For the corset, she bought a steelboned white canvas corset, which she then painted, glittered, tulled and hand beaded.

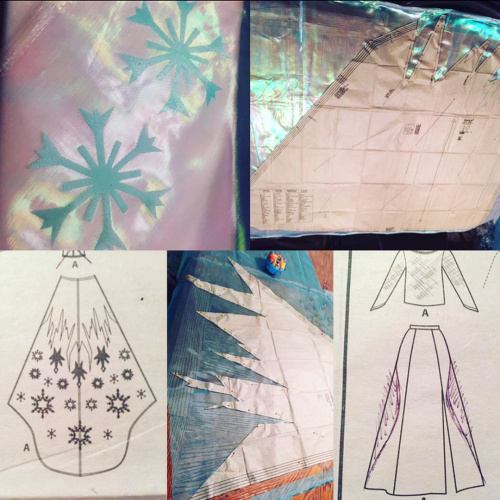
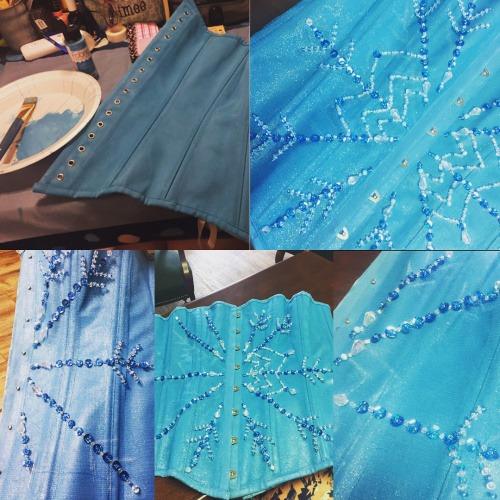 Details of Elsa costume planning and construction. Images courtesy of High Voltage Threads
Boo-Buster Luigi
Cosplay is often about meticulously recreating details from your favorite fandom, but it can also be an opportunity to get creative with remixes, combinations or original characters. I spotted a lot of Ghostbuster mashups over the weekend, but this Luigi Ghostbuster was one of my favorites.
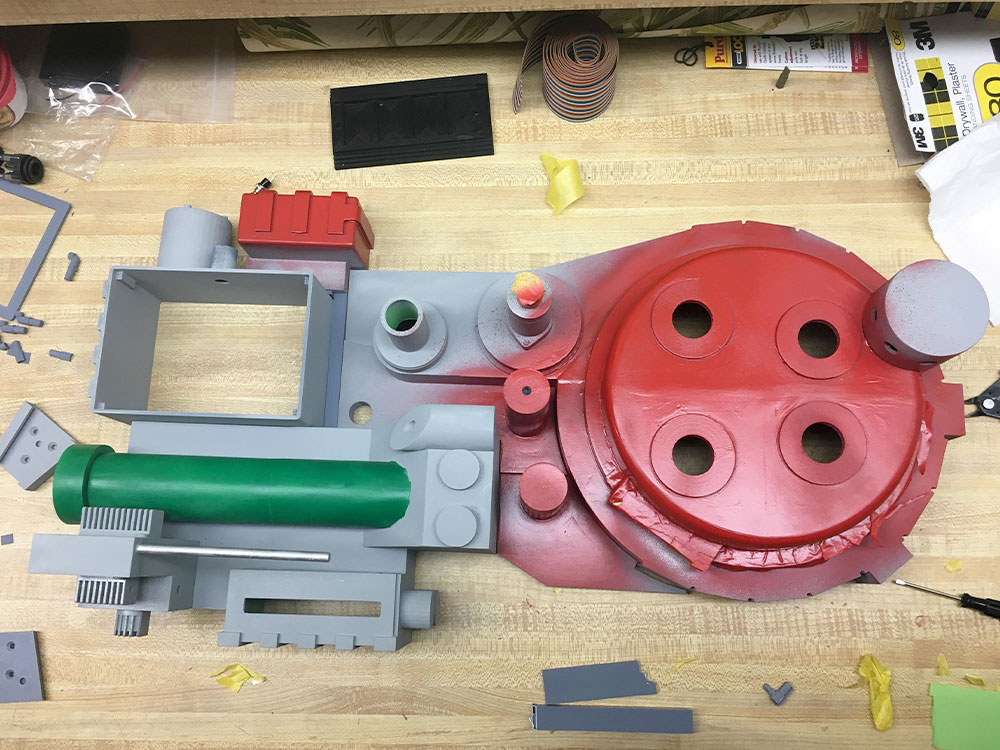
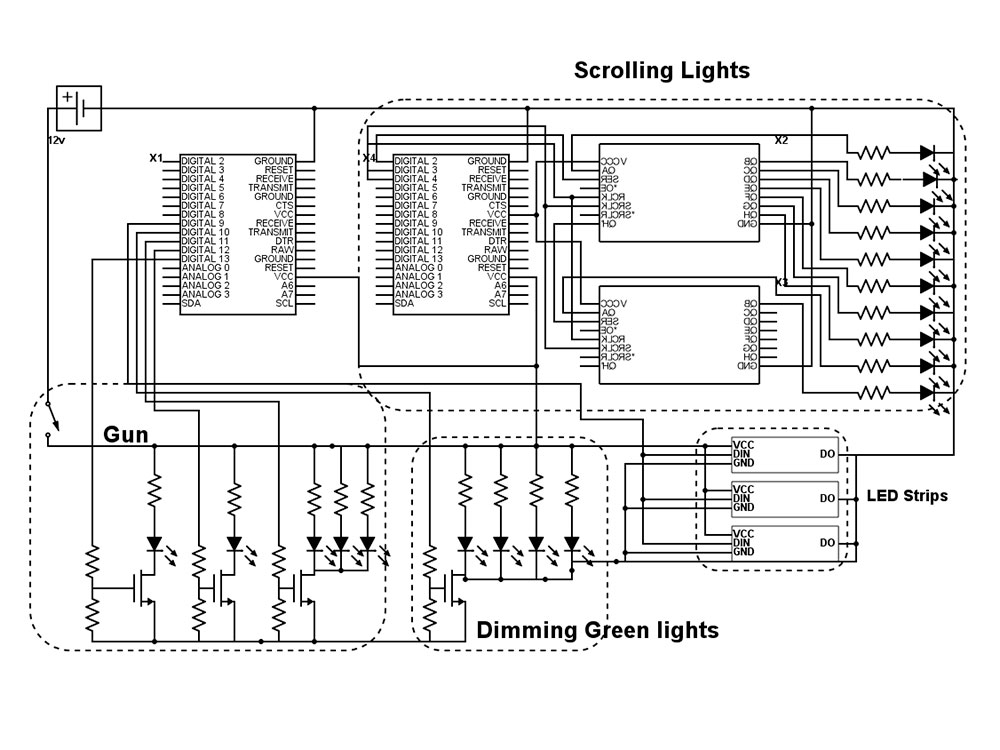
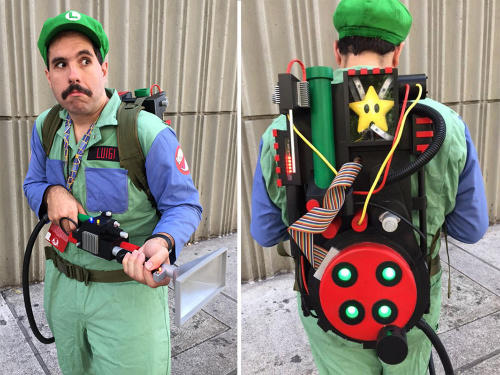 Boo-Buster Luigi. Creator: Nick Santamaria
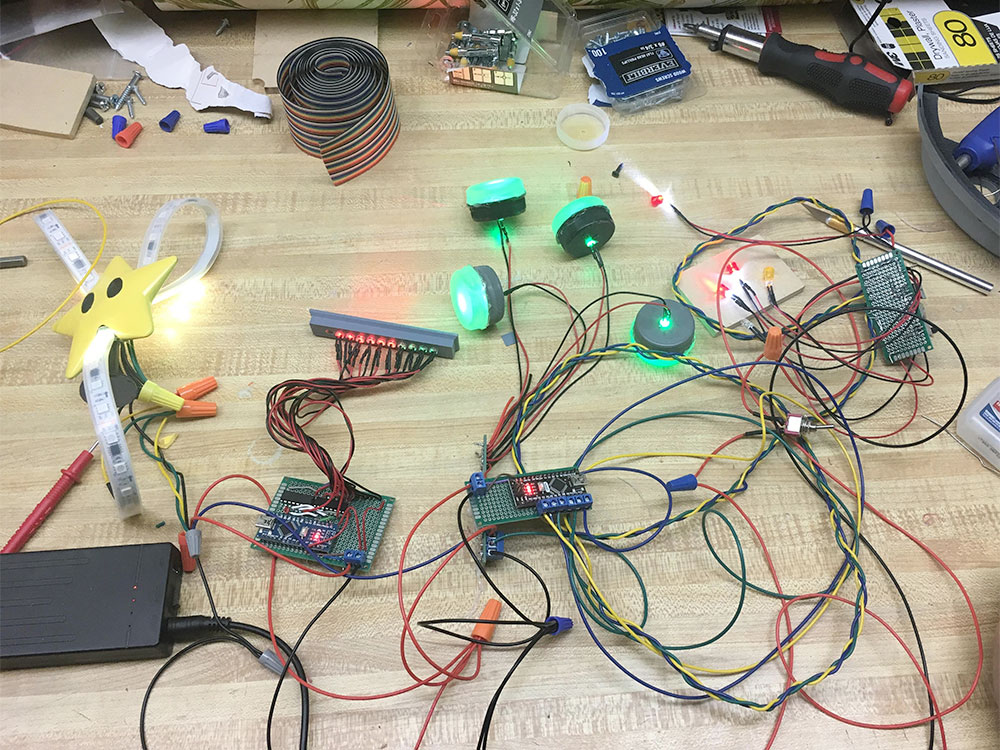
Nick created a Ghostbusters-inspired Luigi from Luigi's Mansion called Boo-Buster Luigi. All the parts in this build were printed using PLA on his Creality CR-10s, hand sanded and painted. To create the animated effects on the proton pack he used two Arduino Nanos, 19 LEDs, three NeoPixel strips, two shift registers and four MOSFETs, all powered by a single 12V battery.
Check out Nick's full album of the build process.Geeking Out at the Wearable Tech Meetup
Saturday night I hosted the Electronic Costuming and Wearable Tech Meetup as part of Dragon Con's Costuming Track programming. The meetup was an open invitation to costumers and makers who use electronics in their cosplay to meet cosplayers with similar interests for conversation, and to share their processes and/or simply show off their work. We had a great turnout that included attendees from other costuming panels who wanted to learn more about electronics and see projects up close, to expert costumers wanting to show off the inner workings of their projects. Here are a few highlights from the event.Having fun with all the makers at the Wearable Tech meetup at Dragon Con #DConCostuming #dragoncon2018 #sparkfun #adafruit #cosplayelectronics #cosplay #cosplayprop pic.twitter.com/hgbFJu71uq
— Angela Sheehan (@the_gella) September 2, 2018
Deadmau5 Head
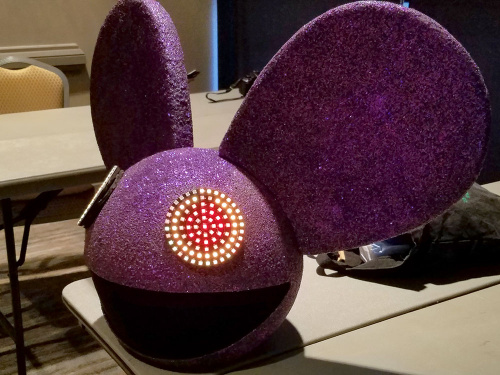
Creator Hunter Fuller purchased the vacuum-formed plastic head from a fellow member at a local hackerspace as a base for this project. The eyes were replaced with WS2812B LED rings arranged in concentric circles, controlled with an ESP8266 dev board and powered by an 18650 lithium ion battery, a 5-volt, 1-amp boost regulator and digital joystick control. The project utilizes a previously developed Arduino sketch Hunter created for an ESP8266-based LED hoop, which provides a Wi-Fi access point and a web page. A cell phone can be used to load the page and choose from a list of patterns and color palettes to display. It can be used while wearing the helmet, as well as by a "handler" accompanying the wearer while walking around the floor of the con hotels.
Daft Punk Helmet
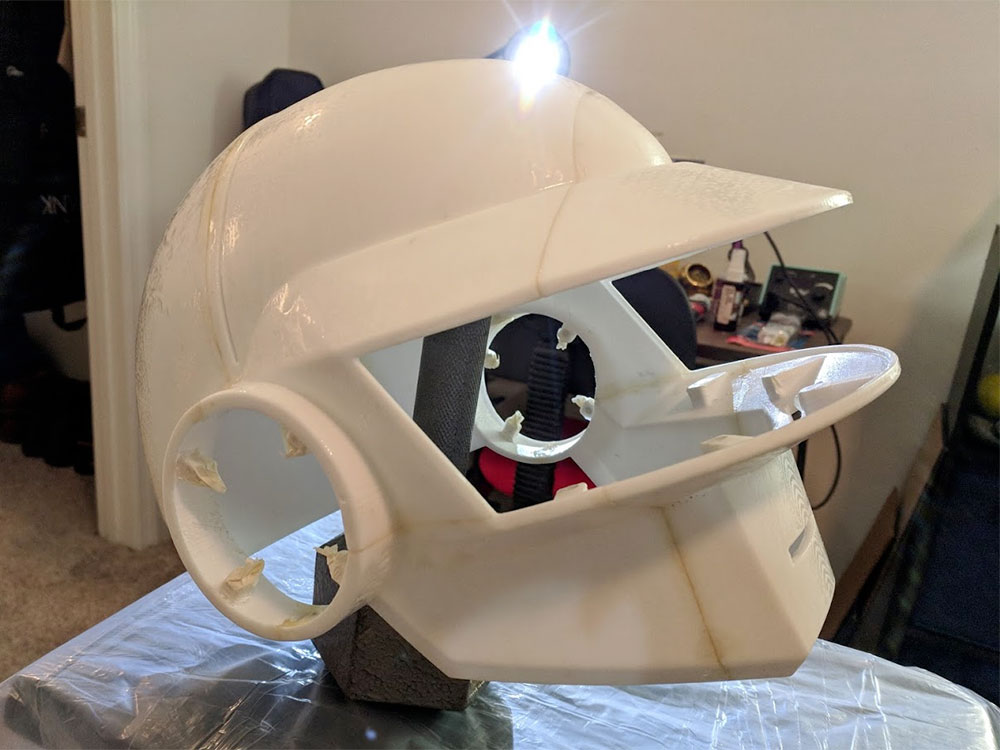
Creator Nathaniel Stepp was inspired by a helmet designed and built by Harrison Krix of Volpin Props, and by another helmet made by uiproductions, Nathaniel brought this fantastic costume piece to the meetup.
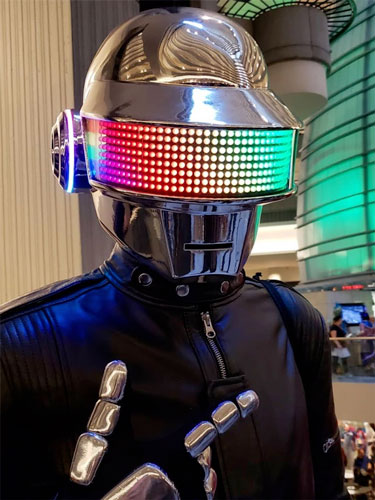
The entire helmet (including electronics integration) was developed and designed in Autodesk Inventor and assembled out of 11 3D-printed polycarbonate pieces. Final priming, prepping and chrome spraying was performed by the talented Gary Watson at Creations N' Chrome.
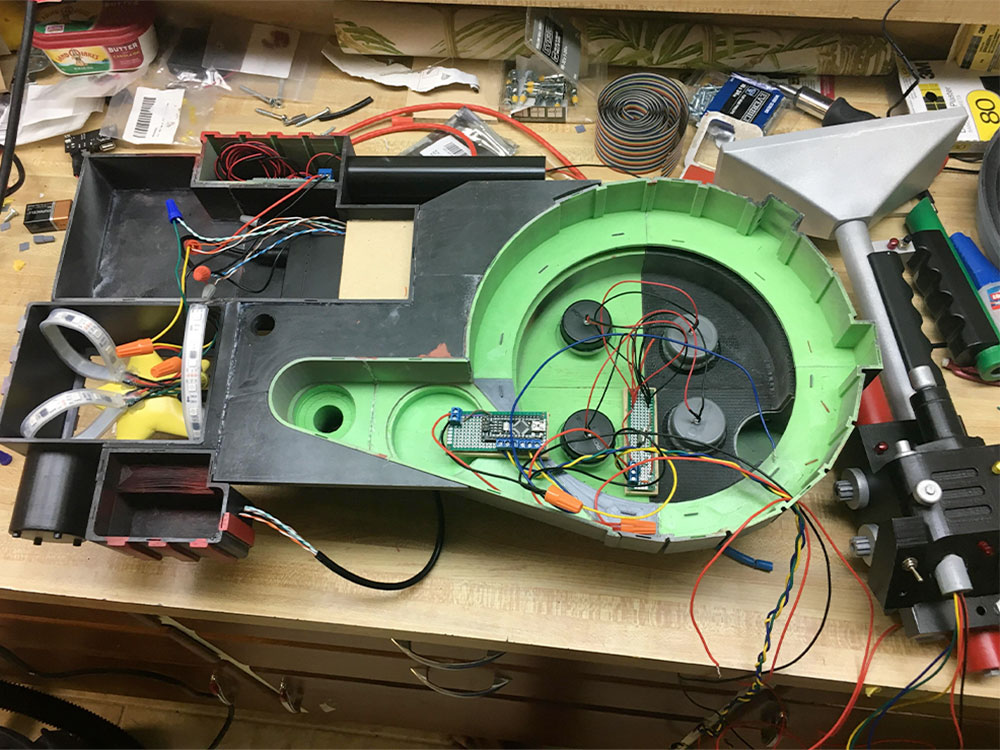
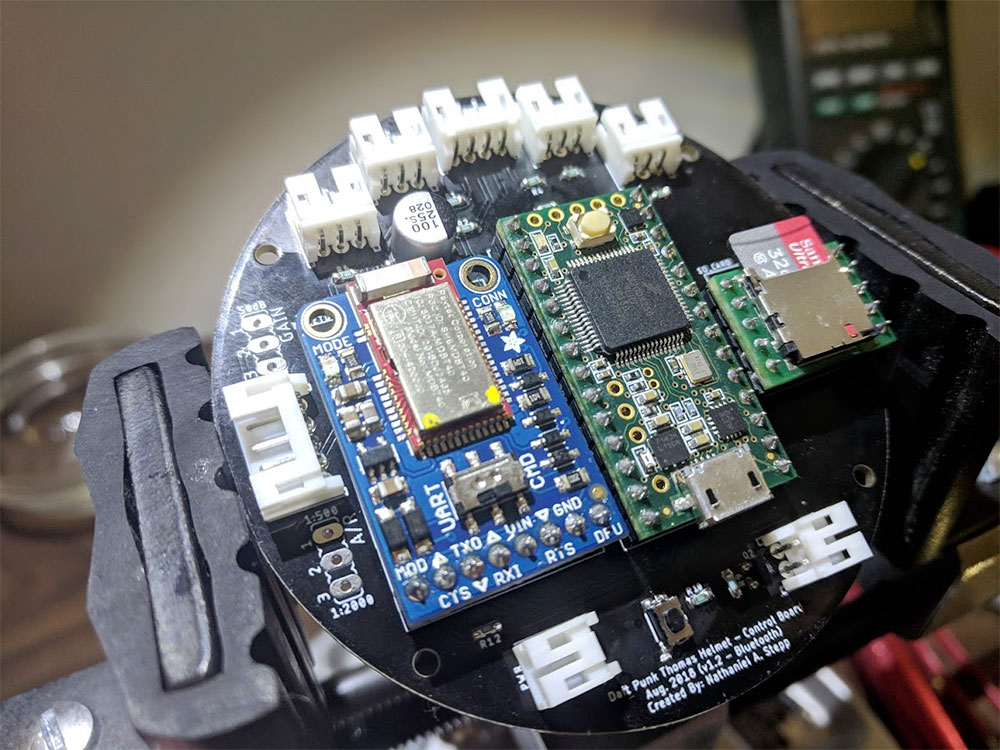
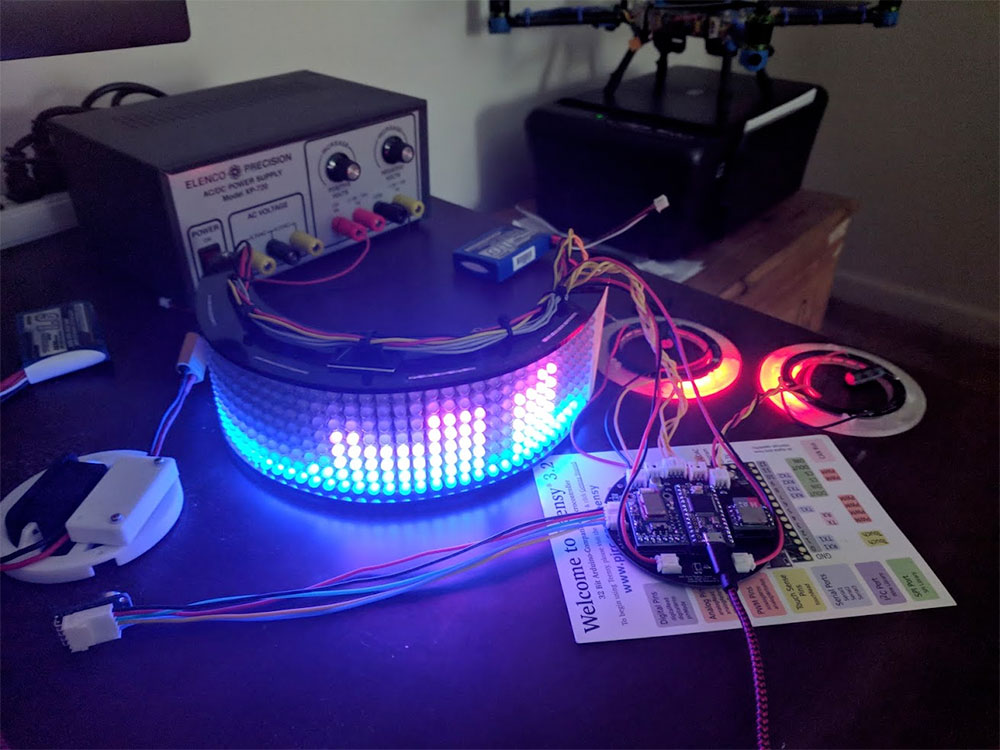
The electronics inside were integrated onto a custom circular PCB that Nathaniel designed, which were mounted into the ear cavities of the helmet with a 3D-printed mounting ring. The board uses a Teensy 3.2 to control all of the helmet's peripherals and LED displays, which include NeoPixel rings on the earpieces, a visor array of 328 5mm through-hole APA106 addressable LEDs, SD card breakout, real-time audio processing using an electret microphone amplifier and auto gain control breakout board, and some fans for ventilation. The animations on the helmet can be controlled via Bluetooth.
Check out an album of build photos and stay tuned for a full write over on Nathaniel's website.Light Up Mjölnir
I was really excited when one of my favorite cosplay duos Cowbutt Crunchies showed up to share their latest creation!
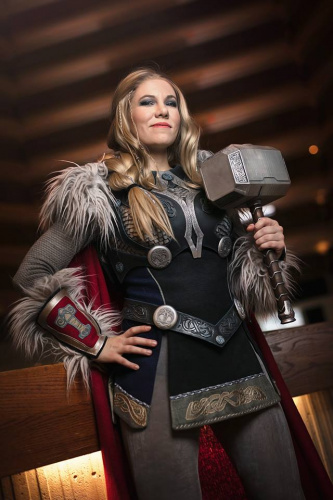 Image via So Say We All Photography
This 3D-printed version of Thor's hammer was made with a combination of transparent PLA with the detailed scrollwork using SLA. A thin coat of silver Liquitex paint and weathering finish on the exterior, is transclucent enough to allow the LEDs to shine through. Inside the hammer are WS2812B LED strips controlled by an Arduino Uno and activated by two buttons - one activating a solid illumination mode for still photos and the other for a "lightning" random effect.
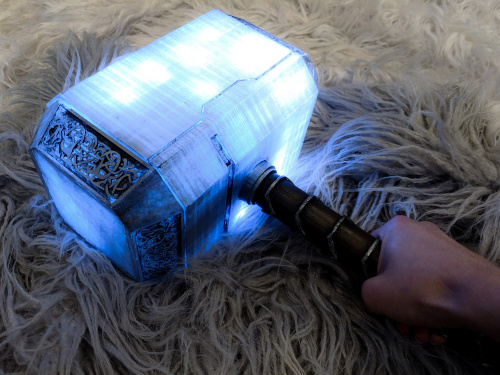
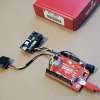
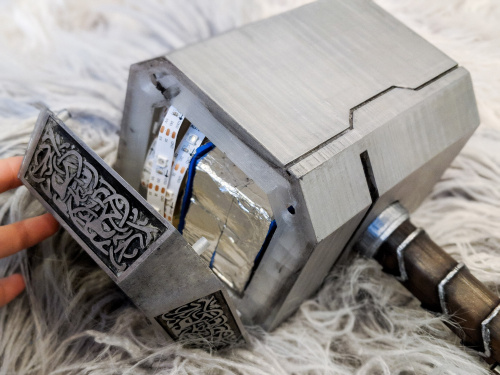 Taking a look inside Thor's hammer - the LED strips surround a box housing the controller and battery. Foil tape helps reflect the light from the LEDs. Images courtesy of Cowbutt Crunchies Cosplay
Were you at Dragon Con? We'd love to see or hear about your costumes in the comments!
Interested in learning more about LEDs?
See our LED page for everything you need to know to start using these components in your project.
Comments 0 comments
Related Posts
Recent Posts
Tags


