Enginursday: Building a Wireless Custom Keyboard
In a previous blog post we showed off a custom macro keyboard. In this week's post, we update it to make it wireless!

A little over three years ago I made a custom keyboard to help speed up the process of laying out a PCB in Eagle. Truth be told, I only ended up using the keyboard for a short amount of time. It wasn't that the keyboard wasn't useful; the main issue was the case wasn't complete. It sat flat on the desk, and I was using pieces of thermal gap filler as feet to keep it from sliding.

Combined with the fact that it used a frequently needed micro USB cable, and the next closest cable was miles ten feet away from my desk, it became a tool that spent most of its time in my desk drawer. What I was missing was a little bit of inspiration to invest the time to do it right.
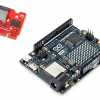
A few months ago I saw a library for the ESP32 that used the Bluetooth radio and turned the ESP32 into a Human Interface Device, or HID. The original keyboard didn't have enough space to easily fit the ESP32 Thing Plus I wanted to use, so it forced me to fully enclose it like I originally intended:
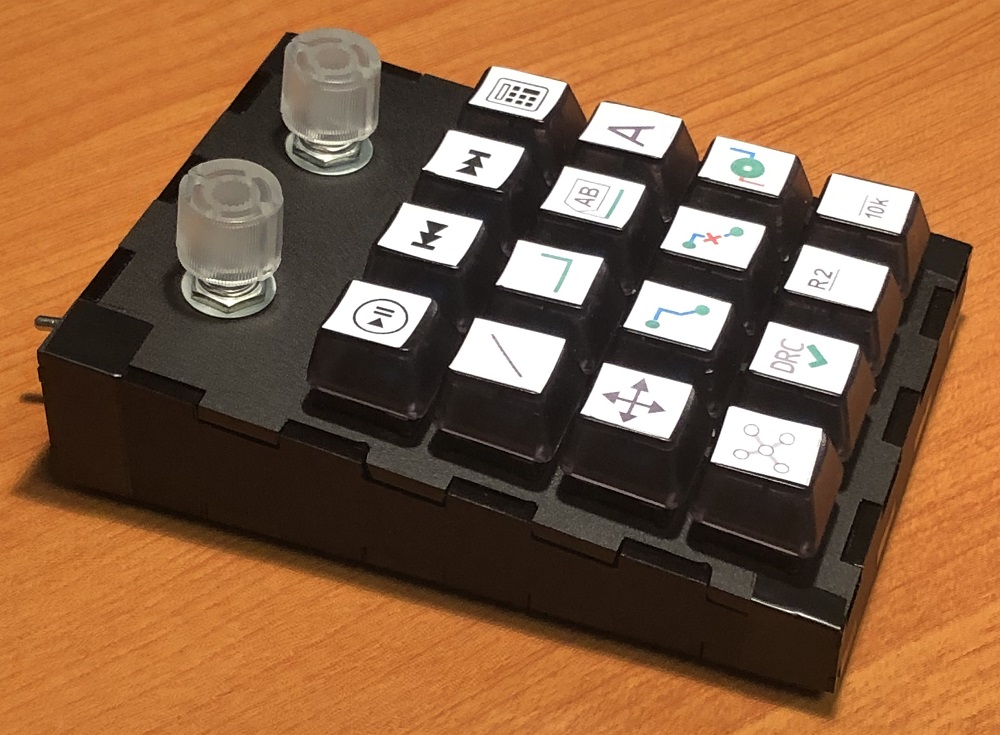
The new box I made had more of an ergonomic pitch that matched my keyboard, starting at around an inch high in the back and thinning down to around half an inch in the front (making sure to leave room for the Cherry MX key body). I used CA glue to hold five of the six sides in place, and black electrical tape to keep the top in place. I was pretty happy with the shape and feel, and I reclaimed some of the functions the previous keyboard had, plus a few new ones:
- Left Knob: Volume Up/Down and Mute
- Right Knob: Eagle Grid Spacing +/- and switch between Imperial/Metic
- LED Indicator: BLE connection status and battery indicator
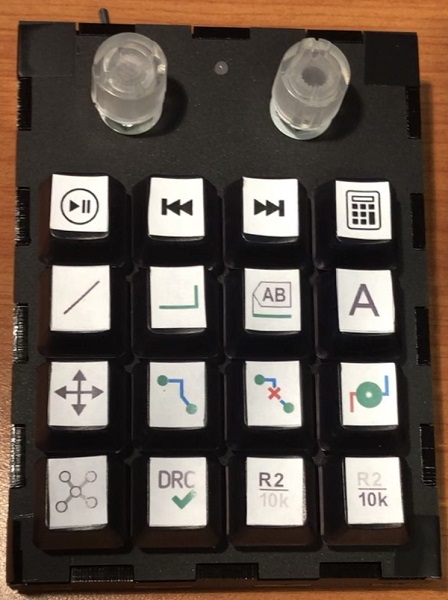
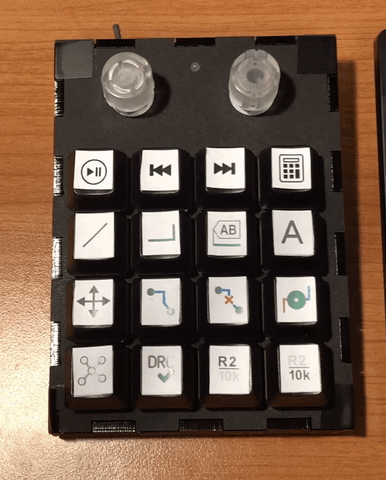
- 16 Cherry MX keys for:
- Play/Pause
- Skip Forward
- Skip Backward
- Launch Calculator (really useful for footprint creation from a datasheet)
- 12 frequently used Eagle shortcut keys
Making the keyboard wireless gave me the flexibility to move it wherever I needed. It also, however, gave me more challenges to think about - mainly power management.
To start, I checked to see how large a battery I could physically fit, and settled on a 2000mAh battery. While the library uses Bluetooth Low Energy, it was not exactly what you would call low energy. After pairing to my computer, the ESP32 was drawing around 83mA, which means it would barely run for a full 24 hours.
Quite a few years ago when I had a wireless mouse, the number one thing that drove me crazy was that I had to charge it every few days. Often I just left the USB cable connected to keep the battery charged and went wireless only when I had to. Having that still in my mind, I wanted to make sure I didn’t run into the same issue again. By putting the ESP32 to deep sleep you can power down parts of the chip you don’t need to use, like the radio, analog to digital converter, etc., to significantly cut down on power and extend the battery life.

Every time the board wakes up, the time it takes to reconnect to the computer can vary, so I needed a way to tell when it was trying to connect, and whether it was awake or asleep. I also needed to know when it was time to charge the battery. The library has a function to send the battery percentage to the computer (shown in the image above), but it wasn’t updating on the computer reliably enough to count on. I solved all of these issues with a single red/green led between the two encoders:
Alternating red and green when pairing (which looks better in person than on camera):

Double green blink when it’s connected and active:
Double red blink when it’s awake and needs charging:
The LEDs draw less than a couple milliamps of current, but if you only flash the LEDs periodically, especially for when the battery needs to be charged, you can get the most out of the battery. To decide when to go to sleep, I monitor any key presses and reset a timer, so that if after 20 minutes the keyboard hasn’t been used, it will put itself to sleep. The biggest downside admittedly is that because I used a voltage divider on the keys, I can’t use them to wake up from sleep. I did try to leave the ADC powered on, but I measured 20mA of current was still being used because it was constantly polling the ADC to see if a key was pressed to wake up.
The other power management solution I came up with was adding a switch to pull the enable pin of the 3.3V regulator down to ground, which cuts power to the ESP32, but will still allow the battery to charge if power is connected.
Speaking of charging the battery, I used a USB-C Breakout along with some wire wrap to provide not only power for charging, but the USB data pins as well so that I can reprogram the board without having to open up the case and stress the wires connecting the keys to the ESP32.

Aside from that, it behaves exactly like the wired version. I’m not exactly sure what the normal use battery life is quite yet. I’ve had the board running for about a week now without charging, aside from making a few quick tweaks to the code.
If you’re interested in making your own, you can check out the wishlist below for the parts used, and the GitHub repo, which has the files for the box, code used, and schematic for the hardware and images for the keycaps I used.
Two parts not on the wishlist are the common anode red/green LED and the switch, which were parts I had laying around in my parts bin, but you should be able to easily edit the size of the holes to match your parts.


Dude Alex! Great project and great upgrade! I'm definitely gonna have to build one of these up sometime soon.
Group select is probably my favorite tool in eagle, so I'd add that. But what key would I swap it out for. Tough call.
Another thought... maybe I'll try out the wake on shake. That way I could just slam my desk when I want to wake up my keyboard :)
Hi Alex! Great post! In my experience, <s>Buzzard</s>Eagle can use all the help it can get! (I prefer to use KiCad or gEDA, though the latter hasn't had much support in recent years).
One thought: It seems to me that an Artemis solution might allow for even lower power consumption, and has enough pins that you could switch (pardon the pun) from a voltage divider scheme to a grid pull-up/pull-down scheme for the keyboard interface. (Pardon me -- I'm not very familiar with the ESP-32 -- looking at the Thing Plus page, it looks like maybe it has enough GPIO pins to do that, too, but I haven't looked at the "wake-up" capabilities.)
Hmm... I can't get Markdown to accept the strike-out stuff... oh well...
Hey 773! Sounds like you're not using Eagle much these days, but I thought I'd mention that Buzzard got a huge upgrade recently. There is a new python version thanks to NPoole. Once you have it installed, it's actually very easy to create and place nice looking vector based text objects! We've been really loving it, especially because the vector based graphics dramatically decrease the file size and CAM times. Cheers!
I agree about the Artemis! I’d like to see Sparkfun’s engineers use their Artemis boards they advertise to be so much in write ups like these to show people that they are useful in everyday projects. The last time I checked, BLE was very poorly documented and a pain to get working so that might be why an Artemis board wasn’t chosen here. It’s kinda sad because I see a lot of potential for them if more stuff was documented and if there were more examples out there...
Complaints aside, it’s a cool project and it inspired me to build a Bluetooth “space mouse” for 3D design using either the Artemis or an ESP32 if I have to. Thanks for the write up!
We are still working on getting a fully featured BLE running for the Artemis, with examples. Unfortunately, a lot of stuff goes into getting that put together. Keep checking the newsletter for updates.
I was surprised to see you used the ESP32 for a wireless keypad application. While it has some nice features, low power was not one of them. For this application that would be top of the list. SparkFuns own Artemis module is an obvious better solution. Personally I would prefer to use an e-paper display instead of the keys so the overlays can be changed depending on the application your using. The number of buttons and functions as well as text output are endless. Battery level can be shown on display instead of a goofy led blink sequence. E-paper will keep the power down to low levels.
I did look into using the Artemis, but as of right now HID hasn’t been implemented. I know the engineers working on the development have been putting a lot of their energy into getting mbed up and running. But I agree, once it is it will be the better solution and run off of a lot less power.
E-paper would work, but I prefer the tactile feel of buttons personally. Something I did consider implementing is oled displays similar to what was used in the FreeDeck. Ultimately the reason I stuck with the original design with cherry MX keys was that the keys I wanted a shortcut for didn’t change much. My macbook for example has a touch bar that replaces the function keys and allows for keys to change based on the active program. But I hardly use it for anything other than adjusting the volume or display brightness. With my first keyboard, there were a couple buttons that I stopped using because the shortcut keys were faster, but they didn’t change frequently enough that made a display worth the development time.
The library does have the ability to send the battery level to the computer, and alert you when it gets low. It doesn't seem to work very well with windows though and I haven't been able to figure out if it's a windows issue or library issue.
I believe the ESP32 actually has a deep sleep (ULP) functionality, just not in Arduino-land. I remember someone trying to get people interested in building the feature out.