
Today on Tech Talk Tuesday, we're gonna talk about tattoo machines! If you've seen me on the site before, you've probably noticed that I have a few tattoos and I'm not the only one. In fact, almost half of all adults between 26 and 40 have at least one tattoo. Turns out they're not just for sailors anymore! That being said, most people aren't aware that the modern tattoo machine was essentially invented by our old friend (or nemesis?) Thomas Edison.
You see, in 1876, Edison patented a device which he called a Stencil-Pen. While the first iteration of this device used a rotary drive, a patent filed the following year would almost pass for a modern tattoo machine and it was intended for making stencils. A pair of coils would drive a needle up and down at a rate of up to 50 cycles per second and the user would write or draw with the needle in order to punch a series of tiny holes in heavy paper. The perforated paper could then be used to roll ink through and make several duplicates of the image. This technology never really caught on; However, in 1891, a fellow named Samuel O'Reilly had the bright idea to modify the original rotary Stencil-Pen for making tattoos. Sam even received a patent for his addition of an ink tube to act as a reservoir. Just a few weeks after Mr. O'Reilly built his tattoo machine based on the rotary action of the original Stencil-Pen, a Mr. Thomas Riley adapted the coil-driven design for tattooing.
The coil-driven tattoo machine saw several incremental improvements over the years and it's still the preferred "iron" for most artists. If you've ever been in a tattoo parlor, you've heard the buzzing of a coil machine. It's easy to adjust the speed, depth and throw of a coil-based machine, and they're easy to repair. That doesn't mean, however, that the rotary machine disappeared entirely. Manfred-Kohrs improved on O'Reilly's rotary design in 1978 and used it to tattoo several notable musicians, artists and celebrities. Today, companies such as Welker, Bishop and Sabre still produce and sell rotary tattoo machines. Because of the ubiquity of small electric motors, rotary machines are also the DIY tattoo machine of choice.
So, if a tattoo machine is so simple, why can't we just 3D-print one? Well, as it turns out, we can. And I did! It's bare-bones simple, but it qualifies as a working iron as you'll see in the video below:
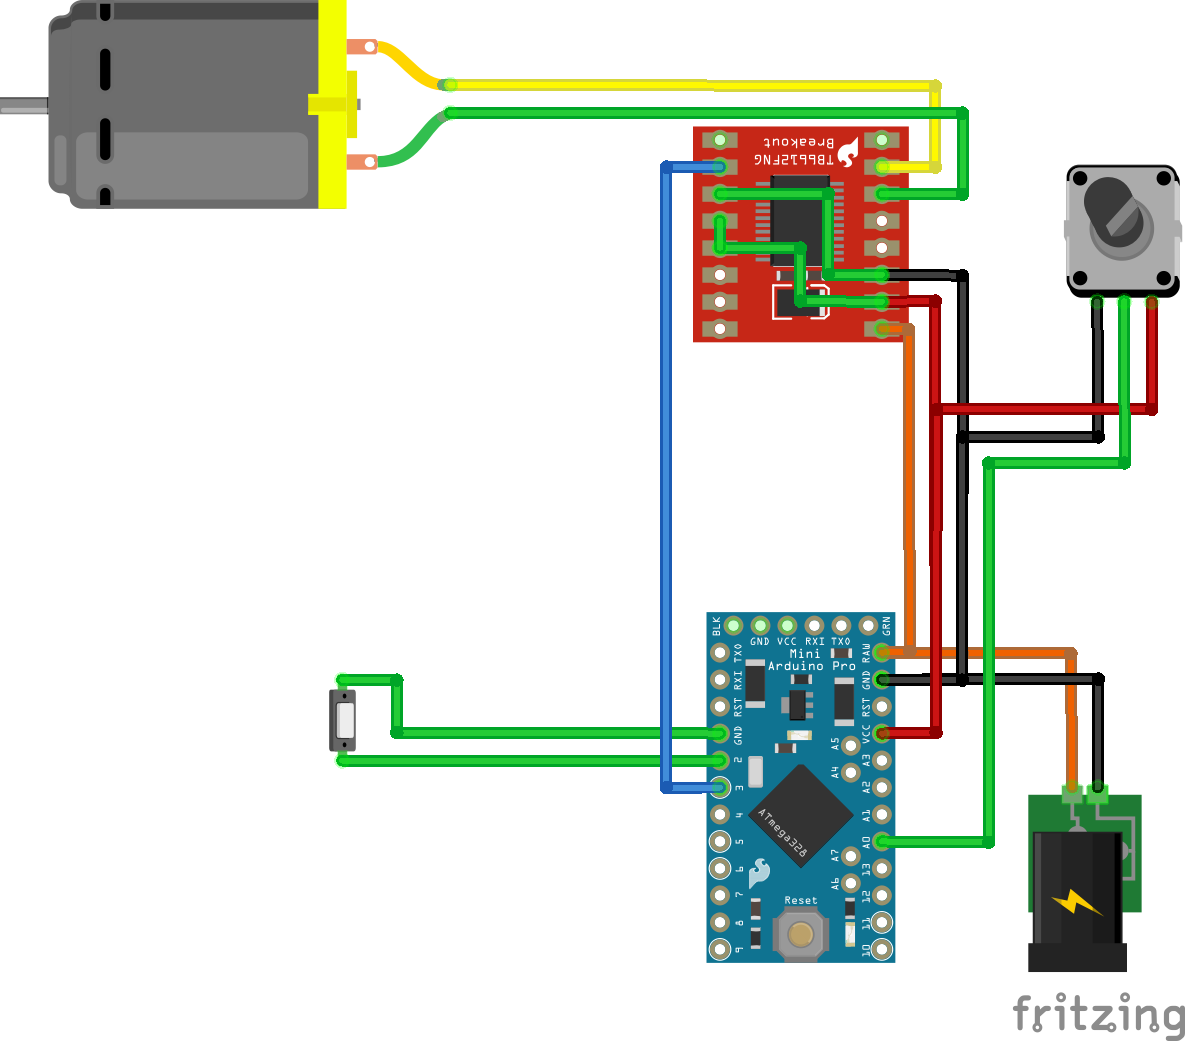
As I mentioned in the video, the electronics for this project are pretty simple. I'm using a SparkFun Pro Micro to feed PWM signals to our TB6612FNG Breakout Board based on inputs from a Rotary Potentiometer and a Foot Switch. The motor is one of our Micro Gearmotors in an Actobotics Enclosure and it seemed perfectly happy chugging along through the entire tattoo session. Here's a diagram to better illustrate the variable speed driver circuit:
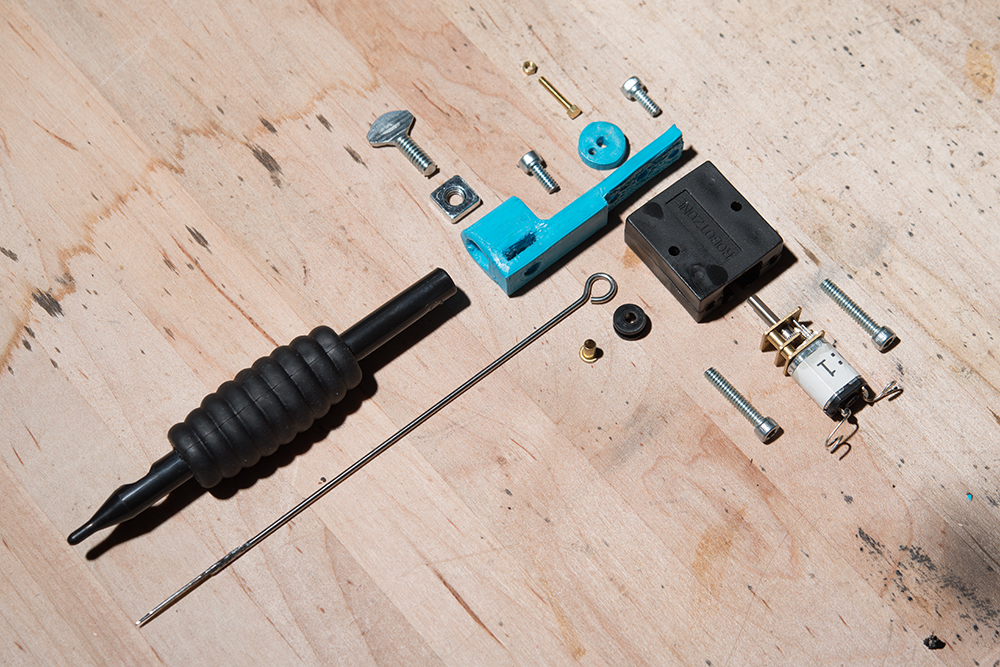
The 3D printing itself wasn't all that exciting for this project. The print, including the enclosure for the power supply, takes just over an hour on my Taz 5 and isn't a complex shape. The only really clever bit of design was making a slot for a square nut to fit into in order to mount the thumbscrew for the needle tube. The working machines were printed from PLA, because that's what I had on the printer at the time, but ABS might work even better. I printed one from ABS for the video above so I'll probably test the ABS construction soon. I'm also excited to have Shapeways print one for me in gold-plated metal!
Okay, I want to take a moment to re-iterate: Tattoos are PERMANENT! If you try this, you can screw up and wear that mistake for life (or until you have cash for laser removal) And do not EVER tattoo others unless you are a trained professional! There's a reason people study and train for a long time to become respected tattoo artists. This is not a good way to "save a buck" on a tattoo; I only did this because I have an enduring fascination with body modification and some experience that helped me along.
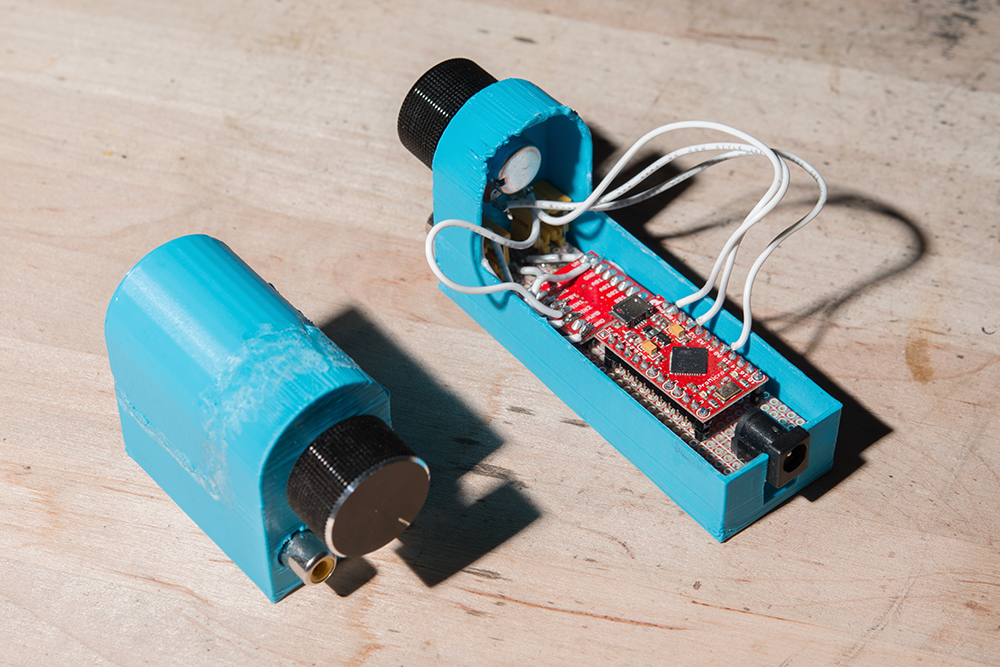
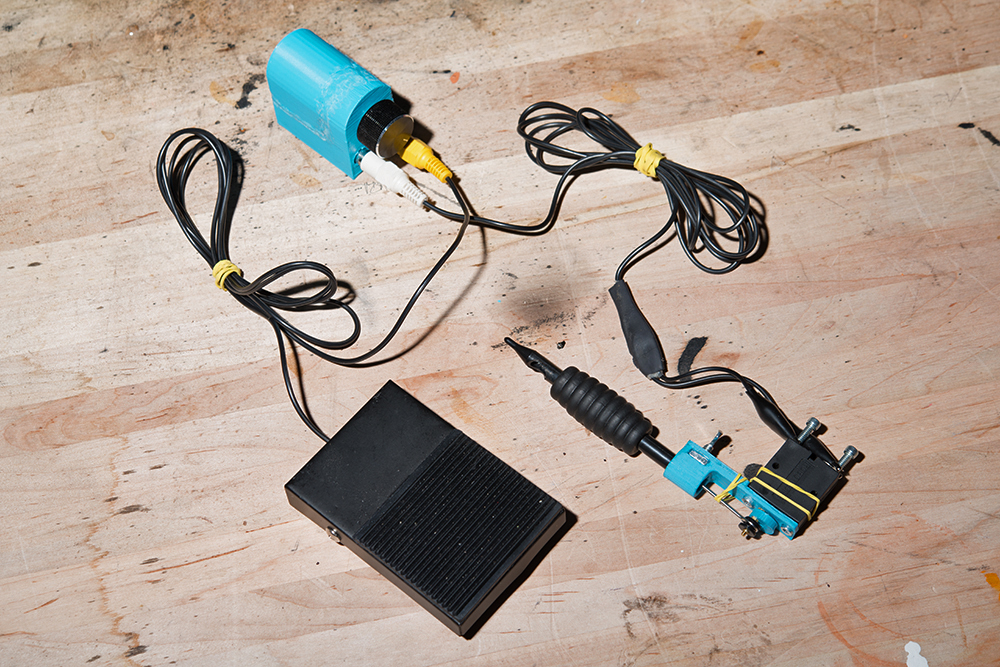
That being said, if you want to build one for yourself, you can find everything on the GitHub repository. I had fun doing this project and I've since gotten a lot of compliments on my tattoo. It's not professional-grade, but I know that I made it myself and that feels pretty good. Anyway, here are some pictures of the completed machines:

If you have any interest in coil machines, let me know in the comments! I may decide to build a coil-based machine and make a video about that process and how modern coil machines work. Thanks for watching my video and for reading today's Tech Talk Tuesday!


I cant seem to find the file for the 3d printed parts of this project :/
Here is the GitHub repository for this project (also linked above). I believe the files are in the
Hardwarefolder.Tried to build this thing.. didnt succeed Word of warning, the components will hardly fit in the provided 3Dmodel once printed..(see difference of size on the pictures) Loads of valuable info is not shared ( like the solderless breadboards) Very confusing electrical wiring diagram ( why did they ever even invent a standard diagram) I feel ive just been conned in buying a buckload of shit and wasting a ton of time //QQ
Well shit, I'm sorry you had such a rough time. Is there any way I can help? The 3D Printed parts should be slightly undersized for a snug fit.
Is the black grommet that goes in the eyelet of the needle 3D printed or purchased?
This is the coolest thing I've seen here in a while! I think it's a really awesome project and the tattoo looks great!