
Beards: A hipster badge of honor, sure, but a festive holiday decoration? Well, I think it's fair to say that old Saint Nick wouldn't look quite so jolly without a full, snowy white beard. But that's about as far as beards go in the Christmas tradition... until now, that is.
You've probably seen this article making the rounds the past couple of weeks. Apparently, a pop-up stall in London’s East Village Christmas Market is "pimping your beard" with strings of battery operated fairy lights. While I certainly won't be competing with any of these fine gentlemen in the beard department, I think I could help them step up their light game. Say hello to my little friend:

Hello!
This friendly fellow is the WS2812 Intelligent LED. Much like the string lights on your Christmas tree, these addressable LEDs can be chained together to make very long runs of lights. Unlike your classic holiday lights, however, these can be individually controlled and they change colors!
So... checkmate, beautiful beard man. Your beard may be thick and full, and attached to a ruggedly handsome face, but mine is blinking and changing colors! And I'll show you how I did it. But first, a quick anatomy lesson on our LED friend:
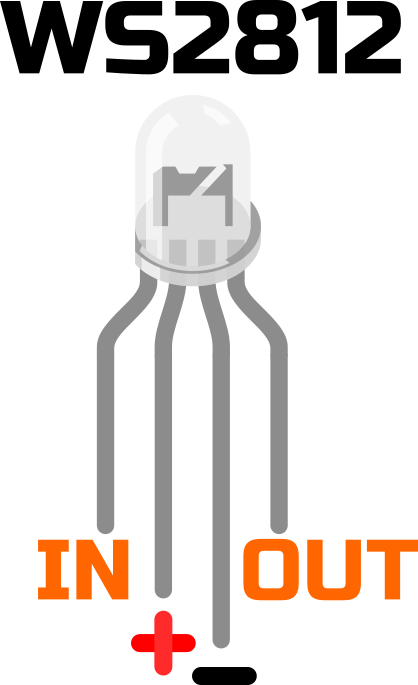
You can tell which pin is which by the length
To get these LEDs blinking, you only need to connect them to power, ground, and one pin on your favorite microcontroller. All of the power connections (the longer pins in the center) need to be wired in parallel. The other two pins are the data pins and they need to be daisy-chained such that the output of one connects to the input of the next, as shown in the diagram below:
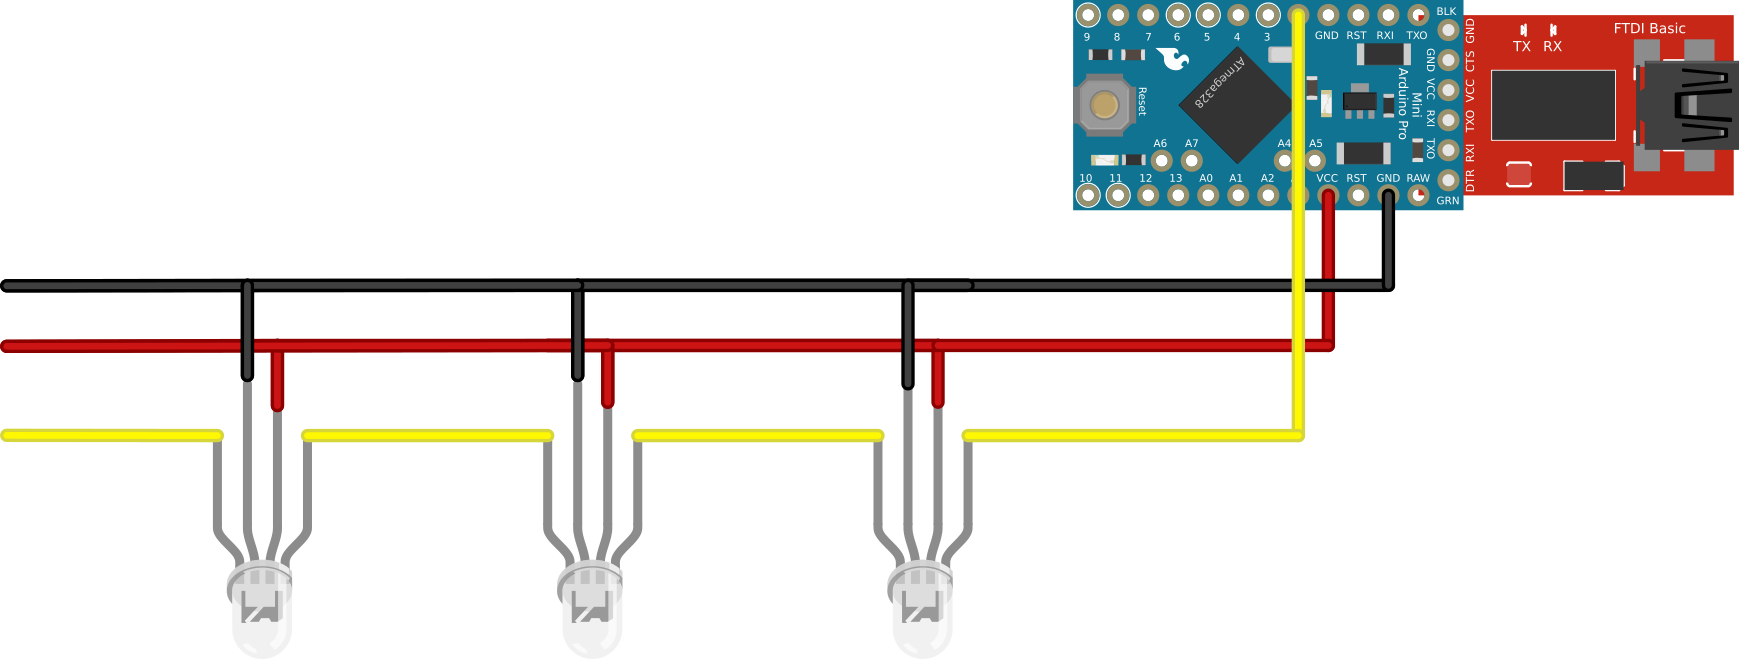
Do it like this!
Even though the diagram above shows a 5V Pro Mini soldered to an FTDI Basic Breakout, I actually used a 5V Pro Micro but you can use either one. The important thing is that you connect the input of the first LED in your string to pin 2 on your controller. Once the whole thing is wired together, you just need to add some code. I suggest grabbing the example code from our Holiday Lights Hookup Guide!
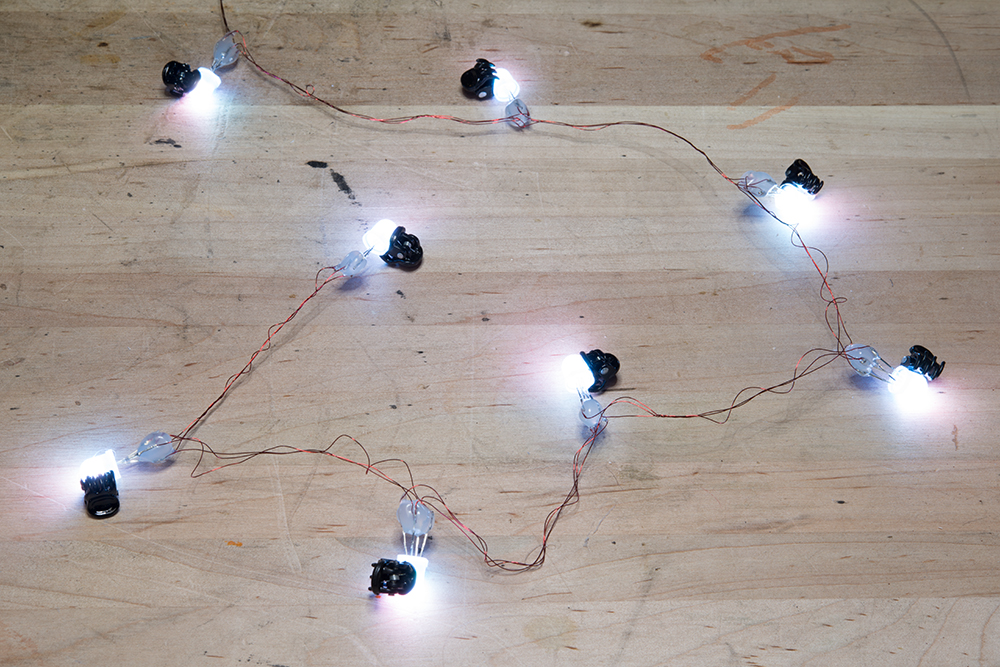
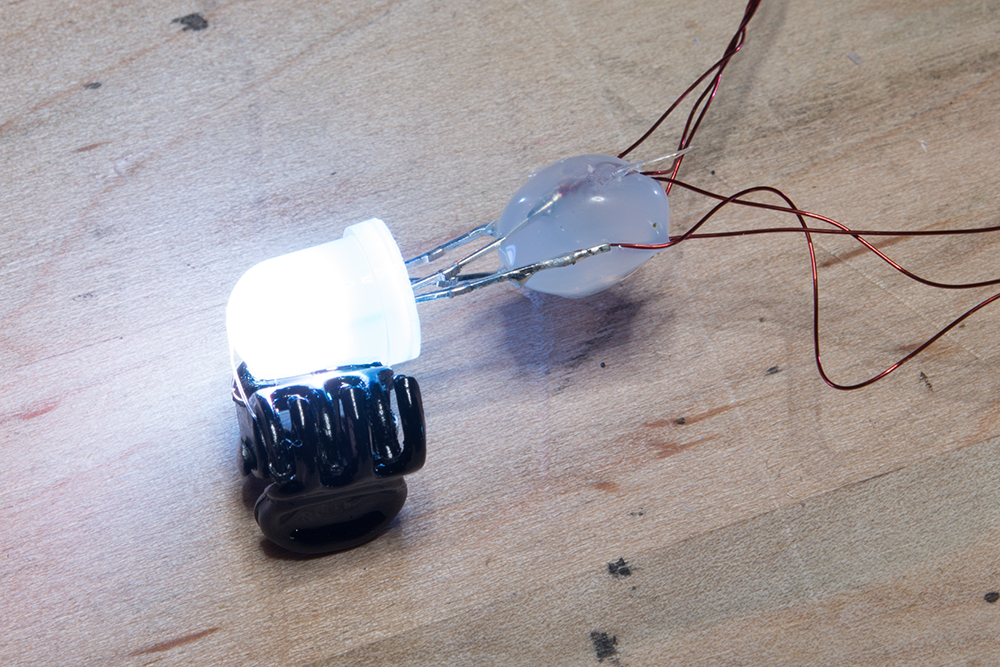
I decided to string together eight of our 8mm Addressable LEDs using some 30ga magnet wire. I would have preferred to use a small gauge stranded wire but I didn't have any on hand. To keep the pins from shorting against each other, I coated them in hot glue. To keep them affixed to my beard, I bought a pack of "micro claw clips" from the drugstore. Since the LED and hair clips are both made of smooth plastic resin, hot glue wouldn't stick so I ended up using CA (superglue) to stick them together. You can see my handywork below:
In order to power my beard lights on the go, I grabbed a USB power bank and connected it to the Pro Micro using a 6" USB Micro-B Cable. To hide the powerbank and Pro Micro, I suggest jamming them into a festive Santa hat. Jazz up your beard with a few small ornaments (preferably an impulse buy from the same drugstore where you bought the hair clips) and rock it to your next holiday party!

It should look kinda like this... your beard may vary.
If any of you dress up your beard (or your partner's) for the holidays then please, please tweet it at us @sparkfun! We can't get enough festive beard action here at SFE HQ.


I hope you like cats! Because they will be all over you, now!!!
Now THAT'S what I call an "Arduino Christmas Project". Like you said, add a few ornaments, maybe string through some tinsel, and you got the reindeer liken' outa your hands. :)) By the way, ever consider Litz wire?