Note: If you are not familiar with the first iteration of the portable lightning detector, make sure to check it out before reading further!
Findings from Field Testing ⚡
Warning! This is not a substitute for sensible lightning strike prevention/incoming storm awareness.
I've had the good fortune of being outdoors quite a bit in the past month. I brought my DIY lightning detector project based on the AS3935 Lightning Detector with me on two backpacking trips and three days of rock climbing. I have made some changes and reprioritized what matters to me in the project based on my experiences.
Comparative Distance Sensing
One of the first changes I added to the project was comparing the distance from the current reading to the previous reading. If the distance from the storm decreased since the last reading, I would received a special message on the OLED screen and three beeps from the buzzer. This was a huge boon for carrying the device while rock climbing. I could wait until a good spot to check the readout but still have some idea of how the storm might be progressing.
 |
 |
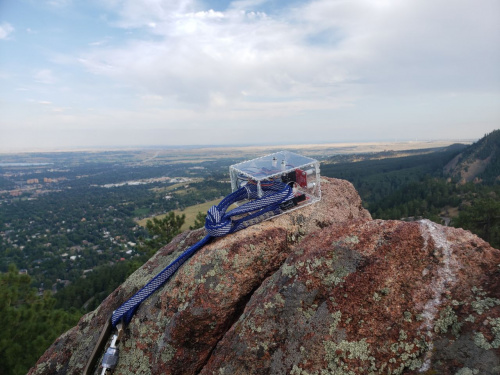
An early warning while rappelling, a good reason to not push for that "one more climb."
Water Resistance
Unsurprisingly, a water proof/resistant enclosure was needed for a second revision. While not needed as much for climbing in clear skies, you'll want to consider one for your electronics when the weather changes to rain or when the environment contains water hazards. I needed a way to prevent water from creeping into the enclosure while camping. On a trek through the St. Vrain Valley, I lost my footing while trekking down the flooded trail. My pack briefly dipped into St. Vrain's overflowed creek, but it was enough to render the detector useless for the rest of the trip, as I dared not reconnect the LiPo battery until I could clean and dry everything back at my workstation.

My buddy's doggo making sure that I'm OK post-fall.
Visibility of the OLED
Some of you warned me about using an OLED for outdoor use but I had to see for myself. While I appreciated the options in output and being able to give written warnings, I found in the end all I really needed was a number to inform me how far away the weather front was from my location. I found myself often having to contort my body into providing shade for the display to make it legible.
Weight
The initial design came in at approximately 5 oz or 0.3 lbs. After hauling it around on a pack and harness for several weeks, I no longer noticed the extra weight. The height of the enclosure, however, became an annoyance when reaching for other gear on my harness.
The Re-Make ⚡
My goals for the outdoor detector were:
- portable and sturdy enough that it could be clipped onto a harness
- report out how close the approaching lighting is
- give easy-to-understand indicators of a nearby strike
My goals for upgrading the new design were:
- reduce the height of the enclosure and make it easier to access the battery
- increase visibility of the read-out
- increase the durability and water resistance of the project
Visibility
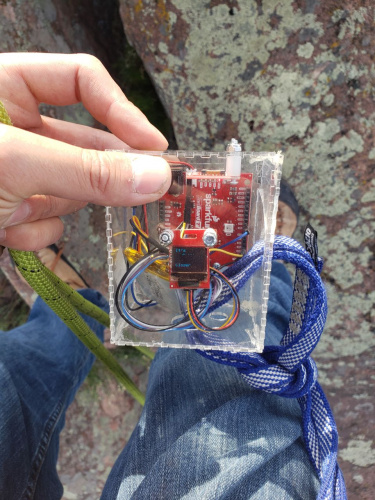
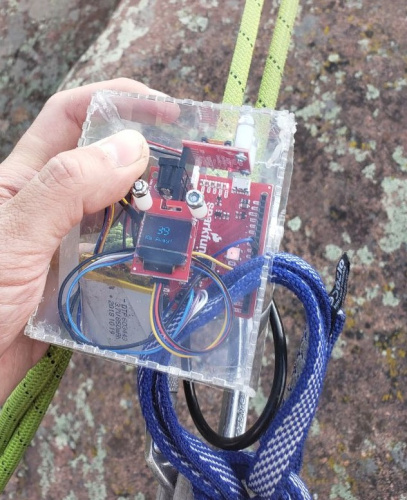
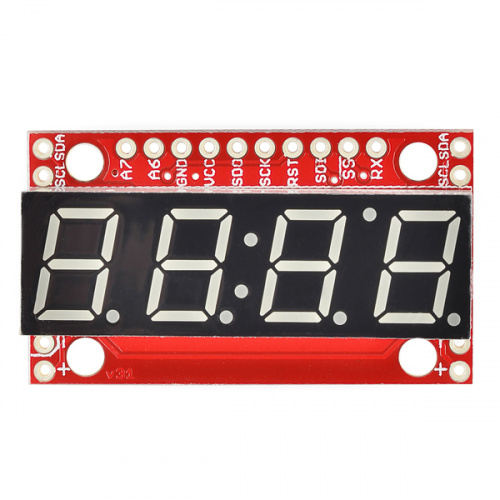
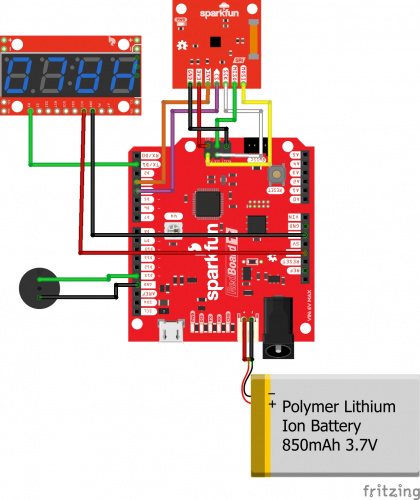
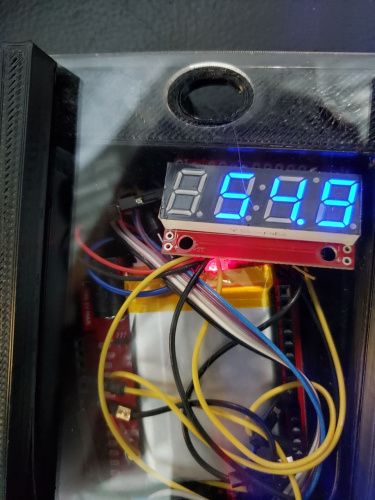
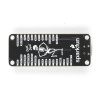
To address visibility in direct sunlight I turned to the 7 Segment Serial display. It displays all the data I really need, and I have found it quite easy to read in any situation. It is extremely easy to use and supports SPI, I2C and Serial/UART communication. I used Serial for this project as all I needed to connect was one wire for communication.
Following this hardware change, the new hookup for the design is as follows.
Enclosure Water Resistance and Height
With the previous iteration of the project I used a box made from 0.25-inch acrylic. This was quite light and made a fairly good seal. I found that the enclosure was difficult to continuously re-open, burdensome on a narrow climb and not water resistant enough after my dip in the St. Vrain's creek water.
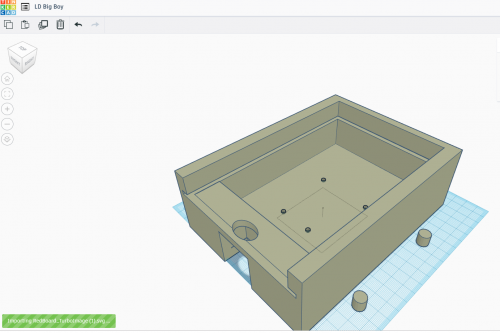
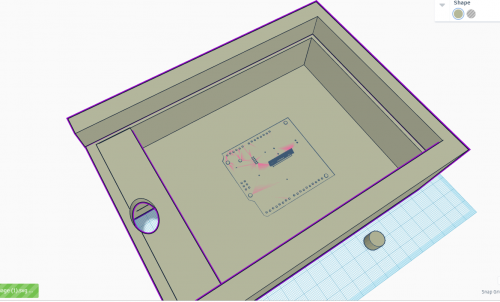
My solution for this was to 3D print an enclosure that fit my needs. I modified a design by McPorsche and used TinkerCAD to alter it for my needs.
I wanted an easy way to have accurate standoff placement in my 3D model. In TinkerCAD, there is an option to import a SVG (Scalable Vector Graphic) file onto your design. There are two easy ways I know of to accomplish this.
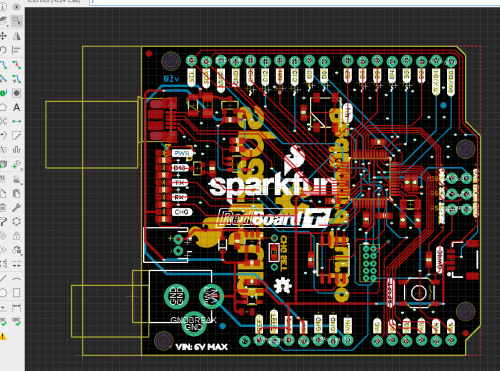
Enclosure Design w/ Eagle's Dimension Layer
First, we could go into the Eagle board's design file and find the dimension layer, export the simplified design as a DXF and convert to a SVG.
 |
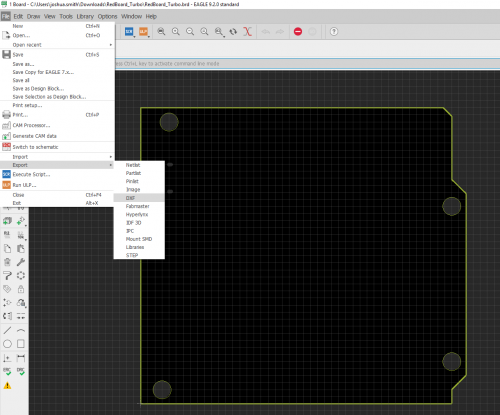 |
Click image for a closer view.
Enclosure Design w/ Fritzing's SVG File
Or, you can access the SparkFun Fritzing parts repo, where there are wonderful SVGs of many SparkFun products ready to use. Once the SVG is obtained, you simply import it onto your 3D model and can use it as a reference for making accurate standoff holes that are wide enough to mount boards.
 |
 |
Once the 3D model was ready, it was an easy print with one of our LulzBot 3D printers.
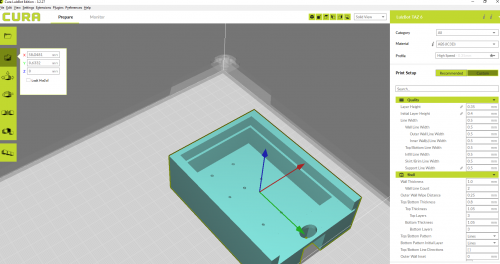
Lulzbots and Cura make everything about 3D Printing a little easier
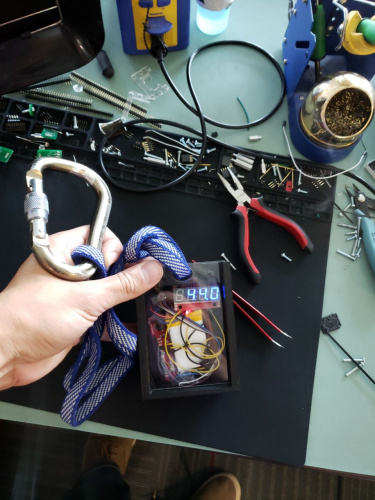
I really liked the design for offering durability with a sliding acrylic lid that can easily be attached to a carabiner.
⚡ V2 Ready to Hit the Trail ⚡
After printing and cutting a piece of acrylic, I was ready to hit the trail!
 |
 |
Final Weight
The initial design came in at approximately 5 oz (or 0.3 lbs), and V2 is approximately 8 oz (0.5 lbs). The height is reduced and with the new design, I do not foresee the extra weight being an issue.
Final Thoughts ⚡ ⚡ ⚡
It has been quite an interesting and informative experience building a project to withstand the destructive chaos of the "outdoors." The satisfaction of building a device to use 15 miles in the backcountry and seeing it work is a wonderful motivation to keep tinkering, building and rewiring. I will admit that although it was informative to get readings on an approaching storm, I was almost always already aware of it from weather reports or gazing at the sky. I also had the strange experience of driving toward the mountains because there was a storm approaching and I wanted to test out the system. I see a real functional use for the outdoor system on several pitches of rock climbing, where you are distracted and are not often in a position to view the weather. I was not sure where this project would end up when I started, but I am happy that I started it. No matter what your interests are, there are plenty of reasons to go out and Start Something!


I'd be a bit nervous about a 3D printed enclosure being water tight. I would at least give it a good long test -- maybe put something waterproof that's heavy enough so that the enclosure with it in it won't float, and put it in a bowl (or bucket) of water over night and then check for infiltration. (Wrapping the weight in a facial tissue before the test could help with detecting leakage.)
Yeah, I had a plant holder that was 3D printed that leaked. If it went through an acetone bath (assuming it was printed with ABS), then that would make it a bit more water tight. Spraying/dipping the enclosure in a coating would be an alternative too as someone else noted.
A good point and a good test! All I hopefully need to the enclosure to withstand is a quick drop into a creek or a little rain.
I've heard of people using wood glue to coat their print for water tightness, they do this for planters, but not sure how long it holds up being water soluble. Maybe use that XTC 3D stuff from smooth on.
Such an interesting article and the landscapes are very good!
Why? You can get an AcuRite 02020 Portable Lightning Detector for just a few bucks more than the lightning detector board alone. Fits in your pocket.
I think you might be on the wrong website. The proper question around these parts is "why not?".
Plenty of reasons why! I get a lot more control of the data output and how I want it relayed, those prefab'd detectors usually run around 50$ or higher, I get a deeper understanding of how those devices operate, it i s a great introduction for myself into making portable systems, and it's a DIY portable lightning detector!
Why not put it in a ready made enclosure like Pelican makes? They have several very small (deck of cards sized) boxes with clear lids. Guaranteed waterproof, and rugged.
Thanks for the suggestion! I might splurge on a nice case when I feel the project is finally finished. In the meantime, printing a custom case with standoff holes for 50 Cents is really nice!
Riiight. I bet free shipping from Amazon cost less than the printer :-) Enclosures have always been the hard part about DIY electronics.
I've been playing with this board for awhile. It seems to have some noise issues when PC connected, resulting in reduced sensitivity, want to try it battery operated. Did you post the code for this modification?
That issue is with the IC in general. It's sensitive to a lot of things and the hookup guide mentions a few under "False Positives and Noise":
"However, it can help to know some potential sources of noise: fluorescent lighting, microwave ovens, smartphone and smartwatch displays, DC-DC converters, refrigerators, and/or things that can switch large voltages in general."
Hope that helps.
You'll definitely reduce the noise events by switching to Battery power and stepping away from an area with lots of electronics. I recommend checking out the examples in the Arduino Library which have helpful steps for tuning your Antenna to fit your needs. Playing around with the Noise and Disturbance level values is Key!