SparkFun Things
We've made a "Stranger Things"-inspired message wall for your viewing (and tweeting!) pleasure.

Lots of us here at SparkFun are fans of the Netflix original series "Stranger Things." It's a super creepy sci-fi/horror show, and there's one scene where a mother, played by Winona Ryder, attempts to contact her missing son using Christmas lights strung on the wall as a sort of ouija board.
Obviously, we had to have this for the office.

Come in and sit a spell.
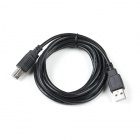
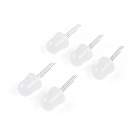
To make it, I used our addressable LEDs, strung together with bits of cut-up USB cable. Then, for each LED, I took an old-school C7 Christmas light, cracked off the metal base and extracted the guts. I then pulled a socket off a strand of lights, hollowed it out and hot glued those two pieces together. Finally, I slipped the completed assembly over the LED.
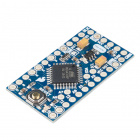
The whole array is being driven by an Arduino Pro, receiving characters over a serial port so you can type in a message to appear on the wall.
But why stop there? I've hooked up a computer to the Arduino and have it searching twitter for the hashtag #sparkfunthings. ~~If you mark a tweet with that hashtag, it'll appear on the wall, and you can see it over the webcam feed below.~~ The livestream has ended for now, but it may be back! Here's a recording of our livestream...
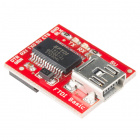
If you're interested in making your own version, all of the code is up on the SparkFun GitHub page. Here's a list of all the bits and pieces (short of the Christmas lights, which can be easily found on Amazon) needed to implement your own version of it.

I hope you enjoyed this little project as much as I enjoyed building it. Thanks for watching, and look out for the Demogorgon!


The only reason I'd sign up for a twitter account.
I'd also be interested in a more detailed description of the setup process. Thanks
Could you provide some more details for step by step? I am not electrically inclined, I am more of a paint and glitter DIYer:) THIS IS AWESOME!!
How has this not gotten more love?! This project is awesome. Nice work, Mike.
Thank you for this great project. just built one of these for school and put it in another teachers classroom and sent messages via the network. Worked great. Kids got a thrill too. Will post a video of it in action soon.
Thanks, Sparkfun! It took me the better part of 40h all-in to make this, but I managed to do it with 3h to spare! Here's the thank you message we sent out to everyone who came to our party: https://youtu.be/rZwIky4oUpY
Great project. I made one for my daughter to use for Halloween at the bar/grill where she works!
@SFUPTOWNMAKER -- This is AWESOME, and I want to remark I just purchased your WS2812 LEDs for this very project.
I need to know your SECRET how you wired this so cleanly! Could you elaborate? You have made it appear as if you connected the 4 wire WS2812 bus to the original power cable. You couldn't do that, of course... so it's be awesome to share some advice, and maybe a close-up photo.
My plan will be to use the original wiring if I can, then glue 2 additional hookup wires along it's length, then spray paint them with plastic green paint to match. Would love to hear your approach...
I used short lengths of USB cable for power and data, then broke the sockets off a string of lights, emptied the sockets, and glued the glass from a broken lamp to each socket. I then inserted the LED into the bottom of the socket. It was, to put it mildly, a LOT of work.
I did spend some time trying to figure out how to use the existing wires, but in the end I decided it would be easier to replace the wires. it took probably about 16 hours to make all the lamps.
if I wanted to try this out (and watch it) where's the operating web cam URL?
We've deactivated the webcam. You can watch the existing stream above and scroll around to see tweets on the sidebar, but in the end, we decided that keeping the project up and running isn't something we have time to spend on.
I'll update the blog post text to reflect that.