How to get a Bootloader on your Board
A brief overview of bootloaders, and a few tutorials we have for installing bootloaders to boards.

Modern microcontrollers are almost always programmed over USB - we rarely deal with lower level programming - but how does that work? First, let's talk about bootloaders and what they are: a small piece of code that will check to see if there is new code coming in, and if so, place the code in a certain location. If there is no new code coming in, it just goes to that location and runs the code that's there. That's basically it! Arduino made bootloaders popular because you no longer needed special (and expensive) programmers to get your code on a board - in fact SparkFun's very first product was a development board (or programmer with I/O and more). Now you can just program it over USB.
Here at SparkFun, when we make our boards we install the bootloader for you, whether it's the Arduino Pro Mini, RedBoard Qwiic or SAMD51 Thing Plus. But how do we do it? AVR-based boards like the Arduino Uno, RedBoard and Arduino Mega used a six-pin header that breaks out the three SPI pins need for programming (MOSI, MISO, CLK), as well as Power, Ground and Reset. These pins make up the ICSP (In Circuit Serial Progammer) port, which is the 2x3-pin port you'll see on most larger size AVR boards. Some boards like the Pro Mini don't have room for the header, but all those pins are broken out for the user, so our test beds just connect to those pins directly.

ARM-based chips like the SAMD21 and SAMD51 use SWD or JTAG for programming. The typical SWD header is a 2x5-pin, half-inch header that breaks out the required SWDIO and SWCLK pins, as well as Power, Ground and Reset. Once again, many of our larger boards like the RedBoard Turbo will have this header on them, but some, like the Pro RF, don't have room and will only have test points that connect to our test beds for programming.
But what if you want to change the bootloader, or design your own board and add a bootloaders? SparkFun has a few different programmers for both AVR and ARM, as well as tutorials on programming those boards. Whether you want to add your own bootloader or just want to program your code without one, we've recently added an ARM Programming Tutorial in addition to our Arduino Bootloader Tutorial to help you get started loading whatever code you need.
Also, check out our older tutorials and guides for some of our programmers.
Installing an Arduino Bootloader
This tutorial will teach you what a bootloader is and why you would need to install or reinstall it. We will also go over the process of burning a bootloader by flashing a hex file to an Arduino microcontroller.
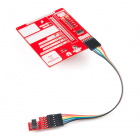
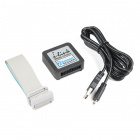
Pocket AVR Programmer Hookup Guide
Skip the bootloader and load your program directly onto an AVR with the AVR Pocket Programmer.
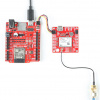
Installing a Bootloader on the MicroView
Fix your bootloader-less MicroView! This tutorial covers how to: disassemble the MicroView, wire it up to an assortment of programmers, program the bootloader, and test it out.
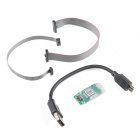
Raspberry Pi Stand-Alone Programmer
This tutorial will show you how to use a headless Raspberry Pi to flash hex files onto AVR microcontrollers as a stand-alone programmer. It also tells the story about production programming challenges, how SparkFun came to this solution, and all the lessons learned along the way.


Love a good bootloader, Ive built a few UF2 bootloaders this week for some of our SAMD21 boars that didnt have 1, look out for those too!
I'd love to hear more about how you did that. I'd like to update a few boards as well.
I'd Love to show you!, when and where?