It's Almost that Time of Year
Fall is in full swing, cold weather has set in, and it is finally time to get ready for Black Friday sales... in particular NEW COMPUTER PARTS!
I am a staunch observer of the time-honored fall tradition of buying my hardware computing needs in November. This year, I was looking for a cheap and portable computer that could:
- Easily be carried around
- Is relatively inexpensive
- Runs off a distribution of Linux
I have built and upgraded my own PCs for the past decade or so, but always felt left out when it came to portable computing stations. They are notoriously tricky to build and maintain on one's own. This year I decided to address my needs with a portable Raspberry Pi station! New laptops typically cost several hundred dollars or more. Raspberry Pis are objectively awesome for their power, price and size. I've had a hard time using them for personal projects due to needing a whole nest of peripherals (such as keyboards, mouse, display, etc.) that can make it hard to move a board that weighs only 1.5 oz. That's all about to change.
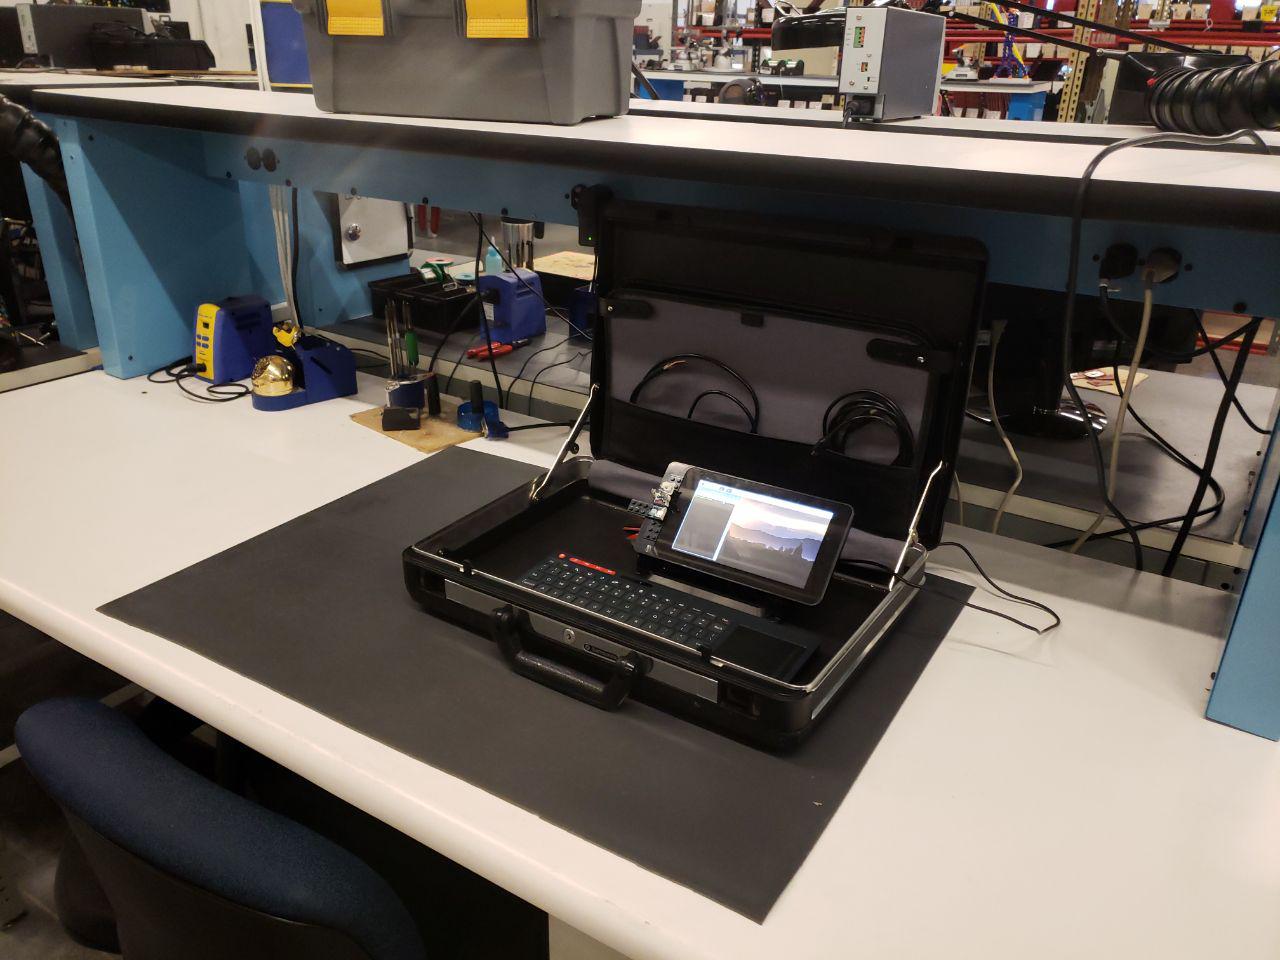
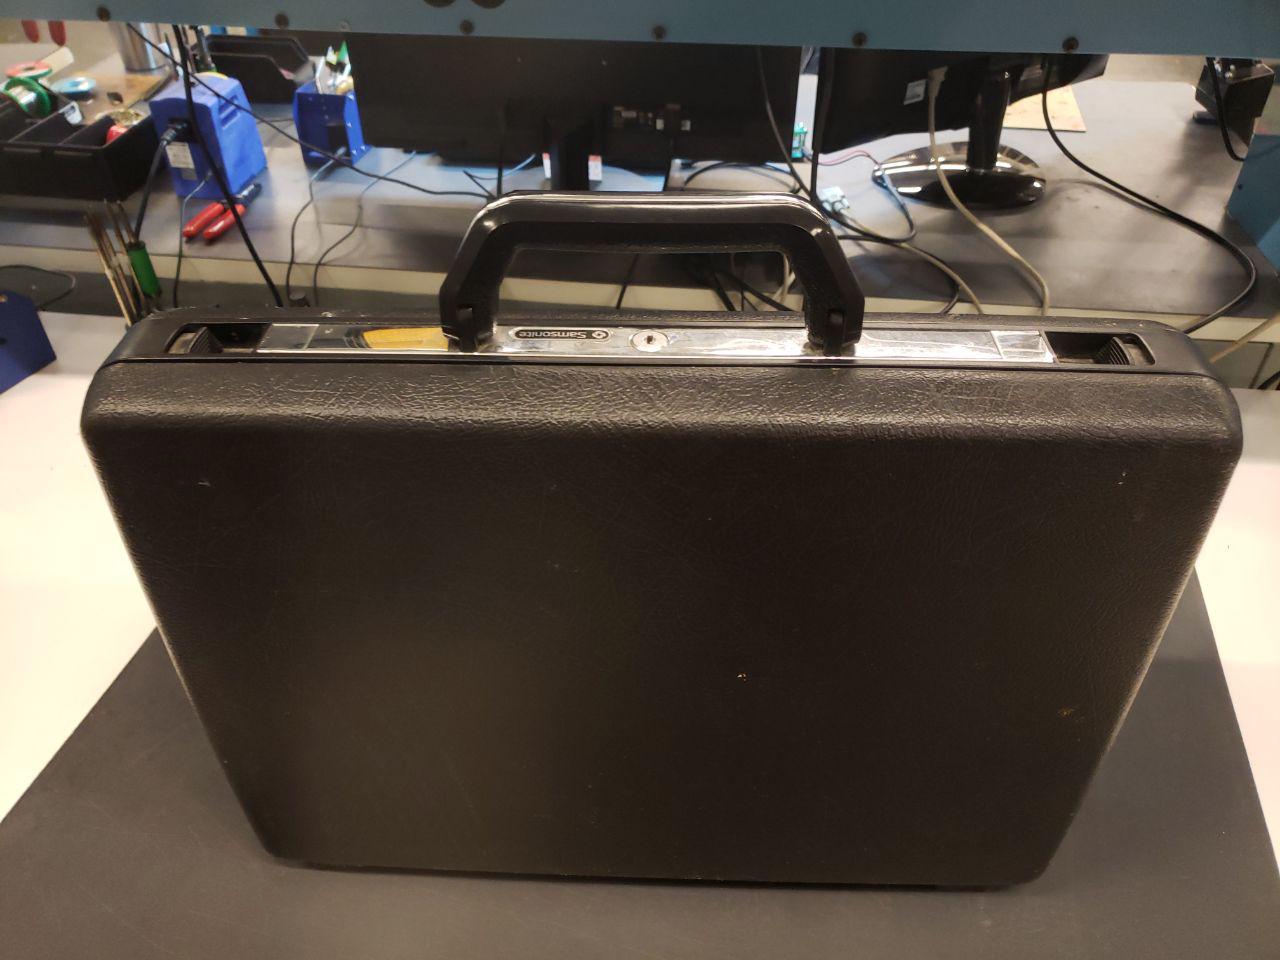
I have had this Samsonite briefcase I've kept in the event I get a fancy job that requires me to carry files around. I have seen some briefcase computer builds before and decided this was my shot. Opening a briefcase to reveal display and wires feels like it fell right off a page of Neuromancer to me. With 2020 right around the corner, there's a good chance the Penske file would be digital anyway.

Parts and Peripherals
As I stated earlier, moving a display, mouse and keyboard has been the biggest issue I've had utilizing a single board computer like a Raspberry Pi. They were my primary focus to get right with this setup, so I dug into the SparkFun catalog to see what could be used for this project.
Here is list of what I used.
We have a large selection of our own breakout boards, hats and peripherals. If you haven't already, I recommend checking them out!
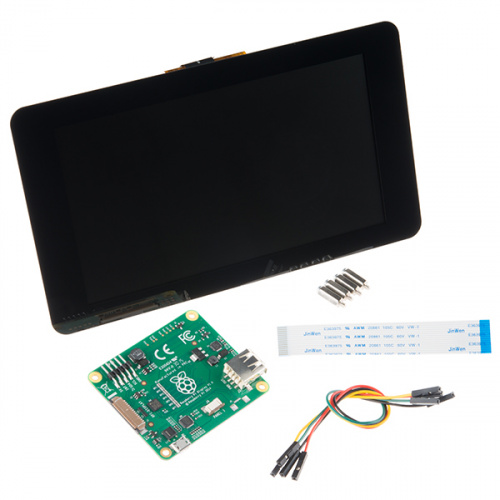
Touch Display and Case
This Rasperry Pi touch display and the case for it made for an easy choice. The SmartiPi Touch acts as a case for the Pi and for the display while leaving the GPIO exposed for use. The case comes with a nice USB splitter so I can power both Pi and display from a single wall-wart. Oh, and there are Lego-compatible studs on it!
Mouse and Keyboard Combo
I wanted a mouse and keyboard that I could easily keep in the case and would operate wirelessly. Enter the two-in-one keyboard and touchpad:

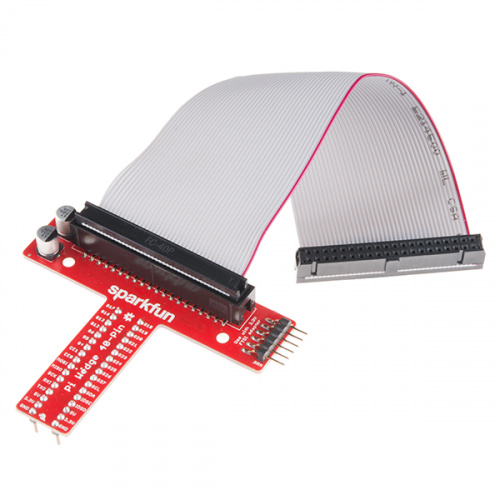
Pi GPIO Breakout Board
While the GPIO is exposed on the back of the display, I wanted to be able to easily use the pins on the fly and plug in a breakout board or Pi hat easily. The Sparkfun Pi Wedge and GPIO cable solved this issue. It also allows for easy breadboarding with the GPIO.
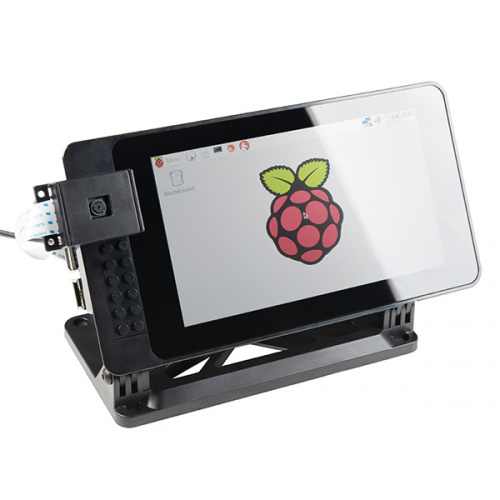
Here's a quick image of the the parts in the case so far.

Pi attached to the display and keyboard. I still have three USB ports available, and all the GPIOs.
Power
A power bank with output of 5V 2.5A is helpful if I need to run the Pi away from an outlet. While it doesn't last very long, it's more than enough if I need to make a few quick changes. Much like using a laptop though, there is often an outlet nearby.
I'll take that Pi to go
With everything assembled and mounted with screws, I have a protective case surrounding my Pi, display and all my peripherals. We utilize Raspberry Pis in our testing and programming here at SparkFun, and they bring their own set of solutions and challenges. We typically utilize them in a "headless" manner and rely on indicator LEDs to let our assembly technicians know the status of the test. This creates a challenge while doing test development or when repairing testing equipment, and involves bringing a large amount of equipment to check the onboard scripts and make changes. With this setup I can easily plug in a Pi and start working.
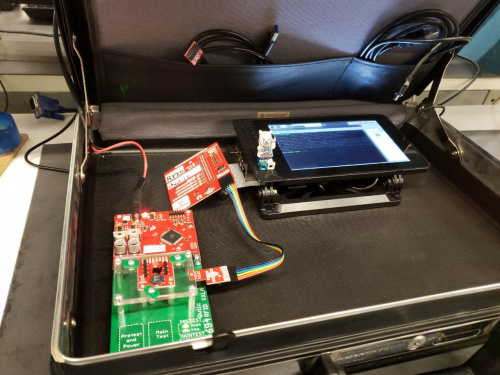
Programming a Qwiic RFID over ISP with the Pi-Grammer hat
The keyboard fits nicely in the top compartment and by the time the Pi has finished shutting down, everything is packed up and ready to go.
 |
 |
What is Your Setup?
There is a growing community of briefcase computer builders and folks looking to made single board computers more mobile and accessible. Are you carefully packing up your Cyberdeck in an ESD-Foam lined case? A loose grocery bag filled with power supplies and parts? How are YOU setting up your Pi? Let us know in the comments, and happy part hunting this season!


Very good; very impressive! Can you give us an idea of the cost to do this? I'd to really like to put my two empty, unused briefcases (one is aluminium no less) to good use. Thanks much.
Thanks! If you already have a Raspberry Pi this would cost around $100. If you still need a Pi, you can grab a Pi 3 A+ for around $30. I used a Pi 2 Model B since I had one already.
Great article-thanks for the share!
Added to my todo list. I also have an acquaintance heading off overseas for a few months to do some teaching work and this just may be perfect for him.
Maybe a little bubblewrap to stop things from sliding? Just a thought. Great work, I think I have an old briefcase that needs repurposing :)