Enginursday: EnLightningment
In this week's Enginursday post, Joel discusses how he went about making a control box for a large scale interactive EL wire art installation.

Burning Man is right around the corner, so what better time to talk about large interactive art installations and electronics?
By now, it should come as no surprise that SparkFun is a supporter of the Burning Man festival as well as the regional burns held across the world. Our own CEO, Nathan, has given an internal Lunch & Learn on how to survive Burning Man your first year. Not to mention the numerous Burn inspired projects scattered across our site. Burners are no strangers to electronics and the DIY culture. Some of the most amazing interactive art of our time is being created for and at these festivals. For the past three years, these gatherings and the art they inspire has become a big part of my life. Since my first exposure at the Apogaea festival in 2012, I've been immersed in the art side of the festival and have enjoyed being able to contribute in a meaningful way. My fist taste of artistic gratitude came while helping my friend and fellow hackerspace member John English build SoundPuddle, a sound interactive space, which was awarded the largest art grant in Apo history at that time.

SoundPuddle making an appearance at the 2014 Denver Mini Maker Faire.
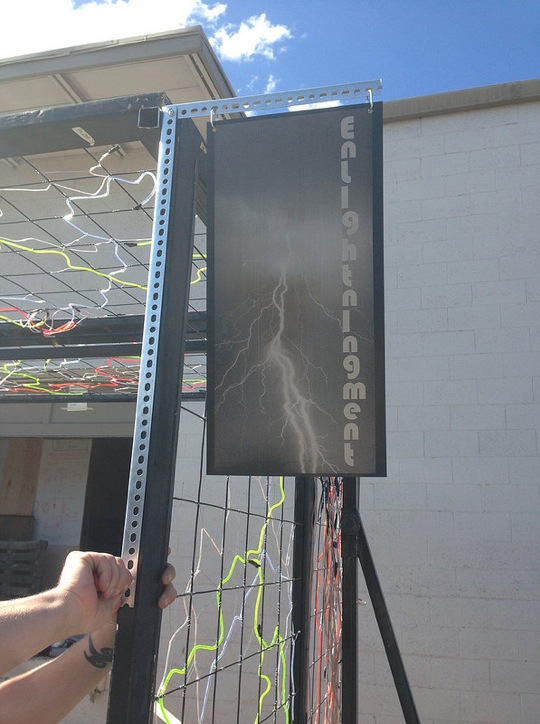
This year, Apogaea was giving away more money in art grants than any previous year. Needless to say, many people applied, much more than there was money to distribute. I, unfortunately, was one of the ones who did not receive an art grant, but that didn't mean that there wouldn't be plenty of other projects to help with. John received another grant to create a whole new sculpture, which would become Lumenexus. This was to be brought in addition to SoundPuddle. My friend and fellow hackerspace member, Liz, was also a grant recipient. Her piece was entitled EnLightningment, and it was a nine-foot-tall archway covered in EL wire made to look like lightning. The idea came from an EL wire lightning dress she had made a few years earlier. Since we had so many art pieces and so many members of our hackerspace, Solid State Depot, were going to be at the festival, we decided to create our own theme camp: Electron Village.
As the festival drew near, the amount of hours being put into each project grew exponentially. While I was simply helping with the build process on Lumenexus (mostly soldering), I was asked to help EnLightningment with a much larger task: building the control circuitry. I had never built something on such a large scale and had never tried to control that much EL wire before, but I knew it could be done. Thusly the crunch to get EnLightningment up and running began.
First, the structure had to be made and covered in the EL wire before we could design the control box. Liz and her partner for the project, Steve, set out to make the structure and map out where the EL wire would go on each panel.
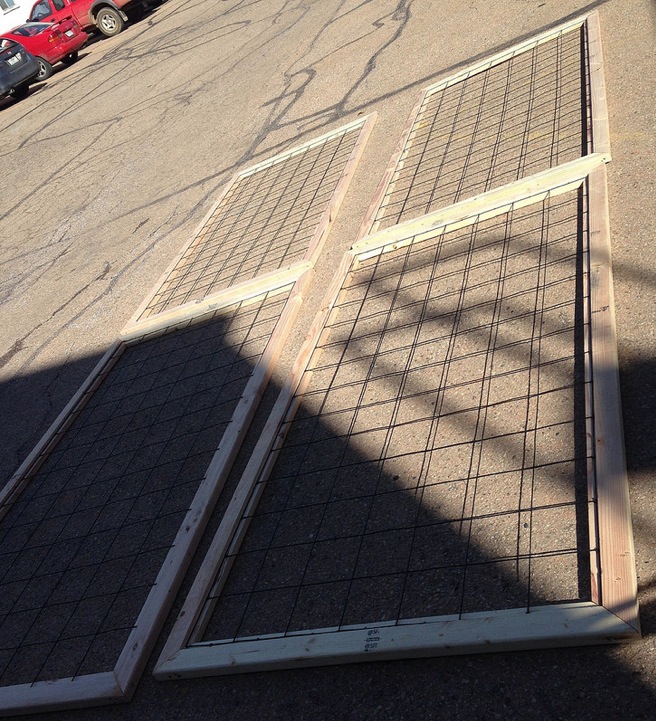
Building the panels.

Mapping out where each color of EL wire will fit on each panel.
With the panels built and painted, the next step was to painstakingly cut, strip, solder and attach each piece of EL wire. With roughly 450 ft. of EL wire, that's a lot of work. Most EL wire used for costumes and other smaller projects is thin and could be brighter. For a project of this scale, some larger wire was needed. Thicker, brighter EL wire was purchased, as well as some beefier inverters. That said, we did end up using a few of the SparkFun 12V inverters, and they worked just as well.

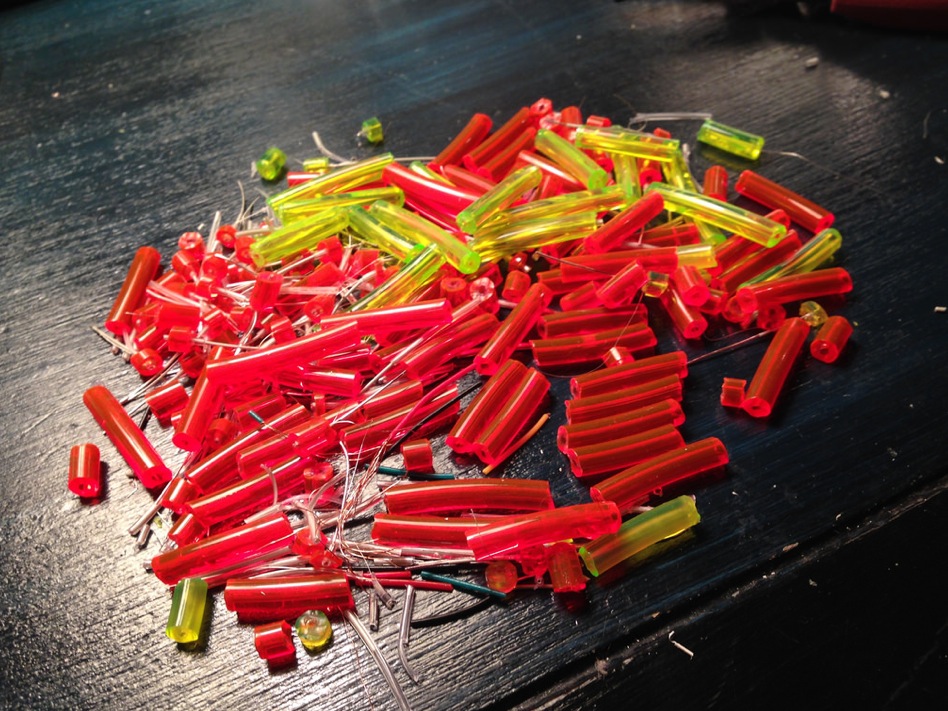
To make the EL wire look like lightning, fishing line was use to tie kinks into sections of each EL strip. This was very time consuming, but they did a fantastic job of making it look realistic.

The panels were connected together using an aerial performance rig, which would serve as the foundation for the whole piece.
Making good use of the hackerspace parking lot.
Once each piece of EL wire was in place, it was time to get cracking on the control box. I knew that this would be too big a task for any one board, so I decided to go with a master/slave style system. For my master control board, I used a SparkFun Arduino Mega Pro 5V. I then used four EL Sequencers as my slave devices. Two DC/DC converters were used to drop the 12V coming off the battery down to 5V for all the boards. We also used some fuses to isolate sections of the circuit, as well as a few extra filtering caps on the converters. Last is the inverters mentioned above. You can (sort of) see the layout in the image below.
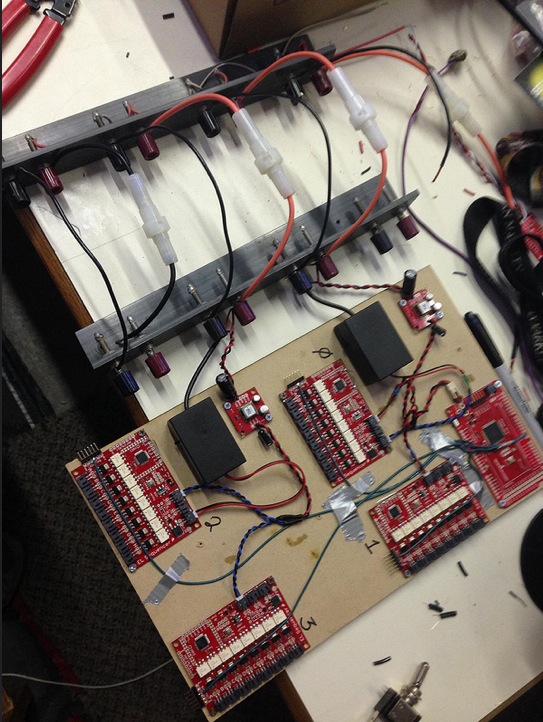
For communication, a single UART line was bussed from the Mego Pro's Tx pin to the Rx pin on each EL Sequencer. Then, two digital I/O pins on each Sequencer were hard wired to give them each a unique address. One board had both tied high, one with both tied low, and two with one high and one low. That way, we could broadcast commands to all four boards with only one transmission.
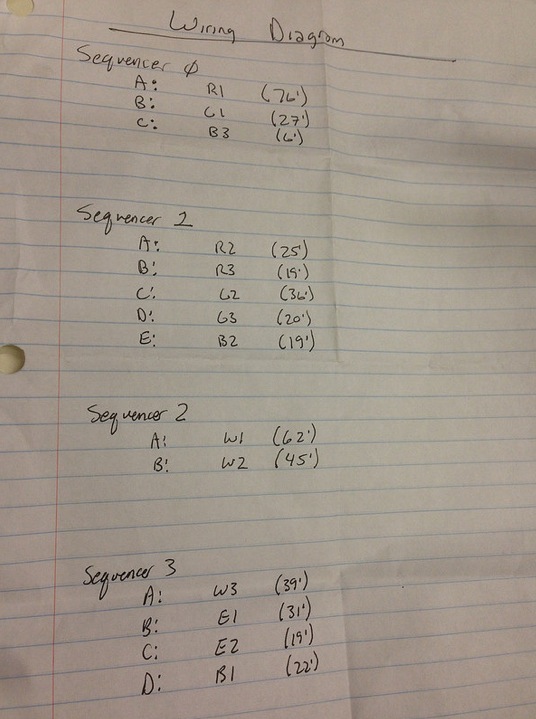
Not every AC line on each sequencer was used, and we lumped EL wire strips into groups of roughly equal lengths for each board to control so that one wouldn't be working harder than any of the others. Colored segments were given names like R1 for each of the red, blue, green, white and eggshell segments. Here's how we broke it down:
As for the interactivity, I decided to throw as many sensors as we had time to make on it and see what worked best in which scenarios. The final choices ended up being light, sound, and motion. The installation just sits and flickers about once every 15 seconds or so to act as an attention grabber. If you walk into the archway, a weatherproof ultrasonic sensor detects your presence and sets off a more frequent lightning storm. Once inside, the light sensor, created by sticking a photoresistor inside a long piece of painted PVC pipe with an LED key chain attached to it, and the sound sensor, a SparkFun Sound Detector board, would pick up participants' voices and light from costumes, adding to the light show. And, if a nearby sound camp started bumping some tunes, it would go into sound saturation mode and give you an amazing light show to accompany your music.
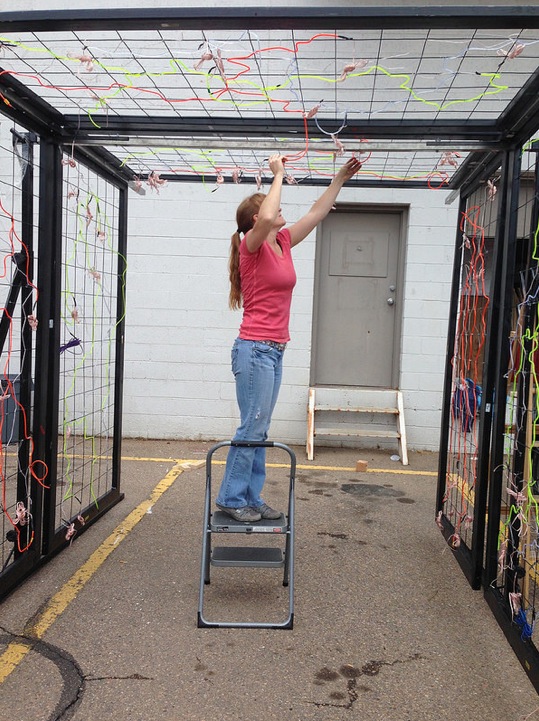
While the electronics were easy to build, coding the multi-layered levels of interaction was a little over my head. Luckily, another hackerspace member and electronics wizard, Dan Julio, helped us get the code in working order.
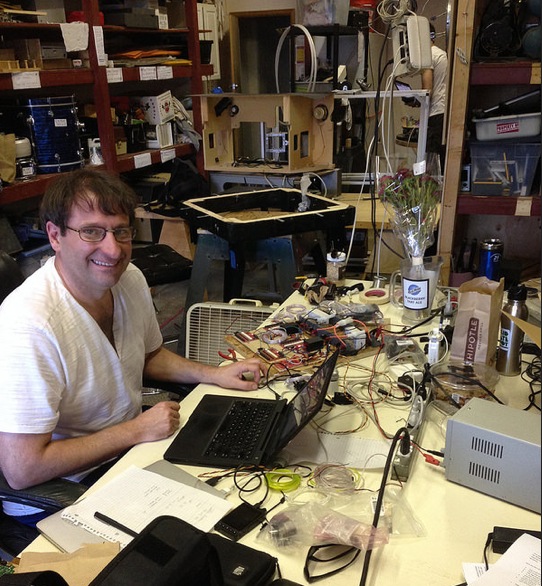
Dan typing away on the EnLightningment master code. If you look close, you can see a more finished version of the control board in the background.
It was finally time to put everything together and see if it worked. We used a simple storage tub to house the battery and electronics, and all the EL wire had to be fed into the tub from one side of the installation. It's hard to see in the picture below, but everything powered on and worked pretty well out of the gate.
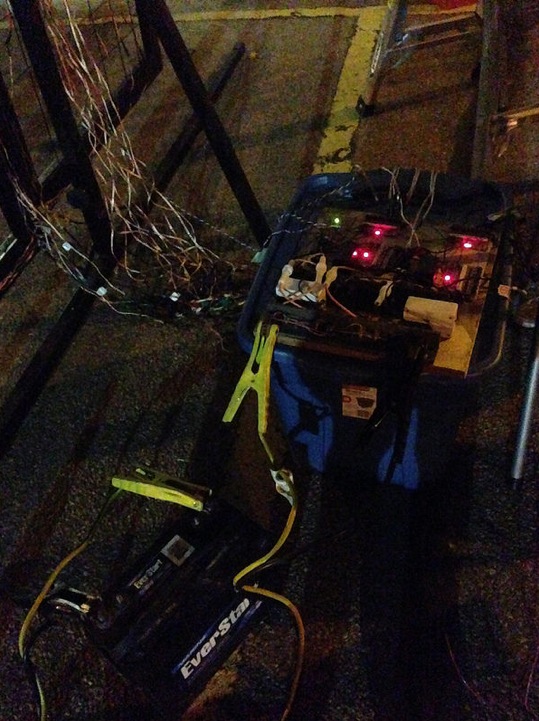
There was some tweaking here and there, but the result was incredible from the moment we fired it up.
ReplaceMeOpen
ReplaceMeClose
It was very exciting to see it working, but we still had lots of work to do and very little time left. One of the last parts was power and how we were going to get more. I had been working on a solar panel rig and finished it up to bring to the festival in case all the batteries we brought weren't enough. Fortunately, we were able to power the whole project off of one battery for the entire six days we were there (granted it was only on from sunset to sunrise usually).

The only thing left was to add a little flair...
...and we were off.

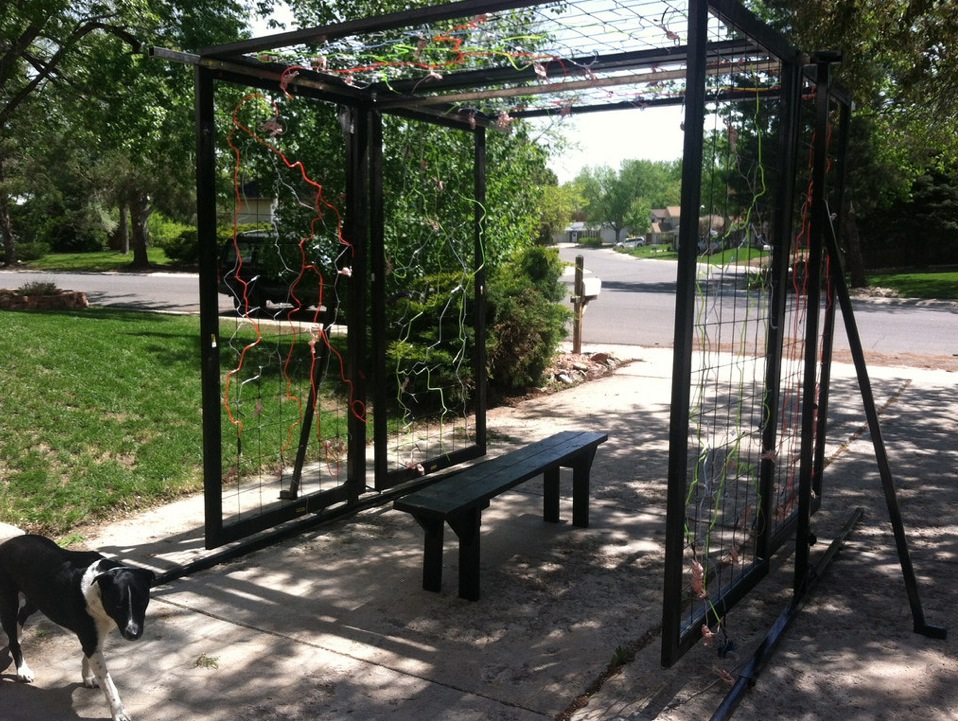
Sometimes it's nice to have an easy-setup art installation. It took Steve and Liz about two hours to set the whole thing up, vs. several days for the other installations.

Once at the festival with all our art up and running, it was time to sit back, relax, and enjoy our creation.
ReplaceMeOpen
ReplaceMeClose
I hope you enjoyed this Enginursday post. If you have any questions or comments, please post them below. Thanks for reading.


Is there any way to get all the code for the sound sensor and enlightenment to use in my alice in wonderland diorama neon sign. I have alice in wonderland sculptures of silicone flowers mushrooms cheshire cat and others that have EL-Wire hidden inside and rgb leds in the caps and faces and more. All tinted with rave colored paints and glow in the dark paints also light up with UV leds hidden in calla lillies placed around the board. All together there is 60 each mushrooms, flowers, plants, that move with animatronic servo motors to shake to appear to move then the rgb diodes in the mushroom caps are used for fiber optics throughout the plants then also to light the stems with side glow fiber optics in 16 million colors for a windows pallet. Then the UV leds hidden in the calla lilies bring it to life with the uv light on the UV reactive paints tinting all my silicone and the backdrop painted in RAVE colors a fantasy mushroom alice in wonderland painting recaptured in rave colors. Oh please this would be the cats ass so to speak to get this code to make it all come to life with music and human voices. Please say yes and email me the code to use in my project. I will give you all the credit in any postings and showings of this project. Mousepotato69@hotmail.com. I can show you some images of work in progress if it would help you to say yes. Sadly I am very new to coding I am retired with over 30+ years in Electromechanical Assembly / Engineering working with sophisticated liquid filling systems for major companies NASA and the USA Government for water purification systems but programing / coding is new to me I only started learning it in 2016 for the 1st time. This is why I ask for your help. I can build you anything you can imagine. I just can not make it do what is required I am still learning. I have the EL Escudo Dos with DAOKI High Sensitivity Sound Microphone Sensor along with many arduino boards of all flavors nano to uno in this project but the sound reaction would be the perfect ending for my art. I look forward to speaking with you on this matter so very eagerly overflowing with excitement and anticipation for the possibilities of a yes I can have permission and use the coding sequences.
Thanks for giving Burning Man, and a Burning Man project some airtime. Looks pretty cool!
My adult renewal in interest in electronics happened after my first Burning Man. I really love working with microcontrollers. I'm glad I rediscovered them (and someone made it much easier with Arduino).
Awesome project! I love building stuff for Burning Man! Looking back through my order history, it's safe to say 80% of the money spent was towards Burn projects.
This was our last creation (2011) SuperConductor