
This Saturday is Earth Day, and all of us at SparkFun are super proud and excited to share how we celebrate Earth Day every day. SparkFun is deeply committed to engaging in environmentally conscious practices and behaviors. From our aggressive recycling habits to our solar panel-covered roof and bike-to-work program, we are doing everything we can to have a minimal carbon footprint.
Today I want to share a simple way to bring the green spirit into your own home with an energy conservation hack. With this project, you will be able to connect any of your appliances to a timer so that they will automatically turn on and off based on your schedule and habits. To make this I used only three parts:

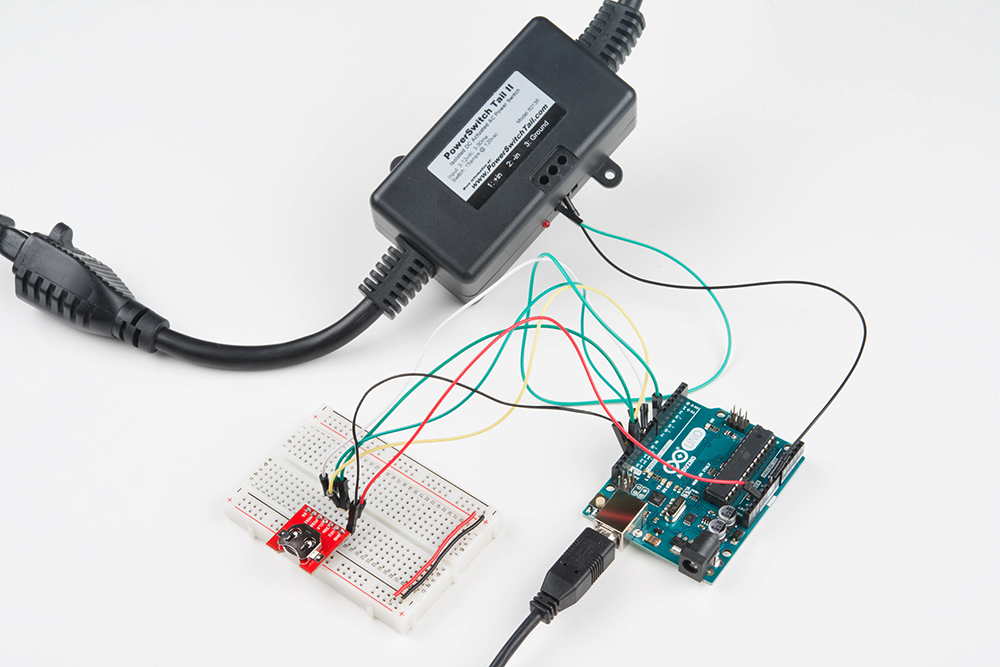
The below diagram illustrates the circuit.

Having a hard time seeing the circuit? Click on the wiring diagram for a closer look.
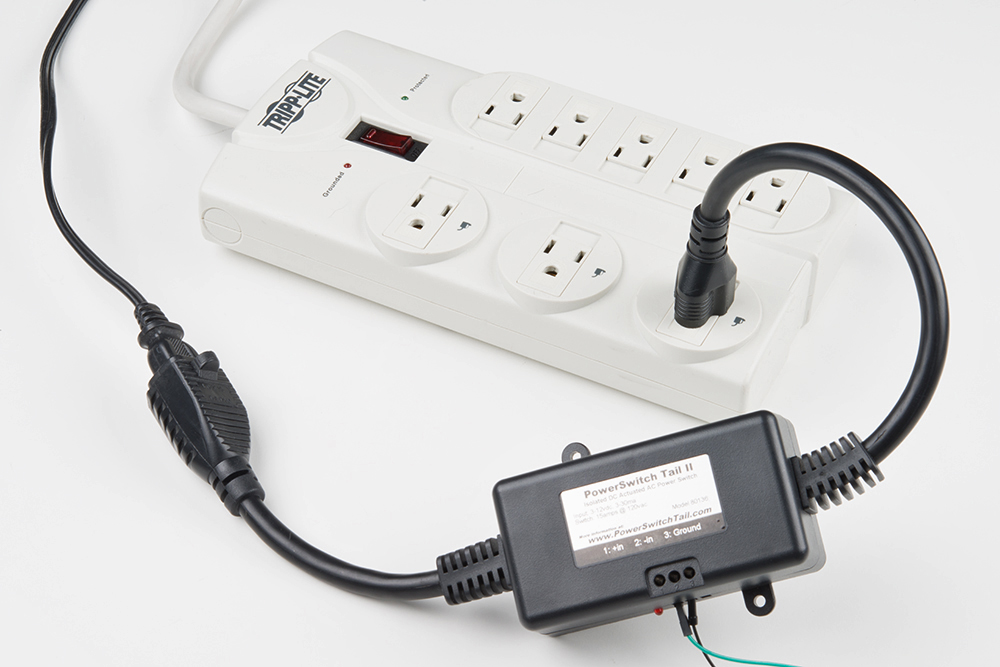
You will notice that there are two open leads going to + and -. These represent the terminals in the PowerSwitch Tail. You will also need to plug one end of the PowerSwitch Tail into the wall and then plug your home appliance into its other end as shown below.
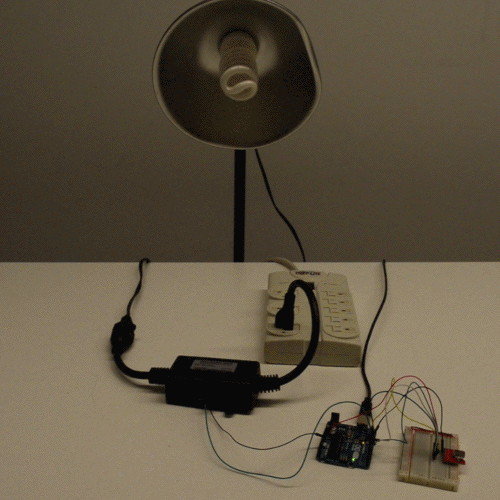
Once your circuit is completed, it should look like this.
Now it’s time to upload your program using the Arduino IDE. I relied on the SparkFun DS3234 Arduino Library. This program will turn your appliance on at 7 a.m. and turn it off at 7 p.m. I have added comments in the code for you to follow along and easily customize the timer based on your own schedule.
// Earth Day Conservation Hack by Melissa Felderman for SparkFun Electronics
#include <SPI.h> //include SPI library
#include <SparkFunDS3234RTC.h> //include Sparkfun DS3234 RTC library

//RTC pin definition
#define PRINT_USA_DATE
#define DS13074_CS_PIN 10

//Power switch tail Pin
int pin = 7;


void setup() {

   Serial.begin(9600);

   //start RTC clock
  rtc.begin(DS13074_CS_PIN);
  rtc.autoTime();


  //Pin mode for power switch tail
  pinMode(pin, OUTPUT);


}

void loop() {
//serial print commands for debugging

  static int8_t lastSecond = -1;

   rtc.update();

   if (rtc.second() != lastSecond) // If the second has changed
  {
    printTime(); // Print the new time

    lastSecond = rtc.second(); // Update lastSecond value
  }

//line of code to control appliance with the RTC.
//To change the times at which to turn on and off the appliance, change the values in the IF statement.
  if(rtc.hour() > 7 && rtc.hour() < 19 ){
    digitalWrite(pin, HIGH);
  }else {
    digitalWrite(pin, LOW);
  }

}

//function for serial
void printTime()
{
  Serial.print(String(rtc.hour()) + ":"); // Print hour
  if (rtc.minute() < 10)
    Serial.print('0'); // Print leading '0' for minute
  Serial.print(String(rtc.minute()) + ":"); // Print minute
  if (rtc.second() < 10)
    Serial.print('0'); // Print leading '0' for second
  Serial.print(String(rtc.second())); // Print second

  if (rtc.is12Hour()) // If we're in 12-hour mode
  {
    // Use rtc.pm() to read the AM/PM state of the hour
    if (rtc.pm()) Serial.print(" PM"); // Returns true if PM
    else Serial.print(" AM");
  }

  Serial.print(" | ");

  // Few options for printing the day, pick one:
  Serial.print(rtc.dayStr()); // Print day string
  //Serial.print(rtc.dayC()); // Print day character
  //Serial.print(rtc.day()); // Print day integer (1-7, Sun-Sat)
  Serial.print(" - ");
#ifdef PRINT_USA_DATE
  Serial.print(String(rtc.month()) + "/" +   // Print month
                 String(rtc.date()) + "/");  // Print date
#else
  Serial.print(String(rtc.date()) + "/" +    // (or) print date
                 String(rtc.month()) + "/"); // Print month
#endif
  Serial.println(String(rtc.year()));        // Print year
}
It’s as easy as that! Look at this light automatically turn on for me!
The best part about this project is the PowerSwitch Tail. With this part, you can easily control any appliances with your sensors and microcontroller. It eliminates the trouble of working with a relay switch and will cut your project build time dramatically!
It's not pretty, but it's a quick and easy to way to save energy. If you're constructing a house from the ground up, you can look into some energy-saving features like the automatic lights and gray outlets at SparkFun's headquarters. The goal of the outlets is to shut off at night, cutting phantom power draw from any electronics plugged into them. Just like the gray outlets, some of our lights are on a timer as well as motion sensors. One of the really cool features about the lights that are close to the windows is that they have light sensors attached to them. If it is super sunny out, the lights will shut off, and the natural light will flood into the building.
Learn more about SparkFun's sustainability efforts on Facebook and Twitter (#EarthWeek) and share your Earth Day projects with us there and in the comments below!


great, simple build. I would run the PowerSwitchTail before the power strip to cut everything at the entertainment center to cut all the devices that draw power while off and then add an override button for that late night "Stranger Things" binge.