Enginursday: Lunchbox Laser Show
Learn how to make an amazingly entertaining laser show small enough to fit inside of a lunchbox.

First, a quick plug. If you've ever wanted to see aquaponics in action, now is your chance. Tour de Tanks is a nationwide event where members of the Aquaponics Association give free, public tours of their home and business aquaponics systems. This event is starting today, May 15, and going until this Sunday the 18th. I will be participating this year, as are a few other Boulderites. If you're in the Boulder area this weekend, please visit one of our many times and locations. If you're not in Boulder, fear not. There are events happening all across the country. Now on to our regularly scheduled program.
Lasers! Scary to some, wildly entertaining to others. We've mentioned lasers before, but rather than being used for advancements in science, today's post is strictly about laser entertainment. LASERTAINMENT.
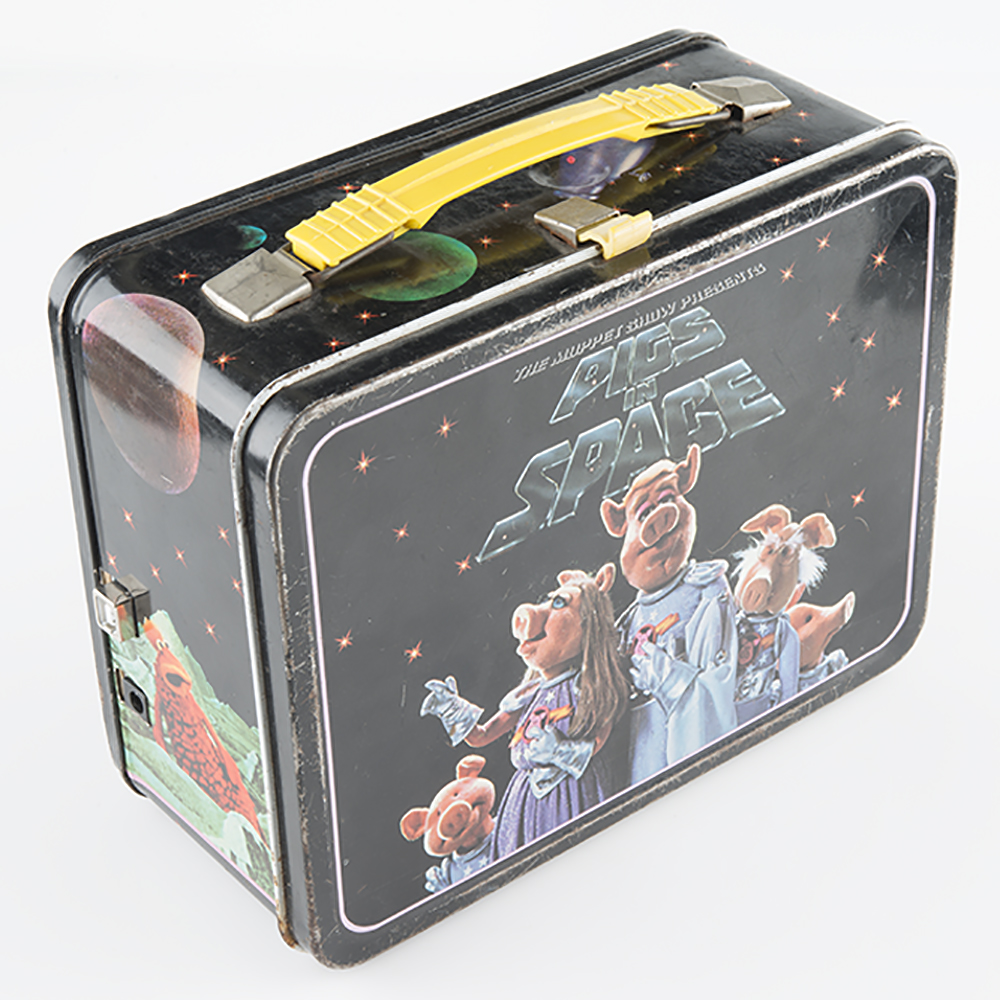
Back in late 2009, there was a particular Make: Magazine article that caught my interest. It was titled "Lunchbox Laser Shows". The article went over how to make amazing looking laser shows with very simple materials. The most fascinating part of the article (to me) was showing how to diffract lasers using hot glue to get an awesome "northern lights" effect. After I read the article, I immediately set out to create my own lunchbox laser show. I bought a Pigs in Space lunchbox off of eBay, some laser diffraction gratings from Dragon Lasers, and some lasers from SparkFun. The originals in the article had no AI behind them; they relied purely on mechanical changes to create the effects. I wanted a little more control over my laser show, so I added an Arduino and an Ardumoto Shield. This allowed me to vary the speed of my motors, add other moving parts - such as mirrors on servo motors - and gave me the option to expand the project by making it sound reactive.
Here is a video of the original in action.
ReplaceMeOpen
ReplaceMeClose
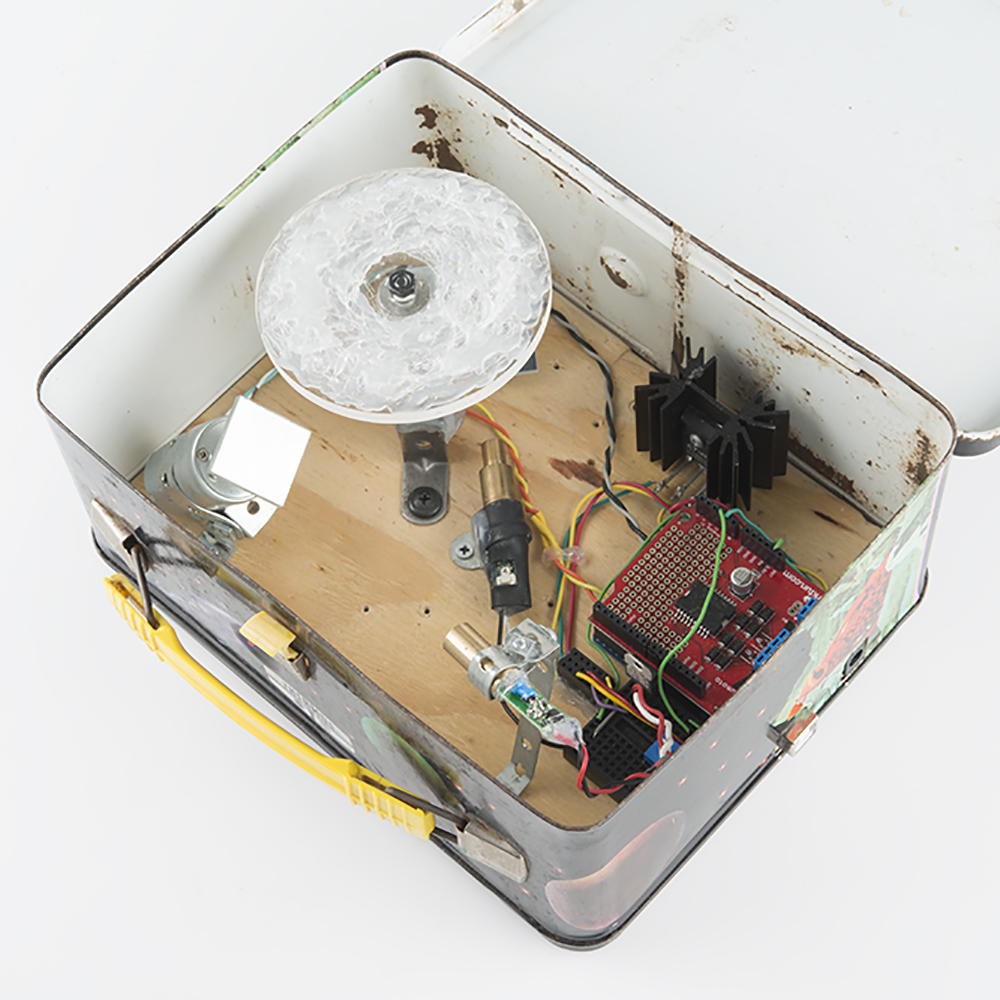
While my lunchbox has made numerous appearances at parties over the years, it had been some time since it had gotten any use or had any modifications. That is until recently, when I was tasked with writing a hookup guide for the Mini FET Shield. As I was thinking of high-current devices to drive with the shield, memories of the lunchbox laser show flashed in my mind. Shortly after, I realized that our new offering of Actobotics parts surely contained some pieces that could be useful in assembling a new generation of lunchbox laser shows. I was also intent on finding new materials through which to shine lasers and see what the effect would be.
Diffraction Testing
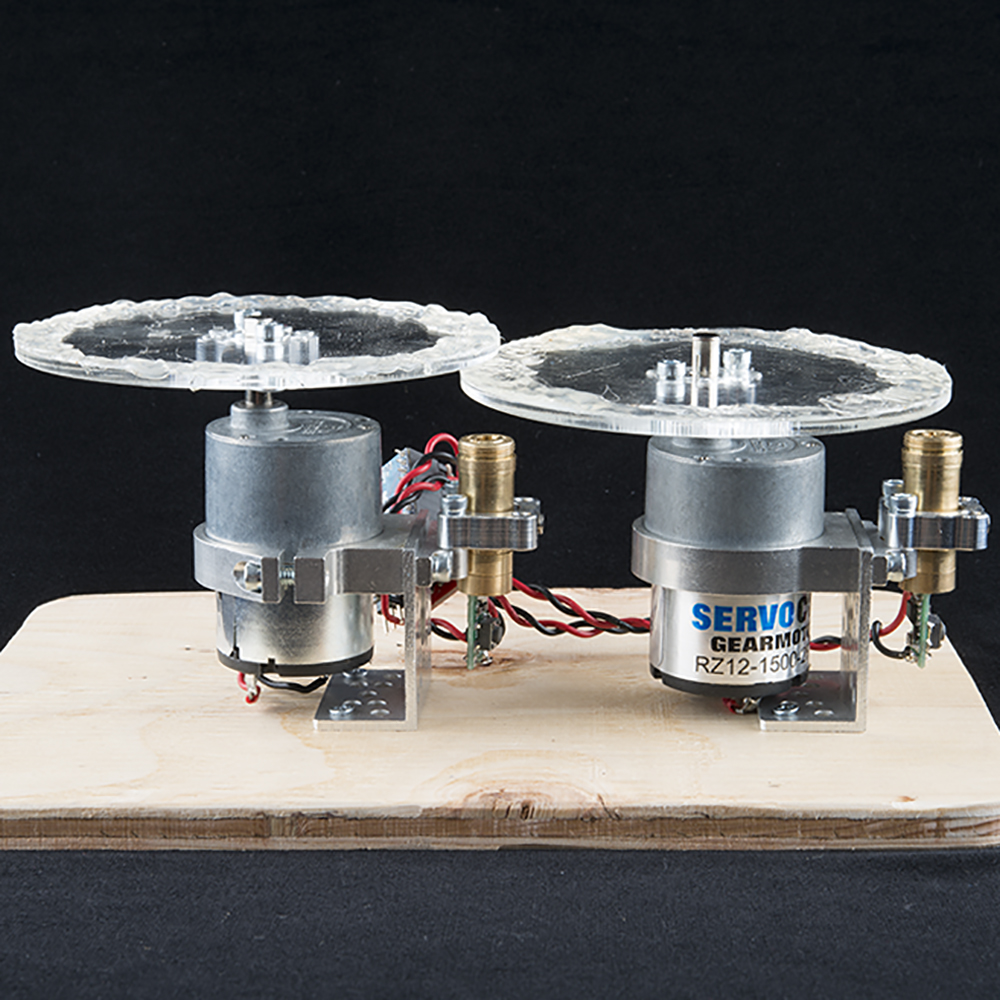
The most convenient Actobotics part I happened across were the clear acrylic wheels that mount to the various motors. In past versions, I had to use various clear discs, such as those found at the bottom of a stack of CDs, or just made my own out of scrap acrylic, and I always had to come up with a clever way of mounting them to the motors. However, the clear wheels worked perfect for applying hot glue and other materials to test how well they performed diffraction, and they mounted to the motors very easily using a set screw hub. Once I had enough hardware to hold the laser and the disc in place, I began experimenting with different materials. Each disc was divided into four sections with a different material applied to each.
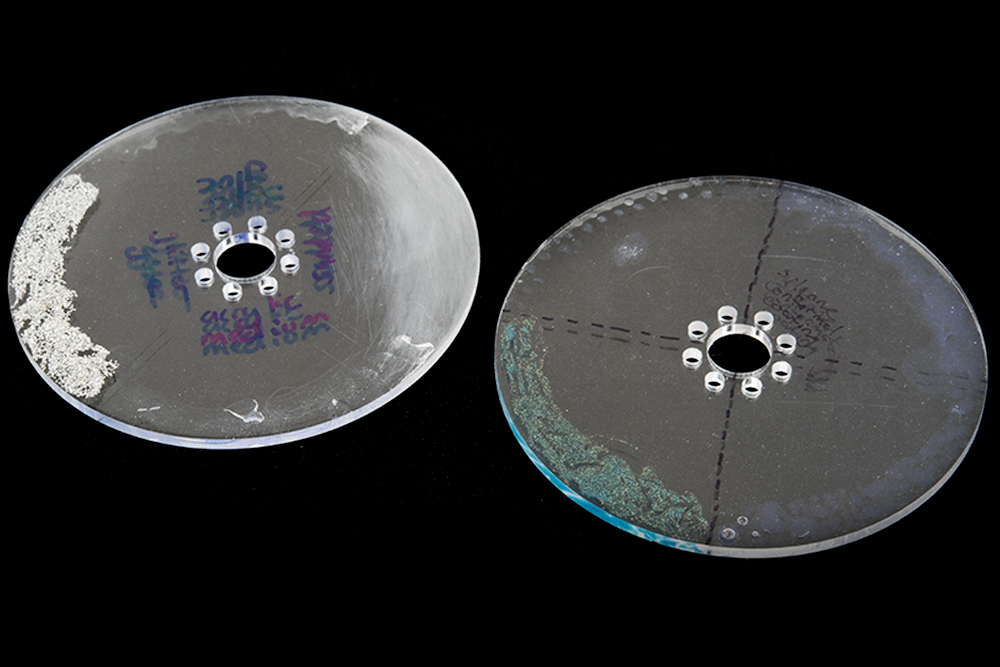
Some of the materials tested were super glue, acrylic paint blending medium, glitter glue, nail polish of different opacities, and sanding the acrylic. Some didn't work as well as hoped. Super glue and acrylic paint medium were similar to the hot glue.
Nail Polish
Gorilla Glue
Glitter Glue
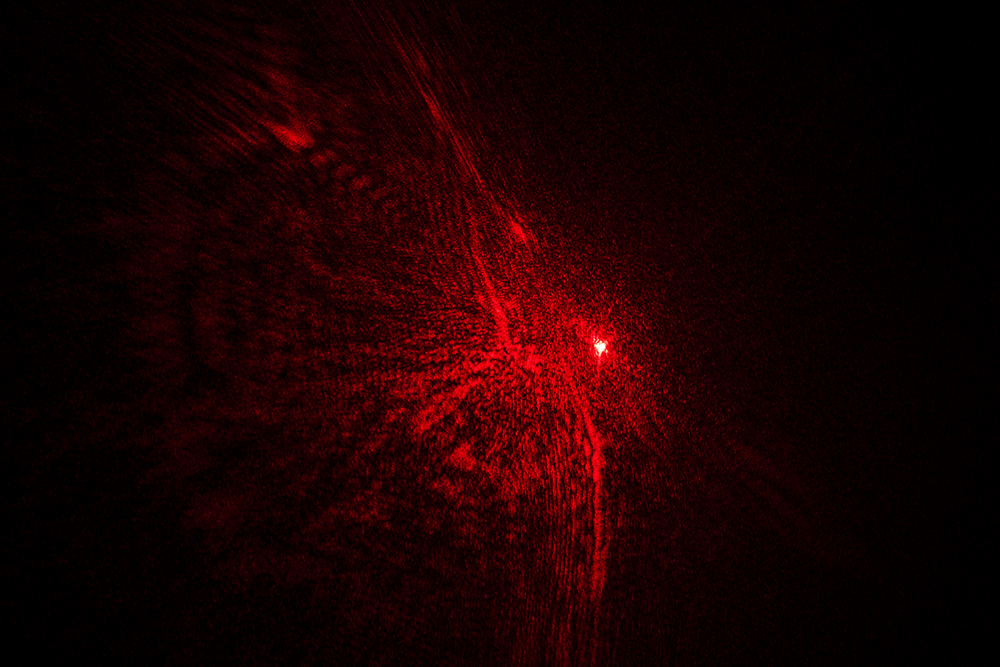
Coincidentally, I was at home the very same evening I decided to make a new lunchbox. I was using my IR thermometer to test the temperature in my various aquariums. I recently set up a vivarium with some dart frogs and decided to see what the temperature was inside their tank. As I shone the red laser through the glass, I noticed that the condensation on the wall was causing some very cool looking diffraction inside the tank. The light bulb went off, and I knew that I had to find a way to replicate that condensation in my laser show. After asking around SparkFun, I found some Silicone Conformal Coating. This allowed for slightly thinner and more water-like layers, so I tried a few different techniques with this material to see if I could replicate real water droplets. As you can see below, the results were pretty close to what I was hoping for, and are amazing in any case.


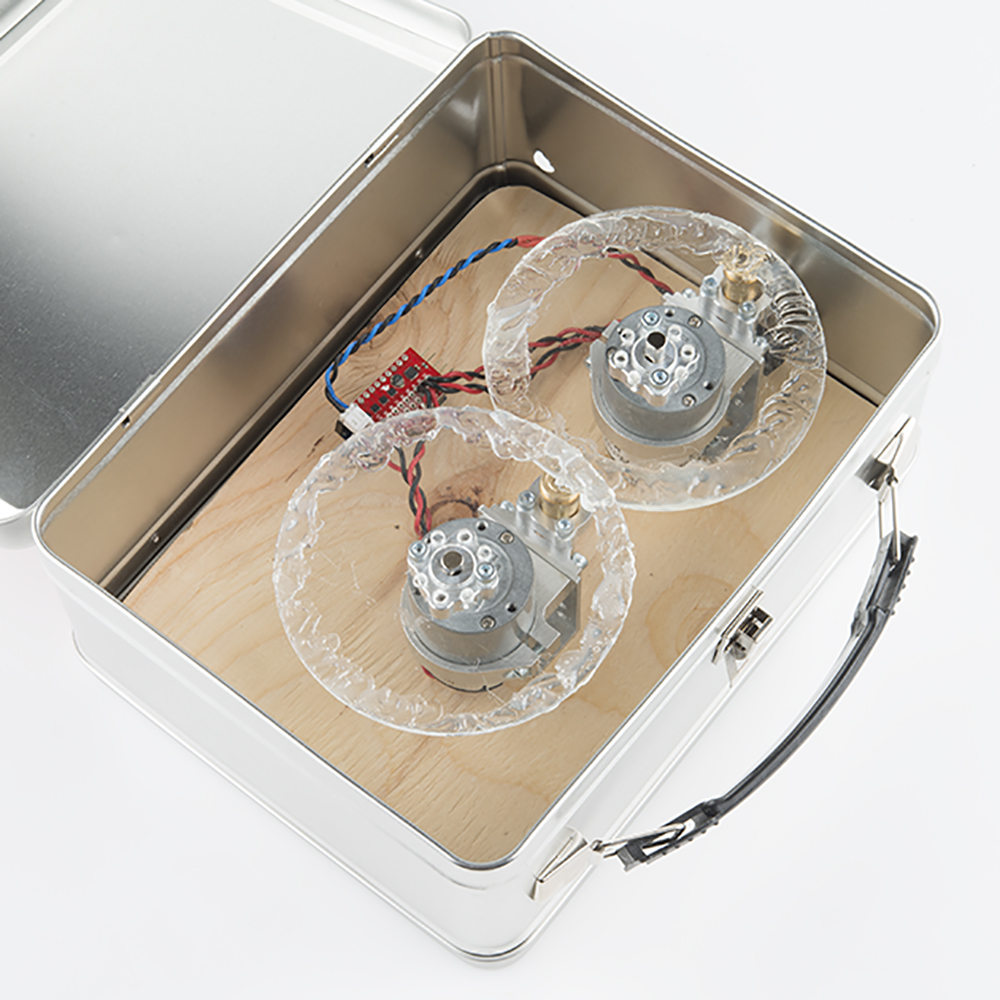
Lunchbox Laser Show 2.0
The Mini FET Shield Hookup Guide goes over how to make a miniature, battery-powered version of the laser show I'll be showing you today. In my original lunchbox, I used Erector pieces to mount my motors and lasers and hinges from the hardware store to mount my mirrors. This time I wanted a more robust mounting scheme. After perusing our Actobotics selection, I settled on a few parts and began assembly.
Here is a wishlist of the various parts I used to mount the lasers and discs. Feel free to add to it as needed.
For this newest version, I wanted to return to the simplicity that the originals in the article exhibited. I made an adapter cable with barrel jack to JST so I can power the mini FET Shield with a wall adapter. I plan on replacing the Arduino and shield with a simple 3.3V power supply. I also took some advice from Member #370694 and made it so that a portion of both wheels overlap.
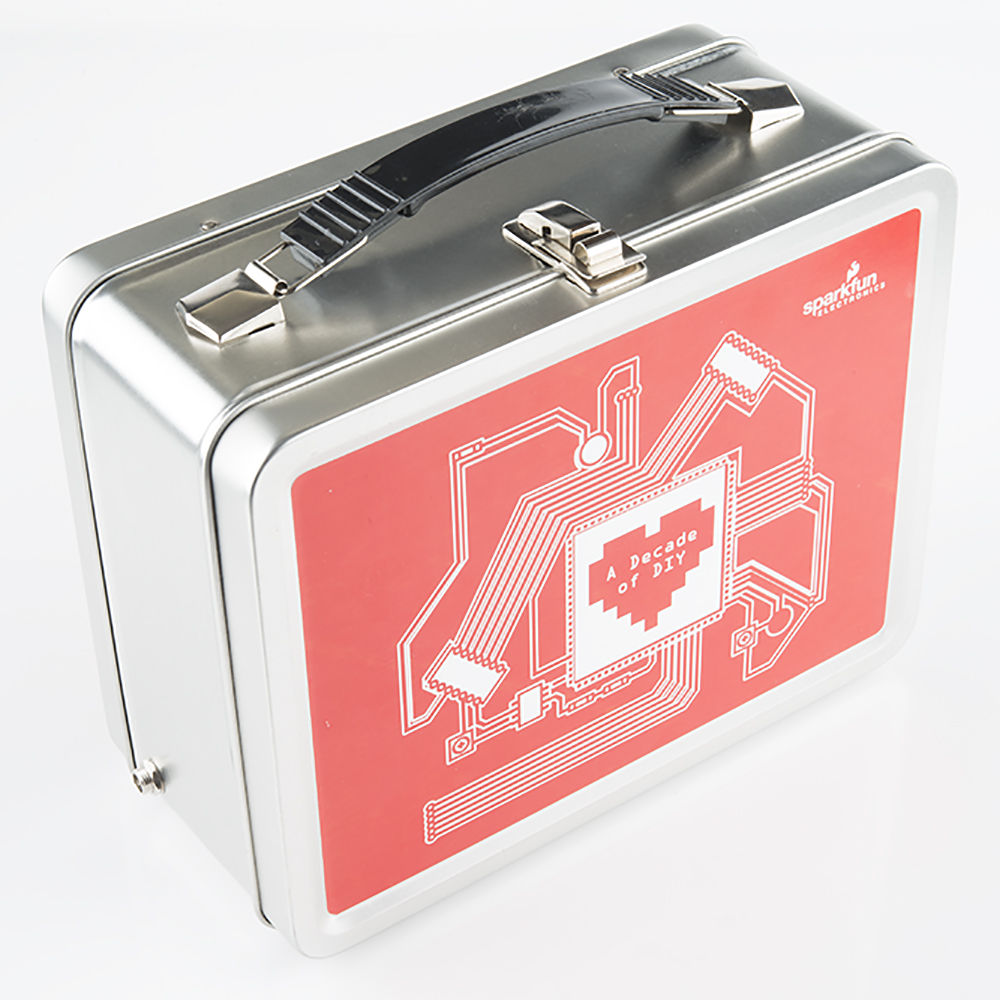
I also happened to have a custom SparkFun lunchbox. We made one for our fearless leader during SparkFun's 10th anniversary. Employees had an opportunity to get one as well, and I knew that one day I'd put lasers in it. That day has come.
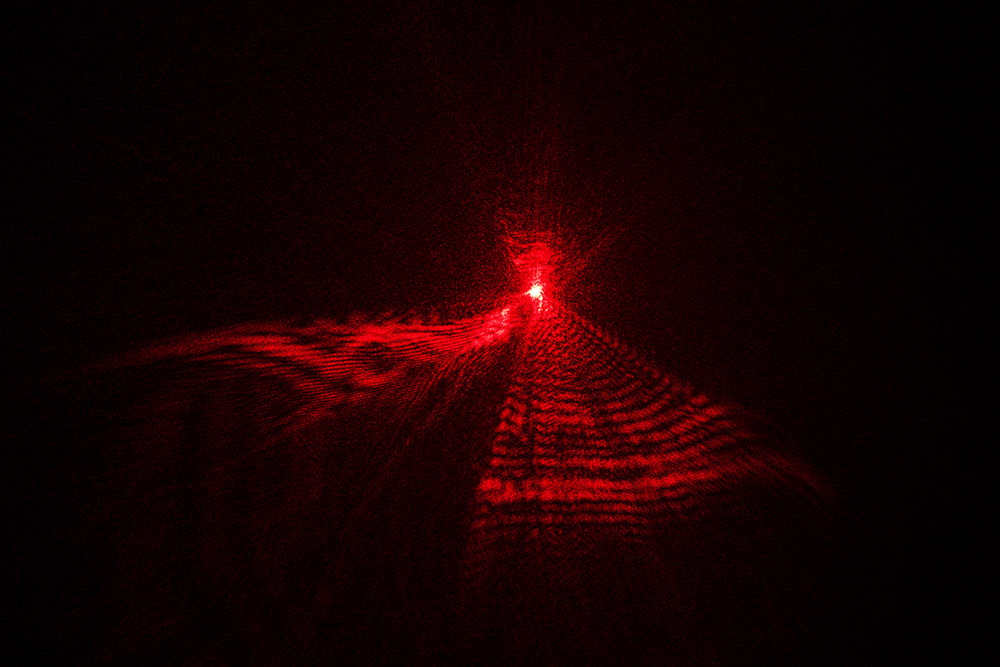
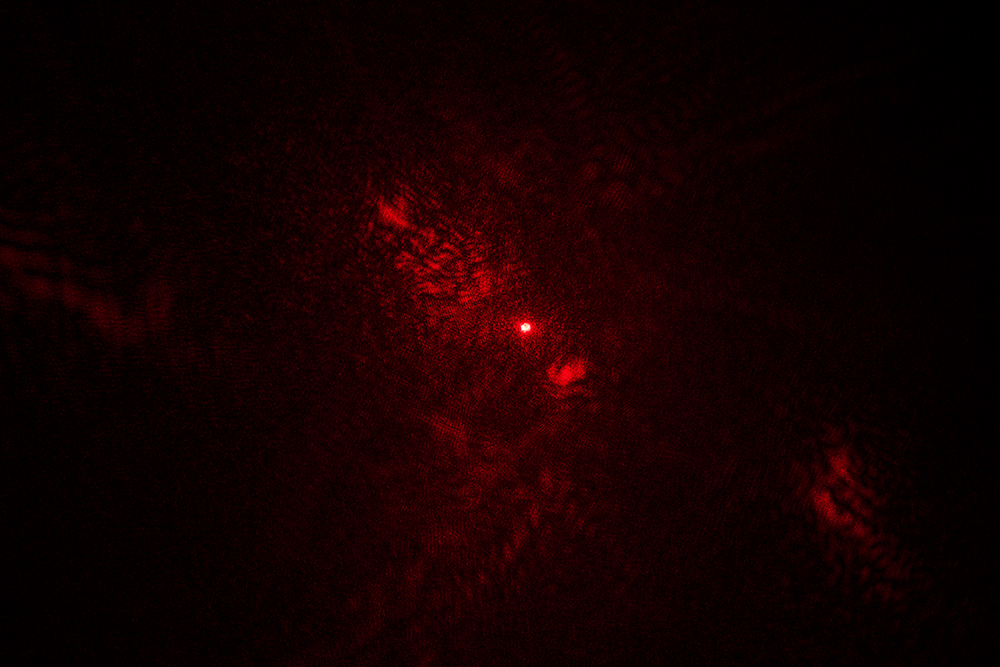
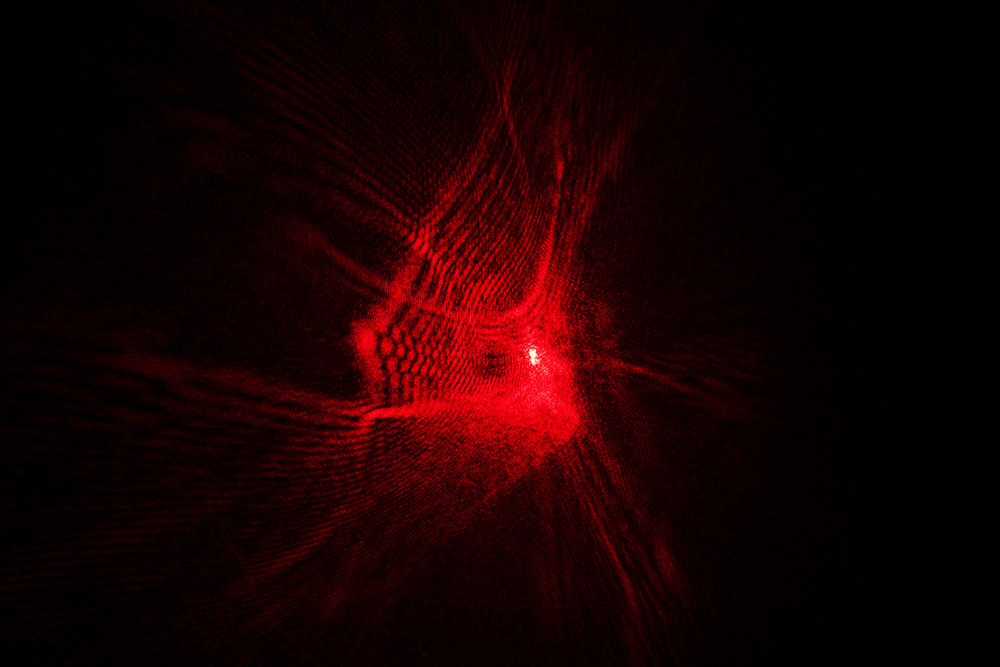
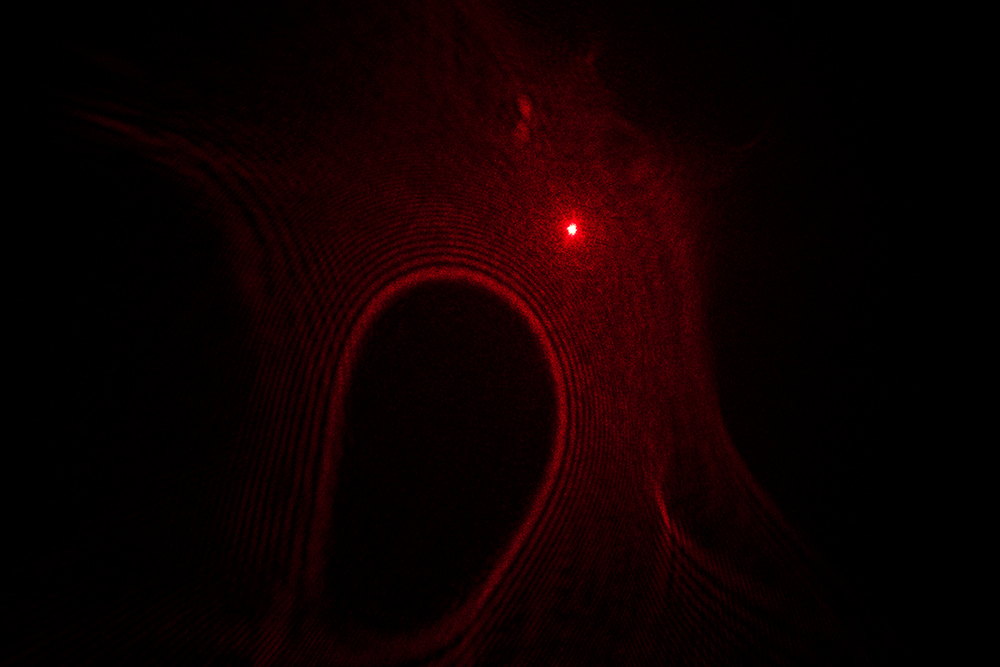
Here is what it looks like in motion. It looks much more amazing in person and when projected on high ceilings. The brighter pattern is the laser through a single disc, and the slightly dimmer, more fluid-looking pattern is through two discs.
ReplaceMeOpen
ReplaceMeClose
Tips
When designing your own lunchbox laser show, here are a few things to keep in mind:
- Slower is better when it comes to motor speed. You can really see the patterns well at slower speeds.
- Thinner is better when applying any diffraction material. I gobbed on the hot glue my first few tries, but soon realized it doesn't take much to get cool effects. It will also give you brighter effects if you use less glue/etc.
- I tried different color acrylic wheels to see if the colors would have any effect on the laser color. Sadly, they did not.
- Keep the current capacity of your power supply in mind while designing. Lasers can pull several hundred mA. The green laser modules are about 200-250mA, so having just four green lasers requires about a 1 Amp power supply.
- Despite all my testing, hot glue still turned out to be one of the cheapest, simplest and easiest to come by materials for diffraction.
- The lunchbox laser show is never complete. Even when you have it where you like it, you'll be thinking of ways to improve it.
We'd love to see what kind of laser fun you're having. If you've made your own lunchbox laser show or just like to shine laser through different materials, please share in the comments below. Thanks for reading!


Sparkfun should make Laser Show Kit.
This is the wishlist.
I think a proper kit with a adjustable speed control and a small enclosure with compartment for at least 4 disks and a RGB laser could be really awesome. Heading towards buying a proper Laser Show Kit.
Ummm, I want a lunchbox!
Very nice "lumia" effects, folks.
Any kind of ripply glass can work. I have a bathroom cabinet shelf, though it's tempered and difficult to cut pieces, it works well, However, if yours is not doing much, you can run two thicknesses on different motors for improved effects. Vary the distance between them also. If one glass doesn't spread the beam much, having the second glass further from the first will widen the entire pattern. Just having a crystal vase on a rotating platform, in front of a screen, can yield good effects as well. AND, DON'T forget to point your laser into your nearest diamond ring !
Also great is the motors and mirrors "Laser Spiro Graph".. The mirrors are mounted "almost perpendicular" on the motor shafts (not like a tennis racket, but like a wheel): THe trick is getting the mirrors as close together as possible. It you use fans, instead of bare motors with shafts, this is difficult. The more mirrors and motors you can bounce the laser off of, the better. http://www.instructables.com/id/Four-Motor-Laser-Spirograph/
http://www.instructables.com/id/DIY-Laser-Spirograph/
I started doing Laser light shows in the mid 80's using the Radio Shack Color Computer and two Galvos salvaged from a thermal strip chart medical monitor. All the software was my own, though I was coached by one of the ILDA members. I eventually developed some sophisticated SW for drawing images on the RS graphics tablet and animating them and choreographing them to music. While I concentrated on the graphics of the "dot-to-dot" drawing type, I also used a model airplane (PWM) servo to move a couple of different lumia effect glasses into the beam. FYI: I have complete information on the math and computations for this on my site,. Images are drawn, saved in a library and displayed with commands in RAM that determine the size, location and rotations of each image. However, my SW is NOT portable to other platforms. The higher level routines for drawing images and doing the choreography are in RS Basic and the actual "Display Processor" that runs a show is in 6809 .MicroProcessor Assembler.
I have also seen some pretty good things done using the sound card output D to A's of a PC on YouTube. Can't seem to find any good ones just now
My INFO: http://k9dci.home.comcast.net/site/?/page/Laser_Graphics/
ILDA: http://www.laserist.org/
Cheers, ScienceAdviserSteve P.S. Don't know why one URL is bold???
"Pigs In Space" would be the perfect lunch box for a laser light show of Pink Floyd's Animals album! ;)
In tech school our project for our team was to build a laser light show. We built a stand with a motor spinning a plate. The motor was precisely controlled using a PWM control chip. For the laser we used a 100mW blue Argon laser that we would shine through various vases with twists and turns in them. With the laser going through the glass we could get effects that looked like fluid flowing on the walls in slow motion. The PWM chip had a dial so we could control the speed of it. In addition we had a dual axis laser writer showing different items on the wall during the show. All and all it was a fun project and we learned a lot about the electronics and the programming to control it.
Jeez Joel, you could have at least given your videos some music. Here you go
I really like the progressive nature of Strongbad
the infinite nature of Strongbad
I always thought Airwolf would be cool with lasers!!
Insufficiently reminiscent of space wizards