Friday Product Post: SerLCD, at Your Service!
Three new, easily-controllable Serial LCDs, more CNC mill accessories and a few other bits coming your way!

Hello there everyone! Today we are thrilled to bring you three new serial LCDs we have dubbed "SerLCDs." We also have new accessories for your Shapeoko and Nomad CNC mills for better ease-of-use when creating your own PCBs, a new Infrared Remote Control, and a few ding-and-dent items that we are sure some of you can use.
Basic Serial LCD? That's my father's name! Please call me SerLCD.
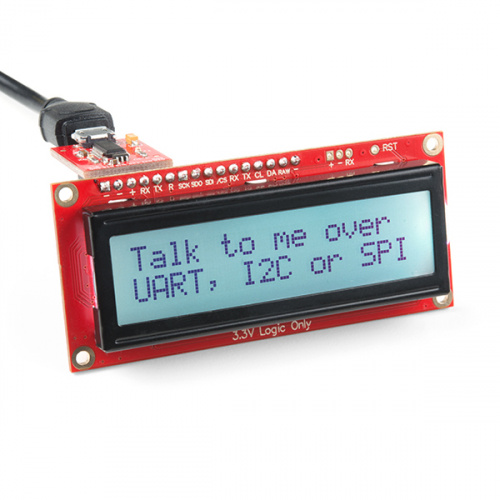
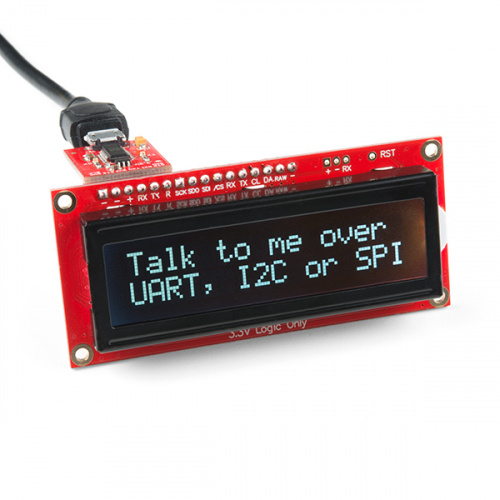
The SparkFun SerLCD is an AVR-based, serial-enabled LCD that provides a simple and cost-effective solution for adding a 16x2 Black on RGB or RGB on Black Liquid Crystal Display to your project. We've seriously overhauled the PCB design on the back of the screen by including an ATMega328P that handles all of the screen control, meaning a backback is no longer needed! This display can now accept three different types of commands: serial, I2C and SPI. This simplifies the number of wires needed and allows your project to display all kinds of text and numbers.
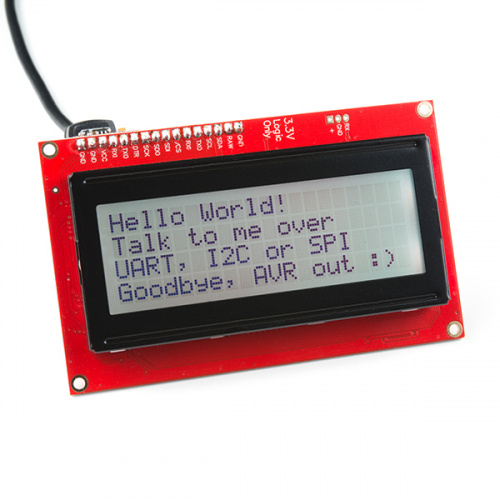
Of course if you need more space, or simply a bigger display, we also offer a 20x4, Black on RGB SerLCD as well! This LCD functions the exact same way as the two above, and requires the same conditions to be met.
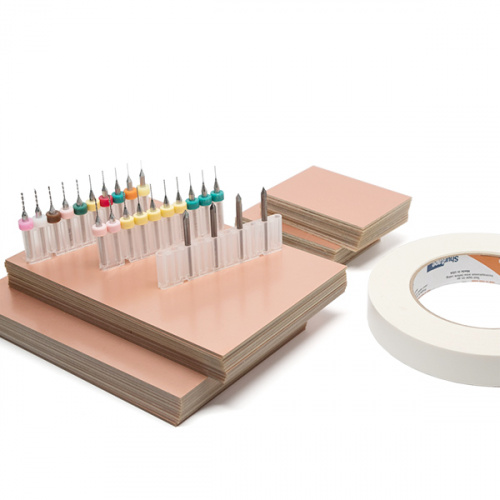
Do you want to get started in PCB machining? The PCB Machining Kit from Carbide 3D includes all of the drills, cutters and copper material you need to start creating your own PCBs on your home CNC machine right away!
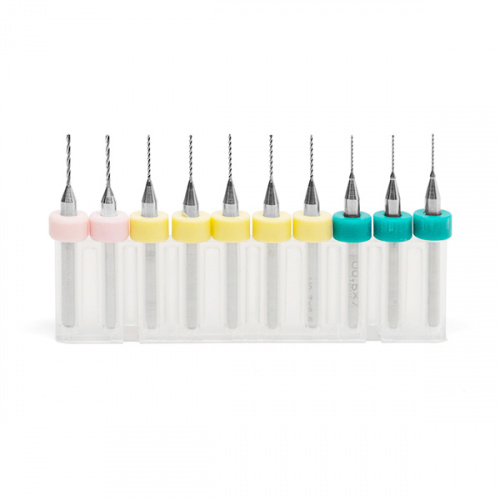
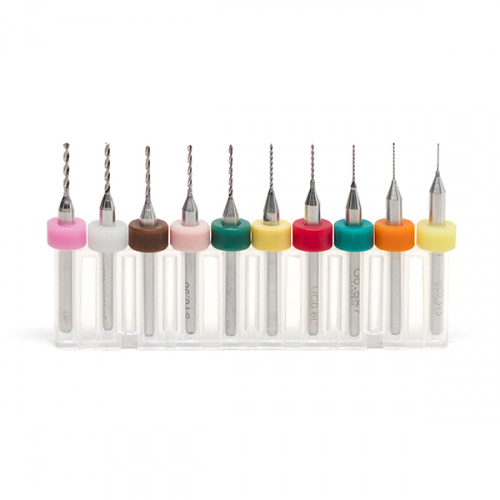
These are standard and variety PCB Drill Sets from Carbide 3D that supply you with more options for drilling into copper clad on your Shapeoko or Nomad CNC machines. These two sets can also be found in the PCB Machining Kit above, as well.
The standard set includes three 0.5 mm, five 0.7 mm, and two 0.9 mm PCB drills, while the variety set includes 10 unique PCB drills from 0.3 mm to 1.2 mm.
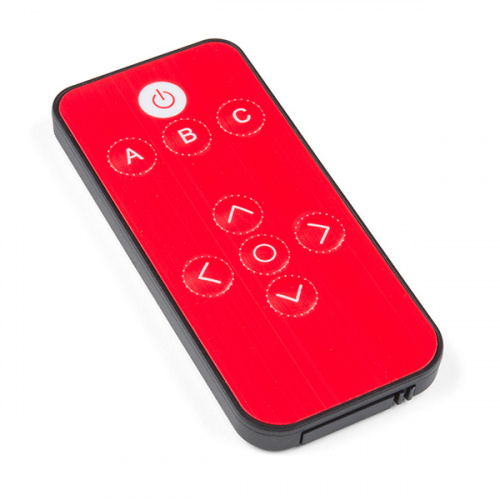
Have you ever needed an inexpensive way to activate something from across the room? Infrared remotes are still the most affordable way to wirelessly control a device. We have designed this remote to be small, simple and low cost.
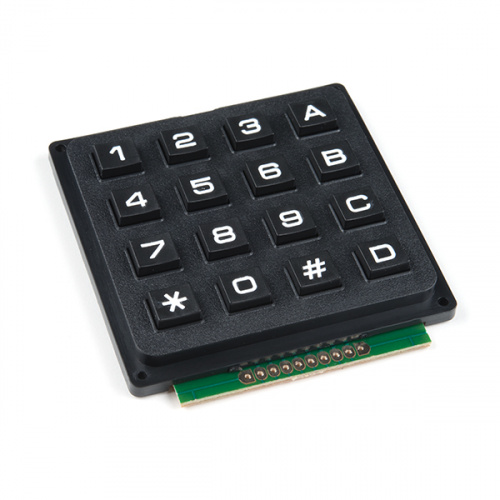
This is a basic 16-button, alphanumeric keypad designed for easy user input and functionality. Four mounting holes allow solid and easy mounting to a panel. The single-row 0.1-inch-pitch solder pads are breadboard friendly. Only eight of the 10 solder pads carry signals - the solder pads on the ends of the row are purely for mechanical attachment. Rubber domes beneath each button provide satisfying key travel with each button press.
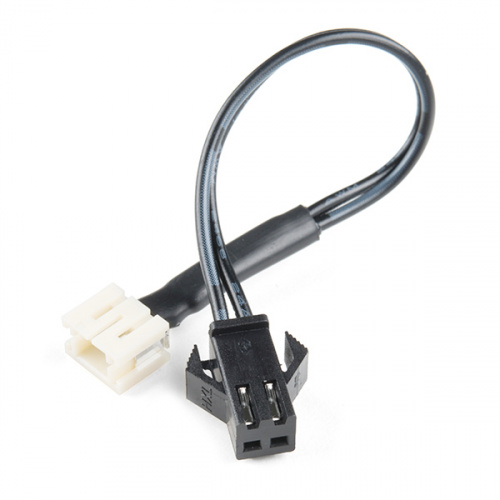
These simple adapter wires terminate with a JST-PH male connector on one end, and a JST-SM female connector on the other, or a JST-PH female connector and a JST-SM male connector. We actually ordered these wires to provide a handy adapter for our EL products but unfortunately we received them with swapped connectors – we're guessing someone out there already has an idea for a use for them.

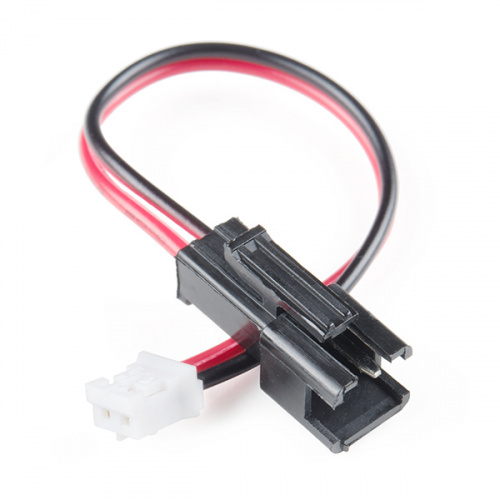
This is a simple two-wire automotive cable. Each assembly has bare wires on both ends with a Molex A and B connector in the middle. With thinner 26 AWG wire, it’s better for applications that would not require the thickness of its 18AWG counterpart.
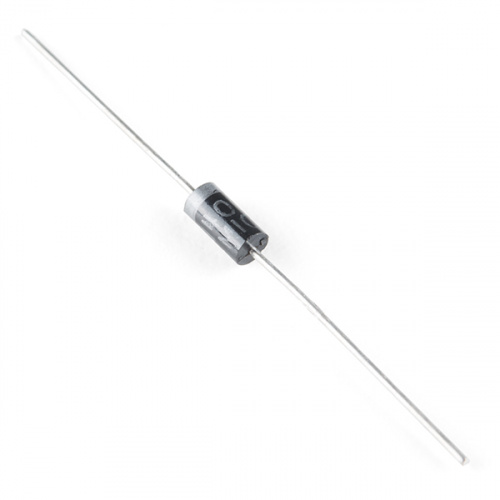
Last up today is this subminiature size, axial lead-mounted rectifier diode. Often used for reverse voltage protection, the 1N4004 is a staple for many power, DC to DC step up, and breadboard projects.
Phew, that's it for this week, folks! As always, we can't wait to see what you make! Shoot us a tweet @sparkfun, or let us know on Instagram or Facebook. We’d love to see what projects you’ve made!
We'll be back next week with even more fantastic new products!


I want to remind folks that are considering the PCB Machining items to please use EXTREME CARE if you use PCB materials that have fiberglass in them as the dust may be carcinogenic. A better alternative may be to use boards that do NOT contain any glass.
The next paragraph is MEANT TO BE HUMOROUS, NOT AN ATTACK!
Gee, last week Pete introduced us to the Pi AVR Programmer, then this week he introduces us to a nifty new Arduino compatible "gadget" with NO AVR connector! ;-)
Seriously, though, these SerLCDs look really nifty! I've done some projects that would be appropriate for these, and both the color control and good character counts make them a good alternative, especially when you don't need graphics in the display. (Why do I have the strange feeling that within a few years we'll see somewhat similar ones, besides the MicroView, that'll do graphics?)
On a shorter term, I'd suggest that when you do a "rev" on the board you at least think about cramming a QWIIC connector onto it somewhere.
Haha, 773, you got me :)
Qwiic would be great. And a 3x2 ISP header would be great.
It's funny, I was joking while we were filming the examples about how I'd prefer to be flashing my example code with the new Pi AVR Programmer, but I opted not to, in order to follow along more like the hookup guide.
These screens have been in the works for far too long (many rounds of protos, plus de-prioritized for other new shinier project), that we just couldn't delay the launch any more. The qwiic connector would be perfect for this, and for any future revision. I also would love to cram some logic level conversion in there (and a standard 3x2 ISP header), but the timeline for a revision is uncertain at this point.
For now, if you're willing to do a little soldering, the qwiic adapter could be a good way to enter a qwiic system. At least it has the 4 pins (GND/VCC/SDA/SCL) in our standard order :)
I do also want to mention that RESET is broken out to a header on these, so you could access all the lines for ISP, it's just not in a more convenient and standard 3x2 form factor.
Thanks again and we'll keep all these thoughts in mind for sure!
Hi Pete!
I suspect that a lot (or at least some) of the uses for SerLCDs will be ones where the depth of the electronics will be important. To be able to limit the depth, but still be able to comply with users that want the 3x2 ISP header, provide pads that can the user can either solder in (or, since you likely can't get to the "solder side", have pads for a surface mount) header, or can use a pogo-pin adapter. (Remember that a via in the 3x2 pattern would help get the pogo-pins aligned, while not interfering with the ability to solder on a surface mount header.)
Personally, I'd tend to put a Qwiic connector at higher priority than the ISP header. Obviously, it needs to be at an edge. To my thinking, the decision on whether or not to actually populate it would depend on how high that crystal is. If the Qwiic connector isn't more than, say, 1/16" (or about 1.5mm) higher, go ahead and populate it. If someone is doing a project that is that tight mechanically, it's probably a fairly safe bet that person has the skills and tools to "depopulate" it, possibly by crushing it with needle-nose pliers before removing the metal bits with a soldering iron. (It would be nice for the layout to keep a "clear zone" of maybe 0.2" around it to allow room for a hand-held soldering iron.)
I was just thinking about a project I built several years ago that had a PIC, a 2x16 LCD, a GPS module, a set of 4 push-button switches (to navigate menus), a pot to control brightness, and a big honker capacitor to allow time to write to EEPROM when a power failure was detected. Today, I could do most of this with off-the-shelf Qwiic modules (GPS and joystick), with a SerLCD providing CPU as well as display, and maybe a "custom module" to read the pot and provide a ferroelectric memory (so I can write to it every second) and eliminate the honker capacitor. (BTW, it sat on the dashboard on my car, so size was also very important.). It also had a temperature measurement capability, but I had a lot of problems with the voltage regulator's heat causing the temperature inside the case to rise. I had thought about going to a switching regulater, but never got around to it.
BTW, I'd really like to see "overall dimensions", weight, and an indication of "peak power" in the description. (This later could be as simple as adding up the current draw from the data sheets for the LCD and chips, and adding a few percent "safety margin". Might also want to state how much goes to the backlight.)
Minor correction: I had mis-remembered something. In my old project mentioned above, I actually used an Arduino Uno to provide the compute power. I was also doing a completely different project at about the same time with a PIC. (I just looked at it again.). FWIW, that big cap is 4700 uF, and dominates my custom shield. BTW, that project was intended for automotive use, so I had the luxury of being able to afford the relatively high current of an Uno in the power budget. The other project was intended to be solar powered, so needed the much lower power demands possible with a PIC (as well as the PIC's inclusion of a Real Time Clock Calendar).
Speaking of Qwiic, I'd really like to see the board for the Qwiic Keypad sans the keypad. We could use an AVR programmer to program it for other than the 12-button keypad (more immediately, the 16 pin keypad, likely with a bit of "scrambling" of wiring, to get a few additional buttons).