Enginursday: Digital Handpan
Make your own digital handpan drum using the Teensy Audio Shield and the Teensy's built-in capacitive touch inputs.

About a year ago, a friend of mine asked me a question that changed my view of percussive instruments forever. She asked, "Have you ever heard of spacedrum?" Being a drummer, I would have remembered if I had ever heard of such an instrument. I had not. She then proceeded to show me this video. I was immediately captivated and had to know more about this so-called spacedrum.
After some research, I discovered that this drum is a relatively new invention. It goes by many names, but the inventors call it a Hang. Other names include Handpan or the redundant misnomer, Hang Drum. Originating in Switzerland, the Hang was developed in the early 2000s. It typically includes eight notes, usually seven notes harmonically tuned around a central, deeper note.
After watching numerous Handpan YouTube videos, I decided that I had to have one of these instruments. However, my dreams of owning my own Handpan were crushed when I discovered that not only are these drums expensive (a couple thousand dollars is not an uncommon price), but they are also incredibly hard to come by, as there are only a handful of makers in the world. The manufacturers even have to hold lotteries or keep waiting lists in many instances.
Remaining undeterred, I kept searching for a cheaper solution. This comparison video of other steel-bodied drums helped point me in the right direction. In it, a similar but different drum is shown: the steel tongue drum. More searching led me to the HAPI Drum website, where I purchased my first HAPI Drum Mini. I have been a satisfied customer ever since.
After spending many months with my steel tongue drum, I wanted to explore the possibility of making a digital version. More research led me to the Oval website. I found the design and approach ideal, but the price tag and preorder status were enough to convince me that I could make my own.
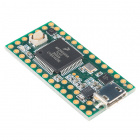
I knew I wanted capacitive touch as the main interface, and I knew the Teensy had pins that were capable of touch sense without any additional hardware. That, coupled with the fact that numerous engineers around SparkFun have been playing with the Teensy Audio Shield, resulted in the Teensy 3.2 being the perfect platform for my project.

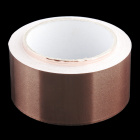
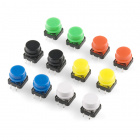
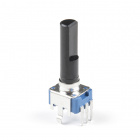
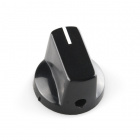
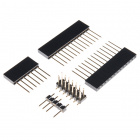

An assortment of SparkFun products used to make the Digital Handpan
Check out the video below for a demonstration and more details about the digital Handpan.
The Teensy, coupled with the Audio Shield, produces polyphonic notes when any number of the eight capacitive touch pads are touched, replicating the bell-like sounds of a Handpan. Using the Teensy Audio Shield as well as the Teensy Audio System Design Tool made the audio portion a breeze. You can even import the Audio System Design Tool code from my sketch to start with the audio system I used, and modify it for your own needs.
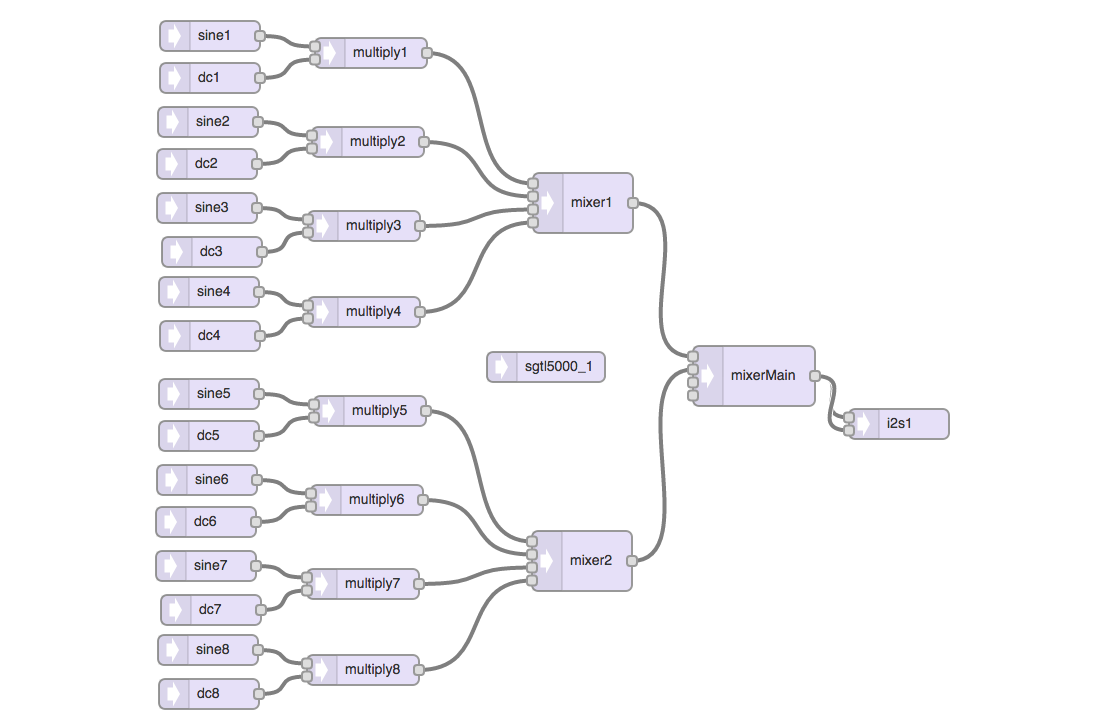
Importing the code from the TeensyAudioDesignTool.h file into the Teensy Audio System Design Tool should result in something that looks like this.
All the code for this project can be found in the Digital Handpan GitHub Repository:
Inside the code, you'll find all the info pertaining to which pins were used as Touch Sense pins and which were used for the buttons and knobs. The comments found in the sketch should contain all other information regarding how the digital Handpan works. Information on how to use the Teesny Audio Shield in conjunction with the Audio library can be found here.
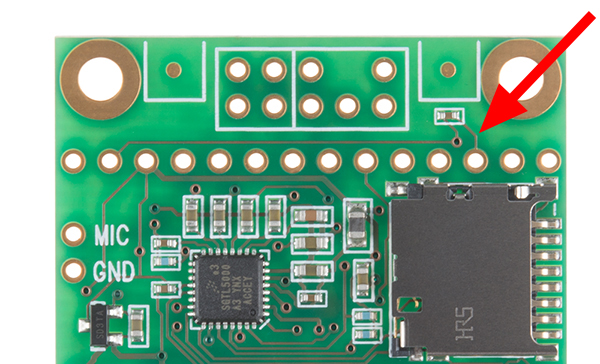
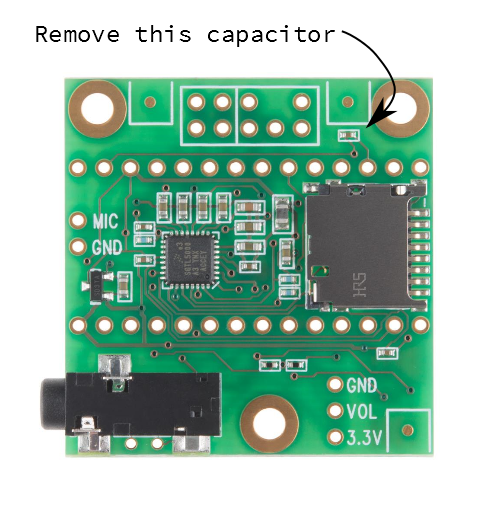
I did have to make one major modification to the Audio Shield for this project. The Teensy 3.2 has 12 pins capable of Touch Sense. Of those 12, five are in use by the Teensy Audio Shield. However, one (pin 15) was being used for the volume knob on the Audio Shield. Since I was using a potentiometer on a separate analog pin that did not have touch sense to control the volume, I was able to cut the trace to the Audio Board's built-in volume knob footprint and use that pin as my eighth capacitive touch pad.
The next step is to find a cool, one-of-a-kind body in which to build the second iteration of the project. Luckily, Halloween has just ended, and the thrift stores will be brimming with odd-shaped items. We'll cover the next iteration of the Digital Handpan in a later post. Thanks for reading!
Comments? Concerns? Suggestions? Please leave them below.


This is crazy cool -Ali B.
I put this project together and made a laser cut box from mat board using a two 1/16" layer design to hide some electronics and do some masking. Also added ability to change the wave form more synth style.
Check it out here
Also here
Code and Adobe AI box template here
Cheers
That is an amazing enclosure! Very well done! Nice addition with the wave change button. Thanks for sharing!
I really like this idea and think i can build it, but as someone who is just beginning with teensy, I feel abandoned on how to. V2 is cool but i don't like how much more complex it has gotten. i just want to make this version. any way a wiring diagram could be made for the project? Thanks for sharing the idea
Unfortunately, we do not and JOEL_E_B has moved on to his next adventure. However, he did link the GitHub repository for the project; the comments in the code should have a few clues on the connections.
Thanks for the reply. I've been to the github so many time and It just doesn't address any of the wiring at all. all the links go in circles. Oh well, i thought i'd try. thanks again.
What a great idea :) I would love to see the Handpanda play that thing with his looping device. I have two Handpans at home only because of https://handpanda.com
thank a lot for good idea. We made a similar, but out of plywood. Although it was the first prototype. https://www.youtube.com/watch?v=450s5zhjOrI&t=2s Now we are looking for a good solution for buttons and copper scotch - this is what we need! Just try to bring the piezo sensor to the mind, as is done in another interesting project https://www.youtube.com/watch?v=1-3VFWMt5uI
Woah this is really cool! It's awesome that you can change the scale like that. That is the only draw back to the real thing. I much prefer the real thing though.. Much more variety of the types of sounds that can be made. If a second hand genuine Hang is too expensive for you, checkout https://handpanguru.com their handpans are much cheaper. I got mine from there and it sounds great!
I love this project! My wife wanted a real hangdrum, but the price is way off. So I decided to build a hangdrum based on this. Wow! After some analyzing of the sound from a real hangdrum, I found some necessary improvements: 1. Add a second harmonic sine (90 degree shifted) with half the amplitude to each sound 2. Add a LP filter with resonance after each 2 harmonic mixers (center frequency of the highest harmonic) 3. Add an ext. delay at the end with feedback (I'm using the CY15B104Q for up to 6sec delay loop) 4. Add a flange effect before going to the output (0.25 Hz, delay 6) 5. add pots to control delay feedback, delay head mixer and pitch (+- 6 semitones 6. Add 4 LEDs to display sclae setting (binary) and pitch set to normal.
Comparing the result to original tone gives similar appearance. If interest exist, I can publish the code and the wiring of the teensy. I also found out, that with USB connect to the PC, the noise floor is real high. I can even hear local Radio station. Therefore I'm using an USB splitter, which came with my BSP from Arturia: One connects to rthe PC, the other to an USB charger. Works like a charm. (this is of course the same, as using an external PS without cutting the track)
Hi, thanks for the feedback. Glad you enjoyed the project! I would love it if you would share your code/wiring. I'm currently making V2, and adding you audio improvements would be a nice addition.
Here is the link for the download code I had to change 1 library file (effect_delay_ext.h) to make the 'initialize' method public. Otherwise the GUI will note create the correct external delay object for me.
After some research, I came up with a solution, which comes really near to the sound. I had to extend the dc module, so it can accept a segment list of levels and times. find the sources here. I also added a moogfilter and fm-modulated waveforms. To use the multiseg, use this code: float times1[]={185.76,185.76,185.76,185.76,185.76,185.76,185.76,185.76,185.76}; float levels1[]={80.7799,79.8124,21.6154,31.9916,15.2982,8.13087,5.67181,2.92224,1.87064}; float times2[]={185.76,185.76,185.76,185.76,185.76,185.76,185.76,185.76,185.76}; float levels2[]={63.4619,31.9866,46.4768,29.1345,1.44017,12.6471,6.70539,2.44639,3.5003}; .... for (int s = 0 ; s < 8; s ++) { dcs[s]->multiseg(levels1, times1, sizeof(levels1)/4,128); dcs[s+8]->multiseg(levels2, times2, sizeof(levels2)/4,128); } and when the pad was touched: sine->frequency(note_frequency[scale[scale_index][t] + ps]); sinex->frequency(2 * note_frequency[scale[scale_index][t] + ps]); dc->noteOn(); dcx->noteOn();
and released: dc->noteOff(); dcx->noteOff(); dc->amplitude(0, dcVal); dcx->amplitude(0, dcVal); (sine,dc is the 1st base sound, sinx,dcx the first harmonic).
I've just finished wiring this up but I'm not getting any audio out of it. I tested the audio board with a guitar example and that worked.
From the handpan's code, I wired the up/down scale pushbuttons with one side going to pins 2 and 3 respectively and the other side of each switch going to the ground pin. The pots are wired to 3.3v on the high-side and ground on the low, with the wipers going to pins 20(A6) and 21(A7). Am I missing something here?
Thanks, -Kirk
Sounds like your wiring is good. You have copper pads soldered to the following pins: 33, 32, 25, 17, 16, 15, 1, 0?
Try just reading in one pad and building up from there.
Also make sure your volume knob is functional. Try disabling it and setting the volume to a constant for testing purposes.
Thank you for your reply. I have my handpan working now. The culprit was a simple wiring error. Now for packaging...
Thanks, -Kirk
Hi Kirk, Glad you hear you got it up and running! I'm no audio signal expert, but I did notice some noise on my system as well. I have not experienced a tone lasting longer than it is suppose to though. I suspect the issue lies in reading the various knobs so frequently in the code. I have a potential solution: to check the volume knob and only call the volume function if the number has changed more than + or - 2 values. But I have not been able to try this solution yet. For the fade, it also sounds like it could be an issue with the potentiometer that controls the fade. Try disabling different parts of the code, such as the fade control, and seeing if that gets rid of your audio problem.
Nice project. I was impressed enough that I ordered all the parts and they arrived today. Then I noticed that there is no wiring diagram. Are you planning on adding one any time soon?
My personal goal is to put this together and then add a display that show the key and mode.
Hi. There is no wiring diagram currently and no plans to make one. All the wiring is straightforward: each copper tape pad is soldered directly to eight of the TouchSense Pins (You'll have to solder to a few on the bottom of the Teensy). Take a look at the code to see which pins were used. I used the Teensy graphical datasheets to find which pins I could use for capacitive touch.
The two buttons and two potentiometers are hooked up in a normal configuration. I actually need to switch the Vcc and GND on mine so the knobs function in a more predictable manner (ie turning to the right turns the volume up, not down). The only big gotcha is the trace that needs cut, which is highlighted above. Feel free to share your creation here or on the GitHub repo. Best of luck.
Well, I did wind up building it. Lot of fun so far. It's only in the basic breadboard stages so I'll post pictures later.
I don't have much experience with the teensy or it's audio daughter board so I am wondering if there is available I2C on the board or if there is something on the daughter board that is already utilizing it. The reason I ask is because I have a .96" OLED that I would like to use to display the Key and Mode.
Thoughts anyone?
EDIT: okay, I jsut realized that my post potentially screams of ignorance but I guess more appropriately I should ask, would there be a clash or addresses between the audio board and the OLED?
This is so boss. Really cool.